Table of Contents
Advertisement
Quick Links
Manual Version: 1.0.1
Date of Issue: 2017-12
We reserve the right to make changes in the course of technical development without previous notice.
© 2016 Siemens Healthcare Diagnostics Products GmbH. All rights reserved.
Emil-von-Behring-Str. 76
35041 Marburg
Germany
Neither this manual nor any parts of it may be duplicated or transmitted in any way without the written approval
of Siemens Healthcare Diagnostics Products GmbH.
11210658
PFA-100 System
Instruction Manual (US)
– Instructions for Use –
Advertisement
Table of Contents

Related Manuals for Siemens PFA-100 System


Summary of Contents for Siemens PFA-100 System
- Page 1 – Instructions for Use – Manual Version: 1.0.1 Date of Issue: 2017-12 We reserve the right to make changes in the course of technical development without previous notice. © 2016 Siemens Healthcare Diagnostics Products GmbH. All rights reserved. Emil-von-Behring-Str. 76 35041 Marburg Germany Neither this manual nor any parts of it may be duplicated or transmitted in any way without the written approval of Siemens Healthcare Diagnostics Products GmbH.
- Page 2 Software of Siemens Healthcare Diagnostics Products GmbH is the copyright property of Siemens. All rights to this software are retained by Siemens. You are entitled to use this software as well as the printed documentation relating to it on one single, non-transferable workstation.
- Page 3 Delivery and installation Quick reference guide Service and warranty Description of the analyzer Setup and changing configuration Performing tests QC procedures 10 Cleaning and disinfection 11 Maintenance 12 Diagnostics and troubleshooting Index PFA-100 System – Instruction Manual (US) – Version 1.0.1...
- Page 4 Chapter overview PFA-100 System – Instruction Manual (US) – Version 1.0.1...
-
Page 5: Table Of Contents
Meaning of the warning and information symbols on the analyzer Statutory requirements Obligations of the system owner 3 Delivery and installation Delivery 3.1.1 Transporting the analyzer 3.1.2 Scope of delivery 3.1.2.1 Accepting delivery 3.1.2.2 Unpacking 3.1.2.3 Inventory analyzer accessories PFA-100 System – Instruction Manual (US) – Version 1.0.1... - Page 6 Disposal of the analyzer 6 Description of the analyzer Analyzer 6.1.1 Carousel 6.1.2 Trigger solution compartment 6.1.3 LCD display 6.1.4 Keyboard 6.1.5 Printer Consumables 6.2.1 Consumables’ labels 6.2.2 Consumables/parts list 6.2.3 PFA test cartridges PFA-100 System – Instruction Manual (US) – Version 1.0.1...
- Page 7 Two different test types, different patient ID Test request with patient ID number option enabled 8.2.1 Single test 8.2.2 Duplicate test or two test types, same patient ID 8.2.3 Two test types, different patient ID PFA-100 System – Instruction Manual (US) – Version 1.0.1...
- Page 8 11.3.2 Removing the O-Ring 11-7 11.3.3 Installing the O-Ring 11-9 11.3.4 Cleaning O-Ring using cleaning pads 11-10 11.4 Replacing printer paper 11-13 11.5 Replacing printer ribbon 11-15 11.6 Replacing fuses 11-16 PFA-100 System – Instruction Manual (US) – Version 1.0.1...
- Page 9 12.5.3 Test Terminated Due To Flow Obstruction 12-8 12.5.4 Test Terminated Due To Insufficient Sample 12-9 12.5.5 Test Terminated Due To Maximum Syringe Travel 12-10 12.6 Other status messages 12-11 Index IX-1 PFA-100 System – Instruction Manual (US) – Version 1.0.1...
- Page 10 Table of contents PFA-100 System – Instruction Manual (US) – Version 1.0.1...
-
Page 11: About This Document
The numbering is also used if the procedure includes only 1 step. Arrow An arrow indicates 1 or more results of an action. Example: 1. Select Print. The dialog Print is displayed. PFA-100 System – Instruction Manual (US) – Version 1.0.1... -
Page 12: Abbreviations
The following abbreviations are used in the manual: Abbreviations Meaning Adenosine-5’-diphosphate Collagen Closure Time Electromagnetic compatibility Epinephrine Geprüfte Sicherheit (safety-tested) Identification PFA-100 System Table 1-1 Abbreviations Note: For information on software upgrades contact Siemens service. PFA-100 System – Instruction Manual (US) – Version 1.0.1... -
Page 13: Safe Handling
System is an instrument and test cartridge system in which the process of platelet adhesion and aggregation following a vascular injury is simulated in vitro. Platelet dysfunction detected by the PFA-100 System may be acquired, inherited, or induced by platelet inhibiting agents. -
Page 14: General Safety Information
• Instruction in operating the PFA-100 System is given when the analyzer is installed by Siemens. If you have any further training requirements, contact your local Siemens office. -
Page 15: Mechanical Safety
Siemens service. • Keep clear of moving parts when the system is in operation. Long hair, necklaces, bracelets, and similar objects can get caught in moving parts. PFA-100 System – Instruction Manual (US) – Version 1.0.1... -
Page 16: Operational Safety
• Only carry out maintenance or replace parts as described in this manual. • Only use Siemens spare parts. • Do not use solvents or abrasive cloths to clean the system. PFA-100 System – Instruction Manual (US) – Version 1.0.1... -
Page 17: Safe Handling Of Samples, Pfa Test Cartridges, And Consumables
Risk of pollution by incorrect waste disposal. Damage to the environment can result. To avoid this hazard: • Discard waste material according to national and local standards and regulations. PFA-100 System – Instruction Manual (US) – Version 1.0.1... -
Page 18: Correct Functionality Of The Analyzer
This section states nature and source of the hazard This section states potential consequences of not avoiding the hazard. This section can be combined with the previous section. • This section lists preventive actions to avoid the hazard. PFA-100 System – Instruction Manual (US) – Version 1.0.1... -
Page 19: Meaning Of The Warning And Information Symbols On The Analyzer
The analyzer complies with the following directives: • 73/23/EEC Low-Voltage Directive • 89/336/EEC EMC Directive The PFA-100 System has been designed and tested to comply with safety standards EN 61010 and IEC 61010 under the conditions listed in Chapter 6.3. - Page 20 2 Safe handling PFA-100 System – Instruction Manual (US) – Version 1.0.1...
-
Page 21: Delivery And Installation
PFA-100 System. 3.1.1 Transporting the analyzer The PFA-100 System has to be handled with care during transport. 3.1.2 Scope of delivery The PFA-100 System is delivered with the following components: •... -
Page 22: Accepting Delivery
3. Inform your Siemens Healthcare Diagnostics Service immediately if anything is missing or damaged. 3.1.2.2 Unpacking To unpack the PFA-100 System after delivery, proceed as follows: 1. Remove the accessories box. 2. Remove the foam packing. PFA-100 System – Instruction Manual (US) – Version 1.0.1... - Page 23 3 Delivery and installation 3. Remove the analyzer from the box. 4. Remove the plastic wrapping. PFA-100 System – Instruction Manual (US) – Version 1.0.1...
-
Page 24: Inventory Analyzer Accessories
1. Open the accessories box and verify if all items are present and in good working order. Figure 3-1 Accessories box Note: The trigger solution is required for PFA-100 System operation, but is not included in the accessory box. The Dade PFA Trigger Solution must be ordered separately using part number B4170-50. - Page 25 Figure 3-3 Cassettes (B4170-70) (Qty. 2) Figure 3-4 Fuses (3106-2422, Qty. 1) (3106-2437, Qty. 2) Figure 3-5 Paper Roll Axle (5400-2397) (Qty. 1) Dade PFA Figure 3-6 Vacuum Cup (B4170-75) (Qty.35) PFA-100 System – Instruction Manual (US) – Version 1.0.1...
- Page 26 Figure 3-7 Power Cord, language kit specific (country-specific) (Qty. 1) Figure 3-8 Cleaning Pads (B4170-73) (Qty. 35) Figure 3-9 PFA-100 Printer Ribbon (B4170-72) (Qty. 1) Dade PFA Figure 3-10 Priming Cartridges (B4170-74) (Qty. 2) PFA-100 System – Instruction Manual (US) – Version 1.0.1...
-
Page 27: Installation
O-Ring Service Tool (B4170-77) (Qty. 1) Installation This chapter contains information about the operating conditions and worktop requirements for the installation of the PFA-100 System as well as the steps to be performed during installation. PFA-100 System – Instruction Manual (US) – Version 1.0.1... -
Page 28: Operating Conditions
Death or serious injury to the patient can result. • Only operate the analyzer under the conditions specified below. The PFA-100 System may be operated under the following ambient conditions: • Only use indoors • Altitude up to 2000m •... -
Page 29: Requirements Of Worktop
3 Delivery and installation 3.2.2 Requirements of worktop The small size of the PFA-100 System requires an area on the laboratory bench top which is approximately 30cm wide and 50cm deep, with about 50cm clearance above the bench. The worktop for the analyzer must meet the following requirements: •... -
Page 30: Connecting The Analyzer
IEC 320, C13 plug is used on the analyzer side and a nationally typical plug with PE contact on the other side. The PFA-100 System can be operated on a supply voltage (AC voltage with 50Hz or 60Hz) of 100–130V or 200–250V. -
Page 31: Installing Fuses
1. Pry open the fuse compartment with a small screw driver (see Figure 3-14 and Figure 3-15) and remove the fuse holder from the analyzer. Fuse compartment Figure 3-13 Location of fuse compartment with fuse holder PFA-100 System – Instruction Manual (US) – Version 1.0.1... - Page 32 • For 220VAC operation, remove the small Phillips screw (see Figure 3-17) and invert the fuse clip. Install the two small fuses (3106- 2437) into the fuse holder, see Figure 3-18). Phillips screw Figure 3-17 Remove Phillips screw PFA-100 System – Instruction Manual (US) – Version 1.0.1...
-
Page 33: Connecting The Analyzer To The Power Source
Figure 3-18 Fuse holder 220VAC 3.2.3.2 Connecting the analyzer to the power source To connect the analyzer to a power source, proceed as follows: 1. Insert power cord. 2. Plug into AC outlet. PFA-100 System – Instruction Manual (US) – Version 1.0.1... -
Page 34: Loading Printer Paper
Loading printer paper To insert a paper roll into the printer, proceed as follows: 1. Make sure that the analyzer is switched off. 2. Open access door. 3. Insert paper roll axle. PFA-100 System – Instruction Manual (US) – Version 1.0.1... - Page 35 3 Delivery and installation 4. Thread printer paper. 5. Switch power on. The printer paper will automatically feed through the printhead. PFA-100 System – Instruction Manual (US) – Version 1.0.1...
-
Page 36: Threading Printer Paper
To thread the printer paper into the printer, proceed as follows: 1. Gently pull printer paper through printer. 2. Thread paper through slot in printer door. 3. Close printer door and tear off the excess paper. PFA-100 System – Instruction Manual (US) – Version 1.0.1... -
Page 37: Loading Trigger Solution
When the access door is open, the spiking needle of the trigger solution bottle can cause injuries. • Lift up the lever of the spiking needle completely before opening the access door. • Take care not to touch the spiking needle. PFA-100 System – Instruction Manual (US) – Version 1.0.1... - Page 38 Risk of damage to the spiking needle if the spiking needle lever is pushed down before the access door is fully closed. • Make sure the access door is fully closed before pushing the lever down. PFA-100 System – Instruction Manual (US) – Version 1.0.1...
-
Page 39: Checking For Correct Installation
1. Check for correct installation using the Self Test function from the Maintenance menu. For a quick reference on how to perform a Self Test see Chapter 4, for details refer to Chapter 9.1 and/or Chapter 12.2, respectively. PFA-100 System – Instruction Manual (US) – Version 1.0.1... -
Page 40: Preparing The Analyzer For Longer Periods Of Non-Operation
Note: Before putting the analyzer into operation again make sure that a new trigger solution bottle is inserted into the analyzer. For details on how to insert a trigger solution bottle refer to Chapter 3.2.3.5. PFA-100 System – Instruction Manual (US) – Version 1.0.1... -
Page 41: Quick Reference Guide
A and B, moisten the cleaning pad with isopropanol before loading). 3. When Self Test is completed, check the print out. For the self test refer to Chapter 9.1. PFA-100 System – Instruction Manual (US) – Version 1.0.1... - Page 42 • Pay attention to the manufacturer's information regarding the gloves' compatibility with the materials and liquids used. 1. Remove and discard the top foil seal from the PFA test cartridge(s). PFA-100 System – Instruction Manual (US) – Version 1.0.1...
- Page 43 DETECTED is displayed. • Remeasure the samples concerned when the issue is solved. Disposal of used PFA test 1. Dispose of the PFA test cartridge in a suitable biohazard waste cartridge(s) container. PFA-100 System – Instruction Manual (US) – Version 1.0.1...
- Page 44 4. Dispose of the PFA test cartridge(s) in a suitable biohazard waste container. After having removed the PFA test cartridge(s): 5. Set the power switch on the back of the analyzer to off. PFA-100 System – Instruction Manual (US) – Version 1.0.1...
-
Page 45: Service And Warranty
• PFA O-Rings and PFA Cleaning Pads • PFA-100 Printer Ribbon and PFA-100 Printer Paper The warranty term for these wearing parts is laid down by the local Siemens office in your country as part of a service or maintenance contract. -
Page 46: Ordering Information
5 Service and warranty Ordering information Note: Only original Siemens spare parts may be used. Order these from your Siemens representative.You will find ordering information in the Siemens product catalogue. The following parts are delivered with the analyzer and can be re-ordered: Qty. -
Page 47: Disposal Of The Analyzer
Damage to the environment can result. • Do not treat electrical and electronic equipment as unsorted municipal waste. • Collect waste electrical and electronic equipment separately and return it to Siemens. PFA-100 System – Instruction Manual (US) – Version 1.0.1... - Page 48 5 Service and warranty 2. Contact Siemens service with regard to disposal of the analyzer. Note: Siemens is committed to take back and recycle electrical and electronic equipment with best practice in order to support our customers and protect the environment.
-
Page 49: Description Of The Analyzer
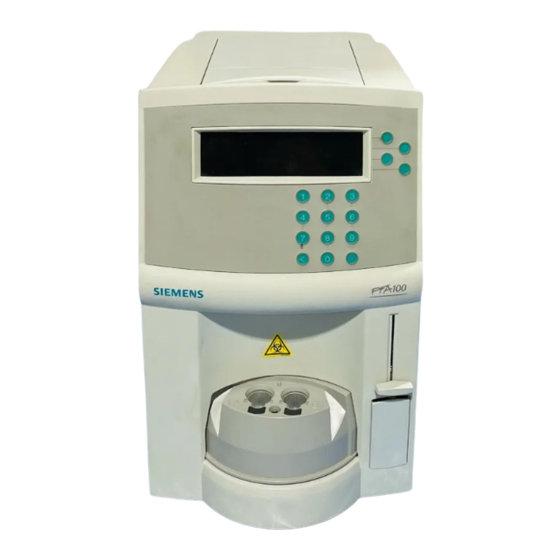
• Laboratory information system (LIS) (Chapter 6.5) • Principle of operation (Chapter 6.6) Analyzer The PFA-100 System is a bench top analyzer. The analyzer consists of the following function units: • Carousel and the cassette (Chapter 6.1.1) • Compartment for the trigger solution (Chapter 6.1.2) •... -
Page 50: Carousel
When testing is complete, the carousel returns to the outside position to allow removal of the used PFA test cartridges. Test cartridge Cassette Carousel Incubation Well Figure 6-2 Carousel PFA-100 System – Instruction Manual (US) – Version 1.0.1... -
Page 51: Trigger Solution Compartment
The system will automatically turn off the LCD backlight after 5 minutes of inactivity following the conclusion of a test or if no key has been pressed for the same length of time. 1. Press any key to turn the light on again. PFA-100 System – Instruction Manual (US) – Version 1.0.1... -
Page 52: Keyboard
The printer is located on top of the analyzer. A small cartridge ribbon allows printing of the data on any standard 58mm wide plain paper. Printer Platelet Function Analyzer < Figure 6-5 Printer and printer paper slot PFA-100 System – Instruction Manual (US) – Version 1.0.1... -
Page 53: Consumables
• Labels used on consumables (Chapter 6.2.1) • Consumables and their specifications (Chapter 6.2.2) • PFA test cartridges (Chapter 6.2.3) 6.2.1 Consumables’ labels The following table explains the meaning of the labels used on Siemens Healthcare Diagnostics consumables: Symbol Explanation Manufactured by... -
Page 54: Consumables/Parts List
Dade PFA Collagen/EPI Test Cartridge B4170-20 Dade PFA Collagen/ADP Test Cartridge B4170-21 PFA O-Ring Service Tool Tool and 2 O-Rings B4170-77 PFA O-Rings Pkg. of 2 O-Rings B4170-78 Table 6-2 Consumables parts list PFA-100 System – Instruction Manual (US) – Version 1.0.1... -
Page 55: Pfa Test Cartridges
Make sure that the main supply voltage does not exceed the recommended ranges. Parameter Value Operating voltage/frequency 100VAC - 240VAC, 60Hz 200VAC - 240 VAC, 50Hz Current (maximum) 1.5A/100VAC, 0.75A/200VAC Power consumption (maximum) 110W Fuse Slo-Blo fuse, Littelfuse, 250V, 1.5A PFA-100 System – Instruction Manual (US) – Version 1.0.1... -
Page 56: Environmental
Max. 15min (room to operating temperature) Incubation time 3.0min Cassette capacity 2 PFA test cartridges Maximum sample volume 1000µL Vacuum set point 40mBar Sound pressure level during: Printing 77dBA Priming/Test 46dBA PFA-100 System – Instruction Manual (US) – Version 1.0.1... -
Page 57: Printer
External PC port The external PC port can be used to download the electronic data to an external computer via a suitable interface software. Refer to Chapter 6.3 for the respective technical specifications. PFA-100 System – Instruction Manual (US) – Version 1.0.1... - Page 58 PCMCIA card. To perform a software upgrade, contact Siemens service. Software upgrade slot Contrast adjustment External PC port Bar code scanner port Power switch Power plug Fuse compartment Figure 6-6 Rear view of the analyzer PFA-100 System – Instruction Manual (US) – Version 1.0.1...
-
Page 59: Laboratory Information System (Lis)
PC port. To select this option via the LCD display, refer to Chapter 7.3.3. The PFA-100 System transmits each result with a checksum. The format for the checksum line is: cs: nnnnn<LF><CR>. It is the responsibility of the user to ensure that the data received by the host computer is accurate. -
Page 60: Principle Of Operation
6 Description of the analyzer Principle of operation Principle of platelet function The PFA-100 System is an analyzer and test cartridge system in which the analysis process of platelet adhesion and aggregation following a vascular injury is simulated in vitro. Platelet dysfunction detected by the PFA-100 System may be acquired, inherited, or induced by platelet inhibiting agents. - Page 61 PFA test cartridge types refer to the corresponding instructions for use. Trigger solution Microprocessor Pressure transducer Syringe Membrane* Sample reservoir* Capillary* * Test cartridge Figure 6-7 PFA test cartridge, exploded view PFA-100 System – Instruction Manual (US) – Version 1.0.1...
- Page 62 6 Description of the analyzer PFA-100 System – Instruction Manual (US) – Version 1.0.1...
-
Page 63: Setup And Changing Configuration
• Change the priming cartridges periodically, depending on their condition. Note: Save the blue priming cartridge for future use. 1. Ensure trigger solution and a priming cartridge (blue cartridge with no foil on top) is installed in the analyzer. PFA-100 System – Instruction Manual (US) – Version 1.0.1... - Page 64 Note: When the analyzer is first powered on, at least 15 minutes are required to reach the operating temperature of 37 °C. When the system heater block has reached operating temperature, the System Ready screen will be displayed. PFA-100 System – Instruction Manual (US) – Version 1.0.1...
-
Page 65: Setup Of The Software
01/11/07 10:30 AM Menus 2. Press the numeric key 3 to select the Setup option. 1 - Run Control 2 - Maintenance 3 - Setup 4 - Print Log Previous Screen PFA-100 System – Instruction Manual (US) – Version 1.0.1... -
Page 66: Setting The Time Format
Previous Screen 3. Press the numeric key 4 to select the Set Time option. 1 - Select Language 2 - Set Defaults 3 - Set Date Previous Screen 4 - Set Time PFA-100 System – Instruction Manual (US) – Version 1.0.1... - Page 67 0 first if a single digit hour is being entered, e.g., 01:00). The new formatted time will be displayed on the left. 01:46 PM 3. To save the selection, press the softkey located next to Enter. PFA-100 System – Instruction Manual (US) – Version 1.0.1...
-
Page 68: Setting The Date Format
(enter 0 first if a singledigit month or day is entered, e.g., 01/01/01) (displayed from left to right). Enter MM/DD/YY MM/DD/YY DD/MM/YY 01/11/07 Previous Screen 6. To save the selection, press the softkey located next to Enter. PFA-100 System – Instruction Manual (US) – Version 1.0.1... -
Page 69: Patient Identification Request
4 - Set Time 4. Press the numeric key 2 to select the Patient ID option. 1 - Flags 2 - Patient ID 3 - Audible Keys Previous Screen 4 - LIS PFA-100 System – Instruction Manual (US) – Version 1.0.1... -
Page 70: Analyzer Initialization
This chapter contains information about: • Configuring low/high flag ranges for results (Chapter 7.3.1) • Activating/deactivating audible tones for softkeys (Chapter 7.3.2) • Transmitting results to a host computer (Chapter 7.3.3) PFA-100 System – Instruction Manual (US) – Version 1.0.1... -
Page 71: Low/High Flag Ranges
(Low Flag) values at which a test result will be flagged with an asterisk (*) on the result printout. 1 - Flags 2 - Patient ID 3 - Audible Keys Previous Screen 4 - LIS PFA-100 System – Instruction Manual (US) – Version 1.0.1... - Page 72 10. Then press the softkey located next to Enter to save the entry. 11. Press the softkey located next to Previous Screen three times to return to the System Ready display. Note: The system will default to No if no selection is made. PFA-100 System – Instruction Manual (US) – Version 1.0.1...
-
Page 73: Audible Keys
5. Press the softkey located next to Yes to enable the option or No to disable the option. 6. Press the softkey located next to Previous Screen three times to return to the System Ready display. PFA-100 System – Instruction Manual (US) – Version 1.0.1... -
Page 74: Laboratory Information System (Lis)
Previous Screen 4 - LIS 5. Press the softkey next to Enable to turn on the transmission of results or Disable to turn it off. Enable Results Upload to LIS Disable Continue PFA-100 System – Instruction Manual (US) – Version 1.0.1... - Page 75 7 Setup and changing configuration 6. Press the softkey located next to Continue, and then the softkey next to Previous Screen three times to return to the System Ready display. PFA-100 System – Instruction Manual (US) – Version 1.0.1...
- Page 76 7 Setup and changing configuration PFA-100 System – Instruction Manual (US) – Version 1.0.1...
-
Page 77: Performing Tests
Touching the analyzer carousel while it is turning may result in pinching of fingers. Minor or moderate injury can result. • Always wait until the measurement has finished before inserting or removing cartridges. PFA-100 System – Instruction Manual (US) – Version 1.0.1... - Page 78 • These items must be handled in accordance with good laboratory practices using appropriate precautions. • Personal protective equipment must be worn when inserting or removing PFA test cartridges from the analyzer. PFA-100 System – Instruction Manual (US) – Version 1.0.1...
- Page 79 6. Place the cassette with the PFA test cartridge(s) into the incubation well(s) of the analyzer so that the cassette is flush to the carousel surface. Do not apply pressure to the sample reservoir opening. The test can now be started. PFA-100 System – Instruction Manual (US) – Version 1.0.1...
-
Page 80: Test Request With Patient Id Number Option Disabled
Print Last Run 01/11/07 10:30 AM Menus When the testing is complete, the analyzer will print and display the results along with an ID No. assigned by the analyzer and the test type. PFA-100 System – Instruction Manual (US) – Version 1.0.1... -
Page 81: Two Different Test Types, Different Patient Id
PFA test cartridge by gently pulling the bottom of the PFA test cartridge toward you until it unsnaps. 3. Dispose of the PFA test cartridge in a suitable biohazard waste container. PFA-100 System – Instruction Manual (US) – Version 1.0.1... -
Page 82: Test Request With Patient Id Number Option Enabled
4. Press the softkey located next to Run. The analyzer will start testing. When the testing is complete, the analyzer will print and display the results along with the patient ID No. entered and the test type. PFA-100 System – Instruction Manual (US) – Version 1.0.1... -
Page 83: Duplicate Test Or Two Test Types, Same Patient Id
PFA test cartridge by gently pulling the bottom of the PFA test cartridge toward you until it unsnaps. 6. Dispose of the PFA test cartridges in a suitable biohazard waste container. PFA-100 System – Instruction Manual (US) – Version 1.0.1... -
Page 84: Two Test Types, Different Patient Id
ID for the sample loaded in position B (right position). 6. To modify the patient ID, use the < key to erase it, then enter the correct number. Enter ID # For Position B Then Press Run Cancel ------------------- PFA-100 System – Instruction Manual (US) – Version 1.0.1... -
Page 85: System - Instruction Manual (Us) - Version 1.0.1 Toc
The carousel will rotate to the load position and the system will display System Ready. 3. Remove and dispose of the PFA test cartridges in a suitable biohazard waste container. PFA-100 System – Instruction Manual (US) – Version 1.0.1... -
Page 86: Printing Results
To print the results of the last run, proceed as follows: 1. From the System Ready display, press the softkey located next to Print Last Run. System Ready Insert Sample(s) Then Press Run Print Last Run 01/11/07 10:30 AM Menus PFA-100 System – Instruction Manual (US) – Version 1.0.1... -
Page 87: Printing Stored Test Results
Note: Events or conditions (status messages) detected during the test run are indicated below the printed test result. Refer to Chapter 12, for full explanation of status messages. PFA-100 System – Instruction Manual (US) – Version 1.0.1... -
Page 88: Printing Usage History
3 - Usage History Previous Screen 4 - Error Log The system prints the usage history. 4. To return to the System Ready display, press the softkey located next to Previous Screen twice. PFA-100 System – Instruction Manual (US) – Version 1.0.1... -
Page 89: Qc Procedures
Blood drawn from healthy adult individuals may be used as normal controls for the PFA-100 System test. As part of the analyzer quality control, it is recommended to test two cartridges of each new lot with a control donor, or whenever the institution wishes to verify the performance of the system. -
Page 90: Self Test And Daily Alignment Check For Trigger Solution Dispensing
3. Press the numeric key 2 to select the Self Test option. 1 - Paper Advance 5 - Clean O-Ring 2 - Self Test 6 - Remove O-Ring 3 - Printer Test 7 - Install O-Ring 4 - Trigger Prime Previous Screen PFA-100 System – Instruction Manual (US) – Version 1.0.1... - Page 91 7. Once the cleaning pad is in position in the carousel well, apply 4-5 drops of isopropanol to the center of the pad. 8. Press gently on the pad with gloved index finger 2-3 times to help distribute the isopropanol. PFA-100 System – Instruction Manual (US) – Version 1.0.1...
- Page 92 Note: The size and exact centering of the drop is not critical. If there is a drop visible on the platform, the trigger solution dispensing is adequate. If there is no drop visible on the platform, call your Siemens Healthcare Diagnostics Service.
- Page 93 15. Rinse both priming cartridges with distilled or deionized water and save them for further use. 16. Press the softkey located next to Previous Screen twice to return to the System Ready display. PFA-100 System – Instruction Manual (US) – Version 1.0.1...
-
Page 94: Run Control
When running two tests, place a second PFA test cartridge into position B (right position). 4. Resuspend the whole blood sample by gently inverting the collection tube 3-4 times by hand. PFA-100 System – Instruction Manual (US) – Version 1.0.1... - Page 95 PFA test cartridge being used (located on the PFA test cartridge pouch and on the PFA test cartridge itself). 10. To modify the lot number, use the < key to erase it, then enter the correct number. PFA-100 System – Instruction Manual (US) – Version 1.0.1...
- Page 96 Note: Events or conditions (status messages) detected during the test run are indicated below the printed test result. Refer to Chapter 12.5 and Chapter 12.6, for full explanation of status messages. PFA-100 System – Instruction Manual (US) – Version 1.0.1...
-
Page 97: Printing Control Results
Enter. The system will print the number of results entered, starting with the most recent control performed. Number of Control Results Enter To Print (Between 1 and 50) Previous Screen PFA-100 System – Instruction Manual (US) – Version 1.0.1... - Page 98 9 QC procedures PFA-100 System – Instruction Manual (US) – Version 1.0.1...
-
Page 99: Cleaning And Disinfection
10.1 Cleaning the analyzer The exterior of the PFA-100 System can be cleaned by wiping with a damp cloth containing a commercial disinfectant solution, e.g. Mikrozid. To remove blood stains use a damp cloth containing water. Do not immerse or pour liquid onto analyzer. - Page 100 12. Apply disinfectant solution to all external surfaces and allow it to sit for 20 minutes, then rinse with distilled or deionized water. 13. Dispose of used paper towels or other wiping material in a suitable biohazard waste container. PFA-100 System – Instruction Manual (US) – Version 1.0.1...
-
Page 101: Maintenance
False results can lead to misdiagnosis and incorrect treatment. • Perform all maintenance procedures on a regular basis, as described below. • Check the functionality of the analyzer daily with the software’s Self Test function. PFA-100 System – Instruction Manual (US) – Version 1.0.1... -
Page 102: Replacing Trigger Solution
When the access door is open, the spiking needle of the trigger solution bottle can cause injuries. • Lift up the spiking needle lever completely before opening the access door. • Take care not to touch the spiking needle. PFA-100 System – Instruction Manual (US) – Version 1.0.1... - Page 103 5. Push the knob all the way down to insert the probe into the trigger solution bottle. Note: It is necessary to prime the system after replacing the trigger solution. PFA-100 System – Instruction Manual (US) – Version 1.0.1...
-
Page 104: Priming The System
Note: Use only one priming cartridge in either position A or B. 3. From the System Ready display, press the softkey located next to Menus. System Ready Insert Sample(s) Then Press Run Print Last Run 01/11/07 10:30 AM Menus PFA-100 System – Instruction Manual (US) – Version 1.0.1... - Page 105 Remove the Cartridge, Then Press Continue 10. Press the softkey located next to Continue. 11. To return to the System Ready display, press the softkey located next to Previous Screen twice. PFA-100 System – Instruction Manual (US) – Version 1.0.1...
-
Page 106: O-Ring Maintenance
2. Rinse the O-Ring under distilled or deionized water. Place O-Ring between forefinger and thumb and remove any debris by using a rubbing motion while rinsing under distilled or deionized water. PFA-100 System – Instruction Manual (US) – Version 1.0.1... -
Page 107: Removing The O-Ring
To remove the O-Ring, proceed as follows: 1. From the System Ready display, press the softkey located next to Menus. System Ready Insert Sample(s) Then Press Run Print Last Run 01/11/07 10:30 AM Menus PFA-100 System – Instruction Manual (US) – Version 1.0.1... - Page 108 Chapter 11.3.1 and Chapter 11.3.4. 7. Invert the O-Ring service tool and tap against the palm of your gloved hand to remove the O-Ring. Follow the manual O-Ring cleaning or replacement procedure. PFA-100 System – Instruction Manual (US) – Version 1.0.1...
-
Page 109: Installing The O-Ring
False results or delayed results due to vacuum leak. False results can lead to misdiagnosis and incorrect treatment. • Always use an intact, thoroughly cleaned or new O-Ring. 4. Load O-Ring in position B of the O-Ring service tool. PFA-100 System – Instruction Manual (US) – Version 1.0.1... -
Page 110: Cleaning O-Ring Using Cleaning Pads
1. Locate the cleaning pads (circular foam sponge) provided with the analyzer. 2. From the System Ready display, press the softkey located next to Menus. System Ready Insert Sample(s) Then Press Run Print Last Run 01/11/07 10:30 AM Menus PFA-100 System – Instruction Manual (US) – Version 1.0.1... - Page 111 5. Place the cleaning pad in the well and apply 4-5 drops of isopropanol to the center of the pad. 6. Press gently on the pad with gloved index finger 2-3 times to help distribute isopropanol. PFA-100 System – Instruction Manual (US) – Version 1.0.1...
- Page 112 Note: The self test must be performed from the Maintenance menu. In case the self test fails, a manual O-Ring cleaning has to be carried out. This manual O-Ring cleaning has to be performed with the O-Ring service tool. PFA-100 System – Instruction Manual (US) – Version 1.0.1...
-
Page 113: Replacing Printer Paper
5. Make sure the edge of the paper is cut straight, if necessary cut the paper. 6. Engage the paper into the printhead, between the metallic support of the printhead and the printhead itself. PFA-100 System – Instruction Manual (US) – Version 1.0.1... - Page 114 11. Press the softkey located next to Load to advance the paper into the printer. 12. Press the softkey located next to Ready Screen to return to the System Ready display. PFA-100 System – Instruction Manual (US) – Version 1.0.1...
-
Page 115: Replacing Printer Ribbon
7. If necessary, press the circle located on the left side of the printer ribbon and turn clockwise to adjust the printer ribbon inside the printhead. 8. Replace the printer paper (refer to Chapter 11.4). PFA-100 System – Instruction Manual (US) – Version 1.0.1... -
Page 116: Replacing Fuses
5. Remove the top fuse and replace with a new one. Pry here Figure 11-5 Fuse compartment 6. To change the fuse configuration, loosen the Phillips screw with a few turns. Phillips screw Figure 11-6 Phillips screw PFA-100 System – Instruction Manual (US) – Version 1.0.1... - Page 117 10. Put the fuse holder assembly back in the housing. Push in all the way. 11. Plug in the power cord and set power switch to on to resume testing. PFA-100 System – Instruction Manual (US) – Version 1.0.1...
- Page 118 11 Maintenance PFA-100 System – Instruction Manual (US) – Version 1.0.1...
-
Page 119: Diagnostics And Troubleshooting
Test, the analyzer prompts the user to load the vacuum test cartridge (priming cartridge containing a vacuum test cup), a priming cartridge and a cleaning pad on the carousel. The result of each test is printed after the test PFA-100 System – Instruction Manual (US) – Version 1.0.1... -
Page 120: Printing Error Log
To print the error log, proceed as follows: 1. From the System Ready display, press the softkey located next to Menus. System Ready Insert Sample(s) Then Press Run Print Last Run 01/11/07 10:30 AM Menus PFA-100 System – Instruction Manual (US) – Version 1.0.1... -
Page 121: Displaying Test Results
In case no closure is detected during a test until • the maximum test time has been reached • the pressure syringe has reached its maximum • the sample is depleted PFA-100 System – Instruction Manual (US) – Version 1.0.1... - Page 122 Maximum Syringe Travel Reached Sample A: CT = >xxx sec No Closure Sample Depleted Note: Refer to Chapter 12.5 and Chapter 12.6 for full explanation of the status messages shown above. PFA-100 System – Instruction Manual (US) – Version 1.0.1...
-
Page 123: Common Status Messages
Sample A: CT = >xxx sec No Closure Maximum Syringe Travel Reached Test terminated due to insufficient sample (see Table 12-4) Sample A: CT = >xxx sec No Closure Sample Depleted PFA-100 System – Instruction Manual (US) – Version 1.0.1... -
Page 124: Maximum Test Time Exceeded
Maintenance menu and rerun the self test. Cleaning or replacing the O-Ring may correct the vacuum leak. If the problem persists, contact the Siemens Healthcare Diagnostics Service. • Rerun the sample with new PFA test cartridge to verify the test result. -
Page 125: Test Terminated Due To Air Leak
Contact Siemens Service for solenoid • Defective PFA test cartridge pump troubleshooting procedure. If the vacuum test fails, perform Manual O-Ring Maintenance Procedure via the Maintenance menu. -
Page 126: Test Terminated Due To Flow Obstruction
OBSTRUCTION. This condition may be caused by micro thrombin in • If problems persist, contact the sample or particulates Siemens Service. introduced into the sample or PFA test cartridge from the environment. • Flow Obstruction During a Test A flow obstruction that occurs after... -
Page 127: Test Terminated Due To Insufficient Sample
12.5.4 Test Terminated Due To Insufficient Sample The following table contains information about the circumstances in which the message TEST TERMINATED DUE TO INSUFFICIENT SAMPLE occurs and how to proceed afterwards. Description Causes Solutions/Comments Result Interpretation The analyzer has detected air •... -
Page 128: Test Terminated Due To Maximum Syringe Travel
> 300 sec. If the repeat result confirms the abnormality, platelet dysfunction may be suspected possibly due to abnormal hemodynamic properties of the sample and/or anti-platelet agents. • If problem persists, contact Siemens Service. Table 12-5 Test Terminated Due To Maximum Syringe Travel... -
Page 129: Other Status Messages
CAROUSEL DRIVE FAIL Same as above, after three retries. 1. Turn the system off, then on to reset the instrument. 2. If the problem persists, contact Siemens service. INCUBATION SYSTEM FAIL The heater block is not heating properly. 1. Contact Siemens Service. - Page 130 1. Perform a reset by turning the analyzer off and then back on. movement of the syringe pump. 2. If the problem persists, contact Siemens Service. TEST CANCELLED NO LOT OR A control ID number was not entered for the 1.
- Page 131 The analyzer has detected a problem in the 1. Perform a reset by turning the analyzer off and then back on. movement of the vacuum chuck drive. 2. If the problem persists, contact Siemens Service. VACUUM TEST FAIL The analyzer has detected a leak in the 1.
-
Page 132: System - Instruction Manual (Us) - Version
12 Diagnostics and troubleshooting PFA-100 System – Instruction Manual (US) – Version 1.0.1... - Page 133 10-1 carousel drive 12-1, 12-11 isopropanol 4-1, 9-3, 11-11 carousel drive failure 12-11 dispensing trigger solution 9-2 cartridge display cartridge type 6-7 see LCD-display insertion into the instrument 6-2, 8-1 PFA-100 System – Instruction Manual (US) – Version 1.0.1...
- Page 134 3-11, 11-16 invalid cartridge type 12-12 fuse holder 3-13 installation 3-11 replacement 11-16 safe handling 2-2, 2-3 keys 6-1 audible tones/sound 7-11 numeric keys 6-4 softkeys 6-1, 6-4 general specifications 6-8 PFA-100 System – Instruction Manual (US) – Version 1.0.1...
- Page 135 12-6 part number see also status messages see consumables MEAN value 8-7 see trigger solution memory patient identification number (PID) 7-7 main memory error 12-11 failure of entry 8-6 PFA-100 System – Instruction Manual (US) – Version 1.0.1...
- Page 136 Siemens service 5-1 paper roll axle 3-5, 3-14 printhead 3-15, 11-13 single test 8-4 ribbon 3-6, 11-14, 11-15 see also tests type 6-9 softkeys protective equipment see keys gloves 4-2, 11-6 PFA-100 System – Instruction Manual (US) – Version 1.0.1...
- Page 137 3-4, 5-2 syringe pump drive fail 12-12 ordering information 3-4 system test priming 4-2 see self test replacement 11-2 residual solution 11-3 spiking needle 2-4 trigger bottle door 2-4 PFA-100 System – Instruction Manual (US) – Version 1.0.1...
- Page 138 6-8 vacuum system failed 12-13 vacuum test 12-2 see also self test vacuum test cup 3-5 vacuum test fail 12-13 voltage fluctuations 3-8 operating voltage 6-7 overvoltages 3-8 supply voltage 3-10 PFA-100 System – Instruction Manual (US) – Version 1.0.1...