Table of Contents
Advertisement
Quick Links
Advertisement
Table of Contents

Related Manuals for NetComm NB8


Summary of Contents for NetComm NB8
-
Page 2: Table Of Contents
Selected terminology used in this manual ... 6 Minimum System Requirements: ... 7 Do I need a micro filter? ... 8 Getting to Know the NB8/NB8W ... 9 LED Indicators ... 9 Default Settings ... 11 Restore Factory Default Setting ... 12 Connecting the NB8/NB8W ... - Page 3 How to establish a console session..65 Configuring with Console Port... 66 Example of RFC1483 Routed mode: ... 68 Appendix B: Glossary ... 74 Appendix C: Cable Information ... 82 Appendix D: Registration and Warranty Information ... 84 NB8/NB8W ADSL2+ Modem Router YML805 Rev1...
-
Page 4: Overview
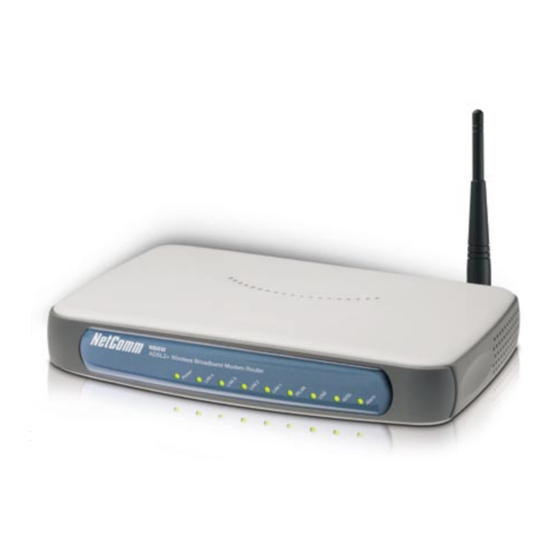
Overview Thank you for purchasing the NetComm NB8/NB8W ADSL2+ Modem Router. NetComm is proud to introduce this entirely new class of all-in-one device incorporating ADSL2+ and Wireless in a single compact unit. The NB8/NB8W is truly a ‘broadband communications gateway’ that, when attached to the appropriate ISP services, will enable multiple broadband communications streams to run concurrently into your home or office. -
Page 5: Nb8/Nb8W Package Contents
NB8/NB8W Package Contents Your NB8/NB8W contains the following items: • NB8 OR NB8W Broadband Communications Gateway (NB8W shown) • Power Supply • RJ11 ADSL Line Connection Cable • USB Cable • RJ45 Cat 5 Ethernet cable • Installation CD •... -
Page 6: Selected Terminology Used In This Manual
A telephone line used for a standard phone-line and service will be referred to as POTS (=Plain Old Telephone Service) The line that connects the NB8/NB8W to a POTS line may be referred to as a pass-through line Telephone cables may be referred to as RJ11 which is the format of the connection plug used for telephones Local area network traffic will be carried by standard Category 5... -
Page 7: Minimum System Requirements
Minimum System Requirements: Different aspects of the NB8/NB8W have different requirements, so let’s look at them in turn. We’ll start with your computer, which ought to match the following requirements if you are to enjoy the benefits of a high-speed ADSL connection and use of Wireless Networking (for the NB8W only). -
Page 8: Do I Need A Micro Filter
Telephones and/or facsimiles in other rooms that are using the same extension will also require Microfilters. The following diagram gives an example of connecting your ADSL Modem/ Router using a Microfilter. A suitable Microfilter can be purchased from NetComm or your Service Provider, if required. YML805 Rev1 NB8/NB8W ADSL2+ Modem Router... -
Page 9: Getting To Know The Nb8/Nb8W
Getting to Know the NB8/NB8W It is recommended that you take a moment to acquaint yourself with the indicator lights, ports and default settings of the NB8/NB8W prior to commencing with installation. LED Indicators Colour Green POWER Green ADSL Green... -
Page 10: Back Panel Ports
NB8/NB8W to its default settings. Wireless LAN antenna. Connect the power adaptor that comes with your NB8/NB8W. Switch to power on / off your NB8/NB8W. 10/100 Base-T Ethernet jack (RJ-45) to connect directly to your computer. (Refer to Appendix A for connection information) USB1.0 port to connect to your USB port. -
Page 11: Default Settings
Empty: Once you have run through ‘ADSL Quick Setup’ you will have a saved WAN connection; • Default connection type: PPPoE (most common for Australian ISPs); • VPI / VCI: 8 / 35; Modem Access • Username: admin • Password: admin NB8/NB8W ADSL2+ Modem Router YML805 Rev1... -
Page 12: Restore Factory Default Setting
Restore Factory Default Setting Restore Factory Defaults will reset the NB8/NB8W to its factory default configuration. Occasions may present themselves where you need to restore the factory defaults on your NB8/NB8W such as: • You have lost your username and password and are unable to login to your NB8/ NB8W’s web configuration page;... -
Page 13: Connecting The Nb8/Nb8W
Connecting the NB8/NB8W The diagram below shows you how to connect the NB8/NB8W to your PC, ADSL and POTS service. The initial set-up is required to get the NB8/NBW up and running: 1. Connecting the cables between NB8/NB8W, PC and telephone(s) and power on 2. -
Page 14: Connecting The Cables
If you wish to connect the Console port, refer to Appendix A. The NB8/NB8W can be connected via a USB cable or an Ethernet cable or both. The USB connection is simply an ethernet simulation. As far as your computer is concerned the USB connection is an Ethernet connection, hence DHCP and other protocols will work the same as for Ethernet. - Page 15 4. Follow the on-screen prompts to load the driver. Refer to the section below for more detailed information. (You may need to restart your computer). 5. Connect one end of the ADSL phone line to the NB8/NB8W ADSL Modem and the other end to the wall socket.
- Page 16 7. Choose “Search for the driver in these locations” and “Search removable media (floppy, CD-ROM...)”. Untick any other boxes and click on the Browse button. Open the CD- ROM drive location of your NetComm NB8/NB8W CD and then select the ‘USBdriver’ folder.
- Page 17 Connecting your NB8/NB8W ADSL Modem via the Console Port for Management The NB8/NB8W’s is equiped with a console port which can be used to configure the modem and diagnose system issued. To access the NB8/NB8W interface using the console port a PC must be equipped with an RS232 port and have a standard VT-100 emulation program such as HyperTerminal 5 or Telix installed.
-
Page 18: Establishing An Adsl Connection Via Pppoe
(e.g. PPPoA, Static, Bridge, etc.). If unsure, follow the steps in this section first. At this point you must have your NB8/NB8W connected according to Section 1, above, with your PC connected to the NB8/NB8W via Ethernet cable (or wireless link for NB8W only). You must also have your ISP-supplied username and password on hand. -
Page 19: Establishing Your Wireless Connection (For Nb8W Only)
4. The default name (SSID) of the NB8W’s wireless network, ‘wireless’, will appear; 5. Connect to the SSID ‘wireless’ and when prompted, enter the default HEX password which is A1B2C3D4E5; 6. Proceed with ‘Establishing an ADSL link via PPPoE’ above. NB8/NB8W ADSL2+ Modem Router YML805 Rev1 ‘wireless’;... -
Page 20: Computer Hardware Configuration
Skip to step 10. 5. If Internet Protocol (TCP/IP) does not display as an installed component, click Add… 6. In the Select Network Component Type dialog box, select Protocol, and then click Add… YML805 Rev1 NB8/NB8W ADSL2+ Modem Router... - Page 21 13. Click OK twice to confirm and save your changes. You will be prompted to restart Windows. 14. Click Yes. Note: For detailed information regarding the advanced features of this product, refer to the Advanced Settings sections. NB8/NB8W ADSL2+ Modem Router YML805 Rev1...
-
Page 22: Advanced Settings
Advanced Settings Your NB8/NB8W has many advanced features that you may want or need to use in the future. Let’s start by taking a look at the menus in the web interface. 1. Login to the NB8/NB8W web interface (http://192.168.1.1);... -
Page 23: Basic
Basic Basic>Home The first page you see after you have successfully setup your NB8/NB8W is the Basic > Home which provides a summary of the status of your NB8/NB8W: Field Software Version Bootloader (CPE) Version Wireless Driver Version Line Rate – Upstream Line Rate –... -
Page 24: Basic>Adsl Quick Setup
Basic>ADSL Quick Setup The NB8/NB8W can be opened in a Web Browser window of a computer attached to the device by entering the Web address http://192.168.1.1. Enter User ID: admin and password: admin. The ‘ADSL Quick Setup’ page will then be displayed when the device is first started, or if you have deleted your WAN connection settings or reset the NB8/NB8W to factory defaults. -
Page 25: Wireless (Nb8W Only)
Enable Wireless Hide Access Point SSID BSSID Country When settings are entered, click Save/Apply NB8/NB8W ADSL2+ Modem Router YML805 Rev1 Enter Check Enable Wireless to turn on wireless transmission If this is checked, wireless clients will need to know the SSID (=wireless network name) if they wish to join the network. -
Page 26: Wireless Security Quick Setup
Default SSID: wireless. This can continue to be used or changed to the name of your choice. Next, click on Wireless>Security. You should see that WEP encryption is enabled by default. Click on Set Encryption Key button to either check, or change, the WEP encryption key: Default WEP Key: A1B2C3D4E5 YML805 Rev1 NB8/NB8W ADSL2+ Modem Router... - Page 27 It is also recommended that your SSID or network name not advertise your actual name but be kept ‘generic’ or anonymous. Note: WEP Security is the appropriate choice if the network clients that wish to connect include 802.11b standard NICs. NB8/NB8W ADSL2+ Modem Router YML805 Rev1...
- Page 28 Users wishing to connect to your network will need to know the SSID name and the WPA Pre-Shared Key. Note: Wireless client network cards must be WPA-compliant to connect to your network; if in doubt check the wireless client network card documentation, or use WEP security (above). YML805 Rev1 NB8/NB8W ADSL2+ Modem Router...
-
Page 29: Wireless Security In Detail
field from which up to four keys are derived in fields underneath the entry field. In all cases, the Wireless Router/Access Point and the workstations wishing to connect must use the same Network Key which needs to be communicated to clients prior to connection. -
Page 30: Network Authentication
802.11 wireless network communications channel (i.e. verbally). To use Shared Key authentication, you must have a network key assigned to the clients trying to connect to your NB8W. NB8/NB8W ADSL2+ Modem Router... - Page 31 Note the following ‘WPA Encryption’ options: TKIP: AES: TKIP+AES: NB8/NB8W ADSL2+ Modem Router YML805 Rev1 The Temporal Key Integrity Protocol (TKIP) takes over after the initial shared secret is entered in your wireless devices and handles the encryption and automatic rekeying.
- Page 32 Enables WPA2 or WPA wireless clients to connect to the NB8W. Requires a RADIUS server to authenticate the wireless clients. Enables WPA2 and WPA clients to authenticate using a PSK (Pre-Shared Key) instead of a RADIUS server. NB8/NB8W ADSL2+ Modem Router...
-
Page 33: Wireless Configuration
Field Name AP Isolation Band Channel Rate Multicast Rate NB8/NB8W ADSL2+ Modem Router YML805 Rev1 About ‘On’: ’wireless clients associated with the access point will only be able to communicate with the Access Point ‘Off’: wireless clients associated with the Access Point will be able to connect to each other ‘peer-to-... -
Page 34: Dtim Interval
Before a station (wireless client) enters power save mode, the station needs the beacon interval to know when to wake up to receive the beacon (and learn whether there are buffered frames at the access point). NB8/NB8W ADSL2+ Modem Router... - Page 35 Xpress 108Mbps. If you are communicating with Xpress otherwise, don’t enable. NB8/NB8W ADSL2+ Modem Router YML805 Rev1 The entered value is represented in ms. Default is 100. Acceptable entry range is 1 to 0xffff (65535).
-
Page 36: Wireless > Mac Filter
Off – disables MAC filtering. Allow – permits access for the specified MAC address. Deny – Rejects access for specified MAC address. Click the ‘Set’ button when done. To Add or Remove a MAC address use these buttons. NB8/NB8W ADSL2+ Modem Router... -
Page 37: Wireless > Bridge
Wireless bridge mode is used to provide a wireless link between WLAN segments to provide greater coverage or to extend network size and reach. If a wireless router is used in bridge mode, then Access Point functionality is disabled. Network Bridges operate to ‘bridge’ two network segments on the ‘physical’... -
Page 38: Wireless > Station Info
Wireless > Station Info This page shows the MAC address of authenticated wireless stations that are connected to the NB8W and their status. In the example below there is one workstation attached to the wireless network. YML805 Rev1 NB8/NB8W ADSL2+ Modem Router... -
Page 39: Management
Management Management > Device Settings > Backup Backup enables you to save a copy of the NB8/NB8W configuration file. This can be re-loaded to restore your settings should you need to reset the device to its factory defaults. The default file name is backupsettings.conf, or give it an explanatory name (e.g. NB8WHome.conf) and save it to somewhere safe on your computer. -
Page 40: Management > Device Settings > Update Firmware
Management > Device Settings > Update Firmware The ‘Update Firmware’ screen allows you to obtain an updated firmware image file from NetComm. Manual software upgrades from a locally stored file can be uploaded using this screen by selecting a firmware file saved to your hard-disk and clicking the ‘Update Firmware’ button. -
Page 41: Management > Snmp
SNMP management station program such as MIB browser on a local host to obtain information from the SNMP agent, in this case the NB8/NB8W (if SNMP enabled). An SNMP ‘community’ performs the function of authenticating SNMP traffic. A ‘community name’ acts as a password that is typically shared among SNMP agents and managers. -
Page 42: Management > Sntp
LAN IP of the web server on port 80 (default for HTTP traffic). If you enable HTTP WAN access to the NB8/NB8W you will be notified that the default port to access the NB8/NB8W has been updated to port 8080. Therefore, your web server will not need to be reconfigured, and you can access your NB8/NB8W on the WAN side using address http:// WAN_IP_OF_NB8/NB8W:8080. -
Page 43: Access Control > Ip Addresses
The IP Addresses option limits the Access>Services by IP address. If the Access Control Mode is enabled, only the listed IP addresses can access the NB8/NB8W for the specified services. Before the service is enabled, specify the IP addresses by clicking the Add button and entering the address details. -
Page 44: Advanced
Once settings are entered, click Save. Connection status can be checked under Status>Diagnostics. Choosing a WAN Profile In the event that you wish to set up several connection profiles on your NB8/NB8W for use in different locations OR with different ADSL services •... - Page 45 In the event that you wish to set up an alternative connection type, for example a PPPoA connection rather than the more common PPPoE type, this is done in the following screen which is accessed from Advanced>WAN>New. Select required connection type, click on Next and follow the prompts. NB8/NB8W ADSL2+ Modem Router YML805 Rev1...
-
Page 46: Advanced > Lan
Advanced > LAN Configure the NB8/NB8W’s LAN IP address and subnet mask. Save button only saves the LAN configuration data. Save/Reboot button saves the LAN configuration data and reboots the NB8/ NB8W to make the new configuration effective. Field LAN IP Address... - Page 47 When your NB8/NB8W hears an IGMP report from a host for a given multicast group it adds the host’s port number for that group. When the NB8/ NB8W hears an IGMP Leave, it removes the host’s port from the table entry.
- Page 48 IGMP Snooping generates no additional network traffic, allowing you to significantly reduce multicast traffic passing through your NB8/NB8W. Save the settings. Save and reboot with the settings applied. NB8/NB8W ADSL2+ Modem Router...
-
Page 49: Advanced > Nat > Explanation
So Port Mapping tells the NAT router: ‘when a request arrives which is intended for TCP port 1357, don’t discard it, but direct it to such-and-such a port’. The port-mapping process invokes advanced routing functionality to ‘bind’... -
Page 50: Advanced > Nat > Port Forwarding
Advanced > NAT > Port Forwarding Note: This option is not available if your NB8/NB8W is in Bridge mode. To display the NAT function, you need to have enabled the NAT feature in the WAN Setup. By default, NAT is enabled on your NB8/NB8W Clicking on Advanced >... - Page 51 WAN side for clients trying to connect to a web server). The external port end on the WAN side of your NB8/ NB8W that clients try to connect to. (e.g. if you are running a service that requires a range of ports to be open you would enter the last port in the range here).
-
Page 52: Advanced > Nat > Port Triggering
PC to Phone Quick Time4 wowcall YML805 Rev1 Outgoing Port Reply Port 6112 6112 7175 51200, 51201,51210 4000 4000 2019 2000-2038, 2050-2051, 2069, 2085,3010-3030 6667 531, 6666, 6667 47624 2300-2400, 28800-29000 12053 12120,12122, 24150-24220 6970-6999 8000 4000-4020 NB8/NB8W ADSL2+ Modem Router... -
Page 53: Advanced > Nat > Dmz
Internet. Enter the IP address of the DMZ computer and click ‘Save/Apply’. The computer with that IP address can then serve web pages or games to the outside world, while the rest of your network remains private. NB8/NB8W ADSL2+ Modem Router YML805 Rev1... -
Page 54: Advanced > Security > Ip Filtering
Source IP address Source Subnet Mask Source Port Destination IP address Destination Subnet Mask Destination Port YML805 Rev1 Comment Enter name for this filter/rule Choose UDP/TCP or both Either port or port range Either port or port range NB8/NB8W ADSL2+ Modem Router... -
Page 55: Advanced > Security > Parental Control
Advanced > Security > Parental Control Parental Control allows NB8/NB8W administrator to restrict access according to hours of the day. Enter target machine’s MAC address and create a Rule Name (called ‘User Name’) and a time range. If you wish to restrict access from, say, 10:00pm until 6:30 in the morning, create two rules to cover the period 10:00-Midnight and midnight –... -
Page 56: Advanced > Qos
Leave blank unless advised by VSP or Network Administrator Leave blank unless advised by VSP or Network Administrator LAN IP address of NB8/NB8W i.e. 192.168.1.1 Source Subnet Mask of same i.e. 255.255.255.0 Leave blank unless advised by VSP or Network Administrator... -
Page 57: Advanced > Routing > Default Gateway
Default Gateway is checked by default and ensures that the NB8/NB8W will accept the first received IP address assigned to it by the DHCP server to which it connects. This will generally be the ISP’s server. You would only uncheck this if the NB8/NB8W was being used in Static Routing mode (see below). -
Page 58: Advanced > Routing > Static Route
Advanced > Routing > Static Route Static routing allows computers that are connected to the NB8/NB8W to communicate with computers on another LAN segment which are connected to the NB8/NB8W via another router. See diagram below for example setup: To set a static route, click add and enter the relevant details in the fields e.g. 192.168.1.2... -
Page 59: Advanced > Routing > Dynamic Route
Advanced > Routing > Dynamic Route Dynamic routing makes use of the RIP protocol to allow the NB8/NB8W to adapt to changes in the network. RIP enables the device to determine the best route for each packet based on the ‘hop count’... -
Page 60: Status
Self explanatory. A series of indicators about various parameters of your broadband connection. Use to troubleshoot connection problems; in event of a fail signifier, click on fail and follow troubleshooting instructions. Note the Ping Default Gateway is an optional parameter and fail may not affect connection. YML805 Rev1 NB8/NB8W ADSL2+ Modem Router... -
Page 61: Status > System Log
Applicable to network or device engineers and administrators. Field Configure>Log Level Display Level Mode NB8/NB8W ADSL2+ Modem Router YML805 Rev1 Description Select level of application event to log Select level of application event to display Remote admin, local admin or both... -
Page 62: Status > Wan
Status > WAN Displays summary of current WAN connection including your ‘Public’ WAN IP (last cell in display). YML805 Rev1 NB8/NB8W ADSL2+ Modem Router... -
Page 63: Status > Route
Status > Route Summarises parameters of IP route for device. NB8/NB8W ADSL2+ Modem Router YML805 Rev1... -
Page 64: Status > Dhcp
Status > DHCP Provides summary of DHCP leases provisioned by NB8/NB8W. Useful source to find client machine MAC addresses. YML805 Rev1 NB8/NB8W ADSL2+ Modem Router... -
Page 65: Appendix A: Configuring And Using The Console Port
Appendix A: Configuring and using the Console Port The NB8/NB8W’s is equiped with a console port which can be used to configure the modem and diagnose system issued. To access the NB8/NB8W interface using the console port a PC must be equipped with an RS232 port and have a standard VT-100 emulation program such as HyperTerminal 5 or Telix installed. -
Page 66: Configuring With Console Port
Router. Connect the RS-232D cable from your computer’s COM port to the console port on the rear of the NB8/NB8W. 4. Connect the power-adaptor to the power port on the rear of the NB8/NB8W, then connect to a power outlet using the power cord included in the NB8/NB8W’s packaging. - Page 67 <Step 2> Click OK <Step 3> Click OK’ NB8/NB8W ADSL2+ Modem Router YML805 Rev1...
-
Page 68: Example Of Rfc1483 Routed Mode
Protocol: Encapsulation: VPI/VCI: IP address range: Subnet mask: Default gateway: DNS: Section 2: Setup the parameters for the NB8/NB8W 1. Setup with router via console port or telnet: 2. Reset-default 3. Setup-System -Router -lan -address -IP address: 211.77.10.121 -Subnet mask: 255.255.255.248 -address -IP address: 192.168.16.200... - Page 69 Select DNS Configuration Tab - 168.95.1.1 – add 168.95.192.1 - add Section 4: How to verify the status 1. Monitor the status of the NB8/NB8W via the console port or telnet: Monitor PING 2. Monitor the NB8/NB8W from computers using the DOS prompt: Check computer itself: PING 211.77.10.122...
- Page 70 Protocol: Encapsulation: VPI/VCI: IP address range: Subnet mask: DNS: Section 2: Setup the parameters for the NB8/NB8W 1. Setup with the NB8/NB8W via console port or telnet: 2. Reset-default 3. Setup -System -NAT -address -IP address: 211.77.10.121 -Subnet mask: 255.255.255.248...
- Page 71 2. When you reach the desktop, click the Start>Setting>Control panel>Network and select TCP/IP protocol. Select Obtain an IP address automatically Section 4: How to verify the status 1. Monitor the status of the NB8/NB8W via the console port or telnet: Monitor 2. Monitor the NB8/NB8W from computers using the DOS prompt: Check computer itself: PING 192.168.8.2...
- Page 72 2. When you reach the desktop, click Start Setting>Control panel>Network and select TCP/IP protocol. Select Obtain an IP address automatically Section 4: How to verify the status 1. Monitor the status of the NB8/NB8W via the console port or telnet: Monitor 2. Monitor the NB8/NB8W from computers using the DOS prompt: Check computer itself: PING 192.168.8.2...
- Page 73 2. When you reach the desktop, click Start >Setting>Control panel>Network and select TCP/IP protocol. Select Obtain an IP address automatically Section 4: How to verify the status 1. Monitor the status of the NB8/NB8W via the console port or telnet Monitor 2. Monitor the NB8/NB8W from computers using the DOS prompt: Check computer itself: PING 192.168.8.2...
-
Page 74: Appendix B: Glossary
IP data and bridges all other types of data. See also routing. A telecommunications technology that can send different types of data over the same medium. DSL is a broadband technology. To send data to all computers on a network. NB8/NB8W ADSL2+ Modem Router... - Page 75 DHCP server digital domain name download Ethernet NB8/NB8W ADSL2+ Modem Router YML805 Rev1 Central Office A circuit switch that terminates all the local access lines in a particular geographic serving area; a physical building where the local switching equipment is found.
- Page 76 When you send data through the Internet, it is sent first from your computer to a router, and then from one router to another until it finally reaches a router that is directly connected to the recipient. Each individual “leg” of the data’s journey is called a hop.
- Page 77 IP address into a Private IP address for each com- puter on your LAN. Only your router and your LAN know these addresses; the outside world sees only the public IP address when talking to a computer on your LAN.
- Page 78 It can also be used to reveal the IP ad- dress for a given domain name. A physical access point to a device such as a computer or router, through which data flows into and out of the device. Plain Old Telephone Service Traditional analog telephone service using copper telephone lines.
- Page 79 SNMP splitter splitterless subnet subnet mask NB8/NB8W ADSL2+ Modem Router YML805 Rev1 In a physically separate location. For example, an employee away on travel who logs in to the company’s intranet is a remote user. Routing Information Protocol The original TCP/IP routing protocol.
- Page 80 The My ADSL Modem is equipped with a USB interface for connecting to a stand- alone PC. Virtual Circuit A connection from your ADSL router to your ISP. Virtual Circuit Identifier Together with the Virtual Path Identifier (VPI), the VCI uniquely identifies a VC.
- Page 81 Web browser Web page Web site NB8/NB8W ADSL2+ Modem Router YML805 Rev1 Wide Area Network Any network spread over a large geo- graphical area, such as a country or continent. With re- spect to the My ADSL Modem, WAN refers to the Internet.
-
Page 82: Appendix C: Cable Information
If you are unsure about which cable to use or which socket to connect it to, please refer to the hardware installation section in this manual. If you are still not sure about cable connections, please contact a professional computer technician or NetComm for further advice. RJ-45 Network Ports RJ-45 Network Ports can connect any networking devices that use a standard LAN interface, such as a Hub/Switch Hub or Router. -
Page 83: Straight And Crossover Cable Configuration
Straight-Through Cabling Cross-Over Cabling Note: To prevent loss of signal, make sure that the length of any twisted-pair connection does not exceed 100 metres. NB8/NB8W ADSL2+ Modem Router YML805 Rev1 Figure 3 Wire Becomes Figure 4... -
Page 84: Appendix D: Registration And Warranty Information
Guide. However some products have an extended warranty option (please refer to your packaging). To be eligible for the extended warranty you must supply the requested warranty information to NetComm within 30 days of the original purchase by registering on-line via the NetComm web site at: www.netcomm.com.au... -
Page 85: Customer Information
NetComm. Failure to do so may cause damage to this product, fire or result in personal injury. -
Page 86: Product Warranty
The warranty is automatically voided if: 1. You, or someone else, use the product, or attempts to use it, other than as specified by NetComm; 2. The fault or defect in your product is the result of a voltage surge subjected to the product either by the way of power supply or communication line, whether caused by thunderstorm activity or any other cause(s);...