NEC U300X User Manual
Xga/wxga single chip 0.55”/0.65” dlp projector
Hide thumbs
Also See for U300X:
- Installation manual (10 pages) ,
- Specification (2 pages) ,
- Specifications (2 pages)

Related Manuals for NEC U300X


Summary of Contents for NEC U300X
- Page 1 Projector U300X/U250X U310W/U260W User’s Manual The U250X and U260W are not distributed in North America. Model No. NP-U300X/NP-U250X NP-U310W/NP-U260W...
- Page 2 (3) Great care has been taken in the preparation of this user’s manual; however, should you notice any questionable points, errors or omissions, please contact us. (4) Notwithstanding article (3), NEC will not be responsible for any claims on loss of profit or other matters deemed to result from using the Projector.
-
Page 3: Important Information
Important Information Safety Cautions Precautions Please read this manual carefully before using your NEC U300X/U250X/U310W/U260W projector and keep the manual handy for future reference. CAUTION To turn off main power, be sure to remove the plug from power outlet. The power outlet socket should be installed as near to the equipment as possible, and should be easily accessible. -
Page 4: Important Safeguards
The Federal Communications Commission does not allow any modifications or changes to the unit EXCEPT those specified by NEC Display Solutions of America, Inc. in this manual. Failure to comply with this government regulation could void your right to operate this equipment. This equipment has been test- ed and found to comply with the limits for a Class B digital device, pursuant to Part 15 of the FCC Rules. - Page 5 Allow at least 4 inches (10cm) of space between your projector and a wall. • Do not try to touch the ventilation outlet as it can become heated while the projector is turned on and im- mediately after the projector is turned off.
-
Page 6: Remote Control Precautions
CAUTION: • DO NOT TOUCH THE LAMP immediately after it has been used. It will be extremely hot. Turn the projector off and then disconnect the power cord. Allow at least one hour for the lamp to cool before handling. - Page 7 • Using the projector at altitudes approximately 2500 feet/760 meters or higher without setting to [High] can cause the projector to overheat and the protector could shut down. If this happens, wait a couple minutes and turn on the projector.
-
Page 8: Table Of Contents
Connect to Computer/Notebook/ Network ... 23 Connect to Video Sources ... 24 Powering On/Off the Projector ...25 Powering On the Projector ... 25 Powering Off the Projector ... 26 Warning Indicator ... 27 Adjusting the Projected Image ...28 Adjusting the Height of Projector Image ... -
Page 9: Usage Notice
High gain type screens are not optimal for use with this projector. The lower the screen gain (i.e., screen gain on the order of 1), the better the appearance of the projected image. - Page 10 - In areas susceptible to excessive dust and dirt. - In direct sunlight. - Move the projector by holding the cable cover. - Hang from the projector in a ceiling or wall mounted instal- lation. - Apply excessively strong pressure against the mirror or lens.
-
Page 11: Introduction
Introduction Product Features This product is an XGA/WXGA single chip 0.55”/0.65” English ... projector. Outstanding features include: U300X/U250X ■ True XGA, 1024 x 768 addressable pixels U310W/U260W True WXGA, 1280 x 800 addressable pixels Single chip DLP technology ■ NTSC/NTSC4.43/PAL/PAL-M/PAL-N/SE- ■... -
Page 12: Package Overview
Package Overview Do not throw This projector comes with all the items shown below. Check to away the mirror cover, carton, and packing make sure your unit is complete. Contact your dealer immedi- materials. ately if anything is missing. The cable cover... -
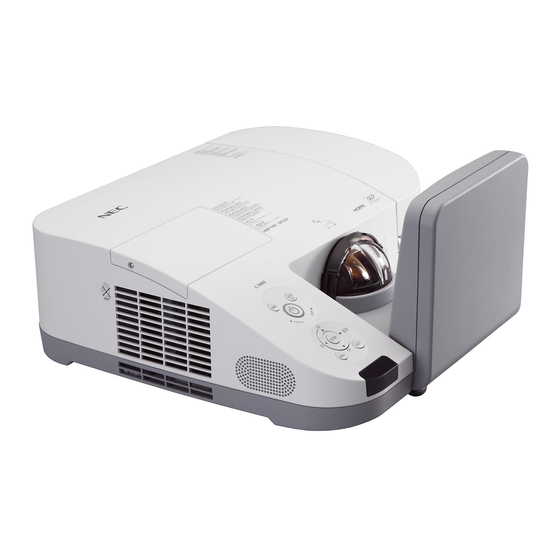
Page 13: Product Overview
1. Lamp Cover 2. Ventilation (outlet) 3. Control Panel 4. Mirror 5. Cable Cover 6. Release rings for Cable 7. Kensington English ... Projector Cover Lock Port (This security slot sup- ports the MicroSaver ® Security System) 8. Tilt Adjusting Feet 9. -
Page 14: Connection Ports
Introduction Connection Ports 12 13 14 1. LAN Connector 2. S-VIDEO IN Connector 3. MONITOR OUT Connector 4. COMPUTER 1 IN Connector 5. COMPUTER 2 IN Connector 6. HDMI Connector 7. PC CONTROL Connector 8. SERVICE Port (for service purpose only) 9. -
Page 15: Control Panel
SOURCE STATUS LED VOLUME - MENU AUTO ADJ. LAMP LED Power on the projector. Refer to the “Power On/Off the Projec- tor” section on pages 25-26. Press “SOURCE” to select an input signal. Indicate the projector’s tempera- ture status. -
Page 16: Removing And Attaching The Cable Cover
2. Remove the cable cover. 3. Install the cable cover by reversing the previous steps. Introduction Adjust the image to compensate for distortion caused by tilt- ing the projector (vertical ± 40 degrees). Increase speaker volume. to select items or make adjustments to your selection. -
Page 17: Remote Control
Introduction English ... Remote Control POWER ON POWER OFF Power on the projector. Refer to the “Power On/Off the Projec- tor” section on pages 25-26. Power off the projector.Refer to the “Power On/Off the Projec- tor” section on pages 25-26. - Page 18 Zoom in/out the projected im- age. Mouse left click. Adjust the image to compensate for distortion caused by tilt- ing the projector (vertical ± 40 degrees). Dim the projector lamp which will lower power consumption and extend the lamp life. (refer...
- Page 19 Introduction English ... Number Button Select password. CLEAR Clear the number while you input the password. FREEZE Freeze To pause the screen im- age. Press again to resume the screen image. EXIT Exit the settings. ENTER Confirm your section of items in sub menu operation.
-
Page 20: Battery Installation
22 feet/7 m and within a 60-degree angle of the remote sensor on the projector cabinet. The projector will not respond if there are objects between the remote control... -
Page 21: Using The Downloadable Software
• Step 1: Install Virtual Remote Tool on the computer. (-> page 15) depending on your • Step 2: Connect the projector to the computer. (-> page 16) computer’s specifica- • Step 3: Start Virtual Remote Tool. (-> page 17) - Page 22 Version 2.0 or later on your computer. not be completed. 1 Download the updated VRT exe file from our web site (http://www.nec-display.com/dl/en/index.html). 2 Double-click the VRT. exe icon. The Installer will start and the Wizard screen will appear. 3 Click “Next”.
- Page 23 Follow the instructions on the screens to complete the uninstallation. Step 2: Connect the projector to the computer 1 Use the supplied computer cable (VGA) to connect the COMPUTER 1 IN connector of the projector directly with the monitor output connector of the computer. English ...
- Page 24 2 Connect the supplied power cord to the AC IN of the projector and the wall outlet. The projector is in the standby condition. TIP: • When Virtual Remote Tool starts for the first time, “Easy Setup” window will be displayed to navigate your connections.
- Page 25 Introduction TIP: • The Virtual Remote Tool screen (or Toolbar) can be displayed without displaying “Easy Setup” window. To do so, click to place a check mark for “Do not use Easy Setup next time” on the screen at Step 6 in “Easy Setup”. 1 Click the Virtual Remote Tool icon 2 Click “Exit”.
- Page 26 2 Click “Help”. The Help screen will be displayed Displaying the help file using the Start Menu. Click “Start” -> “All programs” or “Programs” -> “NEC Projector User Supportware” -> “Virtual Remote Tool” and then “Virtual Remote Tool Help” in this order.
- Page 27 Help of PC Control Utility Pro 4. (-> page 22) • Step 1: Install PC Control Utility Pro 4 on the computer. (-> page 21) • Step 2: Connect the projector to a LAN. (-> page 22) • Step 3: Start PC Control Utility Pro 4. (-> page 22) TIP: •...
- Page 28 Microsoft’s web page. Install the Microsoft .NET Framework To install or unin- Version 2.0 or later on your computer. stall the program, the Windows user account 1 Download the updated VRT exe file from our web site (http://www.nec- must have [Admin- display.com/dl/en/index.html). istrator] privilege (Windows 7, Windows Vista and Windows 2 Double-click the VRT.
- Page 29 [STANDBY • Displaying the help file using the Start Menu. MODE] from the Click “Start” -> “All programs” or “Programs” -> “NEC Projector User menu, the projector Supportware” -> “PC Control Utility Pro 4” -> “PC Control Utility Pro 4 cannot be turned on Help”.
-
Page 30: Installation
Connecting the Projector Connect to Computer/Notebook/Network Make sure that the power plug is fully inserted into both the projector AC inlet and the wall outlet. To the wall outlet 1...Power cord (supplied) 2...Network Cable 3...VGA out cable 4...Audio in cable 5... -
Page 31: Connect To Video Sources
Installation Make sure that the power plug is fully inserted into both the projector AC inlet and the wall outlet. Video Output To the wall outlet Due to the differ- ence in applications for each country, some regions may have differ- ent accessories. -
Page 32: Powering On/Off The Projector
Mode”, the Power LED will turn orange. Turn on the projector first and then the signal sources. Installation on the control panel. The Power LED will flash The startup screen (NEC logo) will display and the ... English... -
Page 33: Powering Off The Projector
When the light turns orange or red, the projector has entered standby mode. If you wish to turn the projector back on, you must wait until the projector has completed the cooling cycle and has entered standby mode. Once in standby mode, simply press the “POWER... -
Page 34: Warning Indicator
The projector will cally shut itself down. When the “LAMP” LED below displays on-screen, the projector has detected that the lamp is approaching its end of sage, change the lamp as soon as possible. When the “STATUS” LED ... -
Page 35: Adjusting The Projected Image
Installation Adjusting the Projected Image The projector is equipped with adjustable feet to raise and lower the image to fill the screen. 1. Rotate the tilt adjustable feet counter clockwise to raise the English ... Adjusting the Height of Projector Image projector or clockwise to lower it. -
Page 36: Adjusting The Projector Focus
U310W/U260W series: The projector will focus at distances from 6” to 12”/148 to 311 mm . Adjusting Projection Image Size U300X/U250X series: Projection Image Size from 63” to 85” (1.600 to 2.159 meters). U310W/U260W series: Projection Image Size from 77” to ... -
Page 37: Throw Distance And Screen Size
Installation Screen Center ( B ) ( C ) U300X/U250X Screen Size Diagonal Width (W) inch inch 1600 1280 1651 1321 1778 1422 1905 1524 1956 1565 2032 1626 2159 1727 U310W/U260W Screen Size Diagonal Width (W) inch inch 1956... -
Page 38: User Controls
On Screen Display The Projector has a multilingual On Screen Display that allows you to make image adjustments and change a variety of set- tings. The projector will automatically detect the source. How to operate To open the OSD, press the MENU button on the Remote Control. -
Page 39: Menu Tree
User Controls Main Menu Sub Menu IMAGE Picture Mode Wall Color Brightness Contrast Sharpness Saturation Advanced SCREEN Aspect Ratio Overscan H Image Shift V Image Shift V Keystone 3D Settings SETTING Language Orientation Menu Location Signal Mute Volume English ... Menu Tree Gamma BrilliantColor™... - Page 40 Main Menu Sub Menu SETTING Advanced SETTING | Network Advanced Security OPTIONS Input Search Fan Mode Information Hide Background Color Lamp/Filter Settings Information Advanced Reset User Controls Settings Logo On / Off PC Control Mode PC Control / LAN Network Closed Captioning Off / CC1 / CC2 / CC3 / CC4 / T1 / T2 / T3 / T4...
-
Page 41: Image
User Controls Picture Mode There are many factory presets optimized for various types of im- ages. Use the Wall Color Use this function to choose a proper color according to the wall. It will compensate the color deviation due to the wall color to show the correct image tone. - Page 42 amount of black and white in the image. Press the Press the Sharpness Adjust the sharpness of the image. Press the “Saturation” and Press the “Hue” functions are only supported Saturation under Video mode. Adjust a video image from black and white to fully saturated color. Press the ...
-
Page 43: Image | Advanced
User Controls IMAGE | Advanced Gamma This allows you to choose a gamma table that has been fine-tuned to bring out the best image quality for the input. BrilliantColor™ This adjustable item utilizes a new color-processing algorithm and system level enhancements to enable higher brightness while providing true, more vibrant colors. - Page 44 Use this option to enable / disable input sources. Press the sub menu and select which sources you require. Press the EN- TER button to finalize the selection. The projector will not search for inputs that are not selected. Exit Press to return to the previous menu.
-
Page 45: Screen
User Controls SCREEN Aspect Ratio Use this function to choose your desired aspect ratio. Overscan Overscan function removes the noise in a video image. Overscan the image to remove video encoding noise on the edge of video source. H Image Shift Shift the projected image position horizontally. - Page 46 V Keystone Press the the image looks trapezoidal, this option can help make the image Each I/O has rectangular. different setting of “Overscan”. 3D Settings “Overscan” can’t Refer to next page. work at same time. User Controls button to adjust image distortion vertically. If ...
-
Page 47: Screen | 3D Settings
User Controls SCREEN | 3D Settings Choose “On” to turn this item on for 3D images. 3D Invert “ ” 3D Invert and “ 3D Over/ ” Under only avail- 3D Over/Under able when 3D is enabled. ... -
Page 48: Setting
SETTING Language Choose the multilingual OSD menu. Press the the sub menu and then use the preferred language. Press Rear-Desktop and Rear-Ceiling are to be used with a translucent screen. Orientation This is the default selection. The image is projected straight on the screen. - Page 49 User Controls Menu Location Choose the menu location on the display screen. Signal Refer to next page. Mute Volume Advanced Refer to page 44. English ... Ceiling Rear When selected, the image will appear reversed in upside down position.
-
Page 50: Setting | Signal (Rgb)
SETTING | Signal (RGB) “Signal” is only supported in Analog VGA (RGB) Phase signal. Synchronize the signal timing of the display with the graphic card. If the image appears to be unstable or flickers, use this function to correct it. Clock Change the display data frequency to match the frequency of your computer’s graphic card. -
Page 51: Setting | Advanced
User Controls SETTING | Advanced Logo Use this function to set the desired startup screen. If changes are made they will take effect the next time the projector is powered PC Control Mode For successful logo ... -
Page 52: Setting | Advanced | Network
OSD menu, the new setting will take effect on next open. On: Assign an IP address to the projector from an external Off: Assign an IP address manually. - Page 53 IP address, you can not link to your service server. 4. Open “Projector Status and Control” to control your projector. English ... an IP, or manually enter the required network information. configuration process. then the web page will display as below:...
- Page 54 “OK” button twice. Step 8: Open your IE and type in the IP address of 192.168.6.74 in the URL then press the ENTER button key. Step 9: Open “Projector Status and Control” to control your projector. , click ... English...
-
Page 55: Setting | Advanced | Security
When you input Use this function to set how long (Month/Day/Hour) the the password, you projector can be used. Once this time has elapsed you will be must press the NUM requested to enter your password again. button and other... - Page 56 User Controls If the incorrect password is entered 3 times, the projector will automatically shut down. If you have forgotten your password, please contact your local office for support. Exit Press to return to the previous menu..English...
-
Page 57: Options
Information Refer to page 53. English ... On: The projector will search for other signals if the current input signal is lost. Off: The projector will only search current input connection. AUTO: The built-in fans automatically run at a variable speed according to the internal temperature. - Page 58 User Controls Advanced Refer to page 54. Reset Choose “On” to return the display parameters on all menus to the factory default settings..English...
-
Page 59: Options | Lamp/Filter Settings
The message will appear 30 hours before suggested replacement of lamp. ECO Mode Choose “On” to dim the projector lamp which will lower power consumption and extend the lamp life. Choose “Off” to return to normal mode. Clear Lamp Hours Reset the lamp hour counter after replacing the lamp. -
Page 60: Options | Information
OPTIONS | Information Information To display the projector information for source, resolution, and software version on the screen. User Controls ... English... -
Page 61: Options | Advanced
ON button on the remote control. Auto Power Off (min) Sets the countdown timer interval. The countdown timer will start, when there is no signal being sent to the projector. The projector will automatically power off when the countdown has finished (in minutes). -
Page 62: Appendices
3. Click “Adjust screen resolution” to display “Display Settings”. Click on the “Advanced Settings”. If the projector is still not projecting the whole image, you will also need to change the monitor display you are using. Refer to the following steps. - Page 63 System Preference-->Display-->Arrangement-->Mirror display If you experience difficulty changing resolutions or your monitor freezes, restart all equipment including the projector. If you are using a Notebook PC: Some Notebook PCs may deactivate their own screens when a second display device is in use. Each has a different way to be reactivated.
- Page 64 Make sure the projection screen is between the required distance 5” to 12”/130 to 314 mm [U300X/U250X] / 6” to 12”/148 to 311 mm [U310W/U260W] from the projector (refer to page 29). Problem: The image is stretched when displaying 16:9 DVD The projector automatically detects 16:9 DVD and adjusts the aspect ratio by digitizing to full screen with 4:3 default setting.
-
Page 65: Led Lighting Message
Lamp cover error or lamp housing error Temperature error Power error Fan error Lamp error Re-firing the lamp (The projector is cooling down) The projector is re-firing. Standby (“Normal” for “Standby Mode”) CONTROL PANEL LOCK is on. Projector Condition Normal Lamp has reached its end of life. - Page 66 Problem: Message Reminders Over temperature - the projector has exceeded its recommended operating temperature and must be allowed to cool down before it may be used. Replacing the lamp - the lamp is about to reach its maximum life- ...
-
Page 67: Cleaning The Filter
• The projector contains high-precision parts. Keep out dust and dirt during filter replacement. • Do not wash the filter with water. Water will damage the filter membrane. • Reattach the filter cover correctly. Failure to do so may cause projector malfunc- tion. Replacing Procedure: 1. -
Page 68: Replacing The Lamp
U310W)) The projector will detect the lamp life at 2500 hours (U250X/ U260W) /2500 hours (U300X/U310W) in Normal mode. When the “Power” LED indicator flashes red and the message below displays on-screen, the projector has detected that the lamp is approaching its end of life. - Page 69 English ... Lamp Replacing Procedure: 1. Switch off the power to the projector by pressing the POWER OFF button on the remote control or the control panel. 2. Allow the projector to cool down at least 60 minutes.
-
Page 70: Cleaning Procedure For The Aspherical Mirror And Lens
1. Turn off the projector and cool projector down for a while. 2. Unplug the power cord from outlet. 3. Blow the dust by blower for cameras which you could buy from camera shops.Wipe the mirror or lens gently using the cleaning... -
Page 71: Specifications
540 TV lines: NTSC/NTSC4.43/PAL/PAL-M/PAL-N/PAL60 300 TV lines: SECAM Scan Rate Horizontal: 31.35 kHz to 91.1 kHz Vertical: 56 Hz to 120 Hz (HDMI: 50 to 85 Hz) English ... U300X U250X 230W AC (190W in ECO mode) 2500 lumens U300X... - Page 72 HDCP and might not be displayed due to the decision/intention of the HDCP community (Digital Content Protection, LLC). *5 An image with higher or lower resolution than the projector’s native resolution (U300X/U250X: 1024 × 768 and U310W/U260W: 1280 × 800) will be displayed with scaling technology.
-
Page 73: Compatibility Modes
Appendices Compatibility Modes Analog RGB SVGA XGA+ (*1)Native resolu- tion on XGA model WXGA (U300X/U250X). Quad-VGA (*2)Native resolu- tion on WXGA SXGA model (U310W/ SXGA+ U260W). WXGA+ WXGA++ (*3) The projector may fail to display UXGA... -
Page 74: Component
TIP: • An image with higher or lower resolution than the projector’s native resolution (U300X/U250X: 1024 x 768 / U310W/U260W: 1280 x 800) will be displayed with scaling technology. • Sync on Green and Composite sync signals are not supported. -
Page 75: Ceiling Mount Installation
Appendices Ceiling Mount Installation 1. To prevent damaging your projector, please use the ceil- 2. If you buy a ceiling mount from another company, please Please note that dam- age resulting from incorrect installation will invalidate the war- ranty. Warning: 1. -
Page 76: Cabinet Dimensions
Appendices Cabinet Dimensions Unit: mm Lens Center 217.00 200.00 200.00 Focus Level Ventilation Ventilation 10.00 38.87 75.35 326.80 89.44 21.28 427.00 148.48 ... English... -
Page 77: Pin Assignments Of D-Sub Computer Input Connector
Appendices Pin Assignments of D-Sub COMPUTER Input Connector Mini D-Sub 15 Pin Connector 11 12 13 14 15 9 10 Signal Level Video signal : 0.7Vp-p (Analog) Sync signal : TTL level COMPUTER 1 IN NOTE: Pin Nos. 12 and 15 are required for DDC/CI. English ... -
Page 78: Pc Control Codes And Cable Connection
PC Control Codes and Cable Connection PC Control Codes Function POWER ON POWER OFF INPUT SELECT COMPUTER 1 INPUT SELECT COMPUTER 2 INPUT SELECT HDMI INPUT SELECT VIDEO INPUT SELECT S-VIDEO PICTURE MUTE ON PICTURE MUTE OFF SOUND MUTE ON SOUND MUTE OFF NOTE: Contact your local dealer for a full list of the PC Control Codes if needed. -
Page 79: Troubleshooting Check List
PC and changed it to projector’s native resolution. The throw distance is within 5” to 12” (130 to 314 mm) on U300X/U250X and 6” to 12” (148 to 311 mm) on U310W/ U260W. Still unchanged even though you adjusted the focus. -
Page 80: Installation Environment
Vertical synch frequency Synch polarity Synch type STATUS Indicator: Steady light Flashing light Remote control model number: DVD Player Signal cable NEC standard or other manufacturer’s cable? Model number: Length: Distribution amplifier Model number: Switcher Model number: Adapter Model number:... -
Page 81: Tco Certification
(on the bottom of the product). To see a list of our TCO certified projectors and their TCO Certification (in English only), visit our website at http://www.nec-display.com/ap/en_projector/tco/index.html The TCO certification, designed by TCO Development, is an international environmental and ergonomics standard for IT equipment. - Page 82 © NEC Display Solutions, Ltd. 2010 7N951531...