Table of Contents
Advertisement
Advertisement
Table of Contents

Related Manuals for NAD T773


Summary of Contents for NAD T773
- Page 1 Owner’s Manual...
-
Page 2: Safety Information
SAFETY INFORMATION PRECAUTIONS PRECAUTIONS PRECAUTIONS PRECAUTIONS PRECAUTIONS Read the Operating Instructions carefully and completely before operating the unit. Be sure to keep the Operating Instructions for future reference. All warnings and cautions in the Operating Instructions and on the unit should be strictly followed, as well as the safety suggestions below. INST INST INST... - Page 3 ELECTRIC POWER ELECTRIC POWER ELECTRIC POWER ELECTRIC POWER ELECTRIC POWER 1 Power Sources - Connect this unit only to power sources specified in the Operating Instructions, and as marked on the unit. 2 Polarization - As a safety feature, some units are equipped with polarized AC power plugs which can only be inserted one way into a power outlet.
-
Page 4: Table Of Contents
GETTING THE MOST FROM THE NAD T 773 ....... . . -
Page 5: Getting The Most From The Nad T 773 Getting The Most From The Nad T 773
NAD T 773, and get the most from this powerful and flexible home- theater component. -
Page 6: Unpacking And Setup
Please save the box and all of the packaging in which your T 773 arrived. Should you move or otherwise need to transport your A/V Receiver, this is by far the safest container in which to do so. We’ve seen too... -
Page 7: About The T 773
EASE OF USE Despite the effort NAD has invested in the T 773 A/V Receiver’s sonic performance, we expended no less in making it powerfully easy to use. Its design is uniquely simple for so sophisticated a component, and the HTR 2 universal remote control is equally understandable, as are the T 773’s own front-panel and on-screen... -
Page 8: Upgradability
Packed with your T 773 is the NAD HTR 2 remote control, a full-system remote especially designed to be easy to use and easy to understand. Be sure to read the section “Using the HTR 2 Remote Control”, to familiarize yourself with the remote’s layout and operations before proceeding to setup your A/V Receiver. -
Page 9: Quickstart
In case you simply cannot wait to experience the performance of your new NAD T 773 A/V Receiver, we provide the following “Quickstart” instructions to get you underway. The steps below connect your DVD player to the T 773’s DVD input; be sure to read “Input Setup”, below. -
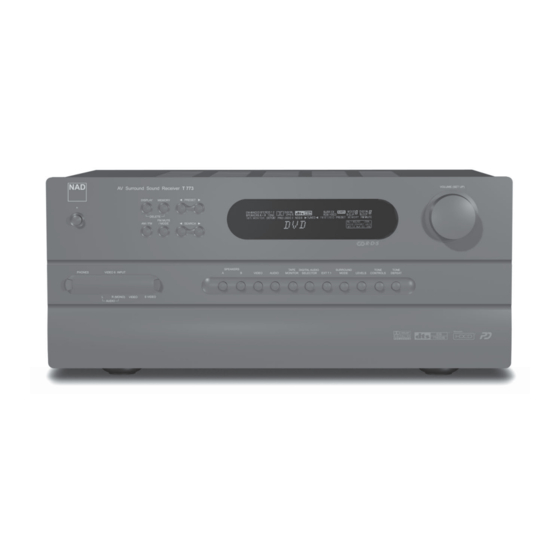
Page 10: Front Panel
10 kHz or 9 kHz steps. To change the step amount, hold in the FM MUTE/MODE and AM/FM keys simultaneously. VFL DISPLAY: The Vacuum Fluorescent Display provides visual information on all of the T773’s important modes, settings, and functions for both MAIN and second ZONE locations. - Page 11 NOTE: Changing the digital audio input via the Digital Audio Selector is a temporary setting that will be lost when the input is changed or the A/V Receiver is cycled though Standby or OFF. (See the section “Input Setup” below to reassign digital inputs to video or audio inputs.) 14 EXT 7.1: Press to listen to the component connected to the T 773’s 7.1 CH.
-
Page 12: Rear Panel
OFF position, the trigger inputs are disabled. SOFT CLIPPING: Enables NAD’s proprietary Soft Clipping circuitry on all channels. Soft Clipping gently limits the output of the T 773 to minimize audible distortion, even should the A/V Receiver be over-driven. - Page 13 SURR-BACK-R jack will supply the same signal from the surround-back Left channel if the T 773 is so configured (see “Speaker Setup,” below). Either one or both channels are available mono or stereo as per “Speaker Setup”. Your NAD audio specialist will be happy to advise you.
-
Page 14: Setting Up The T 773
Suffice it to say that these two questions will influence your system's ultimate performance every bit as powerfully as your selection of electronics and speakers. Your NAD audio specialist dealer will be happy to advise you, and to recommend reference materials. -
Page 15: Displaying The Osd
ABOUT THE ON-SCREEN DISPLAYS (OSD) AND FRONT-PANEL READOUT The T 773 A/V Receiver employs a simple, self-explanatory system of on-screen display "menus" that will appear on the connected video monitor/TV. These are required during the setup process (and are useful in day-to-day operation), so be sure to connect the monitor/TV before proceeding with setup. -
Page 16: Speaker Setup
ABOUT THE ON-SCREEN DISPLAYS (OSD) AND FRONT-PANEL READOUT Every surround-sound system requires "bass-management" to direct low-frequency content from any or all channels to the speakers best able to reproduce it. For this function to operate correctly, it is important that you correctly identify your speakers' capabilities. -
Page 17: Channel-Balance (Test) Setup
Radio Shack part number 33-2050, makes this task easier, more accurate and more repeatable. Ownership of such a meter could prove a valuable audio tool; your NAD audio specialist may be able to help you with temporary use of a meter. -
Page 18: Creating And Using Presets
ABOUT THE ON-SCREEN DISPLAYS (OSD) AND FRONT-PANEL READOUT The T 773’s simple but powerfully flexible system of “Presets” allows you to customize virtually every aspect of your audio-video playback, and recall them with a single key-press. Every parameter of T 773 operation that is available from the main <Setup>... -
Page 19: Using The T 773
You may operate the T 773 A/V Receiver from its front panel or via the HTR 2 remote control. Since the remote will be the primary controller for most cases, we will focus on remote-controlled operations. Be sure also to read the section, "Front Panel" above. -
Page 20: Selecting The Radio
Press the AM/FM key on the T 773 front panel, the HTR 2’s orange [TUNER] (the numeric 9 key), or the yellow [AM] and [FM] keys to select the A/V Receiver’s radio mode. Each subsequent press of either key will toggle the unit between its FM and AM bands. -
Page 21: About Dts And Dolby Digital Modes
ABOUT DTS AND DOLBY DIGIT ABOUT DTS AND DOLBY DIGIT ABOUT DTS AND DOLBY DIGITAL SURROUND MODES ABOUT DTS AND DOLBY DIGIT ABOUT DTS AND DOLBY DIGIT AL SURROUND MODES AL SURROUND MODES AL SURROUND MODES AL SURROUND MODES DTS DIGIT DTS DIGITAL SURROUND DTS DIGIT DTS DIGIT... -
Page 22: About The T 773'S Listening Modes
“Dolby”, “Pro Logic”, and the double D symbol are registered trademarks of Dolby Laboratories. The T 773 A/V Receiver offers nine distinct listening modes, tailored for different types of recordings or program material. The table below lists which modes are available to what input signals. -
Page 23: Displaying The Signal Mode
• Enhanced-Stereo 2 (ST2) All recordings reproduced in stereo via the surround speakers only (plus subwoofer, if any), assuming these are configured in the current <Speakers Setup>. ST2 can prove useful in certain late-night or very low-volume listening situations. The following Surround Sound Modes require a specially encoded signal that must be present in digital format to be decoded by the T 773. -
Page 24: Adjusting Listening Modes
USING THE T 773 ADJUSTING LISTENING MODES ADJUSTING LISTENING MODES ADJUSTING LISTENING MODES ADJUSTING LISTENING MODES ADJUSTING LISTENING MODES Several of the T 773’s listening modes have one or more selectable variations and adjustable parameters you can modify to suit you system, the recording, or your personal preferences. Use the HTR 2 remote's [Surr. -
Page 25: Surround Sound Channel Chart
(see “Front Panel,” above), or via the <Channel Levels> line of the main <Setup> menu. NOTE THAT: The surround back channels (if any) adjust in lockstep with the surround channels; Channel Level changes made via the HTR 2 are retained even if you cycle the A/V Receiver through Standby. -
Page 26: Using The Htr 2 Remote Control
• Contains pre-programmed library of NAD remote codes. The NAD HTR 2 is ready to operate the T 773 A/V Receiver right out of the box, but it is really eight remotes in one. Each of the 8 Device Selector keys at the top of the handset can call up a new “page” of remote- control codes to be transmitted by the remaining 44 keys. -
Page 27: Punch-Through
PUNCH-THROUGH PUNCH-THROUGH PUNCH-THROUGH PUNCH-THROUGH PUNCH-THROUGH The HTR 2’s “punch-through” function allows you to retain a function key from one Device Select “page” on another, so that, for example, the AMP [SURR MODE] function might still control the T 773 when the DVD Device Selector page is active NOTE: The HTR 2’s [VOL] keys are pre-programmed as “punched-through”... -
Page 28: Key-Illumination Timeout
LOADING CODE-LIBRARIES The HTR 2 can store a different library of default NAD codes for each of its Device Selector “pages.” If the original default library does not control your NAD CD player, tape deck, DVD player, or other component, follow the procedure below to change the code-library. -
Page 29: Summary Of Htr 2 Modes
4-6. Whenever the assigned input is selected, either manually or by recalling a Preset, the TRIGGER output will produce +12 V DC, which can be used to activate a connected component or system. See your NAD audio specialist for more information. -
Page 30: T T T T T Roubleshooting Roubleshooting
• Source component not configured for multi channel digital output • Batteries are flat or incorrectly inserted • IR transmitter window on remote, or IR A/V Receiver window on T 773 is obstructed • T 773 front panel is in very bright sunlight or ambient light •... - Page 31 AV SURROUND SOUND RECEIVER AV SURROUND SOUND RECEIVER AV SURROUND SOUND RECEIVER AV SURROUND SOUND RECEIVER AV SURROUND SOUND RECEIVER Amplifier Section Power output Stereo Mode (8 ohms within rated distortion) IHF dynamic power; 8 ohms IHF dynamic power; 4 oh ms...
- Page 32 A Division of Lenbrook Industries LTD All rights reserved. No part of this publication may be reproduced, stored or transmitted in any form without the written permission of NAD Electronics International A Division of Lenbrook Industries LTD T 773 Manual GB 09/03 China...