Panasonic DMR-XW440 Operating Instructions Manual
Hide thumbs
Also See for DMR-XW440:
- Operating instructions manual (104 pages) ,
- Operating instructions manual (104 pages)
Advertisement
Quick Links
Thank you for purchasing this product.
Please read these instructions carefully before using this product, and save this manual for future use.
• This DVD Recorder is for viewing and recording free to view channels only. It does not receive
pay TV or encrypted channels.
Software (Firmware) Update
GL
Broadcast services continue to add new features. As they evolve, firmware
updates may be required to support the latest features. Panasonic strives to
continually update firmware as new technology is released. It's very important
you install the latest updates to maintain proper operation of your unit.
For details, refer to "Software (Firmware) Update" (
http://panasonic.jp/support/global/cs/ (This site is in English only.)
Operating Instructions
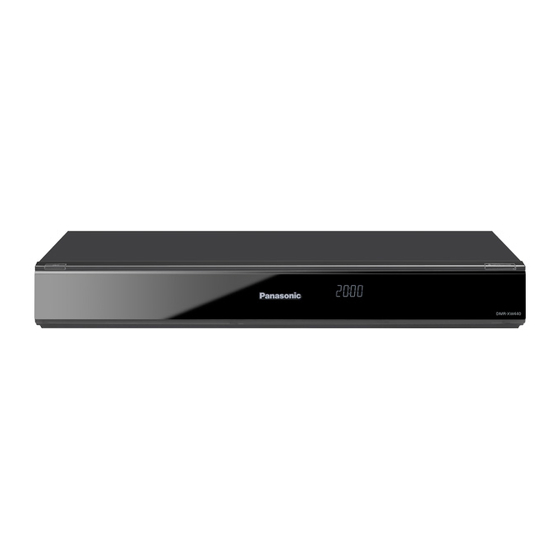
DVD Recorder
DMR-XW440
Model No.
81) or
SQT0134
Advertisement

Related Manuals for Panasonic DMR-XW440


Summary of Contents for Panasonic DMR-XW440
- Page 1 Software (Firmware) Update Broadcast services continue to add new features. As they evolve, firmware updates may be required to support the latest features. Panasonic strives to continually update firmware as new technology is released. It’s very important you install the latest updates to maintain proper operation of your unit.
- Page 2 Safety precautions WARNING CAUTION Unit Unit • To reduce the risk of fire, electric shock or • This unit utilizes a laser. Use of controls or product damage, adjustments or performance of procedures other than those specified herein may result in - Do not expose this unit to rain, moisture, dripping or splashing.
- Page 3 - Do not recharge alkaline or manganese Indemnity concerning recorded content batteries. Panasonic does not accept any responsibility for - Do not use batteries if the covering has been damages directly or indirectly due to any type of peeled off.
- Page 4 Table of contents Safety precautions ..... .2 Editing video Supplied accessories ....3 Deleting/Editing recorded titles .
- Page 5 Convenient functions About descriptions in these operating instructions VIERA Link functions....67 • Pages to be referred to are indicated as “ Playback menu .
- Page 6 Getting started HDD and media information Getting started For more details, refer also to the specifications. ( Recordable/playable contents (–: Impossible) Media type Standard symbol Recordable contents Playable contents • Video • AVCHD/AVCHD 3D Built-in hard disk drive • JPEG [HDD] (HDD) §1...
- Page 7 It cannot be recorded directly. (Only compatible with copying from the built-in HDD) §2 Recorded with AVCHD format compatible devices (Panasonic video camera, etc.). It may not be §3 able to play back, add, or edit depending on the device.
- Page 8 Getting started HDD and media information About extension of files MP4: “.MP4” “.mp4” “.MOV” “.mov” MPEG2: “.MPG” “.mpg” “.MPEG” “.mpeg” “.M2TS” “.m2ts” “.MTS” “.mts” “.TS” “.ts” Xvid: “.AVI” “.avi” Subtitle text files: “.SRT” “.srt” “.SUB” “.sub” “.TXT” “.txt” MKV: “.MKV” “.mkv”...
- Page 9 Getting started • Disc recorded on another device Notes • It may be necessary to finalize the disc, create Top Menu or close the session on the Notes for an External HDD (USB HDD) equipment used for recording to play on this You can use an external HDD in the following two unit.
- Page 10 Getting started HDD and media information Notes for the SD cards Media handling • Compatible SD card • Do not touch the recorded surface of the discs or the terminal surface of the SD cards. - SD Memory Card (from 8 MB to 2 GB, FAT12 and FAT16 DO NOT formats) - SDHC Memory Card...
- Page 11 Getting started Unit care HDD/USB HDD handling care When moving the unit Before moving the unit, ensure the disc tray is • The HDD is a high precision device empty. The HDD is a high precision recording instrument and is easily susceptible to damage. 1 Switch the unit to standby mode.
- Page 12 Getting started Control reference guide Instructions for operations are generally described using the remote control. Remote control 9 Show DIRECT NAVIGATOR, Top Menu ( : Show OPTION menu ( 38, 52, 57) ; Colour buttons (Use in accordance with ...
- Page 13 Getting started Display Main unit Pull to flip down the 6 Recording indicator front panel. • The indicator will light up while recording. • The indicator will blink while recording is 1 Standby/on switch (Í/I) paused and before recording starts.
- Page 14 About HDMI cable Use the High Speed HDMI cables. Non-HDMI-compliant cables cannot be utilized. It is recommended that you use Panasonic’s HDMI cable. When outputting 1080p signal, please use HDMI Cables 5.0 meters or less. • Keep the RF coaxial cables as far away as possible from other cables.
- Page 15 Getting started When the unit is not to be used for a long Amplifier/receiver connections time To save power, unplug it from the household HDMI terminal mains socket. This unit consumes a small amount of power, even when the unit is in 3D programmes can be played back when standby mode.
- Page 16 Getting started Connection ∫ Amplifier/receiver not compatible with 3D DIGITAL AUDIO OUT terminal 3D programmes can be played back when Amplifier/receiver OPTICAL IN this unit is connected to a 3D compatible • This connection only supports up to 5.1ch. Optical digital audio cable Amplifier/receiver HDMI IN (ARC compatible)
- Page 17 Getting started Network connection When this unit is connected to the network, you can enjoy network functions (DLNA function, Network Service, Remote Recording, etc.). For details about connection method, refer to the instructions supplied with the connected equipment. After you make the LAN cable connection, the network setting is needed.
- Page 18 While pressing [TV Í], enter the code with the number buttons. TV operation buttons Manufacturer and Code No. DRIVE INPUT SELECT right) PAGE Brand Code Brand Code Panasonic 01/02/03/04 NOBLEX AIWA NOKIA 25/26/27/60/61 AKAI 27/30 INTERNET NORDMENDE BEKO 05/71/72/73/74 RADIO/ OLEVIA BENQ...
- Page 19 Getting started Easy Setting • If tuning is cancelled partway through, it may not be possible to receive the channels. Restart setup again. Turn on the TV, then select the appropriate AV input to suit the connections to this unit. Easy Network Setting Press [Í] on the remote control or [Í/I] on Follow the on-screen instructions and make...
- Page 20 Getting started FUNCTION MENU screen You can easily access the desired functions, such FUNCTION MENU list as playback, timer recording, the unit’s settings • Media etc. via the FUNCTION MENU. - Disc Press [FUNCTION MENU]. - SD Card - USB device FUNCTION MENU Media TV Guide...