
Related Manuals for Asus S431FL


Summary of Contents for Asus S431FL
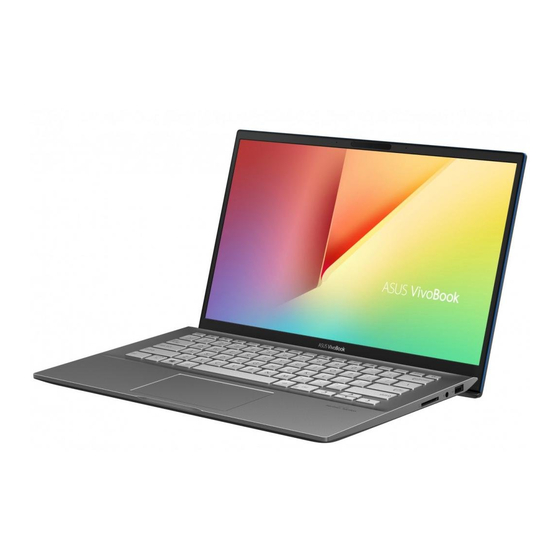
- Page 1 Questo manuale d’istruzione è fornito da trovaprezzi.it. Scopri tutte le offerte per Asus VivoBook S431FL S431FL- EB251T o cerca il tuo prodotto tra le migliori offerte di Notebook E15288 First Edition / April 2019 E-Manual...
- Page 2 Warranty Statement, up to the listed contract price of each product. ASUS will only be responsible for or indemnify you for loss, damages or claims based in contract, tort or infringement under this Warranty Statement.
-
Page 3: Table Of Contents
Table of Contents About this manual .....................7 Conventions used in this manual ................8 Icons ............................ 8 Typography ........................8 Safety precautions .....................9 Using your Notebook PC ....................9 Caring for your Notebook PC ..................10 Proper disposal ........................ 11 Chapter 1: Hardware Setup Getting to know your Notebook PC ..............14 Top View .......................... - Page 4 Chapter 3: Working with Windows® 10 Starting for the first time ..................38 Start menu ........................39 Windows® apps ......................41 Working with Windows® apps..................42 Customizing Windows® apps ..................42 Task view ........................45 Snap feature ........................46 Snap hotspots ........................46 Action Center ......................48 Other keyboard shortcuts ..................49 Connecting to wireless networks ................51 Wi-Fi .............................
- Page 5 Tips and FAQs Useful tips for your Notebook PC ................70 Hardware FAQs ......................71 Software FAQs ......................74 Appendices DVD-ROM Drive Information ..................78 Blu-ray ROM Drive Information ................. 80 Internal Modem Compliancy ..................80 Overview ..........................81 Network Compatibility Declaration ................. 81 Non-Voice Equipment ....................
- Page 6 CTR 21 Approval (for Notebook PC with built-in Modem) ......90 ENERGY STAR complied product ................92 Global Environmental Regulation Compliance and Declaration ....92 ASUS Recycling/Takeback Services ................93 Rechargeable Battery Recycling Service in North America......93 Coating Notice ......................... 93 Regional notice for California ..................
-
Page 7: About This Manual
About this manual This manual provides information about the hardware and software features of your Notebook PC, organized through the following chapters: Chapter 1: Hardware Setup This chapter details the hardware components of your Notebook Chapter 2: Using your Notebook PC This chapter shows you how to use the different parts of your Notebook PC. -
Page 8: Conventions Used In This Manual
Conventions used in this manual To highlight key information in this manual, some text are presented as follows: IMPORTANT! This message contains vital information that must be followed to complete a task. NOTE: This message contains additional information and tips that can help complete tasks. -
Page 9: Safety Precautions
Safety precautions Using your Notebook PC This Notebook PC should only be used in environments with ambient temperatures between 5°C (41°F) and 35°C (95°F). Refer to the rating label on the bottom of your Notebook PC and ensure that your power adapter complies with this rating. -
Page 10: Caring For Your Notebook Pc
Caring for your Notebook PC Disconnect the AC power and remove the battery pack (if applicable) before cleaning your Notebook PC. Use a clean cellulose sponge or chamois cloth dampened with a solution of nonabrasive detergent and a few drops of warm water. Remove any extra moisture from your Notebook PC using a dry cloth. -
Page 11: Proper Disposal
Proper disposal Do not throw your Notebook PC in municipal waste. This product has been designed to enable proper reuse of parts and recycling. The symbol of the crossed out wheeled bin indicates that the product (electrical, electronic equipment and mercury- containing button cell battery) should not be placed in municipal waste. - Page 12 Notebook PC E-Manual...
-
Page 13: Chapter 1: Hardware Setup
Chapter 1: Hardware Setup Notebook PC E-Manual... -
Page 14: Getting To Know Your Notebook Pc
Getting to know your Notebook PC Top View NOTE: The keyboard's layout may vary per region or country. The Notebook view may also vary in appearance depending on the Notebook PC model. Notebook PC E-Manual... - Page 15 Array microphones The array microphones feature echo canceling, noise suppression, and beam forming functions for better voice recognition and audio recording. Camera indicator The camera indicator lights up when the built-in camera is in use. Camera The built-in camera allows you to take pictures or record videos using your Notebook PC.
- Page 16 Capital lock indicator This indicator lights up when the capital lock function is activated. Using capital lock allows you to type capitalized letters (such as A, B, C) using your Notebook PC’s keyboard. Keyboard The keyboard provides full-sized QWERTY keys with a comfortable travel depth for typing.
- Page 17 Touchpad The touchpad allows the use of multi-gestures to navigate onscreen, providing an intuitive user experience. It also simulates the functions of a regular mouse. NOTE: For more details, refer to the Using the touchpad section in this manual. Power button Press the power button to turn your Notebook PC on or off.
-
Page 18: Bottom
Battery time varies by usage and by the specifications for this Notebook PC. The battery pack cannot be disassembled. • Purchase components from authorized retailers to ensure maximum compatibility and reliability. Consult an ASUS service center or authorized retailers for product service or assistance on proper disassembly or assembly of the product. Audio speakers The built-in audio speakers allow you to hear audio straight from your Notebook PC. -
Page 19: Right Side
Right Side Memory card reader This built-in memory card reader supports SD card formats. Headphone/Headset/Microphone jack This port allows you to connect amplified speakers or headphones. You can also use this port to connect your headset or an external microphone. USB 2.0 port The USB (Universal Serial Bus) port is compatible with USB 2.0 or USB 1.1 devices such as keyboards, pointing devices, flash disk... -
Page 20: Left Side
Left Side Power (DC) input port Insert the bundled power adapter into this port to charge the battery pack and supply power to your Notebook PC. WARNING! The adapter may become warm to hot while in use. Do not cover the adapter and keep it away from your body while it is connected to a power source. - Page 21 HDMI port This port is for the HDMI (High-Definition Multimedia Interface) connector and is HDCP compliant for HD DVD, Blu-ray, and other protected content playback. USB 3.1 Gen 1 port The USB 3.1 (Universal Serial Bus 3.1) Gen 1 port provides a transfer rate of up to 5 Gbit/s and is backward compatible to USB 2.0.
- Page 22 Color Status Solid White The Notebook PC is plugged to a power source and the battery power is between 95% and 100%. Solid Orange The Notebook PC is plugged to a power source, charging its battery, and the battery power is less than 95%.
-
Page 23: Chapter 2: Using Your Notebook Pc
Chapter 2: Using your Notebook PC Notebook PC E-Manual... -
Page 24: Getting Started
Getting started Charge your Notebook PC Connect the DC power connector into your Notebook PC’s power (DC) input port. Plug the AC power adapter into a 100V~240V power source. Charge the Notebook PC for 3 hours before using it in battery mode for the first time. - Page 25 • The socket outlet must be easily accessible and near your Notebook • To disconnect your Notebook PC from its main power supply, unplug your Notebook PC from the power socket. WARNING! Read the following precautions for your Notebook PC’s battery: • Only ASUS-authorized technicians should remove the battery inside the device (for non-removable battery only). • The battery used in this device may present a risk of fire or chemical burn if removed or disassembled. • Follow the warning labels for your personal safety. • Risk of explosion if battery is replaced by an incorrect type.
-
Page 26: Lift To Open The Display Panel
Lift to open the display panel Press the power button Notebook PC E-Manual... -
Page 27: Using The Touchpad
Using the touchpad Moving the pointer You can tap anywhere on the touchpad to activate its pointer, then slide your finger on the touchpad to move the pointer onscreen. Slide horizontally Slide vertically Slide diagonally Notebook PC E-Manual... - Page 28 One-finger gestures Tap/Double-tap • Tap an app to select it. • Double-tap an app to launch it. Drag and drop Double-tap an item, then slide the same finger without lifting it off the touchpad. To drop the item to its new location, lift your finger from the touchpad. Notebook PC E-Manual...
- Page 29 Left-click Right-click • Click an app to select it. Click this button to open the right- click menu. • Double-click an app to launch it. NOTE: The areas inside the dotted line represent the locations of the left mouse button and the right mouse button on the touchpad. Two-finger gestures Tap two fingers on the touchpad to simulate the right-click function.
- Page 30 Two-finger scroll (up/down) Two-finger scroll (left/right) Slide two fingers to scroll up or Slide two fingers to scroll left or down. right. Zoom out Zoom in Bring together your two fingers on Spread apart your two fingers on the touchpad. the touchpad.
- Page 31 Drag and drop Select an item then press and hold the left button. Using your other finger, slide on the touchpad to drag the item, lift your finger off the button to drop the item. Three-finger gestures Tap three fingers on the touchpad to invoke Cortana. Notebook PC E-Manual...
- Page 32 Swipe left/Swipe right If you opened multiple apps, swipe three fingers left or right to switch between these apps. Swipe up Swipe down Swipe up to see an overview of all Swipe down to show the desktop. the apps currently opened. Notebook PC E-Manual...
- Page 33 Four-finger gestures Tap four fingers on the touchpad to invoke Action Center. Customizing your touchpad Launch All settings from the Action Center. Select Devices, then select Mouse & touchpad. Adjust the settings to your preference. Notebook PC E-Manual...
-
Page 34: Using The Keyboard
Using the keyboard HotKeys The HotKeys on your Notebook PC’s keyboard can trigger the following commands: Turns the speaker on or off Turns the speaker volume down Turns the speaker volume up Decreases display brightness Increases display brightness Enables or disables the touchpad Adjusts brightness for the backlit keyboard Toggles the display mode NOTE: Ensure that the second display is connected to... -
Page 35: Function Keys
Home key End key Page up key Page down key Function keys Press to enable or disable the function keys feature. When the function keys feature is enabled, you can also access HotKeys by holding down in combination with the top row keys. Windows®... - Page 36 Notebook PC E-Manual...
-
Page 37: Chapter 3: Working With Windows
Chapter 3: Working with Windows® 10 Notebook PC E-Manual... -
Page 38: Starting For The First Time
Starting for the first time When you start your Notebook PC for the first time, a series of screens appear to guide you in configuring your Windows® 10 operating system. To start your Notebook PC for the first time: Press the power button on your Notebook PC. Wait for a few minutes until the setup screen appears. -
Page 39: Start Menu
Start menu The Start menu is the main gateway to your Notebook PC’s programs, Windows® apps, folders, and settings. Change account settings, lock, or sign out from your account Launch an app from the Start screen Launch an app from the taskbar Launch Taskview Launch Search Launch the Start menu... - Page 40 Launching the Start menu Position your mouse pointer over the Start button in the lower-left corner of your desktop then click it. Press the Windows logo key on your keyboard. Opening programs from the Start menu One of the most common uses of the Start menu is opening programs installed on your Notebook PC.
-
Page 41: Windows® Apps
Windows ® apps These are apps pinned on the right pane of the Start menu and displayed in tiled-format for easy access. NOTE: Some Windows® apps require signing in to your Microsoft account before they are fully launched. Notebook PC E-Manual... -
Page 42: Working With Windows® Apps
Working with Windows® apps Use your Notebook PC’s touchpad or keyboard to launch, customize, and close apps. Launching Windows® apps from the Start menu Position your mouse pointer over the app then click to launch it. Use the arrow keys to browse through the apps. Press to launch an app. - Page 43 Resizing apps Position your mouse pointer over the app and right-click it, then click Resize and select an app tile size. Use the arrow keys to navigate to the app. , then select Resize and select an app Press tile size. Unpinning apps Position your mouse pointer over the app and right-click it, then click Unpin from Start.
- Page 44 Pinning apps to the taskbar Position your mouse pointer over the app and right-click it, then click Pin to taskbar. Use the arrow keys to navigate to the app. , then select Pin to taskbar. Press Pinning more apps to the Start menu From All apps, position your mouse pointer over the app you want to add to the Start menu and right-click it, then click Pin to Start.
-
Page 45: Task View
Task view Quickly switch between opened apps and programs using the task view feature, you can also use task view to switch between desktops. Launching task view Position your mouse pointer over the icon on the taskbar and click it. Press on your keyboard. -
Page 46: Snap Feature
Snap feature The Snap feature displays apps side-by-side, allowing you to work or switch between apps. Snap hotspots You can drag and drop apps to these hotspots to snap them into place. Notebook PC E-Manual... - Page 47 Using Snap Launch the app you wish to snap. Drag the title bar of your app and drop the app to the edge of the screen to snap. Launch another app and repeat the above steps to snap another app. Launch the app you wish to snap.
-
Page 48: Action Center
Action Center Action Center consolidates notifications from apps and presents a single place where you can interact with them. It also has a really useful Quick Actions section at the bottom. Launching Action Center Position your mouse pointer over the icon on the taskbar and click it. -
Page 49: Other Keyboard Shortcuts
Other keyboard shortcuts Using the keyboard, you can also use the following shortcuts to help you launch applications and navigate Windows® 10. Launches Start menu Launches Action Center Launches the desktop Launches the File Explorer Launches Settings Launches Connect panel Activates the Lock screen Minimizes all currently active windows Notebook PC E-Manual... - Page 50 Launches Search Launches Project panel Opens the Run window Opens Ease of Access Center Opens the context menu of the Start button Launches the magnifier icon and zooms in your screen Zooms out your screen Notebook PC E-Manual...
-
Page 51: Connecting To Wireless Networks
Connecting to wireless networks Wi-Fi Access emails, surf the Internet, and share applications via social networking sites using your Notebook PC’s Wi-Fi connection. IMPORTANT! Airplane mode disables this feature. Ensure that Airplane mode is turned off before enabling the Wi-Fi connection of your Notebook PC. -
Page 52: Bluetooth
Bluetooth Use Bluetooth to facilitate wireless data transfers with other Bluetooth- enabled devices. IMPORTANT! Airplane mode disables this feature. Ensure that Airplane mode is turned off before enabling the Bluetooth connection of your Notebook PC. Pairing with other Bluetooth-enabled devices You need to pair your Notebook PC with other Bluetooth-enabled devices to enable data transfers. -
Page 53: Airplane Mode
Airplane mode Airplane mode disables wireless communication, allowing you to use your Notebook PC safely while in-flight. NOTE: Contact your airline provider to learn about related in-flight services that can be used and restrictions that must be followed when using your Notebook PC in-flight. Turning Airplane mode on Launch Action Center from the taskbar. -
Page 54: Turning Your Notebook Pc Off
Turning your Notebook PC off You can turn off your Notebook PC by doing either of the following procedures: • Launch the Start menu, then select > Shut down to do a normal shutdown. > Shut down. • From the log-in screen, select • Press to launch Shut down Windows. -
Page 55: Putting Your Notebook Pc To Sleep
Putting your Notebook PC to sleep To put your Notebook PC to Sleep mode: • Launch the Start menu, then select > Sleep to put your Notebook PC to sleep. > Sleep. • From the log-in screen, select Press to launch Shut down Windows. Select Sleep from the drop-down list then select OK. - Page 56 Notebook PC E-Manual...
-
Page 57: Chapter 4: Power-On Self-Test (Post)
Chapter 4: Power-On Self-Test (POST) Notebook PC E-Manual... -
Page 58: The Power-On Self-Test (Post)
The Power-On Self-Test (POST) The POST (Power-On Self-Test) is a series of software-controlled diagnostic tests that run when you turn on or restart your Notebook PC. The software that controls the POST is installed as a permanent part of the Notebook PC’s architecture. Using POST to access BIOS and Troubleshoot During POST, you can access the BIOS settings or run troubleshooting options using the function keys of your Notebook PC. -
Page 59: Bios Settings
• Restart your Notebook PC then press during POST. Launch the Start menu, and choose Settings > Update & • security > Recovery, then select Restart now under Advanced startup. When you enter the Advanced startup screen, select Troubleshoot > Advanced options > UEFI Firmware Settings > Restart. BIOS Settings NOTE: The BIOS screens in this section are for reference only. The actual screens may differ by model and territory. - Page 60 Boot This menu allows you to set your boot option priorities. You may refer to the following procedures when setting your boot priority. On the Boot screen, select Boot Option #1. and select a device as the Boot Option #1. Press Notebook PC E-Manual...
- Page 61 Security This menu allows you to set up the administrator and user password of your Notebook PC. It also allows you to control the access to your Notebook PC’s hard disk drive, input/output (I/O) interface, and USB interface. NOTE: If you install a User Password, you will be prompted to input this •...
- Page 62 To set the password: On the Security screen, select Setup Administrator Password or User Password. Type in a password then press Re-type to confirm the password then select OK. To clear the password: On the Security screen, select Setup Administrator Password or User Password.
- Page 63 Save & Exit To keep your configuration settings, select Save Changes and Exit before exiting the BIOS. Notebook PC E-Manual...
- Page 64 Save a copy of the downloaded BIOS file to a flash disk drive. Connect your flash disk drive to your Notebook PC. Restart your Notebook PC then access the BIOS settings. From the BIOS menu, select Advanced > ASUS EZ Flash 3 Utility, then press Notebook PC E-Manual...
- Page 65 Locate your downloaded BIOS file in the flash disk drive then press . Follow the onscreen instructions to complete the update. After the BIOS update process, select Save & Exit > Restore Defaults to restore the system to its default settings. Notebook PC E-Manual...
-
Page 66: Recovering Your System
Recovering your system Using recovery options on your Notebook PC allows you to restore the system to its original state or simply refresh its settings to help improve performance. IMPORTANT! • Backup all your data files before doing any recovery option on your Notebook PC. -
Page 67: Performing A Recovery Option
• Go back to an earlier build - This option allows you to go back to an earlier build. Use this option if this build is not working for you. • Advanced startup - Using this option allows you to perform other advanced recovery options on your Notebook PC such as: Using a USB drive, network connection or Windows recovery DVD to startup your Notebook PC. - Page 68 Under the Update and security option, select Recovery then select the recovery option you would like to perform. Notebook PC E-Manual...
-
Page 69: Tips And Faqs
Tips and FAQs Notebook PC E-Manual... -
Page 70: Useful Tips For Your Notebook Pc
Useful tips for your Notebook PC To help you maximize the use of your Notebook PC, maintain its system performance, and ensure all your data are kept secured, here are some useful tips that you can follow: • Update Windows® periodically to ensure that your applications have the latest security settings. •... -
Page 71: Hardware Faqs
I turn on the Notebook PC. What should I do? Although these dots normally appear onscreen, they will not affect your system. If the incident continues and subsequently affects system performance, consult an authorized ASUS service center. My display panel has an uneven color and brightness. How... - Page 72 • Check if your speakers were set to mute. • Check if a headphone jack is connected to your Notebook PC and remove it. What should I do if my Notebook PC’s power adapter gets lost or my battery stops working? Contact your local ASUS service center for assistance. Notebook PC E-Manual...
- Page 73 My Notebook PC cannot do keystrokes correctly because my cursor keeps on moving. What should I do? Make sure that nothing accidentally touches or presses on your touchpad while you type on the keyboard. You can also disable your touchpad by pressing Notebook PC E-Manual...
-
Page 74: Software Faqs
Remove any optical discs that are left inside the optical drive then restart. • If the problem still exists, your Notebook PC might have a memory storage problem. Contact your local ASUS service center for assistance. My Notebook PC boots slower than usual and my operating system lags. How can I fix this? Delete the applications you recently installed or were not included with your operating system package then restart your system. - Page 75 My Notebook PC does not boot up. How can I fix this? You can try doing any of the following suggestions: • Remove all connected devices to your Notebook PC then restart your system. • If the problem still exists, contact your local ASUS service center for assistance. Why can’t my Notebook PC wake up from sleep mode? • You need to press the power button to resume your last working state.
- Page 76 Notebook PC E-Manual...
-
Page 77: Appendices
Appendices Notebook PC E-Manual... -
Page 78: Dvd-Rom Drive Information
DVD-ROM Drive Information The DVD-ROM drive allows you to view and create your own CDs and DVDs. You can purchase an optional DVD viewer software to view DVD titles. NOTE: The DVD-ROM Drive is available on selected models. Regional Playback Information Playback of DVD movie titles involves decoding MPEG2 video, digital AC3 audio and decryption of CSS protected content. - Page 79 Region Definitions Region 1 Canada, US, US Territories Region 2 Czech, Egypt, Finland, France, Germany, Gulf States, Hungary, Iceland, Iran, Iraq, Ireland, Italy, Japan, Netherlands, Norway, Poland, Portugal, Saudi Arabia, Scotland, South Africa, Spain, Sweden, Switzerland, Syria, Turkey, UK, Greece, Former Yugoslav Republics, Slovakia Region 3 Burma, Indonesia, South Korea, Malaysia, Philippines, Singapore, Taiwan, Thailand,...
-
Page 80: Blu-Ray Rom Drive Information
Blu-ray ROM Drive Information The Blu-ray ROM Drive allows you to view HD (High-Definition) videos and other disc file formats such as DVDs and CDs. NOTE: The Blu-ray ROM Drive is available on selected models. Region Definitions Region A North, Central and South American countries, and their territories; Taiwan, Hong Kong, Macao, Japan, Korea (South and North), South East Asian countries and their territories. -
Page 81: Overview
Overview On 4th August 1998 the European Council Decision regarding the CTR 21 has been published in the Official Journal of the EC. The CTR 21 applies to all non voice terminal equipment with DTMF-dialling which is intended to be connected to the analogue PSTN (Public Switched Telephone Network). - Page 82 This table shows the countries currently under the CTR21 standard. Country Applied More Testing Austria Belgium Czech Republic Not Applicable Denmark Finland France Germany Greece Hungary Not Applicable Iceland Ireland Italy Still Pending Still Pending Israel Lichtenstein Luxemburg The Netherlands Norway Poland Not Applicable...
- Page 83 This information was copied from CETECOM and is supplied without liability. For updates to this table, you may visit http://www.cetecom.de/technologies/ctr_21.html. 1 National requirements will apply only if the equipment may use pulse dialling (manufacturers may state in the user guide that the equipment is only intended to support DTMF signalling, which would make any additional testing superfluous).
-
Page 84: Federal Communications Commission Interference Statement
Federal Communications Commission Interference Statement This device complies with FCC Rules Part 15. Operation is subject to the following two conditions: • This device may not cause harmful interference. • This device must accept any interference received, including interference that may cause undesired operation. This equipment has been tested and found to comply with the limits for a class B digital device, pursuant to Part 15 of the Federal Communications Commission (FCC) rules. -
Page 85: Fcc Radio Frequency (Rf) Exposure Caution Statement
FCC Radio Frequency (RF) Exposure Caution Statement WARNING! Any changes or modifications not expressly approved by the party responsible for compliance could void the user’s authority to operate this equipment. This equipment complies with FCC radiation exposure limits set forth for an uncontrolled environment. -
Page 86: Compliance Statement Of Innovation, Science And Economic Development Canada (Ised)
Compliance Statement of Innovation, Science and Economic Development Canada (ISED) This device complies with Innovation, Science and Economic Development Canada license exempt RSS standard(s). Operation is subject to the following two conditions: (1) this device may not cause interference, and (2) this device must accept any interference, including interference that may cause undesired operation of the device. -
Page 87: Ul Safety Notices
UL Safety Notices Required for UL 1459 covering telecommunications (telephone) equipment intended to be electrically connected to a telecommunication network that has an operating voltage to ground that does not exceed 200V peak, 300V peak-to-peak, and 105V rms, and installed or used in accordance with the National Electrical Code (NFPA 70). -
Page 88: Power Safety Requirement
REACH Complying with the REACH (Registration, Evaluation, Authorization, and Restriction of Chemicals) regulatory framework, we publish the chemical substances in our products at ASUS REACH website at http://csr.asus.com/english/REACH.htm. Macrovision Corporation Product Notice This product incorporates copyright protection technology that is protected by method claims of certain U.S.A. -
Page 89: Nordic Lithium Cautions (For Lithium-Ion Batteries)
Nordic Lithium Cautions (for lithium-ion batteries) CAUTION! Danger of explosion if battery is incorrectly replaced. Replace only with the same or equivalent type recommended by the manufacturer. Dispose of used batteries according to the manufacturer’s instructions. (English) ATTENZIONE! Rischio di esplosione della batteria se sostituita in modo errato. Sostituire la batteria con un una di tipo uguale o equivalente consigliata dalla fabbrica. -
Page 90: Ctr 21 Approval (For Notebook Pc With Built-In Modem)
CTR 21 Approval (for Notebook PC with built-in Modem) Danish Dutch English Finnish French Notebook PC E-Manual... - Page 91 German Greek Italian Portuguese Spanish Swedish Notebook PC E-Manual...
-
Page 92: Energy Star Complied Product
Declaration ASUS follows the green design concept to design and manufacture our products, and makes sure that each stage of the product life cycle of ASUS product is in line with global environmental regulations. In addition, ASUS disclose the relevant information based on regulation requirements. -
Page 93: Asus Recycling/Takeback Services
ASUS Recycling/Takeback Services ASUS recycling and takeback programs come from our commitment to the highest standards for protecting our environment. We believe in providing solutions for you to be able to responsibly recycle our products, batteries, other components as well as the packaging materials. -
Page 94: Regional Notice For Singapore
Regional notice for Singapore This ASUS product complies with IMDA Standards. Complies with IMDA Standards DB103778 Regional notice for India This product complies with the “India E-Waste (Management) Rules, 2016” and prohibits use of lead, mercury, hexavalent chromium, polybrominated biphenyls (PBBs) and polybrominated diphenyl ethers (PBDEs) in concentrations exceeding 0.1% by weight in homogenous materials and 0.01% by weight in homogenous... -
Page 95: Simplified Eu Declaration Of Conformity
Directive 2014/53/EU. Full text of EU declaration of conformity is available at https://www.asus.com/support/. The WiFi operating in the band 5150-5350 MHz shall be restricted to indoor use for countries listed in the table below:... - Page 96 Notebook PC E-Manual...