Table of Contents
Advertisement
Quick Links
Advertisement
Table of Contents

Related Manuals for Bosch CMG778N.1


Summary of Contents for Bosch CMG778N.1
- Page 1 Oven CMG778N.1 User manual and installation instructions [en]...
-
Page 2: Table Of Contents
en Safety Futher information and explanations are available online: Table of contents INSTALLATION INSTRUCTIONS ....... 47 31.1 General installation instructions....... 47 INFORMATION FOR USE Safety .............. 2 Preventing material damage ....... 7 1 Safety Environmental protection and saving en- ergy ............... -
Page 3: Safety
Safety en When the cooking compartment is hot, any al- equate experience and/or knowledge, coholic vapours inside may catch fire. The ap- provided that they are supervised or have been instructed on how to use the appliance pliance door may spring open. Hot steam and jets of flame may escape. - Page 4 en Safety WARNING ‒ Risk of electric shock! WARNING ‒ Risk of suffocation! Incorrect repairs are dangerous. Children may put packaging material over ▶ Repairs to the appliance should only be their heads or wrap themselves up in it and carried out by trained specialist staff. suffocate.
- Page 5 Safety en Using the appliance for anything other than its WARNING ‒ Risk of explosion! intended purpose is dangerous. This is be- Liquids and other food may easily explode cause, for instance, overheated slippers, pil- when in containers that have been tightly lows filled with grain or cereal, sponges and sealed.
- Page 6 en Safety The outside of the appliance gets very hot WARNING ‒ Risk of electric shock! when the cleaning function is in progress. The appliance uses a high voltage. ▶ Never hang combustible objects, e.g. tea ▶ Never remove the casing. towels, on the door handle. WARNING ‒ Risk of serious harm to ▶...
- Page 7 Preventing material damage en 2 Preventing material damage Fruit juice dripping from the baking tray leaves stains 2.1 General that cannot be removed. ATTENTION! When baking very juicy fruit flans, do not pack too ▶ Alcoholic vapours may catch fire in the hot cooking much on the baking tray.
- Page 8 en Environmental protection and saving energy Operating the appliance without food in the cooking If you prepare microwave popcorn at a microwave compartment may lead to overloading. power level that is too high, the door pane may crack Do not switch on the microwave unless there is food due to overloading.
-
Page 9: Operating Modes
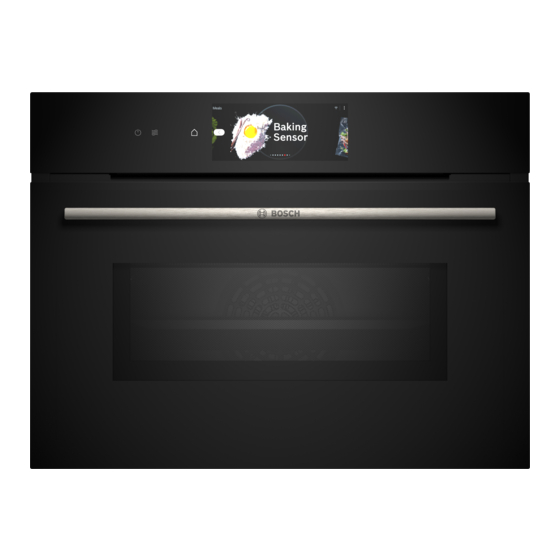
Familiarising yourself with your appliance en 4 Familiarising yourself with your appliance 4.1 Control panel 4.3 Display You can use the control panel to configure all functions The display is divided into different areas. of your appliance and to obtain information about the Digital setting ring operating status. - Page 10 en Operating modes Lighting Possible symbols in the settings area One or more oven lights illuminate the cooking com- Symbol Meaning partment. Go back one setting. When you open the appliance door, the light in the cooking compartment switches on. If the appliance Reset the setting value.
- Page 11 Operating modes en 5.1 Types of heating To ensure that you always find the right type of heating When you select a type of heating, the appliance sug- to cook your food, we explain the differences and ap- gests a suitable temperature or setting. You can use plications below.
-
Page 12: Accessories
en Accessories Symbol Type of heating Temperature What it's used for and how it works range Keeping warm 50 - 100 °C Keep cooked food warm. Plate warming 30 - 90 °C Preheat cookware. Note: Due to thermal inertia, the temperature that is 5.2 Temperature displayed may differ slightly from the actual temperat- With most types of heating, you can set the current ure inside the cooking compartment. - Page 13 Accessories en Accessories Baking tray ¡ Tray bakes ¡ Small baked items Meat thermometer High-precision roasting or cooking. 6.1 Information on accessories Wire rack Insert the wire rack with the open side facing the appliance door and Some accessories are only suitable for certain types of the curved lip ...
-
Page 14: Basic Operation
You can find out which accessories are available for Accessories vary from one appliance to another. When your appliance in our online shop or from our after- purchasing accessories, always quote the exact sales service. - Page 15 Basic operation en Changing the temperature 8.5 Setting the operating mode Once the operation has started, you can change the After you have switched on the appliance, the menu temperature at any time. appears on the display. Press the temperature. To scroll through the various selection options, Change the temperature with the setting ring.
-
Page 16: Rapid Heating
en Rapid heating 9 Rapid heating To save time, rapid heating can shorten the preheat- Set a suitable type of heating and a temperature of ing time for set temperatures over 100 °C. at least 100 °C. Rapid heating is possible for the following types of Rapid heating automatically switches off at temper- heating: atures of 200 °C and above. -
Page 17: Microwave
Microwave en Press . a When the time has elapsed, a signal sounds. A noti- To set the timer, press the relevant time value on fication appears on the display confirming that the the display, e.g. minute display "m" or second dis- operation has finished. -
Page 18: Meat Probe
en Microwave ¡ Accessories supplied: Added microwave Wire rack Adding the microwave to an operating mode reduces Universal pan the cooking time. Baking tray You can combine the microwave with the following functions: Testing cookware for microwave suitability ¡ Types of heating → Page 15 If you are unsure whether your cookware is suitable for –... - Page 19 Ventilation function "Crisp Finish" en the basic setting for this, make sure that the microwave Select the settings for the operating mode, e.g. type does not resume operation without food inside. of heating and temperature. → "Basic settings", Page 24 Press "Added microwave". Use the setting ring to set the microwave output.
- Page 20 en Meat probe inside the food. Once the set core temperature has Thick Insert the meat probe diagonally into the been reached in the food, the appliance automatically pieces meat from above, pushing it in as far as stops heating. of meat possible.
- Page 21 Meat probe en Changing the type of heating 13.3 Setting the meat probe When you change the type of heating, the other set- You can set a core temperature of between 30 °C and tings are also reset. 99 °C. Press . Requirements Press ...
-
Page 22: Dishes
en Dishes Fish Core temperature Other Core temperature in °C in °C Fish, whole 65 - 70 Meat loaf, all kinds of meat 80 - 90 Fish fillet 60 - 65 Heating food, reheating 65 - 75 14 Dishes The "Dishes" operating mode helps you to use your ap- Recommended settings pliance to prepare different meals by selecting the op- For the recommended settings, the optimum type of... -
Page 23: Favourites
Favourites en 14.4 Setting a dish Category Food Baking Cakes Press "Dishes" in the menu. sensor Small baked items Press the required category. Bread, bread rolls Press the required food. Savoury cakes, pizza, quiche Press the required dish. Note: This only contains dishes for Tip: For some dishes, you can select a preferred cooking with the baking sensor. -
Page 24: Childproof Lock
en Childproof lock 15.2 Selecting favourites 15.3 Changing favourites If you have saved favourites, you can use these to set You can change, sort or delete your saved favourites at the operation. any time. Press "Favourites" in the menu. Press "Favourites" in the menu. Press the required favourites. -
Page 25: Home Connect
Home Connect en Appliance set- Selection Factory set- Selection tings tings Fan run-on ¡ Minimum Factory set- ¡ Restore time tings ¡ Recommended ¡ Long Info Indicator ¡ Very long Appliance in- Display technical information about Lighting ¡ When cooking and when the door formation the appliance. - Page 26 en Home Connect Open the Home Connect app and scan the follow- 18.1 Setting up Home Connect ing QR code. Requirements ¡ The appliance is connected to the power supply and is switched on. ¡ You have a mobile device with a current version of the iOS or Android operating system, e.g.
-
Page 27: Cleaning And Servicing
Cleaning and servicing en ¡ When you start the oven using the controls on 18.5 Remote diagnostics the appliance itself, the remote start function is Customer Service can use Remote Diagnostics to ac- activated automatically. You can use the cess your appliance if you contact them, have your ap- Home Connect app to adjust the settings or start pliance connected to the Home Connect server and if a new programme. - Page 28 en Cleaning and servicing Appliance front Surface Suitable cleaning agents Information Stainless steel ¡ Hot soapy water To prevent corrosion, remove any patches of limescale, grease, ¡ Special stainless steel starch or albumin (e.g. egg white) from stainless steel surfaces im- mediately.
-
Page 29: Cleaning Function Pyrolytic Activeclean
Cleaning function "Pyrolytic activeClean" en 19.2 Cleaning the appliance WARNING ‒ Risk of fire! Loose food remnants, fat and meat juices may catch In order to avoid damaging the appliance, you must fire. clean your appliance only as specified, and with suit- Before using the appliance, remove the worst of the able cleaning products. -
Page 30: Cleaning Aid
en Cleaning aid Cancelling the cleaning function Cleaning set- Cleaning Duration in hours ting level You can no longer stop or change the cleaning func- tion once it has started. Approx. 2:15 To cancel the cleaning function, press to switch ▶... -
Page 31: Drying
Drying en To dry the cooking compartment completely, leave the appliance door open for approx. 1 hour or use the drying function. → "Setting the drying process", Page 31 22 Drying To prevent residual moisture, dry the cooking compart- To use the drying function, set "Drying function". ‒... - Page 32 en Appliance door Pull the front pane up and out . Turn the intermediate pane until the arrow is in the top right. Place the front pane down on a flat surface with the door handle facing down. Insert the intermediate pane into the retainer ...
-
Page 33: Rails
Rails en Put the door cover in position and push down on it Close the appliance door. until you hear it click into place. Notes ¡ Do not use the cooking compartment again until the door panes have been correctly fitted. 24 ... -
Page 34: Troubleshooting
en Troubleshooting Hook in the rail at the front and press it down . 25 Troubleshooting You can rectify minor faults on your appliance yourself. WARNING ‒ Risk of electric shock! Read the troubleshooting information before contacting Incorrect repairs are dangerous. after-sales service. - Page 35 Next time, set lower or higher values. ▶ Tip: A lot of other information about the food preparation and corresponding adjustment values can be found in the Home Connect app or on our website www.bosch-home.com. 26 Disposal Dispose of the appliance in an environmentally 26.1 Disposing of old appliance...
-
Page 36: Source Software
en Customer Service This appliance is labelled in accord- ance with European Directive 2012/19/EU concerning used elec- trical and electronic appliances (waste electrical and electronic equip- ment - WEEE). The guideline determines the frame- work for the return and recycling of used appliances as applicable throughout the EU. -
Page 37: Declaration Of Conformity
2014/53/EU. A detailed Declaration of Conformity can be found on- A detailed RED Declaration of Conformity can be found line at www.bosch-home.co.uk among the additional online at www.bosch-home.com among the additional documents on the product page for your appliance. - Page 38 en How it works Roasting in cookware Baking on one level Height If you cover the cookware when you cook your food, Tall baked items and tins/dishes on this will keep the cooking compartment cleaner. the wire rack Shallow baked items/baking tray General information about roasting in cookware ¡...
- Page 39 How it works en ¡ Do not wash or dry food. Add 1-3 tablespoons of 30.4 Microwave cooking water or lemon juice to the food. If you cook food using the microwave mode, you can ¡ Spread the food out so that as much of it as pos- reduce the cooking time considerably.
- Page 40 en How it works Food Accessories/cook- Shelf pos- Type of Temperature in Microwave Cooking ware ition heating °C/grill setting power setting time in → Page 11 in W mins Sponge flan, 6 eggs Springform cake tin 150-160 50-60 Ø 28 cm Sponge flan, 6 eggs Springform cake tin ...
- Page 41 How it works en Food Accessories/cook- Shelf pos- Type of Temperature in Microwave Cooking ware ition heating °C/grill setting power setting time in → Page 11 in W mins Chicken, 1.3 kg, un- Wire rack 200-220 60-70 stuffed Chicken, 1.3 kg, un- Covered cookware ...
- Page 42 en How it works Desserts As soon as the milk starts to rise, stir thoroughly. Repeat the process until the required consistency is Making yoghurt achieved. Remove the accessories and shelves from the Using the microwave mode to make popcorn cooking compartment. Heat 1 litre of whole milk (3.5% fat) to 90 °C on the WARNING ‒ Risk of burns! hob and then leave it to cool down to 40 °C.
- Page 43 How it works en Issue Issue You want to slow ¡ Place the cold duck breast You want to serve ¡ Preheat the serving plate. cook a duck breast. into a pan. your slow-cooked ¡ Make sure that the sauces ¡ Sear the skin side first. meat as hot as pos- that accompany the duck sible.
- Page 44 en How it works Defrosting ¡ Defrosting works best if you divide it into more than one step. The steps are listed one after the other in You can defrost frozen food in your appliance. the recommended settings tables. Tips for defrosting food ¡...
- Page 45 How it works en ATTENTION! Metal touching the wall of the cooking compartment will cause sparks, which may damage the appliance or the inner door pane. Metal (e.g. a spoon in a glass) must be kept at least ▶ 2 cm from the cooking compartment walls and the inside of the door.
- Page 46 en How it works First wire rack: Shelf position 3 ¡ Hot water sponge cake Second wire rack: Shelf position 1 – When baking on 2 levels, place the springform ¡ Shelf positions when baking on 3 levels: tins at diagonally opposite corners of the wire –...
-
Page 47: Installation Instructions
Installation instructions en Recommended settings for defrosting food using the microwave Food Accessory/cook- Shelf pos- Type of Temperature in Microwave Cooking ware ition heating °C power setting time in → Page 11 in W mins Meat Uncovered cook- 1. 180 1. 5 ware 2. - Page 48 en Installation instructions and comply with the applicable national ¡ Cut-out work on the units should be carried safety requirements. out before installing the appliance. Remove ▶ If the power cord is too short, contact cus- any shavings. Otherwise, the correct opera- tomer service.
- Page 49 Installation instructions en 31.4 Installation underneath a hob If the appliance is installed under a hob, the following The minimum worktop thickness a is based on the minimum dimensions must be adhered to (including required minimum clearance . substructure, if applicable).
- Page 50 en Installation instructions Electrically connecting an appliance without a 31.6 Corner installation protective contact plug Observe the installation dimensions and the installation Note: Only licensed specialists may connect the appli- instructions when installing in a corner. ance. Damage caused by incorrect connection is not covered under the warranty.
- Page 51 Installation instructions en For handleless kitchens with vertical bar handle strips: Attach a suitable filling piece in order to cover ‒ any sharp edges and to guarantee a safe install- ation. Pre-drill aluminium profiles to establish a screw ‒ connection ...
- Page 52 Expert advice for your Bosch home appliances, help with problems or a repair from Bosch experts. Find out everything about the many ways Bosch can support you: www.bosch-home.com/service Contact data of all countries are listed in the attached service directory.