Miele CS 1112 E Operating And Installation Manual
Ceramic cooktop
Hide thumbs
Also See for CS 1112 E:
- Operating and installation instructions (40 pages) ,
- Installation instructions manual (22 pages)

Related Manuals for Miele CS 1112 E


Summary of Contents for Miele CS 1112 E
- Page 1 Operating and Installation Instructions Ceramic Cooktop CS 1112 CS 1122 en - CA To prevent accidents and machine damage, read the Operating Manual before installation or use. M.-Nr. 07 342 630...
-
Page 2: Table Of Contents
Contents IMPORTANT SAFETY INSTRUCTIONS....... . . 3 Description of the unit ..........7 CS 1112 . -
Page 3: Important Safety Instructions
WARNING- When using your appliance follow basic precautions, including the following: Read all instructions before installation or use to prevent injury and appliance damage. This appliance conforms to all uniform safety codes and regulations. The manufacturer cannot be held responsible for damage or injury caused by improper use of this appliance. - Page 4 IMPORTANT SAFETY INSTRUCTIONS Technical safety Installation, repair and maintenance work should be performed by a Miele authorized service technician. Work by unqualified persons could be dangerous and may void the warranty. Before installing the cooktop, check for externally visible damage. Do not operate a damaged appliance.
- Page 5 Do not cook on a broken cooktop. Any breakages or cracks in the ceramic surface of the appliance are defects and must be treated as such. If the cooktop should break, cleaning solutions and spills may penetrate the broken cooktop and create a risk of electric shock.
- Page 6 IMPORTANT SAFETY INSTRUCTIONS Use the proper pan size. Select cookware with flat bottoms large enough to cover the heating element. Using undersized cookware will expose a portion of the heating element and may result in ignition of clothing or handles becoming hot. The proper size pot or pan will also improve efficiency.
-
Page 7: Description Of The Unit
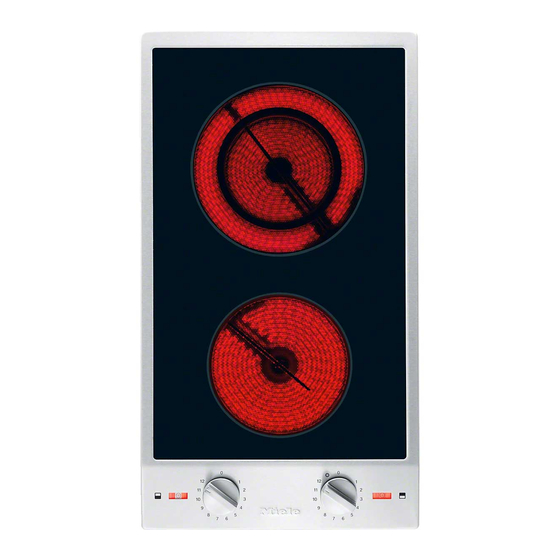
CS 1112 a Variable burner : C 4" or 7" (100 mm or 180 mm) - Power: 700 W or 1800 W b Standard burner : " (145 mm) - Power: 1200 W c Cooking zone indicators d Display Description of the unit Control knobs for the burners: f Standard burner (front) g Variable burner (rear) - Page 8 Description of the unit CS 1122 a Extended burner C 7" or 6 " x 17 (180 mm or 180 mm x 267 mm) - Power: 1500 W / 2400 W b Standard burner " (145 mm) - Power: 1200 W c Cooking zone indicators d Display Control knobs for the burners:...
-
Page 9: Before Using For The First Time
Clean the cooktop ^ Before using for the first time, clean the appliance with a damp cloth and dry with a soft cloth. Do not use liquid dish soap to clean the cooktop, this may cause permanent blue discolorations. Before using for the first time Heat the appliance Metal components of the appliance have a protective coating which may... -
Page 10: How The Cooking Zones Work
How the cooking zones work One-ring cooking zones use one heating strip, and two-ring cooking zones and grill zones use two heating strips. Depending on the model, the heating strips may be separated by a certain distance. See the illustrations. Every cooking zone is equipped with overheat protection (inside temperature limiter), to prevent the glass ceramic... -
Page 11: Use
Turning the cooktop On/Off Do not leave the appliance unattended while in use. ^ To turn a standard burner on turn the control knob of the to the right or left. ^ To turn a variable burner on, turn the respective knob to the right a. -
Page 12: Residual Heat Indicator
Residual Heat Indicator When a cooking zone is switched on, the On/Off indicator will light followed by the residual heat indicator. When the cooking zone is switched off, the On/Off indicator goes out. The residual heat indicator will turn off once the cooking zone is safe to the touch. -
Page 13: Settings
Settings Use for Melt butter, chocolate, etc. Dissolving gelatine Prepare yogurt Warming small quantities of food/liquid Keeping delicate dishes warm Cooking rice, Thawing frozen vegetables Warming liquid or half-set foods Thickening sauces, e.g., hollandaise sauce Cooking rice pudding Defrosting frozen foods Steaming vegetables, fish, etc. -
Page 14: Overheat Protection
Overheat protection Each cooking zone is equipped with a temperature limiter. This feature automatically turns off the heating element before the glass ceramic becomes too hot. Once the ceramic surface has cooled to a safe temperature the heating element will automatically turn back on. -
Page 15: Selecting Cookware
Following these tips will allow you to make the most of your ceramic cooktop. The cooking surface The ceramic cooktop is made of an extremely hard and durable material. The surface is scratch resistant, not scratch proof. Avoid using cookware with ridged bottoms. - Page 16 Selecting cookware Copper bottom and aluminum pans may leave a residue on the cooktop in the form of metallic lines. This is normal. These lines can be removed using a non-abrasive ceramic cooktop cleaner or a shielded scraper blade. Be sure to clean the cooktop after each use.
-
Page 17: Cleaning And Care
Stubborn soiling is best removed with a shielded scraper blade. ^ Apply a ceramic cleaner (available from Miele) using a soft cloth or paper towel. ^ To remove any limescale deposits or metallic residue apply a ceramic cleaner using a soft cloth or use a shielded scraper blade if necessary. -
Page 18: Stainless Steel
Soak baked or hardened spills first to loosen them. Stainless steel surfaces can be cleaned using a non-abrasive stainless steel cleaner (available from Miele). To help prevent resoiling, a conditioner for stainless steel can also be used. Apply sparingly with even pressure. -
Page 19: Frequently Asked Questions
The overheating protection has activated. Items are taking too long to boil. Check the performance of a cooking zone (see "Check performance"). Frequently asked questions Solution Check whether a fuse is blown. If the problem persists contact Miele. Solution See "Overheating protection". -
Page 20: Technical Service
Technical Service In the event of a fault which you cannot easily fix yourself, please contact the Miele Technical Service Department at the address on the back of this booklet. When contacting Technical Service please quote the serial number and model of the appliance. -
Page 21: Installation Instructions
Installation Instructions IMPORTANT: SAVE FOR THE LOCAL ELECTRICAL INSPECTOR'S USE To prevent accidents and machine damage read these instructions before installation or use. -
Page 22: Safety Instructions For Installation
However, under certain conditions it may be possible for installation in these applications. Please contact the Miele Technical Service Department with specific requirements. Do not install this appliance above an oven unless the countertop is at least 1 "... -
Page 23: Safety Distances Above The Appliance
SAFETY INSTRUCTIONS FOR INSTALLATION Safety distances above the appliance The minimum safety distance given by the hood manufacturer must be maintained between the cooktop and the hood above it. See the installation instructions of the hood for these safety measurements. If the hood manufacturers instructions are not available or if flammable objects are installed over the cooktop (e.g. - Page 24 SAFETY INSTRUCTIONS FOR INSTALLATION Safety distances to the sides of the appliance The appliance should only be installed as shown in the illustrations, while maintaining the required safety distances shown. Do not install the appliance between two tall cabinets, this is a fire hazard. A distance of alteast 2"...
-
Page 25: Installation
Installation Safety distance when installing the appliance near a wall with trim or a back splash A minimum distance of 2" (50 mm) between the trim or back splash and the countertop cut-out if required. This distance is only necessary if these items are made of combustible materials e.g. -
Page 26: Installation Dimensions
Installation Installation dimensions CS 1112 a Spring clips b Appliance front c Installation height d Power supply box with connection cable, L = 78 " (2000 mm) - Page 27 Installation CS 1122 a Spring clips b Appliance front c Installation height d Power supply box with connection cable, L = 78 " (2000 mm)
-
Page 28: Cut Out
Installation Cut out ^ Make the worktop cut-out for one or more appliances as applicable. Remember to maintain a minimum safety distance from the back wall, as well as from any tall unit or side wall to the right or left of the appliance(s). -
Page 29: Installation Of Multiple Appliances
Installation of multiple appliances When installing more than one combiset appliance, a support bar b must be installed between the appliances. Countertop cut-out two appliances For the installation of two appliances the width of the countertop cut-out D is the sum of A and C. A, B and C = appliance widths ", 15"... - Page 30 Installation Sample calculations for a countertop cut-out for three appliances appliance width minus " (8 mm) 11" (280 mm) 11" (280 mm) 11" (280 mm) " (372 mm) " (372 mm) " (372 mm) /8" (568 mm) " (568 mm) "...
- Page 31 2 " 2 " " 3 / 1 6 ( 5 0 m ( 5 0 m 1 " - 1 0 m m ( 2 5 - 3 a Spring clips b Support bars c Space between support bar and countertop An additional support bar is required for each additional appliance.
-
Page 32: Attach The Spring Clips And Support Bars
Installation Attach the spring clips and support bars Wood or solid surface countertops 1 " - 1 ( 2 5 - 3 ^ Place the supplied spring clips a and the support bars b at the marked positions as shown above, by laying them on the upper edge of the cut-out and then securing them with the... - Page 33 ^ Coat the edges of the spring clips a, ^ and the space d between the strips b and the countertop with silicone (supplied). Installation...
-
Page 34: Installing The Appliance
Installation Installing the appliance ^ Feed the power cord down through the cut-out. ^ Then place the front side of the appliance in the countertop cut-out. ^ Then with a hand on each side of the appliance press down evenly on the edges until it clicks into position. -
Page 35: Sealing
Sealing The appliance must not be permanently sealed into the countertop when installed. The sealing strip under the edge of the appliance provides a sufficient seal for the countertop. If the appliance is sealed into position, the countertop or appliance could be damaged if it needs to be removed for maintenance or service. -
Page 36: Electrical Connection
Electrical connection CAUTION: Before installation or servicing, disconnect the power supply by either removing the fuse, shutting off the main power supply or manually "tripping" the circuit breaker. Installation work and repairs should only be performed by a qualified technician in accordance with all applicable codes and standards. -
Page 37: Help Protect Our Environment
Disposal of packing materials The cardboard box and packing materials are biodegradable and recyclable. Please recycle. Ensure that any plastic wrappings, bags, etc. are disposed of safely and kept out of the reach of children. Danger of suffocation! Help protect our environment Disposal of an old appliance Old appliances contain materials that can be recycled. - Page 40 Alteration rights reserved / 4608 For the most updated manual see the Miele web site. M.-Nr. 07 342 630 / 00 M.-Nr. 07 342 630 / 00...