Table of Contents
Advertisement
Advertisement
Table of Contents

Related Manuals for Maxent MX-42VM10


Summary of Contents for Maxent MX-42VM10
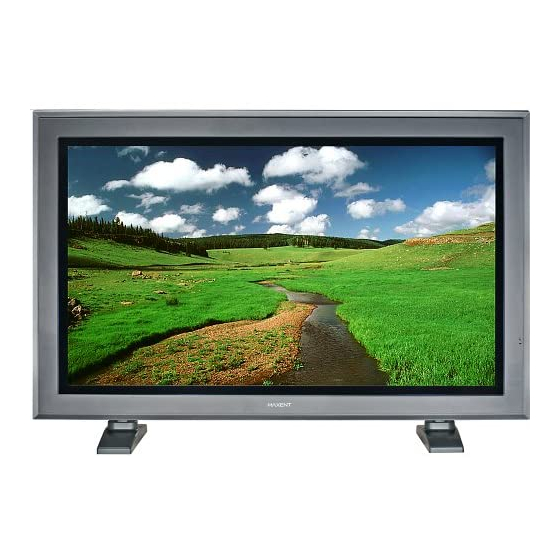
- Page 1 42” Plasma Monitor Owners Manual...
-
Page 2: Important Safety Instructions
Do not overload wall outlets and extension cords as this can result in a risk of fire or electric shock. Unplug the display from the electric outlet and disconnect the antenna/cable TV system during a lightning storm or when left unused for long periods of time. This will prevent damage to the display caused by lightning and power-line surges. -
Page 3: Cleaning & Maintenance
If an outdoor antenna or cable system is connected to the display, be sure the antenna or cable system is grounded to provide some protection against voltage surges and static charge buildups. Section 810 of the National Electrical Code, ANSI/NFPA No.70-1984, provides information about proper grounding of the mast and supporting structure, grounding of the lead-in wire to an antenna discharge unit, size of grounding conductors, location of antenna discharge unit, connection to grounding electrodes, and requirements for the grounding electrode. -
Page 4: Regulatory Notice
Increase the separation between the equipment and receiver. Connect the equipment into an outlet on a circuit different from that to which the receiver is connected. Consult the dealer or an experienced radio/TV technician for help. Warning User must use shielded signal interface cables to maintain FCC compliance for the product. Provided with this display is a detachable power supply cord with IEC320 style terminations. -
Page 5: Table Of Contents
Front Panel Controls ... 9 Rear Panel Connections ... 10 Remote Control ... 11 Display Connections ... 13 Connecting TV or CATV ... 14 Connecting a VCR ... 14 Connecting a DVD ... 15 Connecting a Set-Top Box ... 17 External Audio Connections ... - Page 6 Table of Contents TV Functions ... 55 Memorizing Channels ... 56 On-Screen Status Display (TV Mode) ... 58 Blue Back ... 59 Changing Channels ... 59 MTS ... 60 Closed Captioning ... 61 V-Chip ... 62 Favorite Channel Programming ... 65 Quick View ...
-
Page 7: Getting To Know Your Display
Flat Panel Monitor Getting to Know Your Display... -
Page 8: Package Contents
Getting to Know Your Display Package Contents Flat Panel Display Remote Control Batteries User Manual Warranty Card AC Power Cord Optional Accessories Side-Mount Speakers... -
Page 9: Front Panel Controls
On Screen Display menu is engaged. Select Buttons Use these buttons to navigate through the the On Screen Display menu. If an optional TV tuner is intalled, these buttons also function as Channel Up/ Down. Menu Button Use this button to engage the On Screen Display menu. -
Page 10: Rear Panel Connections
Subwoofer Output Variable or fixed low-frequency audio output jack for connecting to an external amplified subwoofer. Antenna Jack Connect to TV or CATV antenna. RGB Input Connect to RGB output of computer or Set-Top box. RS-232 Connector Connect to a computer serial port. -
Page 11: Remote Control
Push this button to turn on the monitor from Standby mode. Push it again to turn off to Standby mode. Number Keypad Use number keypad to select the TV channel you want to watch. QuickView Use QuickView key to recall the last TV channel watched. -
Page 12: Battery Installation
Turns on Closed Caption Mode. (See Page 61) V-Chip Engages V-Chip protection circuitry settings. (See Page 62) MTS Stereo Engages MTS stereo reception for TV. (See Page 60) Channel Lock / Fav. Set Engages Channel Lock and Favorite Channel Setup Menu. (See Page 65) Sleep Timer Engages Sleep Timer Settings. -
Page 13: Display Connections
Flat Panel Monitor Display Connections... -
Page 14: Connecting Tv Or Catv
If there is a threaded-screw type of connector (called the RF connector), then you have a TV tuner. If you do not see this type of connector, then you do not have a TV tuner installed. -
Page 15: Connecting A Dvd
Video connector. Using TV Input Connect the output to TV (RF out or Antenna out) connector from the VCR to the TV input on the back of monitor. Notes: Cable must be connected from wall/cable box into the VCRs antenna (RF) input. -
Page 16: Using Composite Input
Display Connections Connecting a DVD (con’t) Using S-Video Input Connect the S-Video (4-pin DIN) connector from the DVD to the S-Video input on the back of monitor. Connect the red (R) and white (L) audio jacks from the DVD to the (R) and (L) audio-in jacks located next to the S-Video connector. -
Page 17: Connecting A Set-Top Box
Connecting a Set-Top Box Using Component Video Input There are two sets of component video inputs provided. You can use either set of component inputs to connect your STB. Some HDTV Set top boxes may not have a Component Video output. Instead, use RGB input method. -
Page 18: External Audio Connections
Display Connections External Audio Connections Connecting to an External Amplifiers This monitor can be connected to an external amplifier using the AUDIO OUT jacks located on the back of the monitor. Connect the red (R) and white (L) AUDIO OUT jacks from right side of the connector panel to the external amplifier. -
Page 19: Connecting A Subwoofer
Connecting a Subwoofer This monitor is equipped with a subwoofer output for connecting to an external amplified subwoofer. Connect a RCA cable from the subwoofer’s input to the subwoofer’s output jack on the back of the monitor. Notes: The RCA subwoofer outputs frequencies below 120Hz. -
Page 20: Setting Up Your Monitor Using Plug And Play
Display Connections Connecting a PC (con’t) Setting Up Your Monitor Using Plug and Play This monitor adheres to VESA Plug and Play standard to eliminate complicated and time consuming setup of monitors. This monitor identifies itself to the computer and automatically sends the PC its Extended Display Identification Data (EDID) using Display Data Channel (DDC) protocols. - Page 21 Connecting a PC (con’t) Supported Resolutions This monitor supports the following resolutions Mode Resolution 640(VGA) × 480 640(VGA) × 480 640(VGA) × 480 640(VGA) × 480 800(SVGA) × 600 800(SVGA) × 600 800(SVGA) × 600 800(SVGA) × 600 800(SVGA) × 600 1024(XGA) ×...
-
Page 22: Rs-232 Connection
Display Connections RS-232 Connection Overview This monitor is equipped with an RS-232 serial terminal for using the monitor with computer controls. The RS-232 serial terminal conforms to the RS-232C interface specification. The computer will require software application (such as HyperTerminal) which allows the computer to send and receive control data that can support the communication parameters described in this section. - Page 23 The following is an example of the communication process between the PC and the monitor using a program such as HyperTerminal. Example: Read Power Status followed by Power On command and input select to AV1 with disruption PC Status Send command to read power status Rcv acknowledgment of command received Rcv OFF status from monitor Rcv confirmation of command complete...
- Page 24 Display Connections Description Command TV1 Channel Change TV2 Channel Change Closed Captioning Zoom PIP Position POP Format Sub-Source Sub-Swap R-Gain G-Gain B-Gain R-Bias G-Bias B-Bias Clear Buffer Escape Key Data Options 001…125 001…125 OFF, CC1, CC2, CC3, CC4, TX1, TX2, TX3, TX4 WID=16:9, PAN=Panorama Stretch, NOR=4:3 with black bars, ZO1=Zoom1, ZO2=Zoom2, ZO3=Zoom3 PON=PIP On, OFF=PIP Off...
-
Page 25: Basic Operations
Flat Panel Monitor Basic Operations... -
Page 26: Powering On/Off
Basic Operations Powering On/Off Using Front Panel or Remote Control Make sure the monitor is plugged into the wall outlet and the main AC switch located on the rear of the monitor is switched to ON position. If the power is plugged in and the AC switch is on, the STATUS LED will illuminate in orange color. -
Page 27: Volume Adjustment
Using Direct Input Selection Keys If you prefer not to cycle thru all available inputs, you can use the Direct Input Selection keys located towards the bottom of the remote control. Simply select the input that you would like to switch to and press the Direct Input Selection key for that input. -
Page 28: On-Screen Display Menu
Basic Operations On-Screen Display Menu Accessing OSD Menu via Remote Control or Front Panel The On-Screen Display (OSD) menu allows access to setup various parameters equipped with this display. To access the OSD menu, press the front panel of monitor or press any one of the four arrow keys located on the remote control. -
Page 29: On-Screen Status Display
OSD Background Color Setting The background color of the OSD Menu can be customized. To change the OSD Background color setting, please follow the steps below. Access the OSD menu, select SETUP submenu. Use keys to highlight OSD BACKGROUND. Press selection. -
Page 30: Understanding Widescreen Modes
For 4:3 (Square) Content Content from traditional TV, VCR, and some DVD’s are formatted using a “square” 4:3 format. When viewing content in this “Square” format the following viewing modes are suitable. 4:3 (NORMAL) In 4:3 mode, the original 4:3 image is preserved but black bars are used to fill the the extra space on the left and right. -
Page 31: Changing Aspect Ratios
Changing Aspect Ratios Using Remote Control All widescreen viewing modes are available by pressing the key. Pressing this key repeatedly will cycle through all six modes: Note: Under RGB input modes, only 16:9 WIDE and 4:3 Normal modes are available. When displaying 480p, 1080i, and 720p signals under component video input, only 16:9 WIDE and 4:3 Normal modes are... - Page 32 Basic Operations...
-
Page 33: Picture Controls
Flat Panel Monitor Picture Controls... -
Page 34: Adjusting Picture Settings
Picture Controls Adjusting Picture Settings Using OSD Menu Various picture adjustments can be set using the Picture Adjustment OSD menu. Press the on the front panel or remote control. Use to select the PICTURE option from the menu and press confirm selection. - Page 35 BRIGHTNESS Adjust brightness to enhance the level of dark areas in the video picture such as night scenes and shadow scenes. Increasing brightness will make dark areas more visible. COLOR Use color to adjust the color saturation of the video picture. Increasing color will make the color more intense.
-
Page 36: Picture-In-Picture / Side-By-Side Picture
4:3 aspect ratio within the POP windows. POP (16:9) mode will display both main and sub-picture in 16:9 aspect ratio within the POP windows. PIP Mode M: TV S: AV POP Mode M: TV S: AV Picture... - Page 37 Available PIP/POP Input Combinations Main-picture and sub-picture input combinations are listed below for reference. Note: All digital TV signals (480i, 480p, 720p, 1080i) received via Component 1 or Component 2 inputs can be displayed in combination with TV or AV inputs. Picture Controls...
- Page 38 Picture Controls Picture-in-Picture / Side-by-Side Picture (Con’t) Main and Sub-Window Swap You can swap the main picture and sub-picture. Press the key once to swap. Press the key once again to switch back. Changing Location of PIP Image There are four preset positions where the PIP sub-window can be positioned. Once the PIP mode is turned on, you can switch the PIP sub-picture position to any one of the four corners of the screen.
- Page 39 Changing Size of PIP Window There are several PIP sub-window sizes available for selection. Press the on the front panel or remote control. Use to select the SETUP option from the menu and press confirm selection. Various settings are available from the SETUP menu.
-
Page 40: Selecting Color Temperature
Picture Controls Selecting Color Temperature This monitor is capable of applying various color temperatures (also known as White Balance) onto the video signal for display. Press the on the front panel or remote control. Use to select the PICTURE option from the menu and press confirm selection. - Page 41 In certain special cases, users may desire to manually adjust V-Size. To do so, please use the following procedures: Pressing the key 5 or more times and pressing the V-Size will be enabled in OSD now and this function will be locked again when users turn off monitor. Due to various PC video cards and set-top boxes with differing specifications, it is likely that the initial picture may not fit exactly to the size of the monitor.
-
Page 42: Fine Tuning Rgb Mode
Picture Controls Fine Tuning RGB Mode Due to various PC video cards and set-top boxes with differing specifications, it is likely that the initial video picture have subtle noise or imperfections. Please use the following procedures to adjust the picture quality when using under RGB mode. -
Page 43: Sound Controls
Flat Panel Monitor Sound Controls... -
Page 44: Adjusting Sound Settings
Sound Controls Adjusting Sound Settings Using OSD Menu Various sound adjustments can be set using the Sound Adjustment OSD menu. Press the on the front panel or remote control. Use to select the SOUND option from the menu and press confirm selection. - Page 45 Explanation of Various Sound Control Settings Explanation of each available sound control settings is listed in the table below. BASS Adjusts the BASS level of the sound. For more bass response, increase the BASS level. TREBLE Adjusts the TREBLE level of the sound. For more vocal and high frequency response, increase the TREBLE level.
-
Page 46: Using Surround Sound
Sound Controls Using Surround Sound Turning On Surround Sound This monitor is equipped with a surround sound circuitry that enhances the sound when using two speakers. Press the on the front panel or remote control. Use to select the SOUND option from the menu and press confirm selection. -
Page 47: Built-In Amplification (Speaker)
to select the BBE option and press key to confirm selection. A small display window appears upon selecting the option to change. Use setting. To turn on BBE, select ON position. After achieving desired setting, press to confirm setting and return to previous menu. Built-in Amplification (Speaker) Turning On Built-in Amplification This monitor is equipped with a built-in amplification for optional external speakers. -
Page 48: Using An External Subwoofer
Sound Controls Using an External Subwoofer Connecting a Subwoofer This monitor is equipped with a subwoofer output to connect to an external amplified subwoofer. Connect a RCA cable from the subwoofer’s input to the subwoofer’s output jack on the back of the monitor. Note: The RCA subwoofer outputs frequencies below 120Hz. -
Page 49: Advanced Functions
Flat Panel Monitor Advanced Functions... -
Page 50: Sleep Timer
Advanced Functions Sleep Timer Setting Sleep Timer Using OSD Menu This monitor has built-in sleep timer function. Once set, the monitor will automatically shut-off without user intervention. Press the on the front panel or remote control. Use to select the SETUP option from the menu and press confirm selection. -
Page 51: Osd Menu Language
OSD Menu Language Setting OSD Menu Language This monitor has multiple OSD Menu languages built-in including: English, French, Spanish, German and Italian. Press the on the front panel or remote control. Use to select the SETUP option from the menu and press confirm selection. -
Page 52: Power Save Mode
Advanced Functions Power Save Mode Setting Power Save Mode Using OSD Menu This monitor is equipped with a Power Save mode under RGB input modes. When there are no signals detected by the monitor, the monitor will automatically go into sleep mode until signal is restored. Press the on the front panel or remote control. - Page 53 to select the PASSCODE option and press key to confirm selection. A small display window appears prompting the user to enter the existing passcode. Use the number keys on the remote control to input the code. If the code has not been set before, please use the default “0000”...
-
Page 54: Information Display
V-Frequency Displays the vertical scanning frequency of the signal being displayed. Video System (For TV, AV and Component input with 480i signal) Displays the video system (NTSC) of the signal being displayed. Resolution (For RGB, Component input with 480p, 720p and 1080i signals) Displays the resolution of the signal currently being displayed by the monitor. -
Page 55: Tv Functions
Flat Panel Monitor TV Functions... -
Page 56: Memorizing Channels
TV channels and storing the channels in memory. Setting Tuner to AIR or CABLE The TV tuner is compatible with Cable TV or standard reception using an antenna. Users must setup the tuner to either AIR or CABLE reception modes prior to memorizing channels. -
Page 57: Channel Search
Channel Search After setting the TV Tuner to either AIR or CABLE reception mode, use the monitor’s internal channel search mode to automatically scan for available TV stations. Press the on the front panel or remote control. Use to select the SETUP option from the menu and press confirm selection. -
Page 58: On-Screen Status Display (Tv Mode)
The On-Screen Status Display shows detailed information regarding the operational status of the monitor under TV mode. The status display automatically appears whenever there is a change in TV channels. The status display will automatically disappear after a timeout period. -
Page 59: Blue Back
Blue Back Turning on Blue Back Blue Back setting eliminates the “snowflake” effect that results when a TV channel is not available by displaying a blue colored background. Press the on the front panel or remote control. Use to select the TV option from the menu and press selection. -
Page 60: Mts
TV Functions MTS option sets audio reception settings for the TV tuner. This function is also accessible using the remote control’s MTS key. Pressing the MTS key will cycle the tuner through all available settings. Accessing via OSD Menu Press the on the front panel or remote control. -
Page 61: Closed Captioning
Note: When PIP/POP is enabled, Closed Caption function will be disabled. Accessing via Remote Control Press the key on the remote control repeatedly to cycle through all available Closed Captioning modes. key to key to confirm TV Functions... -
Page 62: V-Chip
TV Functions V-Chip V-Chip (Parental Guide) function is to prevent children from watching programs that are not suitable such as violence or adult language. The user must enter a PASSCODE before any of the V-Chip restrictions are set up or changed. - Page 63 Viewers 14 and over TV-MA Mature audience In addition, you can choose to block all TV content for the entire age-based group or choose to block only certain types of content depending on their sub-ratings. For each age-based group, applicable sub-ratings may include:...
- Page 64 When the V-Chip is set to on, the monitor will automatically block all content that are coded with objectionable ratings as set using either MPAA or TV guidelines. After TV Guidelines are set, users are pre- sented with the MPAA Guidelines menu.
-
Page 65: Favorite Channel Programming
The V-Chip will block all incoming content that meets the guidelines set in the previous section. When this occurs, the monitor’s screen will display “BLOCKED”. To resume normal viewing, please change to a different TV channel. Under certain conditions , the V-Chip may block all channels. If this should occur, simply disable the V-Chip function. -
Page 66: Quick View
Channel Lock Setting Channel Lock Set channel lock to block a TV channel from viewing. Use the keys to scroll to the channel you wish to lock. Press the remote control. - Page 67 If the wrong passcode is entered three times, the monitor will go to the previously viewed channel. Once the passcode is entered correctly, the monitor will unlock all locked channels without prompting the entry of the passcode again until the monitor is powered off and on again. TV Functions...
-
Page 68: Understanding Hdtv
480 lines in order to be displayed. Vertical Resolution (Scan Lines) Vertical scan lines refer to the number of horizontal lines a TV or monitor can display to create an image. As the number of lines increase, more information is displayed, resulting in better picture quality. - Page 69 Is This Monitor Compatible with Digital TV / HDTV? This monitor is compatible with digital TV. In order to receive digital television broadcasts, you will need to use a HDTV decoder or HDTV set-top box with component video output, RGB or DVI video output(s). Please consult...
- Page 70 TV Functions...
-
Page 71: Appendix
Flat Panel Display Appendix... -
Page 72: Troubleshooting
Display image doesn’t fill up If under RGB mode, the H-Size and V-Size the full size of the screen is incorrectly set. If under TV, AV1, AV2, or Component with 480i input, the 4:3 WIDE mode is switched on. Can hear sound, but no Improperly connected source signal cable. -
Page 73: Wall Mount Instructions
Appendix Wall Mount Instructions Empty contents of the package. Make sure the following items are present. A. Left Wall Angle Module B. Right Wall Angle Module C. Horizontal Support D. Horizontal Support E. Screws for Fix Angle x 8 F. Screws for Wooden Wall Mounting x 8 G. - Page 74 Appendix You can adjust the mounting direction and inclination angle (0, 5, 10, 15 degrees) by adjusting the screws position on the Wall Mounting Angle Module. Remove the pedestal table-top stand on the unit, install the unit onto the wall mount bracket.
-
Page 75: Side Mount Speaker Installation
Appendix Side Mount Speaker Installation Empty contents of the package. Make sure the following items are present. Screws X 14 Bracket Set X 2 Speaker Wire X 2 Speaker X 2 Connect speaker wires to the connectors located on the back of each speaker. After connecting the wires, fit wire within the wire Connector groove. - Page 76 Appendix The completed speaker assembly should look like this. Repeat steps 2-3 for the other speaker. Once both speakers are assembled, go to next step. Connect speaker wire from each speaker to the rear speaker connector located on the back of the display.
-
Page 77: Specifications
Specifications Display Panel Screen size 42” WVGA product Aspect ratio 16:9 Number of pixels 852 (H) x 480 (V) pixels Pixel Pitch 1.095 mm (H) x 1.110 mm (V) Luminance 700 cd/m Power Source Input voltage 100 ~ 240Vac, 50 / 60Hz Input current 3.8A Inrush current... - Page 78 Appendix Specifications (Con’t) RGB/DVI For VESA Standard Mode Mode Resolution 640 x 480@60Hz 640 x 480@72Hz 640 x 480@75Hz 640 x 480@85Hz SVGA 800 x 600@56Hz 800 x 600@60Hz 800 x 600@72Hz 800 x 600@75Hz 800 x 600@85Hz 1024 x 768@60Hz 1024 x 768@70Hz 1024 x 768@75Hz 1024 x 768@85Hz...
- Page 79 Specifications (Con’t) Pin Assignments For D-SUB connector (in / loop out) Pin Signal Assignment Pin Signal Assignment Pin Signal Assignment GREEN BLUE RED GND Y/PB/PR For Component 1 and 2 Mode Resolution Refresh Rate 640 x 480p 1920 x 1080i 1280 x 720p Maximum Resolution Up to 1280 x 1024...
- Page 80 Appendix Specifications (Con’t) Acoustics (IHF A-weighted 1meter) 40dB Max. Sound Residual hum (at volume Max.) Practical Max. Audio output (at 10% THD Max.) Sound distortion (at 250 mw 1KHz) Audio output (input at 1.4Vp-p) Reliability Requirement The MTBF is 20,000 hrs. under operation 25+/-5 Emission Requirement The unit shall meet the EMI limits in all screen modes as qualified by FCC class B part 15.
- Page 81 Specifications (Con’t) Preset Timing Chart Item Description: Total time Active display area including borders Active display area excluding borders Left/Top border Right/bottom border Blanking time Front porch Sync-width Back porch Mode No H Resolution V Resolution Refresh Rate Pixel Clock 25.175 31.500 31.500 36.000 36.000 40.000 50.000 49.500 56.250 MHz Horizontal visible Horizontal total...
- Page 82 Appendix Specifications (Con’t) Mode No H Resolution 1024 1024 V Resolution Refresh Rate Pixel Clock 65.000 75.000 78.750 94.500 108.000 28.322 25.175 74.250 74.250 MHz Horizontal visible 1024 1024 Horizontal total 1344 1328 Horizontal front porch Horizontal sync Horizontal back porch Horiz blanking time Vertical visible Vertical total...
-
Page 83: Index
Information Display 54 Installation Speaker 75 Wall Mount 73 Language 51 Memorizing Channels 56 MTS 60 NTSC. See Video System On-Screen Display 28 On-Screen Display (TV Mode) 58 Optional Accessories 8 OSD. See On-Screen Display Passcode 52 Picture Controls 33... - Page 84 Specifications 77 Status LED 9 Surround Sound 45 Table of Contents 5 Tint 35 Treble 45 Troubleshooting 72 TV 55 Changing Channels 59 Channel Search 57 V-Chip 62 V-Frequency 54 V-Position 35 V-Size 35 Variable Audio Output. See Audio Output: Variable...
- Page 85 TINSE2065-1----...