Chapters
Table of Contents
Troubleshooting

Related Manuals for LG PF510Q


Summary of Contents for LG PF510Q
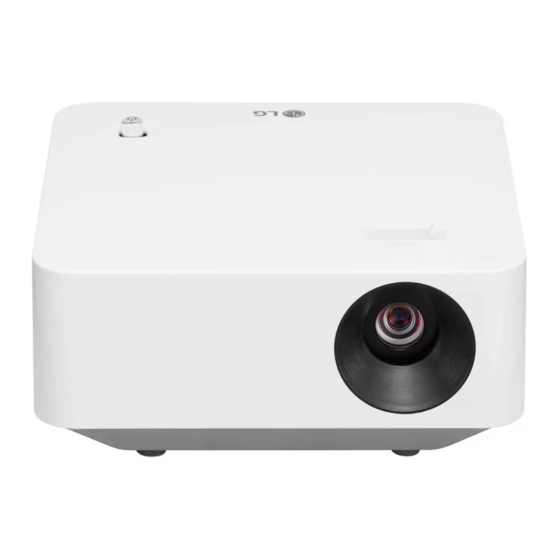
- Page 1 OWNER'S MANUAL DLP Projector Please read the safety information carefully before using this product. PF510Q (PF510Q-GL) PF510QC (PF510QC-GL) www.lg.com Copyright © 2022 LG Electronics Inc. All Rights Reserved.
-
Page 2: Table Of Contents
CONTENTS PREPARATION INSTALLATION Ceiling-Type Installation How to Install the Projector On a Tripod Projection Distance per Screen Size Adjusting the Focus of the Projection Screen Kensington Security System USING REMOTE CONTROL Inserting Batteries in the Remote Control Viewing the Remote Control Features CONNECTING DEVICES Connecting with a HDMI Cable Connecting Headphones... -
Page 3: Preparation
PREPARATION The pictures may differ slightly from the actual product. Accessories Accessories included with the projector are show below. Accessories are subject to change without prior notice. New accessories may be added or old ones removed. Remote Control Owner's Manual Two AA Batteries AC-DC Adaptor Power cord... - Page 4 Optional Extras To purchase optional accessories, visit an electronics store or online shopping site or contact the retail store where you purchased the product. Optional accessories are subject to change without prior notice. Projection Screen Tripod LG Audio Device HDMI Cable...
- Page 5 Parts and Components Inlet Vent Joystick Button Focus Knob Outlet Vent Lens 1) Due to the high temperature of vent area, do not get close to the vent area. 2) Do not touch the lens when using the projector. The lens may be damaged. (Keep lens away from sharp objects.)
- Page 6 Speaker Bottom of the Projector Adjustable leg 1) Turn the adjustable leg left or right to adjust the angle.
- Page 7 (DC IN Port) IR Receiver (Headphone Port) Port Port Port...
- Page 8 Using the Joystick Button You can operate the projector by pressing the button or moving the joystick left, right, up, or down. Basic functions When the projector is turned off, place your Power On finger on the joystick button, press it once, and release it.
- Page 9 Adjusting the menu When the projector is turned on, press the joystick button one time. You can adjust the menu items moving the joystick button left, right, up, or down. Move to the desired menu item, and then press the joystick button once to select it. Turns the power off.
- Page 10 Projector Status Indicators LED Power Indicator LED Power Indicator Power standby state The projector is operating with the power on.
-
Page 11: Installation
INSTALLATION Ceiling-Type Installation WARNING When installing the product on the ceiling, observe the following precautions to prevent the projector from falling: — It is recommended to install the product through a professional installation services provider. (If installing on the ceiling, modify the projector’s PJT Mode settings) —... -
Page 12: How To Install The Projector On A Tripod
How to Install the Projector On a Tripod • You can install the projector using a camera tripod. • As shown below, you can mount the projector instead of a camera on the tripod. • When stabilizing the tripod, we recommend using a locking bolt of standard size 4.5 mm (0.1 inches) or less. -
Page 13: Projection Distance Per Screen Size
Projection Distance per Screen Size Place the projector on a sturdy, level surface, together with the PC or audio/ video source. Place the projector an appropriate distance away from the screen. The distance between the projector and the screen determines the actual size of the image. Position the projector so that the lens is at a right angle to the screen. - Page 14 16:9 Aspect Ratio Projection Screen Size Screen Width (Y) Screen Height (X) Distance (D) inches inches inches inches 26.1 14.7 31.2 1016 34.8 19.6 41.7 1061 1270 43.5 1107 24.5 52.2 1327 1524 52.2 1328 29.4 62.9 1598 1778 61.0 1550 34.3 73.0...
-
Page 15: Adjusting The Focus Of The Projection Screen
Adjusting the Focus of the Projection Screen When an image appears on the screen, check if it is in focus and fits the screen properly. To adjust the focus of the image, slowly adjust the focus knob to the left or right while looking at the top center of the screen. -
Page 16: Kensington Security System
Kensington Security System • This projector has a Kensington Security Standard connector as an anti-theft mechanism. Connect a Kensington Security System cable as shown below. • For more information on installation and use of the Kensington Security System, refer to the user’s guide provided with the Kensington Security System. •... -
Page 17: Using Remote Control
USING REMOTE CONTROL • Depending on country Inserting Batteries in the Remote Control Use 1.5 V, AA-type alkaline batteries. Replace the two batteries with new ones and insert them according to the direction indicator inside the remote control. Remove the battery cover on the back of the remote control by sliding it downwards. -
Page 18: Viewing The Remote Control Features
Viewing the Remote Control Features * : To use the button, press and hold for more than 3 seconds. (Power) Turns the Projector on or off. (Q. Settings) Accesses the Quick Settings. +, - (Volume Button) Adjusts the volume level. (Colour Button) These access special functions in some menus. - Page 19 NOTE • When using the remote control, the optimal operation range is 6 meters (19.6 feet) or less (left/right) and within a 30 degree arc of the remote control IR receiver. • If a cable is connected to the back port, the optimal operating range is 3 meters (9.8 feet) or less (left/right) and within a 30 degree arc of the remote control IR receiver.
-
Page 20: Connecting Devices
CONNECTING DEVICES You can connect various external devices to the projector. Connecting with a HDMI Cable Connect an HD receiver, DVD, PC, Notebook, or external devices to the projector and select an appropriate input mode. With an HDMI cable, you can enjoy high quality picture and sound. Using a HDMI cable, connect the port of the projector to the HDMI output port of the device to connect. -
Page 21: Connecting Headphones
Connecting Headphones You can listen to the audio through a headphone. Optional Extras... -
Page 22: Connecting A Smart Device (Smartphone, Tablet, Etc.)
Connecting a smart device (smartphone, tablet, etc.) • (Home) → [Home Dashboard] → [Inputs] → [HDMI 1]/[HDMI 2] • The picture may look different from the actual product. Connect a smart device to the projector using a cable and set the external input of the projector to HDMI. -
Page 23: Safety Precautions
SAFETY PRECAUTIONS Please take note of the safety instructions to prevent any potential accident or misuse of the projector. Child injuries can be prevented by following these simple safety precautions. The precautions should be followed in the same manner when you store or move your existing projector. - Page 24 Read these instructions. Keep these instructions. Heed all warnings. Follow all instructions. Indoor Installation WARNING Do not install products including projectors and remote controls in the following places: — Any place exposed to direct sunlight; — Any humid place such as bathroom; —...
- Page 25 Keep the following precautions in mind to prevent the temperature rise inside the projector: — Install the air vents at least 30 cm (11.8 inches) away from the wall. — Do not install the product in a place where it cannot be ventilated, such as on a bookcase or in a closet.
- Page 26 CAUTION When moving the projector, be sure to turn off the power switch and disconnect the power plug, antenna cable and the connection cord between the devices. • A failure to do so may cause damage to the projector or the cord, resulting in a fire or electric shock.
- Page 27 When in Use WARNING When thunder or lightning strikes, unplug the power cord and do not touch the antenna wire. • It may cause an electric shock. If there is a gas leak from the gas lines, do not touch the outlet and be sure to vent by opening the window.
- Page 28 Keep the plastic wrapping of the product out of the reach of children. • If a child misuses it, it may suffocate the child. Do not touch near the vents during the operation or immediately after the power is turned off as they generate intense heat. •...
- Page 29 CAUTION Do not use any product that uses high voltage electricity near the projector. (e.g. An electric fly swatter) • It may cause a malfunction. Do not place any liquid containers such as a vase, pot, cup, cosmetics or medicine, decorations such as candles or any heavy objects on top of the projector.
- Page 30 Do not block the light from the projector lens with a person, book or other objects. • If the light from the projector shines on an object for a long time, it can cause fire due to the heat of such light. Also, the reflected light can heat the lens and cause damage to the projector.
- Page 31 Power WARNING Make sure the power plug is securely plugged in to prevent it from shaking. • If the connection is unstable, it may cause a fire. Do not plug too many devices into one multi-power outlet. • This may result in fire due to the power outlet overheating. Do not insert a metal object such as chopsticks into the other end of the power plug while it is plugged into a wall outlet.
- Page 32 Keep the power cord away from heat sources. • The coating of the cord may melt and cause a fire or electric shock. Use only the authorized power cord or AC adapter supplied by LG Electronics. Do not use any other products. •...
- Page 33 Cleaning WARNING Do not spray water directly onto the projector when cleaning it. • It may cause a fire or electric shock. CAUTION How to clean the projector — Disconnect the plug from the outlet before cleaning. — Do not wipe the optical system (the lens and mirror) immediately after the power is turned off.
-
Page 34: Checking Before Reporting Malfunction
CHECKING BEFORE REPORTING MALFUNCTION Please check the list below when you experience the following symptoms during use of the product. It may not be a failure. Projector Safety Check Symptoms • The projector does not display anything on the screen or output sound when it is turned on. -
Page 35: Troubleshooting
Troubleshooting Symptoms Causes and Solutions I cannot turn on • Please make sure your projector power plug is correctly the Projector. connected to the outlet. • There may be a problem with the outlet, so try plugging the power cord of another product into the outlet where the projector was plugged in. - Page 36 This noise is normal and does not affect the projector’s functions. LG Electronics manages the manufacturing of projectors according to strict standards. A fixed level of noise does not indicate a problem.
-
Page 37: Checking Information
CHECKING INFORMATION Specifications PF510Q (PF510Q-GL) MODEL PF510QC (PF510QC-GL) Resolution (Pixel) 1920 (Horizontal) × 1080 (Vertical) Aspect ratio 16:9 (Horizontal:Vertical) Projection distance 795 mm to 3185 mm (31.2 inches to 125.3 inches) — Screen size — 762 mm to 3048 mm (30 inches to 120 inches) -
Page 38: Hdmi Supported Mode
HDMI Supported mode HDMI (DTV) Horizontal Frequency Resolution Vertical Frequency (Hz) (kHz) 640 x 480 31.46 59.94 640 x 480 31.5 720 x 480 31.47 59.94 720 x 480 31.5 720 x 576 31.25 1280 x 720 44.96 59.94 1280 x 720 1280 x 720 37.5 1920 x 1080... - Page 39 HDMI (PC) Horizontal Frequency Resolution Vertical Frequency (Hz) (kHz) 640 x 350 31.46 70.09 720 x 400 31.46 70.08 640 x 480 31.46 59.94 800 x 600 37.87 60.31 1024 x 768 48.36 1360 x 768 47.71 60.01 1152 x 864 54.34 60.05 1280 x 1024...
-
Page 40: Licenses
LG Electronics will also provide open source code to you on CD-ROM for a charge covering the cost of performing such distribution (such as the cost of media, shipping, and handling) upon email request to opensource@lge.com. -
Page 41: Other Specifications
Other specifications As with any bright light source, do not stare into the beam, RG2 IEC 62471- 5:2015. Risk Group 2 CAUTION Possibly hazardous optical radiation emitted from this product. Do not stare at operating lamp. May be harmful to the eye. This label is attached to the bottom of the product and language may differ. -
Page 42: Symbols
Symbols Refers to alternating current (AC). Refers to direct current (DC). Refers to class II equipment. Refers to stand-by. Refers to “ON” (power). Refers to dangerous voltage. - Page 44 Your projector’s OSD (On Screen Display) may differ slightly from that shown in this manual. [ ]: the buttons and the text to be displayed on the projector screen. Copyright © 2022 LG Electronics Inc. All Rights Reserved.
- Page 45 CONTENTS ABOUT LG PROJECTOR HOW TO OPERATE THE PROJECTOR APPS AND CONTENT CONNECT OTHER DEVICES MAKING THE MOST OF SMART PROJECTOR SETTINGS TROUBLESHOOTING BEING AWARE OF THE INFORMATION...
-
Page 46: About Lg Projector
You can open apps and content or use various features of the smart projector. You can check weather information and useful projector features. You can log in to your [LG Account] or view basic information about the account to which you are currently logged in. - Page 47 Returns to the most recently used external input. You can get recommendations from various contents. • You must log in to your LG account to get personalized content recommendations. • You must connect to the network to use the recommendation feature.
- Page 48 Manage LG Projector Home You can change the order of displayed apps or content lists by pressing the button on the remote control. Remote control allows you to select through the menu with the up/down/left/right buttons. You can enter edit mode by selecting...
- Page 49 Enter the [Edit App List] mode. Depending on your usage pattern, you can set the app order automatically or edit it yourself. • After selecting the app you wish to edit from [App List] on the Home screen, press and hold the OK button on the remote control, or selecct the [Edit App List] button located in the last area of [App List] to enter [Edit App List] mode.
- Page 50 Connecting to the Network Connecting to the Network If you configure settings for the network, you can use various services such as online contents and applications. Setting a Wired Network Connect the LAN port of the projector and the router using a LAN cable. The router should be connected to the Internet beforehand.
- Page 51 OFF, disconnect and reconnect it, and then turn the power on to solve the problem. • LG Electronics is not responsible for network connectivity or operation failure due to problems such as equipment failure or disconnected lines. • The network connection may not work properly because of network settings or the Internet service provider.
- Page 52 Logging in with [LG Account] enables you to use customized recommende content and various app service. You can sign up for LG membership and log in with your email address in [LG Account]. Alternatively, you can sign up for LG membership using the ID and password of an external service account.
-
Page 53: How To Operate The Projector
Some models may not be supported. [Remote Control Power] (Q. Settings) → ([Installation Wizard]) → [Remote Control Power] The power button on the LG TV remote control can be used separately or together with the projector. • [Projector + TV] The power on the projector and TV can be used together. - Page 54 [Keystone] (Q. Settings) → ([Installation Wizard]) → [Keystone] • [Auto Keystone] [Auto Keystone] provides a rectangular screen image by automatically adjusting the keystone number when there is a trapezoidal screen image caused by tilting of the projector. Automatically adjusts the keystone number. •...
- Page 55 Using Color buttons When you press the button on the remote control, four coloured buttons appear on the screen. These access special functions in some menus.
- Page 56 Using SIMPLINK With a single remote control, you can easily manage various devices such as a soundbar or set-top box connected to a projector with HDMI. • Up to three devices can be connected and used simultaneously. Connect the SIMPLINK HDMI Output port to the projector’s HDMI IN port with an HDMI cable.
- Page 57 Supported SIMPLINK Functions • Instant Play When you start a multimedia device, you can immediately watch content from the device on the projector without having to control anything. • Controlling devices with the projector remote control Enables the user to control multimedia devices with the projector remote control to watch content.
- Page 58 • It is recommended that you use a gamepad that has been tested for compatibility with LG projectors. PS Dual Shock4 ver.1 & ver.2, MICROSOFT Xbox 360 Controller (cable), NVIDIA Shield Controller, LOGITECH F310, LOGITECH F510, LOGITECH F710, LOGITECH...
-
Page 59: Apps And Content
APPS AND CONTENT Installing Apps You can install apps in a variety of categories such as games, education, and news and conveniently use them on your projectors. Press the button on the remote control. Launch [Apps]. Select a category or press the Search button to search for an app. Select an app to install. - Page 60 • Some USB storage devices may not be supported or may not work properly. • USB drivers containing apps from other LG TVs or LG Projectors may not be used. • Exercise caution when in use by children. Children may have access to inappropriate online content through this product.
- Page 61 Search Content Searches for content by title, actor/actress, and genre. Press the button on the remote control. Launch Search for a variety of content and information by typing in your desired search terms. Enter your desired search term. Shows recent searches. You can select one from the suggested keywords and proceed to search.
-
Page 62: Connect Other Devices
CONNECT OTHER DEVICES Using [Home Dashboard] You can select or control a device (mobile, external device, etc.) connected to the projector. • Run [Home Dashboard] by pressing the button on the remote control. You can check and select the external device connected through the external input port or network. - Page 63 Use AirPlay/HomeKit to control your projector and watch content from your iPad or Mac on the projector screen. • The availability of and access to Contents and Services in LGE Device are subject to change at any time without prior notice. It can only be selected if you have connected a USB storage device or a media server.
- Page 64 To see the Smart Device's screen on the projector To see the Mobile Device's screen on the projector Enable Screen Share mode on the mobile device. Your projector will be displayed in the list of available devices. Select your projector and request connection. Select accept in the connection request popup window.
- Page 65 Playing Sound from a Smart Device through the projector’s Speakers Connect a smart device to the projector via Bluetooth to play sound from the smart device through the projector’s speakers. Turn the smart device’s Bluetooth on, then select the projector from the list of devices.
- Page 66 Connecting USB Connect a USB storage device (USB HDD, USB Flash Drive) to the USB port on the projector to easily enjoy the content files stored on the USB storage device on your projector. USB Flash Drive...
- Page 67 Tips for Using a USB storage device • A USB storage device that has a built-in automatic recognition program or uses its own driver might not be recognizable. • Some USB storage devices may not be supported or may not work properly. •...
- Page 68 Using the [Media Player] You can search and view photos or play videos and songs with the [Media Player] app. Press the button on the remote control. Run the [Media Player] app. Select a device to use from the device list. Select the content to play.
- Page 69 You can select a device connected to your projector. Displayed only when music is playing.Press the to access the Play Music screen. Launch [Search]. [View Type]: Selects a content display mode. [Sort]: Select the option to sort content. [Group]: If you filter by [Music], you can group content into categories such as [Artist] and [Album].
- Page 70 Viewing Photos You can select a photo from the [Media Player] app and view the photo. You can use more features by pressing the down ( ) button on the remote control while viewing a photo. Shows the previous content. Starts the slide show.
- Page 71 Playing Videos You can select a video from the [Media Player] app and play the video. Pressing the left/right ( ) buttons on the remote control allows you to skip backward/forward 10 seconds. You can access more features by pressing the down ( ) button on the remote control while playing a video.
- Page 72 Shows the previous video. Plays or pauses the video. Shows the next video. You can change subtitle settings. Rotates videos. Fast-rewinds the video at higher speeds. You can do the settings related to play on repeat of the video. Fast-forwards the video at higher speeds. 360-degree videos can be viewed in 360 degrees.
- Page 73 Listening to Music You can select a song from the [Media Player] app and play the song. You can use more features by pressing the down ( ) button on the remote control while playing a song. You can set the random play mode. You can set the repeat play mode.
- Page 74 View Computer Files Watch content saved in your PC on the Projector You can enjoy videos/music/photos stored on your PC on the Projector when these devices are connected to the same network. Browse the content on your PC to watch on Projector (Windows 10) Connect you projector and PC to the same network.
- Page 75 Browse and watch the content stored on the PC using the Projector (Windows 10) Connect you projector and PC to the same network. Open the “Start” menu on your PC screen, search for “media streaming options” and then select the result that appears. Select the “Turn on media streaming”...
- Page 76 Matters that require special attention during Content Share • Check your network settings if the Content Share option does not work properly. • May not work properly on a wireless network. It is recommended that you connect to a wired network. •...
- Page 77 To See the PC Screen on the Projector To see the PC screen on the projector Connect wireless Enable Screen Share mode on the PC. Your projector will be displayed in the list of available devices. Select your projector and request connection. After the connection is established, the projector will display the screen of the connected device.
- Page 78 Connect wired Connect the PC with projector by HDMI cable. ® → [Home Dashboard], change the input to the terminal to which the HDMI cable is connected. After the connection is established, the projector will display the screen of the connected PC.
-
Page 79: Making The Most Of Smart Projector
MAKING THE MOST OF SMART PROJECTOR Using the [Web Browser] Using the [Web Browser] You can enter the website when you input the web address on the URL bar. If you input the search word, it will find the information about search word base on the search engine. - Page 80 You can zoom in or out on the screen while browsing the website. [Block Ads]: You can block ads within the web page you are viewing. → [Settings] → [Use However, this button is displayed only when Block Ads] is set to [On]. [Projector View]: Split the screen to display the projector screen.
- Page 81 • The [Web Browser] app on your projector is a browser for projector, so it may work differently than the browser for your PC. – Some of the content may not play properly. – Flash Plug-in is not supported, and only HTML5 media is supported. –...
- Page 82 Changing Web Browser Settings → [Settings] at the top of the [Web Browser] app. Select • [On Startup] You can choose the page that appears when you start the [Web Browser] app. • [Search Engines] You can select a search engine to search for when entering a keyword in the address bar.
- Page 83 LG Electronics headquarters (Korea). The submitted information will only be used to improve the Web Browser performance.
- Page 84 • The camera must be purchased separately. It is recommended that you use a product that has been tested for compatibility with LG Projectors. Logitech C920/C920s/C922 Pro/C922x/C925e/C930c/C930e • Depending on the installation status of the projector, the camera may not be mounted on the projector.
-
Page 85: Settings
SETTINGS The configurable items differ depending upon model. Quick Settings Quick Settings Displays a set of light-weight controls quickly and simply such as [Picture Mode], [Sound Out], [Sleep Timer] and so on. (Q. Settings) button on the remote control. Press the... - Page 86 You can set the [Picture Mode]. You can choose the [Sound Out]. Move to the [Game Optimizer] screen. You can set the [Sleep Timer]. Move to the [Network] screen. Move to the [Installation Wizard] screen. You can set more options. You can add/delete the quick setting items or change their order.
- Page 87 [Picture] Selecting Picture Mode (Q. Settings) → → [Picture] → [Select Mode] Select the picture mode that is best suited to your viewing environment, preferences or video type. Select a picture mode. By adjusting and setting each item in more detail based on the mode, your video is better optimized for its characteristics.
- Page 88 When You Use Normal Signals • [Vivid] Sharpens the image by increasing the contrast, brightness and sharpness. • [Standard] Displays the picture with normal contrast, brightness, and sharpness levels. • [Cinema] Optimizes the screen for movies. • [Sports]/[Soccer]/[Cricket] Optimizes the screen for sports games. Sharpens the image of rapid movements such as kicking or throwing a ball.
- Page 89 When You Use the HDR • [Vivid] Sharpens the image by increasing the contrast, brightness and sharpness. • [Standard] In a normal viewing environment, it opens a screen that can properly show the expressiveness and brightness of HDR. • [Cinema Home] The screen appears brighter and clearer than that of the [Cinema] screen.
- Page 90 Setting the Screen Size (Q. Settings) → → [Picture] → [Aspect Ratio] → [User Selection] You can change the screen size according to the type of content you are watching. • [16:9] Displays an aspect ratio of 16:9. • [Original] The optimal screen ratio changes depending on the input image signal.
- Page 91 Adjusting the Brightness of a Picture (Q. Settings) → → [Picture] → [Advanced Settings] → [Brightness] You can adjust the brightness of the entire screen. • [Adjust Contrast] Adjusts the contrast of the bright and dark areas of the picture. The closer to 100, the higher the contrast.
- Page 92 Adjusting the Color of an Picture (Q. Settings) → → [Picture] → [Advanced Settings] → [Color] • [Color Depth] Tones down or up the Colors displayed on the screen. The closer to 100, the deeper the Color. • [Tint] Adjusts the Color balance between red and green displayed on the screen. The closer to Red 50, the more red the Color will be.
- Page 93 • [White Balance] The function to adjust each color to be reproduced more accurately based on white allows you to adjust the overall color tone of the screen to your preference. – [Method]: This method is used for fine-tuning the color temperature setting. You can control the color temperature at two points of the bright part and dark part of the video if you select [2 Points], at each point of 10 levels if you select [10 Points Signal Level(%)], and at each point of 22 levels of the video...
- Page 94 Adjusting the Contrast of a Picture (Q. Settings) → → [Picture] → [Advanced Settings] → [Clarity] You can adjust the contrast of a Picture to show it more clearly. • [Adjust Sharpness] Adjusts the sharpness of the image. The closer to 50, the sharper and clearer the image.
- Page 95 Applying the Current Picture Settings to All Inputs (Q. Settings) → → [Picture] → [Advanced Settings] → [Apply to All Inputs] The settings you specify only applies to the currently selected input mode. To apply your current picture settings to all input modes, select [Apply to All Inputs]. Resetting Picture Mode (Q.
- Page 96 [Sound] Selecting Sound Mode (Q. Settings) → → [Sound] → [Select Mode] You can select the most suitable sound mode for each genre. • [AI Sound]/[AI Sound Pro] Automatically optimize sound based on content type. • [Standard_soundMode] Optimizes the sound for all types of content. •...
- Page 97 [Use Wired Speaker] (Q. Settings) → → [Sound] → [Sound Out] → [Use Wired Speaker] [HDMI(ARC) Device] Sound from the projector can be output through an external audio device connected via a HDMI (ARC) port. • Select [HDMI(ARC) Device] to automatically turn on SIMPLINK. Once SIMPLINK is turned off, the output speaker settings automatically revert to the default settings for uninterrupted audio output.
- Page 98 • LG Sound Sync devices will automatically try to connect to the recently used devices when you turn the projector on. •...
- Page 99 [Use External Speakers with Projector Speaker] (Q. Settings) → → [Sound] → [Sound Out] → [Use External Speakers with Projector Speaker] Audio can be played through multiple devices simultaneously. [Bluetooth Device + Projector Speaker] Both the internal speaker of the projector and the Bluetooth speaker can be used to output the sound at the same time or a surround sound can be used.
- Page 100 [Equalizer] (Q. Settings) → → [Sound] → [Advanced Settings] → [Equalizer] You can adjust the sound by increasing or decreasing the output of the specific frequency range of the voice signal. The option can be enabled if [Sound] → [Select Mode] is set to [Standard_ •...
- Page 101 Adjusting AV Synchronization (Q. Settings) → → [Sound] → [Advanced Settings] → [Match Screen and Sound] Adjusts the synchronization of the sound from the speaker that is working. The closer the value is set to 60, the slower the voice output speed will be than the default speed.
- Page 102 [LG Sound Sync] (Q. Settings) → → [Sound] → [Advanced Settings] → [LG Sound Sync] By setting this feature to [On], you can adjust the volume of the connected LG Sound Sync device using a projector remote control. • If the auto-power feature of the sound bar that supports LG Sound Sync is set to On, the sound bar will be turned on or off together when the projector is turned on or off.
- Page 103 [Digital Sound Output] (Q. Settings) → → [Sound] → [Advanced Settings] → [Digital Sound Output] You can configure the [Digital Sound Output] settings. (Q. Settings) → → [Sound] → [Sound Out] → [Use • You can set when Wired Speaker] is set to [HDMI(ARC) Device]. •...
- Page 104 Using an eARC Supported Audio Device (Q. Settings) → → [Sound] → [Advanced Settings] → [eARC Support] eARC is a technology that enables faster transmission of more acoustic information because it has a wider bandwidth than conventional ARC. Through the connected audio device, the sound of the projector can be output in a higher quality sound than ARC.
- Page 105 [General] [AI Service] (Q. Settings) → → [General] → [AI Service] • [AI Sound] When set to [On], the image quality is automatically optimized for content characteristics based on the algorithms learned with deep learning techniques. – This setting only applies to the internal speakers of the Projector or HDMI (ARC) connected devices that support [Sound Mode Share].
- Page 106 [Usage Limits Setting] (Q. Settings) → → [General] → [Family Settings] → [Usage Limits Setting] You can use the projector in the set time period only. Outside of the set time period, you must enter your password to use the projector. Set [Enable the function] to [On].
- Page 107 Setting Projector (Q. Settings) → → [General] → [Devices] → [Projector Management] • [Home/Store Mode] You can choose between [Home Mode] and [Store Mode]. To use the projector at home, select [Home Mode]. Select [Store Mode] only when the projector will be displayed in store. The [Store Mode] provide settings optimized for store display.
- Page 108 – It is recommended that you use a product that has been tested for compatibility with LG projectors. Bluetooth Keyboard: LG Rolly Keyboard2 KBB-710, Arteck HB192, LOGITECH K480, Apple Magic Keyboard, Arteck HB030B Keyboard Bluetooth Mouse: LOGITECH Mx Master 2S, LOGITECH M535, Apple Magic...
- Page 109 – The [Turn on via Wi-Fi] feature must be used in an app on a smart device that supports the feature. – The [Turn on via Bluetooth] feature can only be used with certain LG Electronics smartphones. – The projector must be plugged in.
- Page 110 Setting HDMI External Input (Q. Settings) → → [General] → [Devices] → [HDMI Settings] You can apply settings to ensure a clear picture and easy control for the HDMI connected devices. [SIMPLINK (HDMI-CEC)] You can conveniently control and use various multimedia devices connected through HDMI with the projector’s remote control.
- Page 111 Setting a Wired Network (Q. Settings) → → [General] → [Network] → [Wired Connection (Ethernet)] If you configure settings for the network, you can use various services such as online contents and applications. If the router connected to the network supports the DHCP feature, connecting the projector and router by wire will automatically connects to the network.
- Page 112 Setting a Wireless Network (Q. Settings) → → [General] → [Network] → [Wi-Fi Connection] If you configure settings for the network, you can use various services such as online contents and applications. If you have set up the projector for a wireless network, you can check and connect to the available wireless Internet networks.
- Page 113 – It is subject to change depending on the broadcast country settings. • [LG Services Country] Select the country where you want to access LG’s services. Services may vary depending on location. – You must set the country manually when you are not connected to the...
- Page 114 Setting the Time (Q. Settings) → → [General] → [System] → [Time & Timer] You can check the time or configure related settings. The configurable items differ depending upon model. • [Set Automatically] It automatically sets the projector time. • [Time]/[Date]/[Time Zone] You can manually set the date and time, etc.
- Page 115 Setting [Safety] (Q. Settings) → → [General] → [System] → [Safety] To set [Safety], set it to [On]. • [Application Locks] You can lock or unlock the application. – The lock function is not immediately available for the currently running application.
- Page 116 → [General] → [System] → [Additional Settings] → [Notifications] You can view all notifications from projector apps and LG service at the same time. You can view and delete each notification message, and directly move to the app or website using notifications that support shortcuts.
- Page 117 Restoring the Default Settings (Q. Settings) → → [General] → [System] → [Reset to Initial Settings] Return projector to its initial settings. This will revert all settings to their default values. After reset, the projector will automatically turn off and on. •...
- Page 118 To Use Energy Saving Feature (Q. Settings) → → [General] → [Energy Saving] Reduces power consumption by adjusting peak screen brightness. If you use [Energy Saving Step] function, brightness of your projector will be affected. • [Energy Saving Step] – [Minimum]/[Medium]/[Maximum]: Applies the pre-set Energy Saving mode. •...
- Page 119 To Use Audio Guidance (Q. Settings) → → [General] → [Accessibility] → [Audio Guidance] If [Audio Guidance] is set to [On], audio guides will be provided in various situations, such as when you adjust the volume or change settings and input signals. •...
- Page 120 [Projector Power Sound] (Q. Settings) → → [General] → [Accessibility] → [Projector Power Sound] This feature lets you turn on/off the sound effects that you hear when your projector is switched on or off. • Some models may not be supported. •...
- Page 121 [Support] [Software Update] (Q. Settings) → → [Support] → [Software Update] If the software needs to be updated, run Software Update to apply the latest software version for use. • [Auto Update] If set to [On], updates will be proceeded automatically without asking when there is a new update after a version check.
- Page 122 [Screen Self-diagnosis] (Q. Settings) → → [Support] → [Screen Self-diagnosis] Start the Picture Test to check that the video signal output is normal, and then select whether there is an error. If there are no problems in the test, check the connected external device. [Sound Self-diagnosis] (Q.
-
Page 123: Troubleshooting
• [LG Remote Service] You can get help in solving the problem via Remote Service. For [LG Remote Service], make sure to contact the LG Electronics Customer Service Center. – Some models may not be supported. - Page 124 Troubleshooting Power/Remote Issues Please check the list below when you experience the following symptoms during use of the product. It may not be a failure. I cannot turn on the Projector. • Please make sure your projector power plug is correctly connected to the outlet. •...
- Page 125 I cannot turn the projector on with the remote control. • Please make sure your projector power plug is correctly connected to the outlet. • Replace the batteries in the remote control. (Use alkaline batteries.) • Check whether there are any obstacles in front of the projector’s remote control sensor.
- Page 126 Troubleshooting Screen Issues Please check the list below when you experience the following symptoms during use of the product. It may not be a failure. (Q. Settings) → → [Support] → [Screen Self-diagnosis] First of all, perform to check for any abnormalities in the projector. If you are using a set-top box, turn it off, and then turn it back on.
- Page 127 I see vertical lines in the left, right, top, and bottom corners of the screen, or colors are blurred when I try to connect to HDMI. • (Q. Settings) → → [Picture] → [Aspect Ratio] → [Just Scan] Set [Just Scan] to [Off]. [Just Scan] shows you the original image as it is.
- Page 128 Troubleshooting Sound Issues Please check the list below when you experience the following symptoms during use of the product. It may not be a failure. (Q. Settings) → → [Support] → [Sound Self-diagnosis] to First of all, perform check for any abnormalities in the projector. If you are using a set-top box, turn it off, and then turn it back on.
- Page 129 HDMI port connected to [Input] to PC and select [Save]. The sound does not play when the PC is connected with an HDMI cable. ® In PC settings, set Control Panel → Sound → Play → LG projector as the default • device. •...
- Page 130 Troubleshooting Movie Playback Issues Please check the list below when you experience the following symptoms during use of the product. It may not be a failure. For more information about supported files, see "Using the [Media Player]". I cannot find a file in the [Media Player]. • Check that the files on the USB storage device can be read by a PC. •...
- Page 131 I cannot see the subtitles. • Check that the file plays without any problems on a PC’s video player. Also check for file damage. • Check that the video and subtitle files have the same name. • Also check that both the video file and the subtitle file are in the same folder. •...
- Page 132 Troubleshooting Network Connection Issues Please check the list below when you experience the following symptoms during use of the product. It may not be a failure. Before connecting to a wireless network, check the name and password of the Wi-Fi device to connect.
- Page 133 When X appears next to Gateway • Check the AP (Router) or consult your Internet service provider. • Unplug the power cord of the AP (Router), Cable Modem, wait 10 seconds. Reapply power. • Initialize (Reset) on the AP (Router) or Cable Modem. •...
- Page 134 Enter your email address on the find password page, and we'll send you a link to reset your password. You can also reset your password in LG Account → Reset Password on the •...
- Page 135 (Q. Settings) → → [General] Change the country you want to use in → [System] → [Location] → [LG Services Country]. (Some models may not be supported.) • If you cannot see some apps, it may be because you deleted them. Please reinstall the appropriate app.
- Page 136 Troubleshooting Internet Browser Issues Please check the list below when you experience the following symptoms during use of the product. It may not be a failure. Some parts of a particular website are not visible when I am using the Internet. •...
-
Page 137: Being Aware Of The Information
BEING AWARE OF THE INFORMATION Supported Photo Files File type Format Resolution Minimum: 64 x 64 Maximum jpeg, jpg, jpe JPEG Normal Type: 15360 (W) x 8640 (H) Progressive Type: 1920 (W) x 1440 (H) Minimum: 64 x 64 Maximum: 5760 (W) x 5760 (H) Minimum: 64 x 64 Maximum: 1920 (W) x 1080 (H) - Page 138 Supported Video Files Maximum data transfer rate • Full HD video H.264 1920 x 1080@60P BP/MP/HP@L4.2 Maximum 40 Mbps HEVC 1920 x 1080@60P Main/Main10@L4.1 Maximum 40 Mbps Supported external subtitles smi, srt, sub (MicroDVD, SubViewer 1.0/2.0), ass, ssa, txt (TMPlayer), psb (PowerDivX), dcs (DLP Cinema) Supported embedded subtitles format •...
- Page 139 Supported video codecs Extension Codec VC-1 Advanced Profile (except for WMVA), VC-1 Video Simple and Main Profiles WMA Standard (except for WMA v1/ WMA Audio Speech) Xvid (except for GMC), H.264/AVC, Motion Jpeg, Video MPEG-4 MPEG-1 Layer I, II, MPEG-1 Layer III (MP3), Dolby Audio Digital, LPCM, ADPCM Video...
- Page 140 Cautions for Video Playback • Some user-created subtitles may not work properly. • A video file and its subtitle file must be located in the same folder. For subtitles to be displayed properly, make sure that the video file and the subtitle file have the same name.
- Page 141 Supported music file formats File type Item Info Bit rate 32 kbps ~ 320 kbps Sample freq. 16 kHz ~ 48 kHz Support MPEG-1, MPEG-2 Channels mono, stereo Bit rate Sample freq. 8 kHz ~ 96 kHz Support Channels mono, stereo Bit rate 64 kbps ~ 320 kbps Sample freq.