Table of Contents
Advertisement
Quick Links
Advertisement
Table of Contents

Related Manuals for Technika TFL7W


Summary of Contents for Technika TFL7W
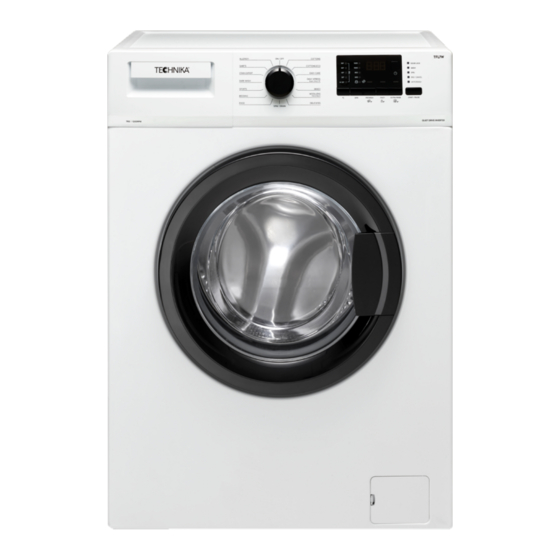
- Page 1 TFL7W 7kg Front Load Washing Machine USER MANUAL technika.com.au...
- Page 2 THANK YOU FOR YOUR PURCHASE Dear Customer, Congratulations on the purchase of your new product from Technika. We recommend you please take some time to read the instruction manual thoroughly to familiarise yourself with the functionality and operations to ensure optimum performance of your new appliance.
-
Page 3: Table Of Contents
CONTENTS Before You Begin Operation Explanation of Symbols Control Panel Packaging Information Preparing the Machine Programme Selection For Your Safety Programme and Consumption Table Life and Property Safety Main Programmes Hot Surface Safety Additional Programmes Children's Safety Special Programmes Electrical Safety Temperature Selection Disposal Regulations Spin Speed Selection... -
Page 4: Before You Begin
1. SAFETY INSTRUCTIONS 1.1 General Safety Warnings 1. SAFETY INSTRUCTIONS 1. SAFETY INSTRUCTIONS BEFORE YOU BEGIN 1.1 General Safety Warnings 1. SAFETY INSTRUCTIONS 1.1 General Safety Warnings 1. SAFETY INSTRUCTIONS WARNING: 1.1 General Safety Warnings 1. SAFETY INSTRUCTIONS WARNING: Please read the user manual carefully before using the unit. 1.1 General Safety Warnings WARNING: 1.1 General Safety Warnings... -
Page 5: For Your Safety
1. SAFETY INSTRUCTIONS 1.1 General Safety Warnings 1. SAFETY INSTRUCTIONS 1.1 General Safety Warnings 1. SAFETY INSTRUCTIONS FOR YOUR SAFETY 1.1 General Safety Warnings 1. SAFETY INSTRUCTIONS 1. SAFETY INSTRUCTIONS 1. SAFETY INSTRUCTIONS WARNING: 1.1 General Safety Warnings 1.1 General Safety Warnings 1. -
Page 6: Children's Safety
1.1 General Safety Warnings 1. SAFETY INSTRUCTIONS 1.1 General Safety Warnings WARNING: 1. SAFETY INSTRUCTIONS 1. SAFETY INSTRUCTIONS 1.1 General Safety Warnings 1.1 General Safety Warnings FOR YOUR SAFETY 1. SAFETY INSTRUCTIONS Icon Type Meaning 1. SAFETY INSTRUCTIONS WARNING: Icon Type Meaning WARNING... -
Page 7: Disposal Regulations
RISK OF ELECTRIC SHOCK Dange SYMBOL ISO 7010 W021 WARNING: FOR YOUR SAFETY SYMBOL ISO 7010 W021 CAUTION WARNING: WARNING: CAUTION WARNING: IMPORTANT / NOTE Disposal Regulations Disposal of your old machine This product complies with EU WEEE Directive (2012/19/EU). This product bears a classification symbol for waste electrical and electronic equipment (WEEE). -
Page 8: Installation
INSTALLATION Your washing machine automatically detects the amount of laundry placed inside when selecting a program. While installing the product, before the first use, calibration should be done to ensure that the laundry amount is detected in the most accurate way. To do this, select the Drum Cleaning* program and cancel the spin function. -
Page 9: Removing The Transportation Locks
INSTALLATION 1. SAFETY INSTRUCTIONS Removing the Transportation Locks 1.1 General Safety Warnings 1. Loosen all bolts with an appropriate wrench until they turn freely. 1. SAFETY INSTRUCTIONS 2. Remove the transport safety bolts by turning them slightly. 3. Insert the plastic covers in the bag containing the user manual to the openings on the rear panel. 1.1 General Safety Warnings 1. -
Page 10: Connecting The Water Supply
1.1 General Safety Warnings 1. SAFETY INSTRUCTIONS INSTALLATION 1.1 General Safety Warnings 1. SAFETY INSTRUCTIONS Connecting the Water Supply WARNING: 1.1 General Safety Warnings It is necessary to have 10 – 80 liters of water flowing from the fully open tap in one minute to have your machine run smoothly. Icon Type Meaning... -
Page 11: Connecting The Drain Hose To The Drain
1.1 General Safety Warnings 1. SAFETY INSTRUCTIONS INSTALLATION WARNING: 1.1 General Safety Warnings Icon Type Meaning WARNING: Connecting the Drain Hose to the Drain Icon Type Meaning WARNING Serious injury or death risk WARNING Serious injury or death risk WARNING: RISK OF ELECTRIC SHOCK Dangerous voltage risk •... -
Page 12: Electrical Connection
1. SAFETY INSTRUCTIONS INSTALLATION 1.1 General Safety Warnings 1. SAFETY INSTRUCTIONS Electrical Connection Connect the product to a grounded outlet protected by a 16 A fuse. Our company shall not be liable for any damages that will arise when the product is used without grounding in accordance with the local regulations. 1.1 General Safety Warnings 1. -
Page 13: Preparation
PREPARATION Sorting the Laundry • Sort laundry according to type of fabric, colour, and degree of soiling and allowable water temperature. • Always observe the instructions given on the garment care labels. Preparing Laundry for Washing • Laundry items with metal attachments such as, underwiring, belt buckles or metal buttons will damage the product. -
Page 14: Tips For Energy And Water Saving
PREPARATION Tips for Energy and Water Saving Following information will help you use the product in an ecological and energy / water efficient manner. • Operate the product in the highest load capacity allowed for the programme you have selected, but do not overload. See, “Programme and consumption table”. •... -
Page 15: Using Detergent And Softener
PREPARATION Using Detergent and Softener When using detergent, softener, starch, fabric dye, bleach and descaling agents; read the manufacturer’s instructions written on the package and follow the dosages specified. Use measuring cup if available. The detergent drawer is composed of three compartments: –... - Page 16 PREPARATION 1. SAFETY INSTRUCTIONS Using Detergent and Softener (continued) 1.1 General Safety Warnings Adjusting detergent amount 1. SAFETY INSTRUCTIONS The amount of washing detergent to be used depends on the amount of laundry, the degree of soiling and water hardness. •...
- Page 17 PREPARATION Using Detergent and Softener (continued) Using gel and tablet detergent • If the gel detergent thickness is fluidal and your product does not contain a special liquid detergent container, put the gel detergent into the main wash detergent compartment during first water intake.
-
Page 18: Tips For Efficient Washing
PREPARATION Tips for Efficient Washing Clothes Light colours Colours: Dark colours: Delicates, woollens & whites: 40-90°C Cold - 40°C Cold - 40°C & silks: Cold - 40°C It may be necessary Powder and Liquid detergents Prefer liquid to pretreat the liquid detergents suitable for detergents produced... -
Page 19: Displayed Programme Time
PREPARATION Displayed Programme Time You can see the programme duration on the display of your machine while selecting a programme. Depending on the amount of laundry you have loaded into your machine, foaming, unbalanced load conditions, fluctuations in power supply, water pressure and programme settings, the programme duration is automatically adjusted while the programme is running. -
Page 20: Operation
OPERATION Control Panel 1. Display 5. Start / Pause button 9. PreWash / 2. End time adjustment button 6. Temperature adjustment button Drum Clean Function 10. Fast+ Function / 3. Status indicators 7. Spin Speed adjustment button Child Lock 4. Program selection knob 8. -
Page 21: Programme And Consumption Table
OPERATION Programme & Consumption Table Auxiliary Functions Programme 2.40 1200 Cold - 90 ● ● ● ● Cottons 1.80 1200 Cold - 90 ● ● ● ● 0.97 1200 Cold - 90 ● ● ● ● Cottons Eco 40** 0.937 1200 Cold - 40 1.35... -
Page 22: Main Programmes
OPERATION Programme & Consumption Table (continued) Please read installation section of the manual before first use. Water and power consumption may vary subject to the changes in water pressure, water hardness and water temperature, ambient temperature, type and amount of laundry, selection of auxiliary functions and spin speed, and changes in the mains voltage. -
Page 23: Additional Programmes
OPERATION Additional Programmes For special cases, additional programmes are available in the machine. Additional programmes may differ according to the model of the machine. Cottons Eco Use to wash your normally soiled, durable cotton and linen laundry. Although it washes longer than all other programmes, it provides high energy and water savings. - Page 24 OPERATION Additional Programmes (continued) Shirts Use this programme to wash shirts made of cotton, synthetic and synthetic blended fabrics together. This programme ensures that your clothes wrinkle less. When the quick wash function is selected, the pre-treatment algorithm is used. Apply the pre-treatment chemical directly onto the clothes, or add it together with the detergent when the machine starts to take in water from the main wash compartment.
-
Page 25: Special Programmes
OPERATION Special Programmes For specific applications, select any of the following programmes. Rinse Use when you want to rinse or starch separately. Spin+Drain Use this program to remove the water on the clothe / in the machine. Before selecting this programme, select the desired spin speed and press Start / Pause button. First, the machine will drain the water inside of it. -
Page 26: Auxiliary Function Selection
OPERATION Spin Speed Selection (continued) Rinse hold If you are not going to unload your clothes immediately after the programme ends, you can use the rinse hold function to keep your laundry in the final rinsing water in order to prevent them from getting wrinkled when there is no water in the machine. -
Page 27: Functions / Programmes Selected By Pressing The Function Buttons
OPERATION Auxiliary Functions (continued) Extra Rinse This function enables the machine to carry out another rinsing cycle in addition to the one carried out after the main wash. This is particularly useful for people with sensitive skin and will further reduce the chance of detergents remaining on clothing articles. -
Page 28: End Time Adjustment
OPERATION Functions / Programmes Selected by Pressing the Function Buttons (continued) In addition to the method above, to deactivate the Child Lock, switch the Programme Selection knob to On / Off position when no programme is running, and select another programme. Child Lock will not be disabled after a power failure or unplugging. -
Page 29: Starting The Programme
OPERATION End Time Adjustment (continued) Changing the delayed end time If you want to change the time during countdown: Turn the programme selection knob to cancel the delayed end time function, and then set the desired time again. 1. Press the End Time Adjustment button. When pressed for the first time, the programme duration will be rounded up to the closest whole number time. -
Page 30: Loading Door Lock
OPERATION Progress of the Programme (continued) You can change the auxiliary functions, speed and temperature settings without stopping the programme flow while the programme is running. To do this, the change you are going to make must be something that will be carried out after the programme step that is running. If the change is not suitable, relevant lights will flash 3 times. -
Page 31: Changing The Selections After The Programme Has Started
OPERATION Changing the Selections After the Programme has Started Press the Start / Pause to switch the machine to pause mode while a programme is running. The light of the current programme will flash on the Programme Follow-up indicator, indicating that the machine has switched to pause mode. Also, when the loading door is ready to be opened, the Loading Door light will turn off in addition to the programme step light. -
Page 32: End Of Programme
OPERATION End of Programme At the end of the programme, “End” will be displayed. 1. Wait until the light of the loading door goes off completely. 2. Switch the programme selection knob to On / Off to switch off the machine. 3. -
Page 33: Maintenance & Cleaning
MAINTENANCE & CLEANING Service life of product extends and frequently experienced problems will be reduced if it is cleaned at regular intervals. Cleaning the Detergent Drawer Clean the detergent drawer at regular intervals (every 4-5 washing cycles) as shown below in order to prevent accumulation of powder detergent in time. -
Page 34: Cleaning The Body And Control Panel
MAINTENANCE & CLEANING Cleaning the Body and Control Panel Wipe the body of the machine with soapy water or non-corrosive mild gel detergents as necessary, and dry with a soft cloth. Use only a soft and damp cloth to clean the control panel. Cleaning the Water Intake Filters There is a filter at the end of each water intake valve at the rear of the machine and also at the... - Page 35 MAINTENANCE & CLEANING Draining Remaining Water and Cleaning the Pump Filter (continued) Foreign substances left in the pump filter may damage your machine or may cause noise problem. If the product is not being used, shut the tap shut, remove mains pipe and drain the water inside the machine against any likely freezing.
-
Page 36: Trouble Shooting
TROUBLE SHOOTING Problem Possible Cause a) Start / Pause / Cancel a) Press Start / Pause / Cancel button. Programmes button is not pressed. do not start after b) It may be difficult to close b) Reduce the amount of laundry the loading door the loading door in case and make sure that the loading... - Page 37 TROUBLE SHOOTING Problem Possible Cause a) Water drain hose is clogged. a) Clean or flatten the hose. There is water Product stopped shortly after leaking from the the programme started. bottom of the b) Pump filter is clogged. b) Clean the pump filter. product Product stopped a) Machine has stopped temporarily...
- Page 38 TROUBLE SHOOTING Problem Possible Cause Washing a) Water pressure is low. a) Product waits until taking takes longer in adequate amount of water than specified to prevent poor washing in the user quality due to the decreased manual* amount of water. Therefore, the washing time extends.
- Page 39 TROUBLE SHOOTING Problem Possible Cause a) There is unbalanced a) Automatic unbalanced load Programme load in the product. detection system is activated time does not due to the unbalanced distribution countdown* of the laundry in the product. a) There is unbalanced a) Automatic unbalanced load Product does load in the product.
- Page 40 TROUBLE SHOOTING Problem Possible Cause a) Insufficient amount a) Use the recommended amount Washing of detergent is used. of detergent appropriate for water performance hardness and the laundry. is poor: Stains persist or the b) Excessive laundry is loaded in. b) Do not load the product laundry is not in excess.
- Page 41 TROUBLE SHOOTING Problem Possible Cause a) The amount, brand and storage a) Use a detergent appropriate for Washing machine conditions of the detergent the washing machine and your does not rinse well used are inappropriate. laundry. Keep detergents closed in an environment free of humidity and do not expose them to excessive temperatures.
- Page 42 TROUBLE SHOOTING Problem Possible Cause a) Detergent was put in a) If detergent is put in the prewash Laundry does the wrong compartment. compartment although prewash not smell like cycle is not selected, the product the softener** can take this detergent during rinsing or softener step.
- Page 43 TROUBLE SHOOTING Problem Possible Cause a) Too much foam forms a) Use detergents appropriate Too much foam inside the product. (**) for the washing machine. forms inside the product** b) Excessive amount b) Use only sufficient of detergent is used. amount of detergent.
-
Page 44: Technical Specifications
TECHNICAL SPECIFICATIONS Packaging materials of the product are manufactured from recyclable materials in accordance with our National Environment Regulations. Do not dispose of the packaging materials together with the domestic or other wastes. Take them to the packaging material collection points designated by the local authorities. Height 84cm Width... -
Page 45: Manufacturers Guarantee
Australia / New Zealand. b) In the case of Technika products used for purposes other than personal, domestic or household purposes (including business or commercial use), a period of 90 days from the date the product is purchased as a brand-new product from a retailer located in Australia / New Zealand. - Page 46 MANUFACTURER GUARANTEE 3. Consumer Guarantees Our goods come with guarantees that cannot be excluded under the Australian / New Zealand Consumer Law. You are entitled to a replacement or refund for a major failure and for compensation for any other reasonably foreseeable loss or damage.
- Page 47 READ THE INSTRUCTION BOOKLET BEFORE INSTALLING AND USING THE APPLIANCE. The manufacturer will not be responsible for any damage to property or to persons caused by incorrect installation or improper use of the appliance. The manufacturer is not responsible for any inaccuracies, due to printing or transcription errors, contained in this manual.
- Page 48 technika.com.au...