Table of Contents
Advertisement
Quick Links
Advertisement
Table of Contents

Related Manuals for Technika TCD7W


Summary of Contents for Technika TCD7W
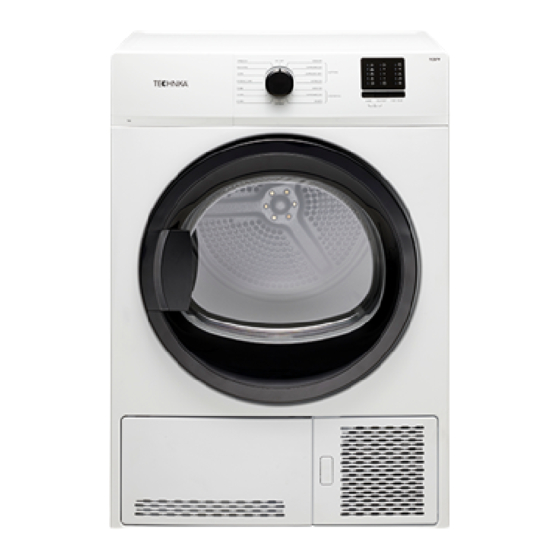
- Page 1 TCD7W 7kg Condenser Dryer USER MANUAL technika.com.au...
- Page 2 THANK YOU FOR YOUR PURCHASE Dear Customer, Congratulations on the purchase of your new product from Technika. We recommend you please take some time to read the instruction manual thoroughly to familiarise yourself with the functionality and operations to ensure optimum performance of your new appliance.
-
Page 3: Table Of Contents
CONTENTS Before You Begin Operation Explanation of Symbols Overview Packaging Information Control Panel Symbols For Your Safety Using the Dryer General Safety Starting the Program Electricity Safety Programme Selection Table Product Safety Consumption Table Mounting Over a Washing Machine Auxiliary Functions Intended Use Warning Indicators Child Safety... -
Page 4: Before You Begin
1. SAFETY INSTRUCTIONS 1.1 General Safety Warnings 1. SAFETY INSTRUCTIONS 1.1 General Safety Warnings 1. SAFETY INSTRUCTIONS BEFORE YOU BEGIN 1.1 General Safety Warnings 1. SAFETY INSTRUCTIONS 1. SAFETY INSTRUCTIONS 1.1 General Safety Warnings 1. SAFETY INSTRUCTIONS WARNING: 1.1 General Safety Warnings 1. -
Page 5: For Your Safety
FOR YOUR SAFETY This section contains safety instructions that will help protect from risk of personal injury or property damage. Failure to follow these instructions shall void any warranty. 1. SAFETY INSTRUCTIONS 1. SAFETY INSTRUCTIONS General Safety 1.1 General Safety Warnings •... - Page 6 1.1 General Safety Warnings 1. SAFETY INSTRUCTIONS 1. SAFETY INSTRUCTIONS WARNING: FOR YOUR SAFETY 1.1 General Safety Warnings 1. SAFETY INSTRUCTIONS 1.1 General Safety Warnings 1. SAFETY INSTRUCTIONS Icon Type Meaning WARNING: Icon Type Meaning WARNING Serious injury or death risk WARNING: WARNING Serious injury or death risk...
-
Page 7: Product Safety
1.1 General Safety Warnings 1. SAFETY INSTRUCTIONS 1.1 General Safety Warnings WARNING: 1. SAFETY INSTRUCTIONS FOR YOUR SAFETY 1.1 General Safety Warnings Icon Type Meaning WARNING: Icon Type Meaning WARNING Serious injury or death risk 1.1 General Safety Warnings 1. SAFETY INSTRUCTIONS WARNING Serious injury or death risk WARNING:... -
Page 8: Mounting Over A Washing Machine
1. SAFETY INSTRUCTIONS FOR YOUR SAFETY 1.1 General Safety Warnings 1. SAFETY INSTRUCTIONS WARNING: 1.1 General Safety Warnings Mounting Over a Washing Machine Icon Type Meaning WARNING: • A fixing device should be used between the two machines when installing the dryer above a washing machine. Icon Type Meaning... -
Page 9: Disposal Regulations
RISK OF ELECTRIC SHOCK Dange SYMBOL ISO 7010 W021 WARNING: FOR YOUR SAFETY SYMBOL ISO 7010 W021 CAUTION WARNING: WARNING: WARNING: CAUTION IMPORTANT / NOTE Disposal Regulations Disposal of your old machine This product complies with EU WEEE Directive (2012/19/EU). This product bears a classification symbol for waste electrical and electronic equipment (WEEE). -
Page 10: Installation
1. SAFETY INSTRUCTIONS INSTALLATION 1.1 General Safety Warnings 1. SAFETY INSTRUCTIONS WARNING: 1.1 General Safety Warnings Before the calling the nearest authorized service agent for the installation of the dryer, ensure Icon Type Meaning that electrical installation and water drain is appropriate referring to the user’s manual. If they WARNING: Icon Type... -
Page 11: Connecting The Water Drain Hose For Models With The Water Tank At The Bottom
INSTALLATION Connecting the Water Drain Hose for Models with the Water Tank at the Bottom Connection pipe to water drain is at the bottom rear of your machine. 1. Remove the bracket and the rubber cap. 2. Attach the drain hose and replace the bracket to its position. Important: During full capacity usage, it is advised to use the machine with direct drain connection, since the machine may pause with flashing water tank warning symbol. -
Page 12: Adjusting The Feet
INSTALLATION Adjusting the Feet 1. Turn the feet to left or right until the dryer stands level and firmly. Changing the Illumination Lamp In case an illumination lamp is used in your laundry dryer. To change the bulb / LED used for illumination of your tumble dryer, call your authorized service agent. -
Page 13: Preparation
PREPARATION Laundry Suitable for Drying in the Dryer Always obey the instructions given on the garment tags. Dry only the laundry having a label stating that they are suitable for drying in a dryer and make sure that you select the appropriate programme. Do not dry with dryer At high temperature At medium temperature... -
Page 14: Correct Load Capacity
PREPARATION Correct Load Capacity Follow the instructions in the “Programme selection and consumption table”. Do not load more than the capacity values stated in the table. Following weights are given as examples: Programme Selection & Consumption Table Laundry Approximate weights (g)* Cotton quilt covers (double) 1500 Cotton quilt covers (single) -
Page 15: Operation
OPERATION Overview 1. Power cord 5. Lint filter 9. Water tank (located inside kick plate) 2. Top panel 6. Type label 10. Adjustable legs 3. Control panel 7. Kick plate 11. Kick plate opening button 4. Loading door 8. Ventilation grids... -
Page 16: Control Panel
OPERATION Control Panel Symbols 1. Program selection knob 2. Alarm button 3. Delay Start button Full tank Filter Clean the On / Off 4. Start / Pause button cleaning filter drawer required / condenser Timer Anti- Mute Child lock delay crease Cupboard Iron... -
Page 17: Programme Selection Table
OPERATION Programme Selection Table Capacity Spin speed Drying Programmes Description (kg) (rpm)* time (mins) Dry shirts more delicately and thus Xpress 14 1200 causes less wrinkles for easy ironing. Dry delicate items in a more sensitive manner, Delicates and causes less creasing and easier ironing. Dry denim pants, skirts, shirts Jeans 1200... -
Page 18: Consumption Table
OPERATION Consumption Table Energy Capacity Energy consumption value Programmes star (kg) (kWh per year) rating Cupboard dry+ (cottons) Energy Label standard program (AS/NZS 2442) “All the filters must be cleaned prior to test series.” All values given in the table have been fixed according to standard laboratory conditions. These values may deviate from the table according to the laundry type, laundry spin speed, environmental conditions and voltage fluctuations. -
Page 19: Warning Indicators
OPERATION Warning Indicators Warning indicators may vary depending on the model of your dryer. Filter cleaning When the program is completed, the warning indicator for filter cleaning turns on. Water tank When the program is completed, the warning indicator to empty the water tank turns on. If the water tank fills up while the program continues, the warning indicator starts flashing and the machine goes into stand-by. -
Page 20: Changing The Program After The Dryer Has Started
OPERATION Changing the Program After the Dryer has Started You can change the program you selected to dry your laundry with a different program after the dryer starts running. • For instance, select Extra Dry program by turning the program 1. -
Page 21: Maintenance & Cleaning
1.1 General Safety Warnings 1. SAFETY INSTRUCTIONS MAINTENANCE & CLEANING 1.1 General Safety Warnings 1. SAFETY INSTRUCTIONS WARNING: Service life of the product extends and frequently faced problems decrease if cleaned at regular intervals. 1.1 General Safety Warnings Icon Type Meaning WARNING: Icon... -
Page 22: Cleaning The Sensors
1. SAFETY INSTRUCTIONS MAINTENANCE & CLEANING 1.1 General Safety Warnings Cleaning the Sensors 1. SAFETY INSTRUCTIONS There are dampness sensors in the machine that detect whether the laundry is dry or not. 1.1 General Safety Warnings 1. SAFETY INSTRUCTIONS 1. SAFETY INSTRUCTIONS To clean the sensors: 1. -
Page 23: For The Condenser
MAINTENANCE & CLEANING For the Condenser Clean the condenser after every 30 drying cycles or once a month. To clean the condenser: 1. If a drying process has been carried out, open the door of the machine and wait until it cools down. 2. -
Page 24: Trouble Shooting
TROUBLE SHOOTING Problem Possible Cause a) Fibre filter pores might be clogged. a) Wash the filter with warm water. b) Filter drawer might be clogged. b) Clean the sponge and filter cloth (if any) in the filter drawer (for products with heat pump. c) The condenser might be blocked. - Page 25 TROUBLE SHOOTING Problem Possible Cause Program a) Loading door might not a) Ensure that the loading terminated be closed completely. door is properly closed. prematurely b) There might be a power outage. b) Press the Start / Pause for no reason button to start the program.
-
Page 26: Technical Specifications
TECHNICAL SPECIFICATIONS Packaging materials of the product are manufactured from recyclable materials in accordance with our National Environment Regulations. Do not dispose of the packaging materials together with the domestic or other wastes. Take them to the packaging material collection points designated by the local authorities. Height (Min. -
Page 27: Manufacturers Guarantee
Australia / New Zealand. b) In the case of Technika products used for purposes other than personal, domestic or household purposes (including business or commercial use), a period of 90 days from the date the product is purchased as a brand-new product from a retailer located in Australia / New Zealand. - Page 28 MANUFACTURER GUARANTEE 3. Consumer Guarantees Our goods come with guarantees that cannot be excluded under the Australian / New Zealand Consumer Law. You are entitled to a replacement or refund for a major failure and for compensation for any other reasonably foreseeable loss or damage.
- Page 29 NOTES...
- Page 30 NOTES...
- Page 31 READ THE INSTRUCTION BOOKLET BEFORE INSTALLING AND USING THE APPLIANCE. The manufacturer will not be responsible for any damage to property or to persons caused by incorrect installation or improper use of the appliance. The manufacturer is not responsible for any inaccuracies, due to printing or transcription errors, contained in this manual.
- Page 32 technika.com.au...