Advertisement
Quick Links
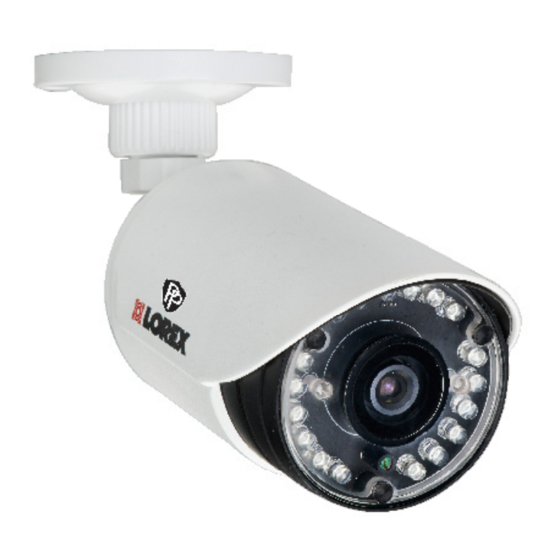
960H WEATHERPROOF NIGHT VISION SECURITY CAMERA
960H CAMÉRA DE VISION NOCTURNE DE SÉCURITÉ À L'ÉPREUVE DES INTEMPÉRIES
960H CÁMARA DE SEGURIDAD A PRUEBA DE AGUA, DE VISIÓN NOCTURNA
Quick Start Guide
Version / Version / Versión 1.0
Guide de démarrage rapide
Guía de inicio rápido
CVC7723 SERIES / SÉRIE / SERIE
ENGLISH
Contents
• IR Night Vision Camera*
• Mounting Kit / Allen Key*
• 60ft BNC / Power Extension Cable*
• Power Adapter**
*Model CVC7723PK4 is a 4-pack that includes four of the listed items.
** A "4-in-1" Power Adapter that provides power to four cameras or individual power adapters
may be provided, depending on product configuration.
Warning/Caution
• Read this guide carefully and keep it for future reference.
• Follow all instructions for safe use of the product and handle with
care.
• Use the cameras within given temperature, humidity and voltage levels
noted in 'Camera Specifications'.
• Do not disassemble the cameras.
• Do not point the cameras directly towards the sun or a source of
intense light.
• Use only the supplied regulated power supply. Use of a non-regulated,
non-conforming power supply can damage this product and voids the
warranty.
• Periodic cleaning may be required. Use a damp cloth only. Do not use
harsh cleaners or aerosol cleaners.
• The supplied extension cable is rated for surface mounting only.
• Cables for in-wall / floor-to-floor installations are sold separately.
WARNING
- A REGULATED UL / CSA APPROVED power supply is REQUIRED for use
with this camera. Use of a non-regulated, non-conforming power supply can damage this
product and voids the warranty.
Setup Diagram
Camera
Power Adapter
Power
Power
DVR
Extension Cable
BNC
Video Input
Schéma d'interconnexion
Adaptateur
Caméra
d' alimentation
Alimentation
Alimentation
DVR
Rallonge
BNC
Entrée vidéo
Diagrama de configuración
Cámara
Adaptador de
energía
Energía
Energía
Cable de
DVR
extensión
BNC
Entrada de video
Installing the Cameras
ATTENTION
- Test each camera prior to selecting a permanent mounting location by
temporarily connecting the camera(s) and cables to the DVR.
Before installing the cameras:
• Decide whether to run the cables through the wall / ceiling
(drilling required) or along the wall / ceiling.
• If you run the cables along the wall / ceiling, you must run the
cable through the cable notch on the base. This will keep the
camera base flush to the surface when mounted.
To install the cameras:
Cable Notch
1. Set the camera in the desired mounting position and mark holes for
screws through the camera base.
2. Drill the holes, then feed the cable through the
mounting surface or cable notch and mount
the camera stand to the surface using the
provided screws. Make sure all screws are
fastened tightly.
3. Set the position and angle of the camera.
A
B
C
A) Turn the adjustment ring
B) Loosen lower screw with the
C) Loosen upper screw with the
to tighten / loosen the stand
Allen key to adjust the camera's
Allen key to rotate the camera
connection. Adjust the camera's
vertical position.
housing.
horizontal position.
4. Remove the protective film from the camera lens.
ATTENTION
- This camera includes an Auto Mechanical IR Cut Filter. When the camera
changes between Day/Night viewing modes, an audible clicking noise may be heard
from the camera. This clicking is normal, and indicates that the camera filter is working.
Dimensions / Dimensions / Dimensiones
70mm / 2.8"
67mm /
2.6"
225mm / 8.9"
Connecting the Cameras
To Camera:
To DVR:
Male Power
Female Power
BNC
1. Connect the BNC and power
2. Connect the BNC connector to the video
connectors to the camera.
input of your DVR.
3. Connect the power connectors to the
4-in-1 power adapter.
OR
Connect each camera to an individual
power adapter.
Installation Tips
• Point the cameras where there is the least amount of obstructions (i.e.
tree branches).
• Install the cameras where they are difficult for vandals to reach.
• Secure cabling so that it is not exposed or easily cut.
• Cameras rated for outdoor use. Installation in a sheltered location
recommended.
www.lorextechnology.com
Copyright © 2014 Lorex Corporation
As our products are subject to continuous improvement, Lorex Corporation reserves the right to modify product
design, specifications and prices, without notice and without incurring any obligation. E&OE
Copyright © 2014 Lorex Corporation
Nos produits étant sans cesse améliorés, Lorex Corporation se réserve le droit de modifier la conception du produit,
les spécifications et les prix sans préavis et sans aucune obligation. E&OE
Copyright © 2014 Lorex Corporation
Ya que nuestros productos están sujetos a mejoras continuas, Lorex Corporation se reserva el derecho de modificar
el diseño de la imagen, las especificaciones y los precios sin aviso y sin incurrir en ninguna obligación. E&OE
Camera Specifications
Image Sensor
1/4" 1.3 MP CMOS
Video Format
NTSC
Effective Pixels
H: 1280 V: 800
Resolution
900 TVL
Scan System
2:1 Interlace
Sync System
Internal
S / N Ratio
39dB (AGC Off)
Iris
AES
AES Shutter Speed
1/60 ~ 1/25,000 Sec.
Min. Illumination
0.1 Lux without IR LED; 0 Lux with IR LED
Video Output
Composite 1.0Vpp @ 75ohm
Lens / Lens Type
2.8mm F2.0 / Fixed
FOV (Diagonal)
76°
Termination
BNC Type
IR LED Qty. / Type
30 pieces / 850nm
Night Vision Range*
130ft (40m) / 92ft (28m)
Power Requirement
12V DC ±10%
Power Consumption
Max. 380mA (w/ IR)
Operating Temp. Range
-4° ~ 122°F / -20° ~ 50°C
Operating Humidity Range
< 90% RH
Indoor/Outdoor**
Both (IP66)
Weight (including stand)
0.6lbs / 0.3kg
* Stated IR illumination range is based on ideal conditions in typical outdoor night time ambient lighting and in total
darkness. Actual range and image clarity depends on installation location, viewing area, and light reflection /
absorption level of object.
** Not intended for submersion in water. Installation in a sheltered location recommended.
Advertisement

Related Manuals for Lorex CVC7723 Series


Summary of Contents for Lorex CVC7723 Series
- Page 1 E&OE Energía Copyright © 2014 Lorex Corporation Nos produits étant sans cesse améliorés, Lorex Corporation se réserve le droit de modifier la conception du produit, Cable de les spécifications et les prix sans préavis et sans aucune obligation. E&OE extensión...
- Page 2 Installation des caméras Installation des caméras Spécifications de la caméra FRANÇAIS ATTENTION – Tester chaque caméra avant de sélectionner l'emplacement permanent de Capteur d'images 1.3 MP CMOS 1/4 po Vers la caméra : Vers le DVR : montage en connectant de façon temporaire les caméras et les câbles au DVR. Format vidéo NTSC Contenu...