Table of Contents
Advertisement
Quick Links
Advertisement
Table of Contents

Summary of Contents for Vestfrost VWM 22148 BM
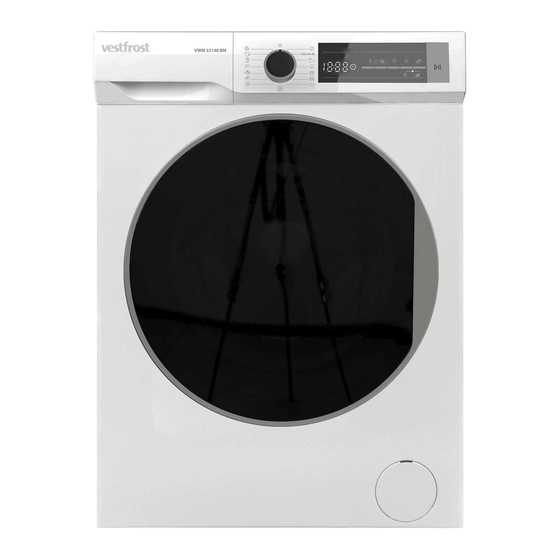
- Page 1 VWM 22148 BM...
- Page 2 Thank you for choosing this product. This User Manual contains important safety information and instructions on the operation and maintenance of your appliance. Please take the time to read this User Manual before using your appliance and keep this book for future reference. Icon Type Meaning...
-
Page 3: Table Of Contents
CONTENTS 1. SAFETY INSTRUCTIONS ....................1 1.1 General Safety Warnings ....................2 1.2 During Use ........................6 1.3 Packaging and Environment...................7 1.4 Savings Information ......................7 2. TECHNICAL SPECIFICATIONS ..................9 2.1 Technical Specifications ....................9 3. INSTALLATION .......................10 3.1 Removing the Transit Bolts...................10 3.2 Adjusting the Feet / Adjusting Adjustable Stays............10 3.3 Electrical Connection ....................10 3.4 Water Inlet Hose Connection .................. -
Page 4: Safety Instructions
1. SAFETY INSTRUCTIONS Operating voltage / frequency (220-240) V~/50Hz Total current (A) Water pressure (Mpa) Maximum 1 Mpa / Minimum 0. 1Mpa Total power (W) 2200 Maximum washing capacity (dry laundry) (kg) • Do not install your machine on a carpet or such grounds that would prevent the ventilation of its base. -
Page 5: General Safety Warnings
NOTE: For a softcopy of this user manual, please contact the following address: “washingmachine@standardtest. info”. In your e-mail, please provide the model name and serial number (20 digits) which you can find on the appliance door. Read this user manual carefully. Your machine is for domestic use only. - Page 6 • • • • • laundry. • • programme you have chosen. • EN - 3...
- Page 7 • • Make sure that the door of your Washing Machine is not restricted and can be opened fully. Install your machine in a location that can be fully ventilated and preferably has constant air circulation. Read these warnings. Follow the advice given to protect yourself and others from risks and fatal injuries.
- Page 8 • • Take necessary measures to prevent the hose • does not block the plug hole. • • • • • • hazard. • • or detergent drawer. EN - 5...
-
Page 9: During Use
people. • • • • • • • • This appliance can be used by children aged 8 years and above and persons with reduced physical, sensory or mental capabilities or lack of experience and knowledge if they have been given supervision or instruction concerning use of the appliance in a safe way and understand the EN - 6... -
Page 10: Packaging And Environment
hazards involved. Children shall not play with the appliance. Cleaning and user maintenance shall not be done by children without supervision. • • • Your warranty does not cover damage caused by sources of damage. • owner. NOTE: Replacement of drive belt, only by authorized service. - Page 11 • • the shop where you purchased the product. EN - 8...
-
Page 12: Technical Specifications
2. TECHNICAL SPECIFICATIONS voltage / (220-240) frequency V~/50Hz (V/Hz) Total current Water pressure (Mpa) Total power 2200 dry laundry 1400 Programme number General Appearance (mm) 3. Top plate 4. Detergent Drawer 5. Drum 7. Water Inlet Valve Depth 8. Power Cable EN - 9... -
Page 13: Installation
3. INSTALLATION (such as carpet) that would prevent • • adjustable feet. • If the bolts are not removed, they warranty. spanner. pull. • use. NOTE: • the scope of the warranty. • 240V, 50 EN - 10... -
Page 14: Water Inlet Hose Connection
• and red capped hose to the hot water • amps. • that connect to the water supply. • threaded tap. damage that occurs due to the use of • NOTE: and the red capped end of the hose to •... -
Page 15: Water Discharge Connection
4.1 Detergent Drawer • • hose. • bathtub. • not bent, buckled, crushed or extended. • ground. 4. CONTROL PANEL OVERVIEW 5. Detergent Drawer 3. Softener Compartment 4. Pre-Wash Detergent Compartment 5. Powder Detergent Levels 6. Powder Detergent Scoop (*) EN - 12... -
Page 16: Sections
Main wash detergent compartment: • programme. compartment: • set exactly to the programme you want. Pre-wash detergent compartment: 3. Water Temperature Adjustment Button 4. RPM Speed Adjustment Button 8. Start/Pause Button 9. Start/Pause Button Lamp speed The display panel shows “End” when the selected programme is complete. -
Page 17: Using Your Washing Machine
5. USING YOUR or bag. WASHING MACHINE Can be Normal Do not bleach bleached temperature temperature Can be dry Dry flat No dry cleaned Hang to dry Do not tumble Perchloroethylene pure alcohol R11, R13, R11, R113, Gas Petroleum • allowed together. -
Page 18: Adding Detergent To The Machine
of the detergent drawer. Do not exceed the MAX level. LAUNDRY TYPE WEIGHT (gr) • Towel • Bathrobe 1200 Underwear Tablecloth • • trapped between the rubber seal and the door. • • supply. 2. Turn on the water supply. •... -
Page 19: Additional Functions
Use the washing water temperature adjustment button to alter the automatically programmed washing water temperature. 23 hours . When you select a programme the • Press the delay key once. maximum temperature for that programme • “01h” will be displayed. will light up on is automatically selected. - Page 20 6. Pre-Wash(*) or 4 Pre-Wash or 4 You can add an additional rinse operation to This additional function allows you to give your laundry using this additional function. heavily soiled laundry a pre-wash before Your machine will carry out all rinsing steps the main washing programme takes place.
-
Page 21: Child Lock
Start/Pause button NOTE: If you put less than half load, the you may start the programme you the standby mode, the Start/Pause led on The Child Lock function allows you to lock the buttons so that the wash cycle or 4 you have chosen cannot be changed unintentionally. -
Page 22: Cancelling The Programme
To cancel a running programme at any time: cancelled. cancel the programme. 5. You can now select and run a new programme. 5.10 Programme End as the programme you have selected • • remove the laundry. • to dry. • •... -
Page 23: Programme Table
6. PROGRAMME TABLE Programme COTTON *60-90-80-70-40 4,0 kg), bedclothes, etc.) ECO 40-60 *40 - 60 4,0 kg), bedclothes, etc.) COTTON Pre- *60 - 50 - 40 - 30 - 1&2 Wash “- -C” 4,0 kg), bedclothes, etc.) COTTON 20 *20- “- -C” (Underwear, bedsheet, tablecloth, towel (max.2,0 kg) bedcloth, etc.) COLOURS... - Page 24 NOTE: PROGRAMME DURATION MAY CHANGE ACCORDING TO THE AMOUNT OF LAUNDRY, TAP WATER, AMBIENT TEMPERATURE AND SELECTED ADDITIONAL FUNCTIONS. (*** programme may last longer than 15 EN - 21...
- Page 25 • The most efficient programmes in terms of energy consumption are generally those that perform at lower temperatures and longer duration. • Loading the household washing machine up to the capacity indicated by the manufacturer for the respective programmes will contribute to energy and water savings.
-
Page 26: Important Informations
• Use detergents, softeners and other additives suitable for automatic washing machines only. Excessive foam has occurred and automatic foam absorption system has been activated due to too much detergent usage. • We recommend that periodic cleaning for washing machine every 2 months. For periodic cleaning please use Drum Clean programme. -
Page 27: Cleaning And Maintenance
7. CLEANING AND MAINTENANCE 2 months. supply off and remove the plug from the socket • • Turn off the water • • CAUTION: Do not cleaners, glass cleaners CAUTION: agents to clean your breakdowns are out of the scope of the warranty. -
Page 28: Warning
WARNING: 7.4 Detergent Drawer the drawer every 2 months to clean the To remove the detergent drawer: • extended. We recommend that you clean the pump the pump cover. 2. Lodge the end of the powder spade • Press the region shown below inside the detergent drawer you have pulled all the way back, and continue pulling and remove the detergent drawer from... -
Page 29: Body / Drum
8. Body / Drum any softener residue. Refit the flush stopper after cleaning and check that it is seated properly. 1. Body or soap and water, to clean the external 2. Drum • Rinse with a brush and lots of water. •... -
Page 30: Troubleshooting
9. TROUBLESHOOTING below, then you should: • • Turn off the water supply. FAULT POSSIBLE CAUSE TROUBLESHOOTING Fuses are faulty. Replace the fuses. Start/Pause button not pressed. Press the Start/Pause button. completely closed. Turn tap on. completely closed. The feet have not been adjusted. Adjust the feet. -
Page 31: Automatic Fault Warnings And What To Do
FAULT POSSIBLE CAUSE TROUBLESHOOTING Hard water. result. (**) ..... . part of the drum. Laundry has detergents may appear on your Grey spots appear on the laundry. - Page 32 The minimum period which must supply the spare parts for the household washing machine is 10 years. REPAIRER CONTACT DETAIL: www.eico.dk SUPPLIER WEBSITE : www.eico.eu Eico A/S Østergade 118 DK-9700 Brønderslev Denmark SUPPLIER DUR OF GUARANTEE : Denmark: 2 years Norway: 5 years Sweden: 3 years Finland: 2 years...