LG Kyocera Cricket Hydro View - Smartphone Quick Start Guide
- User manual (158 pages) ,
- Quick start manual (44 pages) ,
- Get started (30 pages)
Advertisement
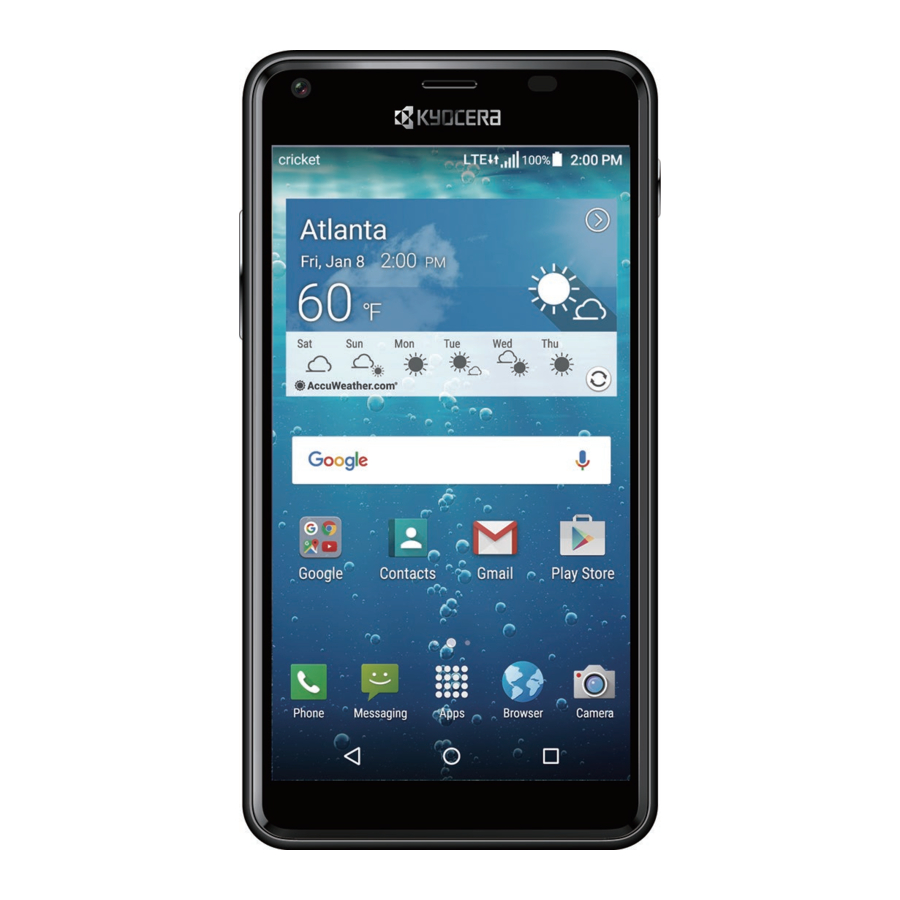
Getting to know your Hydro VIEW

Phone setup
Installing a nano SIM card and microSDTM card

- Remove the back cover by inserting your fingernail in the slit on the bottom of your phone and pulling away from the phone.
- Slide the flap of the SIM card holder in the direction of the arrow to unlock it (1) and lift the flap (2).

Putting undue pressure on the flap of the SIM card holder may damage it.

- Insert the nano SIM card into the flap of the SIM card holder, making sure the cut-off corner is at the top right and the card is inserted behind the SIM guide tabs (3).
- Lower the flap of the SIM card holder (4) and slide the flap in the direction of the arrow to lock it (5). Bottom of SIM card should rest against stopper (6).
- Insert the microSD card (optional) into the microSD card holder with the gold contacts facing down.
- Replace the back cover and charge your phone.
Touch screen
Navigating your phone

- To unlock the screen, press the power key on the side of the phone and swipe the screen up.
- Use your fingertip to lightly touch the screen.
- Use quick flicks of your finger on the touchscreen to swipe up, down, left, and right.
- To return to the previous screen, tap the Back key
![]()
- Tap the Home key
![]() at any time to return to the main home screen.
at any time to return to the main home screen. - Tap the Overview key
![]() to access recently viewed apps.
to access recently viewed apps. - Tap Apps
![]() to access applications on your phone.
to access applications on your phone.

 at any time to return to the main home screen.
 to access recently viewed apps.
Notifications panel

Access alerts, including new messages, emails and software updates.
- Swipe down from the top of the home screen to access the Notifications panel.
- Clear individual notifications by swiping left or right on the alert, or tap
![]() CLEAR ALL to remove all notifications.
CLEAR ALL to remove all notifications.
 CLEAR ALL to remove all notifications.
Personalize
Set wallpaper

- To change your home screen wallpaper, press and hold a blank part of the home screen.
- Tap WALLPAPERS
![]() and follow on-screen instructions.
and follow on-screen instructions.
 and follow on-screen instructions.
Add to home screen
- Press and hold a blank part of the home screen and tap WIDGETS
![]() or APPS
or APPS ![]() .
. - To move an icon, press and hold it and drag it to a new location. To delete it, drag it to REMOVE.
 or APPS
  .
.Organize folders

- To create a folder, press and hold an icon and drag it on top of another icon.
- To rename a folder, tap it, tap the folder name, and tap the Folder name field to bring up the keyboard.
Create new home screens
Press and hold a blank part of the home screen. From the thumbnail view, tap the thumbnail with a plus sign (+) on it.
Calls and voicemail
Make a call

- From the home screen, tap Phone
![]()
- Select an option to place a call:
- DIALPAD
![]() : Manually enter telephone number.
: Manually enter telephone number. - RECENT CALLS
![]() : Retry or return recent calls.
: Retry or return recent calls. - FAVORITES
![]() : Call or edit a favorite contact.
: Call or edit a favorite contact.
 : Manually enter telephone number.
 : Call or edit a favorite contact.
Check voicemail

- From the Home screen, tap Phone
![]() , then tap DIALPAD
, then tap DIALPAD ![]() .
. - Touch and hold 1 key
![]() .
.
 .
.Use call waiting
Call waiting helps you answer or hold a call while you are on an existing call.
- On the Incoming call screen, swipe
![]() .
. - Tap Merge calls
![]() to merge calls or tap Swap calls
to merge calls or tap Swap calls ![]() to switch between active calls.
to switch between active calls.
 .
. to switch between active calls.
Text and picture messaging
Send a text message

- From the home screen, tap Messaging
![]() .
. - Tap
![]() to start a new text message.
to start a new text message. - In the To field, enter a number or a contact name or tap Contacts
![]() to access your contacts.
to access your contacts. - Tap the Type message field and enter your message.
- Tap Send
![]() to send the message.
to send the message.
 .
. to start a new text message.
 to access your contacts.
 to send the message.
Send a picture message

- Follow steps 1-4 above.
- Tap the Paperclip .
- Tap Pictures
![]() and select desired picture.
and select desired picture. - Tap Send
![]() to send the message.
to send the message.
 and select desired picture.
Email setup

- From the Home screen, tap Apps
![]() , then tap Email
, then tap Email ![]() .
. - Select an email provider.
- Enter the email address and password and then tap
![]() .
.
 .
.- To set up your account manually, tap MANUAL SETUP.
- Enter any other necessary information and follow the onscreen instructions.
Note: To set up your corporate email, contact your IT administrator.
Create and send an email message

- From the home screen, tap Apps
![]() , and then tap Email
, and then tap Email ![]() .
. - To compose a new message, tap
![]() .
. - Tap To field and enter email address or name or tap Contacts
![]() to access your contacts.
to access your contacts. - Enter a subject and email message.
- To attach files to the email message, tap Attach
![]() and then follow the on-screen instructions.
and then follow the on-screen instructions. - Tap Send
![]() to send message.
to send message.
 .
. to send message.
Cricket Services
These services make using Cricket even better and easier!

My Cricket: Access billing, make a quick payment, view usage and access support from the palm of your hand.

Cricket Wi-Fi: Automatically connect to free and open Wi-Fi® hotspots, helping you to maximize data usage and enhance coverage.

Cricket Voicemail: Quickly view, access and play back your voicemail messages, easily save important numbers to your Favorites lists and respond to messages by calling back or texting.

Deezer: Listen on-the-go with ad-free streaming music, download your favorites to your phone, and get customized playlists based on your preferences.
Apps on Google Play™
Access Google Play

- From the home screen, tap Play Store
![]() .
. - Use your existing Google account or create one following the steps on the screen.
 .
.Navigate Google Play

From Play Store, you will have multiple ways to search for apps, games and more.
- Tap a category to browse popular apps, games, movies and music organized by popularity or category.
- Tap Search
![]() to search the Play Store for a specific game or app.
to search the Play Store for a specific game or app. - To install, tap the app and follow instructions. Once installed, you will see a notification in the Notifications panel. Open the app from this notification or by locating the app in the Apps
![]() .
.
Note: You will need to set up a payment method, such as credit or debit card or PayPal account, to purchase apps.
Camera and video
Take a picture

- From the home screen, tap Camera
![]() .
. - Zoom in and out by pinching with your fingers or by using the Volume key.
- Tap
![]() to take a photo.
to take a photo.
 to take a photo.
View pictures
- From the home screen, tap Apps
![]() .
. - Tap Gallery
![]() .
.
 .
.Take a video

- From the home screen, tap Camera .
- Tap
![]() to start and tap
to start and tap ![]() to stop recording video.
to stop recording video.
 to start and tap
 Send a picture
- After taking a picture, tap the thumbnail in the corner of the screen and then tap Share
![]() .
. - Scroll through options to send via text messaging or email, Bluetooth, and more.
 .
.More information
On the Web
Detailed support information, including device specifications and the full user manual, is available at: www.cricketwireless.com/support/devices.
On the phone
- Call Customer Care at 1-855-246-2461 or
- Dial 611 from your phone.
Accessories
For more information concerning accessories, please visit your local Cricket store location or go to www.cricketwireless.com/shop/accessories.
Note: Store and online inventories may vary.
Product meets FCC Radio Frequency Exposure Guidelines—FCC ID V65C6742. This device complies with Part 15 of the FCC Rules. Operation is subject to the following two conditions:
- this device may not cause harmful interference, and
- this device must accept any interference received, including interference that may cause undesired operation.
Copyright © 2016 Kyocera Corporation. All rights reserved. KYOCERA is a registered trademark of Kyocera Corporation. All other trademarks are the property of their respective owners. Screen images simulated. All features, functionality, and other product specifications are subject to change without notice. Screen shots are simulated and subject to change.
© 2016 Cricket Wireless LLC. All rights reserved. Cricket and the Cricket logo are registered trademarks under license to Cricket Wireless LLC.
5KKTI72KFNRX-
Printed in Mexico

Documents / Resources
References
Download manual
Here you can download full pdf version of manual, it may contain additional safety instructions, warranty information, FCC rules, etc.
Download LG Kyocera Cricket Hydro View - Smartphone Quick Start Guide
Advertisement
Thank you! Your question has been received!


Need Assistance?
Do you have a question about the Hydro View that isn't answered in the manual? Leave your question here.