Table of Contents
Advertisement
Advertisement
Table of Contents

Related Manuals for Logitech Harmony 720


Summary of Contents for Logitech Harmony 720
-
Page 1: Harmony Remote
720 Harmony Remote User Manual, version 1.1... -
Page 2: Table Of Contents
Adding Custom-Labeled Buttons...9 CHANGING THE SETTINGS FOR YOUR HARMONY REMOTE...10 LEARNING INFRARED (IR) COMMANDS...10 Using the Infrared Sensor...10 Naming an Infrared Command...11 GETTING ADDITIONAL HELP...12 Finding Answers to Your Questions...12 Troubleshooting Your Harmony Remote...12 Version 1.1 Harmony 720 Page i... -
Page 3: Introduction
If in doubt about how to set up your Harmony remote, follow the information and instructions using the Logitech Harmony remote software (also referred to as Harmony remote software). The Harmony remote is an Internet-powered universal remote control. Your Harmony remote can control most devices that understand infrared (IR) signals. -
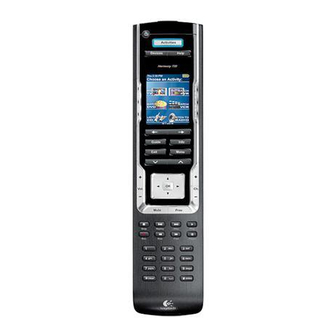
Page 4: Getting To Know Your Harmony Remote
N. INFO: Gives you additional information on program listings, if you have a device with the Guide feature. O. Infrared Learning Port: The Harmony remote uses this port to learn commands from your original remote. Harmony 720 Page 2... -
Page 5: User Manual Harmony
Harmony 720 Beginning the Setup Process Once you have installed the Logitech Harmony remote software, connect your remote and you will be guided through a series of question-and-answer steps to complete the online setup process: Login Information: Create your login information. -
Page 6: Using Your Harmony Remote
As a default, when you select an Activity, you will see a message on the remote’s display reminding you to keep the remote pointed at your entertainment system while the Activity starts. This helps ensure that all infrared (IR) signals are properly sent. Use the Harmony Remote Software to turn on/off the “Starting Activity” message. Version 1.1 Harmony 720 Page 4... -
Page 7: Viewing The Status And Navigation Bars
• D: Battery indicator (battery’s power) • E: Activity you are in (if applicable) The navigation bar displays information such as: • F: The number of screens available in a menu, and the screen currently displayed Harmony 720 Page 5... -
Page 8: Types Of Help Available
Device mode during normal use of your Harmony remote. This mode should only be used to send a specific command to a specific device. You can eliminate the use of device mode by customizing your Activities. Version 1.1 Harmony 720 Page 6... -
Page 9: Using The Smart Buttons
• Set the time and date. • Turn the slide show on/off. • Temporarily turn the Remote Assistant on/off (available only if you selected the option under Remote Preferences on home in the Harmony software—see Using the Remote Assistant.) Version 1.1 Harmony 720 Page 7... -
Page 10: Customizing Your Harmony Remote
Customizing Your Harmony Remote All customization of your Harmony remote is done from the Harmony remote software: Use the Harmony remote software to: Troubleshoot • Click Troubleshoot when your Harmony remote isn’t controlling your system correctly. view Activities • Click Activities to add or delete Activities. •... -
Page 11: Adding Your Favorite Channel Icons
Use the Harmony Remote Software to: • Add custom-labeled buttons to a device. • Add a custom-labeled button for an Activity. Custom-labeled buttons are displayed on the Harmony remote’s display from left to right, top to bottom. Version 1.1 Harmony 720 Page 9... -
Page 12: Changing The Settings For Your Harmony Remote
• B: Your Harmony remote • C: Distance between remotes: 5-10 cm (2”-5”) apart The following steps outline what happens when you press a button on your original remote control: 1. The infrared sensor on the Harmony remote learns the infrared signal. -
Page 13: Naming An Infrared Command
• For infrared commands that select inputs (e.g. on a stereo receiver), start with the prefix “Input”. Do not name the input based on what you have connected to your device, rather name it based on what it is called on the front of the device, or on the remote control (e.g. InputAux, InputVideo1, InputTape, InputDVD, Input VCR). -
Page 14: Getting Additional Help
Asks you simple questions so the Harmony remote can automatically fix problems you are having with an Activity. Description To be used when the Harmony remote is not controlling your system correctly. Harmony 720 Page 12...