Table of Contents
Advertisement
Quick Links
Advertisement
Table of Contents

Related Manuals for AEG NSC7G751ES


Summary of Contents for AEG NSC7G751ES
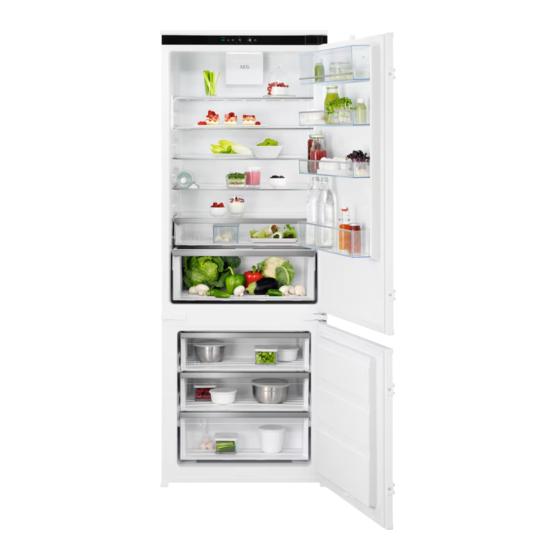
- Page 1 NSC7G751ES User Manual Fridge Freezer USER MANUAL...
-
Page 2: Table Of Contents
12. ENVIRONMENTAL CONCERNS..............26 FOR PERFECT RESULTS Thank you for choosing this AEG product. We have created it to give you impeccable performance for many years, with innovative technologies that help make life simpler – features you might not find on ordinary appliances. Please spend a few minutes reading to get the very best from it. - Page 3 ENGLISH of incorrect installation or usage. Always keep the instructions in a safe and accessible location for future reference. 1.1 Children and vulnerable people safety This appliance can be used by children aged from 8 • years and above and persons with reduced physical, sensory or mental capabilities or lack of experience and knowledge if they have been given supervision or instruction concerning the use of the appliance in a...
-
Page 4: Safety Instructions
– with food and accessible drainage systems; store raw meat and fish in suitable containers in the – refrigerator, so that it is not in contact with or drip onto other food. - Page 5 ENGLISH • At first installation or after reversing • The mains cable must stay below the the door wait at least 4 hours before level of the mains plug. connecting the appliance to the power • Connect the mains plug to the mains supply.
-
Page 6: Installation
• Wrap the food in any food contact • Please note that self-repair or non- material before putting it in the freezer professional repair can have safety compartment. consequences and might void the guarantee. 2.4 Internal lighting • The following spare parts will be... - Page 7 ENGLISH WARNING! WARNING! Refer to installation Fix the appliance in instruction document to accordance with installation install your appliance. instruction document to avoid a risk of instability of the appliance. 3.1 Dimensions Overall dimensions ¹ Space required in use ² 1884 1894 ¹...
- Page 8 3.3 Electrical Connection Overall space required in use ³ CAUTION! Any electrical work required H3 (A+B) 1923 to install this appliance should be carried out by a qualified electrician or 1229 competent person. ³ the height, width and depth of the...
-
Page 9: Control Panel
ENGLISH 4. Check that no cut, or stray strands of CAUTION! wire is present and the cord clamp Refer to the installation (E) is secure over the outer sheath. instructions for the Make sure the electricity supply installation. voltage is the same as that indicated on the appliance rating plate. - Page 10 The set temperature will be ECOMETER indicator reached within 24 hours. Extra Cool button / indicator After a power failure, the appliance goes back to the Fridge compartment indicator set temperature. Alarm indicator Door open alarm indicator 4.4 Switching off the fridge...
- Page 11 ENGLISH 4.7 Extra Cool function This device activates automatically when needed or manually. With the Extra Cool function, you may To switch on the function, press the Fan rapidly cool large amounts of warm food, button. The Fan indicator lights up. for example after doing grocery shopping, without warming food already To switch off the function, press again...
- Page 12 The alarm stops after closing the door. Press any button to switch off the sound Display Default parame‐ and flashing of the internal fridge light. ters If you do not press any Temperature units button, the sound switches off automatically after...
-
Page 13: Daily Use
ENGLISH the unit to select between The display shows Celsius and for Fahrenheit. 2. Tap repeatedly until you see 3. Press and hold the ECO button for . Tap repeatedly until you approximately 3 seconds to exit the Setting mode. turns into blinking and then Factory settings... - Page 14 2. Place the rear part of the drawer on the rails. 3. Pull the drawer out while lifting it up and detach it from the rails. To reassemble: 3. Keep the front of the drawer lifted up 1. Pull out the rails completely.
- Page 15 ENGLISH 1. Unlock lateral gripping from both sides simultaneously. 5.6 Removing ExtraZone It is recommended to empty the drawer before removing it from the fridge. To remove the drawer: 1. Pull out the drawer from the fridge extending the rails fully. 2.
- Page 16 1. Pull out the rails completely. 1. Unlock lateral gripping from both sides simultaneously. 2. Place the rear part of the drawer on the rails. 2. Pull the glass shelf support towards yourself. 3. Keep the front of the drawer lifted up while pushing the drawer in.
- Page 17 ENGLISH sealing and can be used to manage the humidity inside the drawer. Do not place any food products on the humidity control device. The position of the humidity control depends on the type and quantities of fruit and vegetables: •...
- Page 18 5.9 Bottle Stop plate (a label located inside the appliance). The accessory prevents bottles or cans When the freezing process is complete, from rolling. You may stack the bottles in the appliance automatically returns to the a pyramid to save shelf space and better previous temperature setting (see "Extra...
-
Page 19: Hints And Tips
ENGLISH 1. Fill these trays with water. Do not use metallic 2. Put the ice trays in the freezer instruments to remove the compartment. trays from the freezer. 6. HINTS AND TIPS 6.1 Hints for energy saving • It is recommended to put labels and dates on all your frozen food. - Page 20 • For adequate storage refer to food in the optimal conditions and packaging label to see the shelf life of defrosting may have already started. food. • To limit the defrosting process buy • It is important to wrap the food in such...
-
Page 21: Care And Cleaning
ENGLISH • Cover the food with packaging to shelf above the vegetable drawer. preserve its freshness and aroma. Store meat for at most 1-2 days. • Always use closed containers for • Fruit and vegetables: clean thoroughly liquids and for food, to avoid flavours (eliminate the soil) and place in a or odours in the compartment. -
Page 22: Troubleshooting
For this purpose use the tube cleaner 7.5 Period of non-operation provided with the appliance. - Page 23 ENGLISH Problem Possible cause Solution The compressor operates Temperature is set incorrect‐ Refer to "Control panel" continually. chapter. Many food products were Wait a few hours and then put in at the same time. check the temperature again. The room temperature is too Refer to "Installation"...
- Page 24 Problem Possible cause Solution Appliance is fully loaded and Set a higher temperature. is set to the lowest tempera‐ Refer to "Control panel" ture. chapter. Temperature set in the appli‐ Set a higher temperature. ance is too low and the am‐...
- Page 25 ENGLISH Problem Possible cause Solution Many food products are stor‐ Store less food products at ed at the same time. the same time. The door has been opened Open the door only if neces‐ often. sary. The Extra Freeze function is Refer to "Extra Freeze func‐...
-
Page 26: Noises
9. NOISES SSSRRR! BRRR! CLICK! HISSS! BLUBB! 10. TECHNICAL DATA The technical information is situated in web link to the information related to the the rating plate on the internal side of the performance of the appliance. Keep the appliance and on the energy label. - Page 28 www.aeg.com/shop...