
Related Manuals for Linksys EFG80


Summary of Contents for Linksys EFG80
-
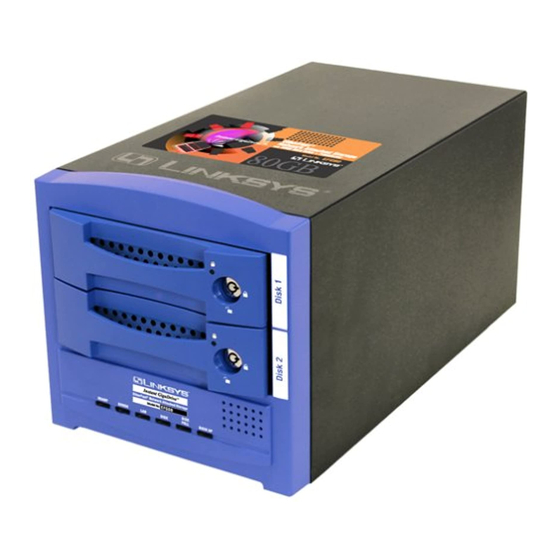
Page 1: Attached Storage
Instant GigaDrive Series EtherFast ® Network Attached Storage 80 GB Hard Drive + PrintServer with Use this guide to install: EFG80 User Guide... - Page 2 Linksys reserves the right to revise or update its products, software, or documentation without obligation to notify any individ- ual or entity.
-
Page 3: Table Of Contents
Appendix F: Contact and Returns Information Linksys highly recommends that you regularly back up the files that are on the Instant GigaDrive™ . Linksys is not responsible for any data loss, nor will Linksys perform any recovery on lost data or files. -
Page 4: Chapter 1: Introduction
Figure 1-1 Important: Linksys highly recommends that you regularly back up the files that are on the Instant GigaDrive™ . Linksys is not responsible for any data loss, nor will Linksys perform any recov- ery on lost data or files. -
Page 5: Chapter 2: Getting To Know The Instant Gigadrive E
Chapter 2: Getting to Know the Instant GigaDrive™ The Instant GigaDrive’s Rear Panel All of the Instant GigaDrive’s con- nectors and switch- es are on the rear panel, as shown in Figure 2-1. Figure 2-1 Power Switch The Power switch is a spring-loaded soft switch that powers the Instant GigaDrive™... -
Page 6: Beeper Codes
Figure 2-2 Green. This LED flashes when data is transmitted or received via the network. Disk Green. This LED flashes when the Instant GigaDrive’s hard drive is being accessed. It stays on during the self-test. Disk Full Green. This LED lights up when the Instant Gigadrive™ has reached its maximum storage capacity. -
Page 7: Chapter 3: Installing The Instant Gigadrive E
Chapter 3: Installing the Instant GigaDrive™ Overview This chapter instructs you on how to physically connect the Instant GigaDrive™ to your network. This chapter also covers the hook-up of a print- er to the Instant GigaDrive’s print server port. (The Instant GigaDrive™ will perform equally well as a storage device with or without an attached printer.) If you aren’t interested in taking advantage of the Instant GigaDrive’s print server function, skip any steps that deal with printer installation. -
Page 8: Chapter 4: Using The Instant Gigadrive's Setup Wizard
The first button is the Setup button. Click this button to continue with the setup procedure. The second button is the User Guide button. The third button, Linksys Web, connects you to the Linksys web site if you have an active Internet connection. Lastly, clicking the Exit button will exit the Setup Wizard. - Page 9 When an Instant GigaDrive™ has been found by the Setup Wizard, you can create a shortcut on your desk- top for quicker access to that Instant GigaDrive™. The shortcut appears as shown in Figure 4-3. From the screen shown in Figure 4-2, once you have found the Instant GigaDrive™...
- Page 10 Figure 4-6 IP Address. Set the Instant GigaDrive’s IP Address here, making sure that it is on the same LAN segment as the PC running the Setup Wizard. Subnet Mask. The Subnet Mask must match the other devices on your network.
- Page 11 Local Time. Set your current time here. Time Zone. Select your local time zone from the drop-down menu here. Local Date. Set your current date here. Click the Next button on the right to proceed or the Back button to return to the previous screen.
-
Page 12: Chapter 5: Using The Instant Gigadrive's Web-Based Utility
Figure 5-2. From this page, you can set a password, administer the Instant GigaDrive™, view this user guide, and even go to the Linksys web site. Click the disk’s links to access their contents. If you click the link to User Log in, you will be required to enter your User Name and Password. -
Page 13: User Password Tab
User Password Tab Figure 5-5 From the User Password tab, shown in Figure 5-5, any user can change their password for interacting with the Instant GigaDrive’s web-based utility. To do this, enter your User Name in the User Name field. This should be the same as your network logon. -
Page 14: Administration Tab - System
From the LAN screen, you will be able to configure some of the settings you saved from the Setup Wizard. While these changes are being made, you can click the Save button to save these changes, Cancel to clear all changes, or Help to get further information about anything on this screen. - Page 15 IDENTIFICATION GigaDrive Name The GigaDrive Name is how the GigaDrive is represent- ed on your network. When you look at the devices on your network, you will see the GigaDrive listed under this name. Comment The Comment field is optional, but it is a good place to list additional information about the GigaDrive, such as its location on the network, what department it belongs to in your organization, its default IP Address, etc.
-
Page 16: Administration Tab - Users
Administration Tab - Users Figure 5-9 The Users screen, shown in Figure 5-9, allows you to manage the users that are on the Instant GigaDrive™. Users can be members of many user groups. Existing Users The user list shows all existing users. The details of the selected user are displayed in the "Properties"... -
Page 17: Administration Tab - Status Information
Setup menu ALWAYS performs these functions. Check the Enable Disk Quota of box if you want to set the disk usage limit for the user. Enter the maximum amount of disk space the user is allowed to use. Click the Clear Form button to clear the form for the entry of a new user. - Page 18 • Click the Shutdown Now button to shut down the server immediately. This will break all existing connections, including this one. Clicking this button does NOT save any data you have entered. • Click the Restart Now button to restart (reboot) the server. This will break all existing connections, including this one.
-
Page 19: Administration Tab - Group
Administration Tab - Group Figure 5-13 The Groups Information screen (Figure 5-13) allows you to manage the User Groups that exist on the Instant GigaDrive™. New Group Use this area to create a new group. Enter the desired name for the new Group in the Name field, then click the Create button. -
Page 20: Administration Tab - Backup
Administration Tab - Backup Figure 5-15 As shown in Figure 5-15, the Backup Settings screen allows you to back up the Instant Gigadrive’s configuration file to your PC. You can also back up data from one disk to another. Data Backup This is used to back up data from one disk to another. -
Page 21: Administration Tab - Upgrade
Format Disk If you have installed a new hard drive in the Instant GigaDrive’s expansion slot, you will need to format the hard drive with the new format utility. Click the Format Disk but- ton to format the appropriate hard drive. Self-Test This test tells you the condition of the hard drive. -
Page 22: Appendix A: Troubleshooting
(checked), check it. • Make sure that the TCP/IP -> network card entry is bound to the Client for Microsoft Networks service. Select the TCP/IP entry for your network Card, click Properties, and then choose the Bindings tab. If Client for Microsoft Networks is not bound (checked), check it. -
Page 23: Appendix B: Installing A Second Hard Drive
Appendix B: Installing a Second Hard Drive Important: This GigaDrive supports IDE Ultra DMA (or UDMA) hard drives with a throughput of 33 - 66 Mbps (ATA/33, ATA/66) and a rotation speed of 5400 or 7200 rpms. When you’re ready to install a second hard drive into the GigaDrive, follow these directions: 1. - Page 24 8. Insert a screw through the tray’s left side, as shown in Figure B-6, and into your drive. To tighten it and secure the drive to the tray on the right, you will need a narrow screwdriver to fit through the hole as shown. 9.
-
Page 25: Appendix C: Setting Up The Built-In Printserver
Appendix C: Setting Up the Built-in PrintServer Important: As screens vary between operating systems, you may find that the screenshots in this section look a little different from your own operating system. When you’re ready to utilize the GigaDrive’s built-in PrintServer, follow these simple directions: 1. - Page 26 The next screen will request how the printer will be located by the GigaDrive. Select Type the Printer name, or click Next to browse for a printer. Then, in the field below, enter this location in the following for- mat: \\Lkg(last six digits of the server name located on the back of the GigaDrive)\Lkg(last six digits of the server name located on the back of the GigaDrive)_p1.
-
Page 27: Appendix D: Glossary
12. Clicking the Finish button on the previous screen will return you to the Printers folder. This folder will show all printers available on the network, as shown in Figure C-11. Your new printer should be shown here. If you wish to change any settings, right-click the printer’s icon and select Properties. - Page 28 DHCP supports static addresses for computers containing Web servers that need a permanent IP address. DNS - The domain name system (DNS) is the way that Internet domain name are located and translated into Internet Protocol (IP) addresses. A domain name is a meaningful and easy-to-remember "handle"...
- Page 29 conventions relating to the format and timing of data transmission between two computers that they must accept and use to be able to understand each other. IP Address - In the most widely installed level of the Internet Protocol (IP) today, an IP address is a 32-binary digit number that identifies each sender or receiver of information that is sent in packet across the Internet.
-
Page 30: Appendix E: Specifications
Power Certifications Operating Temp. Storage Temp. Operating Humidity Storage Humidity Network Attached Storage EFG80 IEEE 802.3, IEEE 802.3u SMB/CIFS over TCP/IP One 10/100 RJ-45 Port One DB-25 Standard Parallel Port UTP Category 5 Ethernet Network Cable or better Star Rear: 10 and 100Mbps Mode... -
Page 31: Appendix F: Contact And Returns Information
Warranty is for Repair and Replacement only. Linksys is not responsible for credit or refunds. Linksys will not be held responsible for any data or file loss recovery under any circumstances. Linksys offers cross shipments, a faster process for processing and receiving your replacement.