Advertisement
Available languages
Available languages
Quick Links
Advertisement

Summary of Contents for necnon NCD-KIDSCAM PRO
- Page 3 Ⅰ. Introducción de Uso Instalación y reemplazo de la tarjeta TF 1. Inserte la tarjeta TF (al menos C6) antes de usar. 2. Formatee la tarjeta TF en la cámara antes de usarla. 3. Presione la tarjeta TF hacia adentro para sacar la tarjeta. Instrucción de luz indicadora y carga La luz indicadora se enciende en azul cuando la cámara está...
- Page 4 Luz indicadora 0.5-2A Micro USB 5PIN Interruptor de encendido encendido Tarjeta TF (C6 y superior)
- Page 5 Instrucciones de encendido / apagado de la cámara 1.Pulse el interruptor de encendido en "ON", luego mantenga presionado el botón de encendido para encender la cámara, la luz azul encendida. 2. Mantenga presionado el botón de encendido para apagar la cámara, la luz azul apagada.
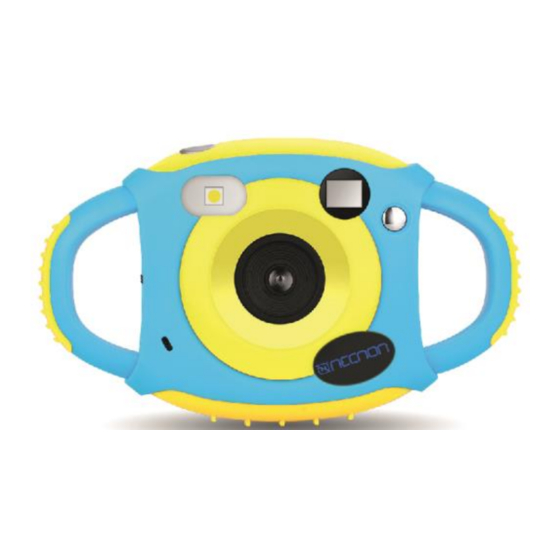
- Page 6 Ⅱ. Introducción de Función (Descripción de Menú) Buscador de vista TV-OUT Puerto Obturador Botón OK USB Puerto Indicador luminoso Interruptor de Reproducir foto / video botón Derecha botón Izquierdo Eliminar Encendido / Menú Ranura para tarjeta TF...
- Page 7 Encendido / Menú Presione el botón de menú para acceder a la configuración del menú. Presione el botón izquierdo y derecho para cambiar las selecciones entre resolución, tamaño de película, modo de captura, etc. Presione el botón OK para seleccionar. Presione el botón de encendido para regresar.
- Page 8 Interruptor de foto/vídeo Presione el botón para alternar entre foto y vídeo. El modo Foto es el predeterminado. En cualquier modo, presione el botón OK para capturar la imagen o el vídeo Modo de vídeo Mode de foto...
- Page 9 Reproducir Pulse Reproducción, luego los botones Izquierda o Derecha para revisar la foto o el vídeo. Presione el botón OK para reproducir el video. Durante la reproducción, presione el botón Eliminar para seleccionar proteger o eliminar fotos / videos. Presione el botón Izquierda / Derecha para cambiar y presione el botón OK para seleccionar.
- Page 10 Eliminar Cuando esté en Modo de foto y Modo de video, presione el botón Eliminar para dirigir la eliminación de foto / video. Presione los botones Izquierda / Derecha para elegir y presione el botón OK para seleccionar y salir.
- Page 11 Botón izquierdo / derecho (Selector de Efectos de color / de marcos) En el modo de foto, presione el botón izquierdo para seleccionar diferentes efectos de color, presione el botón derecho para seleccionar marcos de fotos. Presione el botón OK para disparar. Notas: Los efectos de color o los marcos de fotos no están disponibles en el modo de video.
- Page 12 Ajuste de fecha y hora Encuentra la configuración de fecha y hora en el menú. Presione el botón de Encendido / Menú para cambiar Fecha / Mes / Año y Horas y Minutos. Presione los botones Izquierda o Derecha para elegir la fecha y la hora, y presione el Botón OK para completar la configuración.
-
Page 13: Configuración De Idioma
Configuración de idioma Encontrar idioma en el menú. Presione el botón OK para ver los idiomas. Presione los botones Izquierda o Derecha para cambiar de idioma, presione el botón OK para seleccionar. - Page 14 Ⅲ. Parámetros técnicos...
- Page 15 Ⅰ. Usage Instructions Installation and Change of TF Card 1. Please insert TF Card (at least C6) face up to card slot before using. 2. Please format the TF Card in the camera before using. 3. Press the TF Card inward to take out the card Instruction of Indicator Light and Charging 1.
- Page 16 Indicator Light 0.5-2A Micro USB 5PIN Power Switch TF Card (C6 and above)
- Page 17 Instructions of Camera Power On/Off 1. Push the Power Switch to "ON", then long press the Power Button to turn on the camera, blue light on. 2. Long press the Power Button to turn off the camera, blue light off. 3.
- Page 18 Ⅱ. Introduction of Buttons and Functions Viewfinder TV-OUT Port Shutter/Ok Button USB Port Indicator Light Photo/Video Switch Playback Left Button Right Button Power/Menu Button Delete Button TF Card Slot...
- Page 19 Power/Menu Button Press Power Button to access to menu settings. Press Left & Right Button to shift selections between Resolution, Movie Size, Capture Mode etc. Press Shuter/OK Button to select. Press Power Button to return.
- Page 20 Photo/Video Switch Press the button to switch back and forth between photo and video. Photo mode is the default. In either mode, press Shutter/OK Button to capture the image or video. Video Mode Photo Mode...
- Page 21 Playback Press Playback, then the Left or Right buttons to review Photo or Video. Press OK Button to playback video. During playback, press Delete Button to select protecting or deleting photo/video. Press Left/Right Button to switch and press OK button to select. Press Power Button to return. Playback Mode...
- Page 22 Delete Button When in Photo Mode and Video Mode, press Delete Button could direct to deleting photo/video. Press Left or Right Buttons to choose and press Shutter/OK Button to select and exit.
- Page 23 Left Button/Right Button (Color Effects/Photo Frames Select) In Photo Mode, press Left Button to select different Color Effects, press Right Button to select Photo Frames. Press Left and Right Button to change colors and frames. Press Shutter/OK Button to shoot. Notes: Color Effects or Photo Frames are not available in Video Mode.
- Page 24 Date & Time Setting Find Date&Time Setting in Menu. Press Power/Menu Button to switch Date/Month/Year and Hours&Minutes. Press the Left or Right Buttons to choose date and time, and press OK Button to complete the setting.
-
Page 25: Language Setting
Language Setting Find Language in Menu. Press OK Button to view Languages. Press the Left or Right Buttons to switch between languages, press OK Button to select. - Page 26 Ⅲ. Technical Parameters...