
Related Manuals for Emerson Rosemount 8782


Summary of Contents for Emerson Rosemount 8782
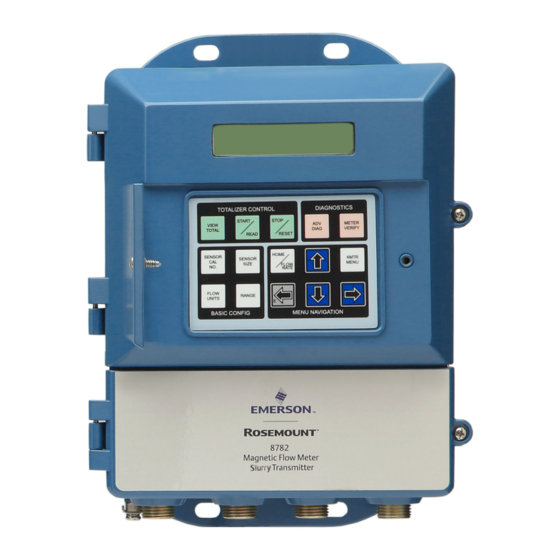
- Page 1 Quick Start Guide 00825-0100-8782, Rev AA November 2019 ™ Rosemount 8782 Slurry Magnetic Flow Meter Transmitter...
- Page 2 Quick Start Guide November 2019 Safety WARNING • Failure to follow these installation guidelines could result in serious injury or death. • Installation and servicing instructions are for use by qualified personnel only. Do not perform any servicing other than that contained in the operating instructions, unless qualified.
-
Page 3: Return Policy
For additional installation information, configuration, maintenance, and ™ troubleshooting, refer to the Rosemount 8782 Magnetic Slurry Flow Meter with HART Protocol Reference Manual All user documentation can be found at www.emerson.com. For more contact information see Emerson Flow customer service. Return policy Emerson procedures must be followed when returning equipment. -
Page 4: Emerson Flow Customer Service
Quick Start Guide November 2019 Emerson Flow customer service Email: • Worldwide: flow.support@emerson.com • Asia-Pacific: APflow.support@emerson.com Telephone: North and South America Europe and Middle East Asia Pacific United States 800 522 6277 U.K. 0870 240 Australia 800 158 727 1978... -
Page 5: Pre-Installation
November 2019 Quick Start Guide Pre-installation Before installing the transmitter, there are several pre-installation steps that should be completed to make the installation process easier: • Identify options and configurations that apply to your application • Set the hardware switches if necessary •... - Page 6 Quick Start Guide November 2019 Mechanical considerations The mounting site for the transmitter should provide enough room for secure mounting, easy access to conduit entries, full opening of the transmitter covers, and easy readability of the Local Operator Interface (LOI) screen (if equipped).
- Page 7 November 2019 Quick Start Guide Figure 3-1: Rosemount 8782 Dimensional Drawing (229) (89) (71) (79) 12.0 (306) 11.2 (283) 17.7 (449) 11.4 (289) (49) (43) (49) (40) (99) (198) A. Conduit entry, ½–14 NPT (4 places) B. Ground lug C. LOI keypad cover D.
- Page 8 Quick Start Guide November 2019 the proper power supply, conduit, and other accessories necessary to comply with these standards. The transmitter requires external power. Ensure access to a suitable power source. Table 3-2: Electrical Data Electrical data Power input AC power: 90–250 VAC ( ), 1.5A, 120 VA Standard DC power:...
-
Page 9: Pipe Mounting
November 2019 Quick Start Guide Mounting Wall mount transmitters are shipped with mounting hardware for use on a 2 inch (50 mm) pipe or flat surface. Figure 4-1: Mounting bracket A. U-bolt B. Fasteners Pipe mounting 1. Assemble the hardware and transmitter housing on the pole as shown in Figure 4-1. -
Page 10: Surface Mounting
Quick Start Guide November 2019 Surface mounting Attach the transmitter to the mounting location using customer supplied mounting screws. The installation of the transmitter shall be rated for four (4) times the weight of the transmitter or 44lbs (20kgs). ™ Rosemount 8782 Slurry Magnetic Flow Meter Transmitter... -
Page 11: Conduit Requirements
November 2019 Quick Start Guide Wiring Conduit entries and connections Transmitter conduit entries ports are ½"-14NPT as standard, M20 conduit connections will use an adapter. Conduit connections should be made in accordance with national, local, and plant electrical codes. Unused conduit entries should be sealed with the appropriate certified plugs. - Page 12 Quick Start Guide November 2019 Figure 5-1: Best practice conduit preparation A. Safety ground B. Power C. Coil D. Output E. Electrode Sensor to transmitter wiring Remote cable kits can be ordered directly using the kit numbers shown in Table 5-1 Table 5-2.
- Page 13 November 2019 Quick Start Guide Table 5-1: Component cable kits - standard temperature (-20°C to 75°C) Cable kit # Description Individual Alpha p/n cable 08732-0065-0001 (feet) Kit, component cables, Std Coil 2442C temp (includes Coil and Electrode 2413C Electrode) 08732-0065-0002 (meters) Kit, component cables, Std Coil 2442C...
- Page 14 Quick Start Guide November 2019 Figure 5-2: Individual component cables 17 18 19 A. Coil drive B. Electrode C. Twisted, stranded, insulated 14 AWG conductors D. Drain E. Overlapping foil shield F. Outer jacket G. Twisted, stranded, insulated 20 AWG conductors •...
- Page 15 November 2019 Quick Start Guide length, or failure to connect cable shields properly, may also expose the unit to electrical noise, resulting in an unstable meter reading. Figure 5-3: Cable ends A. Unshielded length B. Coil C. Electrode WARNING Shock hazard! Potential shock hazard across remote junction box terminals 1 and 2 (85V).
- Page 16 Quick Start Guide November 2019 Remote junction box terminal blocks Figure 5-4: Remote junction box views A. Sensor B. Transmitter Note Junction box appearance and configuration may vary, but terminal numbering is consistent for all junction box types. Table 5-3: Sensor/transmitter wiring Wire color Sensor terminal Transmitter terminal...
-
Page 17: Wiring Sensor To Transmitter
November 2019 Quick Start Guide Wiring sensor to transmitter Figure 5-5: Wiring using component cable Quick Start Guide... - Page 18 Quick Start Guide November 2019 Power and I/O terminal blocks Open the bottom cover of the transmitter to access the terminal block. Note To connect pulse output and/or discrete input/output, and for installations with intrinsically safe outputs, refer to the product reference manual. Figure 5-6: Terminal blocks 9 10 19 18...
- Page 19 November 2019 Quick Start Guide Table 5-4: Power and I/O terminals (continued) Terminal number AC version DC version AC L1 DC (+) Note Polarity: Internally Powered, Terminal 7 (–) Analog HART, Terminal 8 (+) Analog HART. Externally Powered, Terminal 7 (+) Analog HART, Terminal 8 (–) Analog HART Only available with ordering code AX.
-
Page 20: Powering The Transmitter
Quick Start Guide November 2019 Powering the transmitter Before connecting power to the transmitter, be sure to have the necessary electrical supplies and required power source: Wire the transmitter according to national, local, and plant electrical requirements. If installing in a hazardous location, verify that the meter has the appropriate hazardous area approval. -
Page 21: Overvoltage Category
12 VDC to 42 VDC. Note For applications with sensors greater than 14 inch (350 mm) and process temperature greater than 212 °F (100 °C), consult an Emerson Flow representative (see back page) when applying less than 18 VDC to power terminals. - Page 22 Quick Start Guide November 2019 AC power supply requirements Units powered by 90 VAC to 250 VAC have the following power requirements. Peak inrush is 7 A at 250 VAC supply, lasting approximately 1 ms. Figure 5-7: AC current requirements 1.40 1.30 1.20...
- Page 23 November 2019 Quick Start Guide DC power supply requirements Units powered by 12 VDC power supply may draw up to 8.6 A of current steady state. Peak inrush is 13 A at 12 VDC supply, lasting approximately 1 ms. Figure 5-8: DC current requirements A.
-
Page 24: Analog Output
Quick Start Guide November 2019 Analog output The analog output signal is a 4-20 mA current loop. Depending on the IS output option, the loop can be powered internally or externally via a hardware switch located on the front of the electronics stack. The switch is set to internal power when shipped from the factory. - Page 25 November 2019 Quick Start Guide Table 5-5: Terminal assignment by power source type Power source Terminal #7 Terminal #8 Internal 4–20 mA negative (–) 4–20 mA positive (+) External 4–20 mA positive (+) 4–20 mA negative (–) Figure 5-10: Analog loop load limitations 10.8 A.
-
Page 26: Basic Configuration
Quick Start Guide November 2019 Basic Configuration Once the flow meter is installed and power has been supplied, the transmitter must be configured using the LOI, if equipped, or a configuration tool, such as ProLink III Software, AMS Device Manager, or AMS Trex Device Communicator. -
Page 27: Local Operator Interface (Loi)
November 2019 Quick Start Guide Auto zero The Auto zero is recommended for optimum performance when a flow meter is initially installed, and it typically does not need to be performed again. However, if process conditions drastically change, a new Auto zero is recommended. -
Page 28: Product Certifications
Product Certifications For detailed approval certification information and installation drawings, please see the appropriate document listed below: • Document number 00825-MA00-0009: Rosemount 8782 and MS Approval Document - Class Division • Document number 00825-MA00-0010: Rosemount 8782 and MS Approval Document - IECEx and ATEX •... - Page 29 November 2019 Quick Start Guide Quick Start Guide...
- Page 30 Quick Start Guide November 2019 ™ Rosemount 8782 Slurry Magnetic Flow Meter Transmitter...
- Page 31 November 2019 Quick Start Guide Quick Start Guide...
- Page 32 © 2019 Rosemount, Inc. All rights reserved. The Emerson logo is a trademark and service mark of Emerson Electric Co. Rosemount, 8600, 8700, 8800 marks are marks of one of the Emerson Automation Solutions family of companies. All other marks are property...