Table of Contents
Advertisement
Quick Links
Cover
USER'S GUIDE
Initial Setup
Preparing a Power
Supply
Playing the Digital Piano
Playing Notes with
Different Tones
Changing Sound Reverberation and Ambiance
Using the Sound Mode
Effects (Hall Simulator/
Reverb and Surround)
Using DSP Effects
Registering a Setup
Saving and Recalling
Performance Setups
(Registration)
PX - S6000
Turning Power On or Off
Sounding Two Different
Tones at the Same Time
(Layer)
Using Chorus (Chorus,
Flanger, Short Delay)
Using the Mixer
Adjusting the Volume
Level, Stereo Pan and
Effects for Each Part
Changing the Pitch
Changing the Pitch in
Semitone Steps
(Transpose)
Using Pedals
Splitting the Keyboard
Between Two Tones
(Split)
Using Microphone Effects
Recording Performances in Real-Time
Using the MIDI Recorder
to Record Performances
Fine Tuning a Pitch
(Master Tuning)
Using Commercially
Available Headphones
Using the Metronome
Adjusting Acoustic Piano
Sound Characteristics
(Acoustic Simulator)
Recording a Performance
with the Audio Recorder
Connecting with a
Smart Device
Using the Dedicated App
EN
Advertisement
Table of Contents

Related Manuals for Casio Privia PX-S6000


Summary of Contents for Casio Privia PX-S6000
- Page 1 Cover PX - S6000 USER’S GUIDE Initial Setup Preparing a Power Turning Power On or Off Using Pedals Using Commercially Supply Available Headphones Playing the Digital Piano Playing Notes with Sounding Two Different Splitting the Keyboard Using the Metronome Different Tones Tones at the Same Time Between Two Tones (Layer)
- Page 2 • The Bluetooth word mark and logos are registered trademarks owned by Bluetooth SIG, Inc. and any use of such marks by CASIO COMPUTER CO., LTD. is under license. Other trademarks and trade names are those of their respective owners.
- Page 3 Use of unauthorized accessories creates the risk of fire, electric shock, and personal injury. • You can get information about accessories that are sold separately for this product from the CASIO catalog available from your retailer, and from the CASIO website. https://support.casio.com/global/en/emi/manual/PX-S6000/...
-
Page 4: Table Of Contents
Contents Overview and Setup EN-6 General Guide............. EN-6 Touch Operation and Notation Used in this Guide . - Page 5 Contents Sounding Two Different Tones at the Same Time (Layer) ......EN-44 Layering Two Tones ............. . EN-44 Unlayering the Keyboard.
- Page 6 Contents Using the Metronome EN-81 Starting or Stopping the Metronome ..........EN-81 Changing the Metronome Settings (Tempo, Beat, Pattern, etc.) .
- Page 7 Contents Adjusting Keyboard Sensitivity EN-127 Changing Keyboard Response to Key Velocity (Touch Response) ....EN-127 Changing Touch Response Sensitivity ..........EN-127 Adjusting the Timing of Key Press to Sound (Hammer Response) .
- Page 8 Using the Dedicated App EN-155 About the App for Smart Devices (CASIO MUSIC SPACE) ......EN-155 Connecting with External Devices...
-
Page 9: Overview And Setup
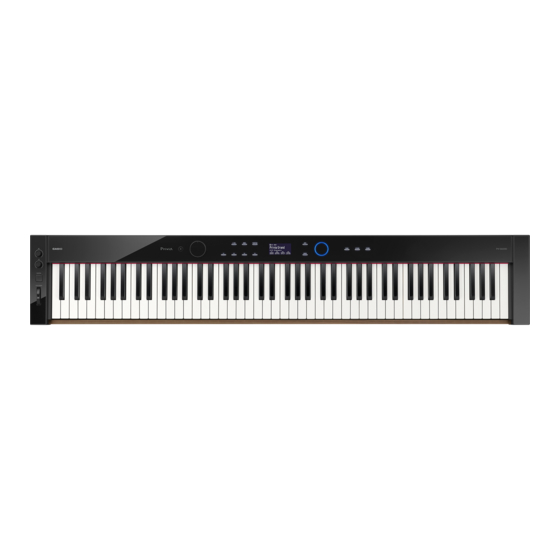
Overview and Setup General Guide ■ Front Panel bl ENTER button button (Power) bm EXIT button 2 Volume knob 3 LED (Red, White) bn Touch ring bo PIANO button 4 a button bp E. PIANO button 5 0REC button 6 FUNCTION button bq OTHERS button 7 F1 button br Display... - Page 10 Overview and Setup Touch Buttons and Touch Ring Turning on Digital Piano power causes all of the touch buttons (4 to bm, bo to bq) and the touch ring (bn) to light. The above illustration shows when all buttons are lit. During actual operation, only the buttons that are currently enabled are lit or flashing.
- Page 11 Overview and Setup ■ Display (Top Screen) The top screen is the screen that appears on the display when the Digital Piano is turned on. Part name, Tone number Indicators Tone name F Button Set name ...
-
Page 12: Touch Operation And Notation Used In This Guide
Overview and Setup Touch Operation and Notation Used in this Guide ■ Touch Ring Operation and Notation This operation is shown like this Touch and immediately release the top, bottom, left or right edge of the touch ring Touch top, bottom, left or right on the touch ring. -
Page 13: Preparing A Power Supply
Overview and Setup Preparing a Power Supply The Digital Piano can be powered by an AC adaptor or AA batteries (alkaline or rechargeable nickel- metal-hydride). Using an AC Adaptor Use only the AC adaptor (JEITA Standard, with unified polarity plug) that comes with this Digital Piano. Use of a different type of AC adaptor can cause malfunction of the Digital Piano. - Page 14 Overview and Setup ■ Disconnect Protection Precautions (1) Never pull on the cord with excessive force. (2) Never repeatedly pull on the cord. (3) Never twist the cord at the base of the plug or connector. (4) Loop and bundle the power cord, but never wind it around the AC adaptor. (5) Before moving the Digital Piano, be sure to unplug the AC adaptor from the power outlet.
-
Page 15: Using Batteries
Overview and Setup Using Batteries • Be sure to turn off power before loading batteries. • Use commercially available AA-size alkaline batteries or AA-size eneloop rechargeable batteries. • Low battery power can cause abnormal operation. If this happens, replace batteries with new ones. - Page 16 Overview and Setup ■ To load batteries Open the battery cover on the bottom of the Digital Piano. Load eight AA-size batteries into the battery compartment. • Load batteries with their positive + and negative - ends facing correctly. Insert the tabs of the battery cover into the holes along the side of the battery compartment, and close the cover.
- Page 17 Overview and Setup ■ To select the Battery Type Select the battery type that matches the battery installed in this Digital Piano’s battery case. Touch the FUNCTION button. The FUNCTION menu appears. Touch the top or bottom of the touch ring to select “SYSTEM” and then touch the ENTER button.
- Page 18 Overview and Setup ■ Low Battery and Replace Battery Notifications A battery icon appears on the display to let you know when battery power is getting low. Low Battery Indicator Low battery icon (not flashing) Replace Battery Indicator Replace battery icon (flashing) •...
-
Page 19: Turning Power On Or Off
Overview and Setup Turning Power On or Off Before turning on the power, turn the volume knob to the position shown below. Press the P (Power) button to turn on the Digital Piano. When the power is turned on, “Welcome” appears on the display. •... -
Page 20: Auto Resume
Overview and Setup Auto Resume When the Digital Piano is turned off, various settings such as tone numbers are reset. If “SYSTEM” > “Auto Resume” is set to “On” in the FUNCTION menu (page EN-33), most settings will be retained even when the power is turned off. -
Page 21: Power On Alert
Overview and Setup Power On Alert When the AC adaptor is used, the touch button will flash after six minutes of inactivity to notify the user that the power has not been turned off. The power-off notification function works when “SYSTEM” > “Power On Alert”... -
Page 22: Adjusting Display Contrast
Overview and Setup Adjusting Display Contrast To adjust the contrast of the display, use “SYSTEM” > “LCD Contrast” in the FUNCTION menu (page EN-33). Adjusting the Volume Control the master volume of the Digital Piano using the volume knob. • The mixer function (page EN-65) allows you to individually adjust the volume of the keyboard, song playback volume, and input volume from the MIC IN jack. -
Page 23: Outputting From The Speakers While Headphones Are Connected
Overview and Setup Outputting From the Speakers While Headphones are Connected If “SYSTEM” > “Speaker Out” in the FUNCTION menu (page EN-33) is set to “On”, sound will come out of the speakers even if headphones are plugged into either PHONES jack. •... -
Page 24: Using A Commercially Available Microphone
Overview and Setup Using a Commercially Available Microphone You can connect a commercially available dynamic microphone to the MIC IN jack and sound audio from the microphone with the Digital Piano. You can adjust the volume level of microphone input with the MIC VOLUME knob. Microphone volume control is independent from overall Digital Piano volume. -
Page 25: Operation Lock
Overview and Setup Operation Lock When Operation Lock is enabled (“On” or “Auto”), all button operations except the P (Power) button and the Operation Lock release operation are disabled to prevent accidental operation during a performance. Touch the FUNCTION button. The FUNCTION menu appears. -
Page 26: Options For Connecting To Smart Devices, Computers, And External Audio Devices
— — — Audio through external speakers or Equipment audio equipment (LINE OUT jacks)” (page EN-163) *1 Using the included Wireless MIDI & Audio Adaptor. *2 Use with apps other than CASIO’s dedicated app is not guaranteed to work. EN-23... -
Page 27: Using The Included Wireless Midi & Audio Adaptor
Overview and Setup Using the Included Wireless MIDI & Audio Adaptor ® To pair this Digital Piano with a Bluetooth wireless technology-capable external device, you need to plug the Wireless MIDI & Audio Adaptor into the Digital Piano’s USB Type A port. USB Type A port Wireless MIDI &... -
Page 28: Operations Common To All Modes
Operations Common to All Modes • Unless otherwise specifically noted, all of the procedures in this manual assume that the Digital Piano is in its initial power on state (immediately after you turn on power). If you run into problems with a procedure, turn Digital Piano power off and back on, and then try performing the procedure again. -
Page 29: Setting The Sensitivity Of The Touch Buttons And Touch Ring
Operations Common to All Modes • For an example of a specific operation using the touch ring, see “Basic Operation for Contents of the Display” (page EN-27). • To reset the value of the item currently selected on the screen to its initial default value, touch and hold the FUNCTION button and touch the top, bottom, left, or right of the touch ring. -
Page 30: Basic Operation For Contents Of The Display
Operations Common to All Modes Basic Operation for Contents of the Display Selecting Operation Items The dots ( ) shown on the display of the Digital Piano indicate items that can be used with the touch ring or ENTER button. −... - Page 31 Operations Common to All Modes Move the cursor ( ) to the item whose value you want to change. For example, move the cursor ( ) to “Part name and tone number”. Part name and tone number Touch the left or right or trace along the touch ring. The value at the cursor position (tone number in this example) changes.
- Page 32 Operations Common to All Modes ■ Close-Up Screen If the setting of “SYSTEM” > “Close-up” in the FUNCTION menu (page EN-33) is changed from “Off” (default value) to “On”, the display will show a “close-up screen” that magnifies the value whenever you trace along the touch ring to change a value.
-
Page 33: Navigating The Hierarchy Of Setting Items
Operations Common to All Modes Navigating the Hierarchy of Setting Items Use the settings list screen to select from many options for tones, functions, or specific settings. The following is a schematic for navigating the hierarchy of setting items and for the sequence of operations when selecting categories, setting values, etc. -
Page 34: The F Button Menu And Function Menu
Operations Common to All Modes • Touch and hold the EXIT button to return to the top screen. • The description of each operating procedure in this manual omits the step of returning to the first screen using the EXIT button at the end of each procedure. The F Button Menu and FUNCTION Menu Using the F Button Menu The F button menu shown at the bottom of the display represents the functions that will be activated... - Page 35 Operations Common to All Modes ■ To change the F Button Set Touch the top or bottom of the touch ring on the top screen to move the cursor ) to the F Button Set row. Touch the left or right or trace along the touch ring. The F Button Set changes and the content of the F button menu changes, as well.
-
Page 36: Using The Function Menu
Operations Common to All Modes Using the FUNCTION Menu Touch the FUNCTION button to display the FUNCTION menu. This menu can be used to access most of the functions and settings of the Digital Piano. ■ FUNCTION Menu Operation Example As an example, this section describes how to change the “Hammer Response”... - Page 37 Operations Common to All Modes ) to “KBD SETTING”, and then touch the ENTER (2) Trace the touch ring to move the cursor ( button. (3) Move the cursor ( ) to “Hammer Response” by touching the top or bottom of the touch ring. (This time, it is not necessary to touch the ENTER button.) Change the value.
-
Page 38: Text Character Input
Operations Common to All Modes Text Character Input Use the procedure below when you need to change the name of Registration Bank (page EN-88), F Button Set (page EN-100), data saved on a USB flash drive or to input or edit other text (page EN-143). - Page 39 Operations Common to All Modes • The characters shown in the table below are supported for file names on an exFAT formatted USB flash drive. & (First cell in the above table is blank.) • The characters shown in the table below are supported for file names on a FAT 32 formatted USB flash drive.
- Page 40 Operations Common to All Modes ■ To save edited text Touch the ENTER button on the text editing screen. A confirmation screen appears. To return to the text editing screen and continue editing, touch the left (NO) of the touch ring. To save your edits, touch the right (YES) of the touch ring.
-
Page 41: Acoustic Settings For The Digital Piano And Playback Of The Demo Songs
Acoustic Settings for the Digital Piano and Playback of the Demo Songs Selecting the Piano Position Setting You can select the acoustic settings appropriate for the Digital Piano’s location. Select “04 Listening” of the F Button Set. See “To change the F Button Set”... -
Page 42: Listening To The Demo Songs
Acoustic Settings for the Digital Piano and Playback of the Demo Songs Listening to the Demo Songs Follow the steps below to play back the built-in demo songs in sequence. Select the “01 Standard” of the F button set. See “To change the F Button Set”... - Page 43 Acoustic Settings for the Digital Piano and Playback of the Demo Songs To start the demo song, touch the a button. • Each time the a button is touched after this, the demo song is stopped or resumed. To return to the top screen, touch the EXIT button. •...
-
Page 44: Playing Notes With Different Tones
Playing Notes with Different Tones Selecting a Single Tone This Digital Piano has many tones available. Choose your favorite tone and play it. • For details about tone categories and the names of tones included in each category, refer to the separate “Built-in Music Data Lists”. -
Page 45: Selecting A Tone By Category
Playing Notes with Different Tones Selecting a Tone by Category Touch the top or bottom of the touch ring on the top screen to move the cursor ) to the part name and tone number. Touch the ENTER button. A list of tone category names is displayed. Use the touch ring to select a tone category then touch the ENTER button. -
Page 46: Selecting A Tone With The F Buttons
Playing Notes with Different Tones Selecting a Tone with the F Buttons Select the “07 Piano Collect” or “08 E.PianoCollect” of the F button set. See “To change the F Button Set” (page EN-32). Touch one of the F1 to F4 buttons, to select the tone you want. •... -
Page 47: Sounding Two Different Tones At The Same Time (Layer
Playing Notes with Different Tones Sounding Two Different Tones at the Same Time (Layer) As shown in the figure below, by assigning different tones to the “Upper 1” and “Upper 2” parts, two tones can be played simultaneously when the keyboard is played. This feature is called “Layer”. When Layer is turned on, both the Upper 1 and Upper 2 parts sound simultaneously. -
Page 48: Unlayering The Keyboard
Playing Notes with Different Tones Touch the F4 button (LAYER). Layer is turned ON and the indicator appears on the display. Part name: U2 (Upper 2) Displayed when Layer is on Perform the operation described in “Selecting a Single Tone” (page EN-41) operation to select the Upper 2 tone. -
Page 49: Splitting The Keyboard Between Two Tones (Split
Playing Notes with Different Tones Splitting the Keyboard Between Two Tones (Split) By assigning a “Lower” part to the lower range of the keyboard (as shown in the figure below), the lower range and upper range of the keyboard can play different tones. This function is called “Split”. With Split turned on, you can do the following. -
Page 50: Changing The Split Point
Playing Notes with Different Tones Perform the operation described in “Selecting a Single Tone” (page EN-41) operation to select the lower range tone (Lower tone). • To use both SPLIT and LAYER at the same time, perform steps 3 to 4 of the above operation following the operation described in “Layering Two Tones”... -
Page 51: Changing Part Settings (Volume Level, Octave Shift, Tuning, Etc
Playing Notes with Different Tones Changing Part Settings (Volume Level, Octave Shift, Tuning, etc.) You can change the volume, octave shift, tuning, and other settings for the Upper 1 and Upper 2 parts when using Layer (page EN-44), and the Lower part when using Split (page EN-46), individually for each part. -
Page 52: Applying Effects
Applying Effects Using the Sound Mode Effects (Hall Simulator/Reverb and Surround) The “Sound Mode” of this Digital Piano includes the following effects. • Hall Simulator/Reverb Hall Simulator and Reverb are both effects that change the reverberation of the sound. The hall simulator effect simulates the rich clarity, unconstrained brilliance, Hall Simulator and other distinctive acoustic characteristics of world-famous concert halls and structures. -
Page 53: Specifying The Hall Simulator/Reverb Type
Applying Effects Specifying the Hall Simulator/Reverb Type Before selecting a Hall Simulator/Reverb type, make sure to enable the Hall Simulator/Reverb. For details, see “Enabling or Disabling the Hall Simulator/Reverb and Surround Effects” (page EN-49). • The “SOUND MODE” screen shown in step 2 can also be displayed by touch and hold the F button to which “SMODE”... -
Page 54: Adjusting The Depth Of The Hall Simulator/Reverb Effect
Applying Effects Adjusting the Depth of the Hall Simulator/Reverb Effect The mixer can be used to individually adjust the Hall Simulator/Reverb for each part (Upper 1/Upper 2/ Lower), audio input from the MIC IN jack, etc. For more information, see “Using the Mixer”... -
Page 55: Using Dsp Effects
Applying Effects Using DSP Effects The Digital Piano’s DSP (Digital Signal Processor) can be used to apply various effects to the built-in tones. Effects include equalizer, tremolo, limiter, wah-wah, among others. Preset DSPs This Digital Piano is equipped with 100 preset DSP effects. These effects can be applied to any of the built-in tones, and the effect settings adjusted as you like. -
Page 56: Selecting A Dsp Type
Applying Effects Selecting a DSP Type To quickly switch the DSP effect type applied to a tone, select one of the “Preset DSPs” (DSP type numbers 001 to 100) using the following operation: Perform the operation described in “Selecting a Single Tone”... - Page 57 Applying Effects ■ To change DSP settings Use the “DSP” screen to change DSP settings. • Note that any changes you make to DSP settings are cleared whenever you change the tone or turn off Digital Piano power. If you want to retain DSP changes you make, use the registration function (page EN-86) to save the setup so you can recall it later.
- Page 58 Applying Effects If DSP ON/OFF:OFF is displayed, switch it to ON by the following operation. (1) Use the touch ring to select “DSP ON/OFF:OFF” and touch the ENTER button. (2) Use the touch ring to set the value to “On”. (3) Touch the EXIT button to return to the “DSP”...
- Page 59 Applying Effects ■ About Bypass All modules contain a “Bypass” parameter. When set to “Off” (default), the effects in that module are enabled. When set to “On”, the module is “bypassed” from the line connecting the sound source to the output, disabling the effects in the module.
-
Page 60: Using Chorus (Chorus, Flanger, Short Delay
Applying Effects Using Chorus (Chorus, Flanger, Short Delay) The chorus effect thickens the sound. Changing the Chorus Type This Digital Piano has a preset chorus effect assigned to each tone, but you can select a different type by following the operation below. Select the “09 Favorite Piano”... -
Page 61: Adjusting Brilliance
Applying Effects Adjusting Brilliance Brilliance is an effect that adjusts the brightness of a sound. • The brilliance effect is applied to the entire sound output from the Digital Piano. Select the “09 Favorite Piano” of the F button set. See “To change the F Button Set”... -
Page 62: Adjusting Acoustic Piano Sound Characteristics (Acoustic Simulator
Applying Effects Adjusting Acoustic Piano Sound Characteristics (Acoustic Simulator) The piano tones of this Digital Piano include elements characteristic of the sound of an acoustic piano. Follow the procedure below to adjust them. Select the “09 Favorite Piano” of the F button set. See “To change the F Button Set”... -
Page 63: List Of Acoustic Piano Sound Setting Items
Applying Effects List of Acoustic Piano Sound Setting Items Setting Items Description String Resonance. Playing on an acoustic piano causes the strings String Reso. that are harmonics of the played strings to resonate. You can use this setting item to adjust the level of resonance. Damper Resonance. -
Page 64: Using Microphone Effects
Applying Effects Using Microphone Effects Various effects can be applied to the audio from a microphone connected to the MIC IN jack. In addition to the 25 preset types, you can change the effect settings to your liking. • You can also adjust settings for the volume, stereo pan, and Hall Simulator/Reverb applied to audio input from the MIC IN jack. -
Page 65: Specifying The Microphone Effect Type
Applying Effects Specifying the Microphone Effect Type Select the “05 Song Play” of the F button set. See “To change the F Button Set” (page EN-32). Touch and hold the F4 button (MICFX). The “MIC FX” screen appears. Touch the ENTER button to display the “MIC FX TYPE” screen. Use the touch ring to select the type of microphone effect. -
Page 66: Changing Microphone Effect Settings
Applying Effects Changing Microphone Effect Settings The microphone effect is made up of three modules (M1 to M3) as shown in the figure below. Sound Source Output • Each module contains different effects (equalizer, delay, limiter, etc.). • Each type of microphone effect has a specific set of effects in each module. For more information, “Microphone Effect Type List”... - Page 67 Applying Effects Use the touch ring to select the module (from “M1” to “M3”) whose settings you want to change, and touch the ENTER button. A list of parameters for the effect in the selected module is displayed. • “Bypass” is common to all modules. Set to “On” if you do not want to use the effect in the currently displayed module.
-
Page 68: Using The Mixer
Using the Mixer The mixer allows you to individually adjust the volume, stereo pan, and effects for each part (Upper 1/ Upper 2/Lower) and audio input from the MIC IN jack. Adjusting the Volume Level, Stereo Pan and Effects for Each Part Select the “04 Listening”... -
Page 69: List Of Mixer Setting Items
Using the Mixer List of Mixer Setting Items Parameter Setting items Description Range of values Category Adjusts the overall volume of the Upper 1, KB Group Upper 2, and Lower parts while maintaining their relative volumes. U1 Part Adjusts the individual volume of the Upper 1, U2 Part Upper 2, and Lower parts. -
Page 70: Changing The Sound During A Performance
Changing the Sound During a Performance Using Pedals This Digital Piano is equipped with two jacks for pedal connections. Pedals can be connected to both jacks and used at the same time. Jack Connectable Pedal Separately available pedal unit PEDAL UNIT (three pedals: damper, soft, and sostenuto) Commercially available expression pedal, the included sustain pedal EXPRESSION/ASSIGNABLE... -
Page 71: Expression/Assignable Jack
Changing the Sound During a Performance EXPRESSION/ASSIGNABLE jack Use the EXPRESSION/ASSIGNABLE jack to connect the included sustain pedal (SP-3), a commercially available expression pedal or a separately available sustain pedal. ■ Connectable Expression Pedals • Maximum resistance value: 10kΩ±20% to 50kΩ±20% •... - Page 72 Changing the Sound During a Performance ■ To specify the pedal function Display the “EXP/ASGN. PEDAL” screen by performing the procedure under “To specify the pedal type” (page EN-68) and change the value of the “Pedal Target” setting. The following setting values are for the expression pedal only: “Expression”, “Master Vol”, “Tempo”, and “LY Balance”.
- Page 73 Changing the Sound During a Performance ■ Expression Pedal Calibration When connecting an expression pedal to the EXPRESSION/ASSIGNABLE jack for the first time, perform calibration (adjustment) as follows. Connect an expression pedal to the EXPRESSION/ASSIGNABLE jack. Select the “13 KB Setting” of the F button set. See “To change the F Button Set”...
-
Page 74: Enabling/Disabling The Pedal Operation For Each Part (Upper 1/Upper 2/Lower
Changing the Sound During a Performance Enabling/Disabling the Pedal Operation for Each Part (Upper 1/Upper 2/ Lower) Touch the FUNCTION button to display the FUNCTION menu. Use the touch ring to select “PEDAL/WHEEL” then touch the ENTER button. Select from the menu the jack to which the pedal whose settings you want to change is connected. -
Page 75: Using The Knobs
Changing the Sound During a Performance Using the Knobs The two knobs are used by assigning different functions to each. Assignable functions include modifying tones, adjusting effects, or controlling the volume of specific parts. By turning the knobs, the parameter values of the assigned functions can be changed in real time while playing. Using the Knobs to Change Parameters Under initial default settings, the functions that modifies the frequency characteristics of your performance sound are assigned to each of the knobs as follows: K1 knob: Cutoff Freq., K2 knob:... -
Page 76: Changing The Function Assigned To A Knob
Changing the Sound During a Performance Changing the Function Assigned to a Knob Select the “12 Control” F button set. See “To change the F Button Set” (page EN-32). Touch the F3 button (KNOB). The “KNOB” screen appears. Touch the top or bottom of the touch ring to select the item whose setting value you want to change. - Page 77 Changing the Sound During a Performance ■ List of Assignable Functions to the Knobs Function Category Description Cutoff Freq. Knob/CTRL Adjusts timbre by attenuating the components of a note’s frequency characteristics that are higher than a certain frequency (cutoff frequency). A larger value specifies a brighter, harder sound, while a lower value specifies a mellower, softer sound.
- Page 78 Changing the Sound During a Performance Function Category Description Upper2 Pan Mixer Adjusts the stereo pan of the Upper 2 part. Lower Volume Mixer Adjusts the volume of the Lower part. Lower Pan Mixer Adjusts the stereo pan of the Lower part. KB Hall/Rev.
-
Page 79: Resetting The Parameters Of The Functions Currently Assigned To The Knobs
Changing the Sound During a Performance Resetting the Parameters of the Functions Currently Assigned to the Knobs Select the “12 Control” F button set. See “To change the F Button Set” (page EN-32). Touch and hold the F3 button (KNOB). A confirmation screen will appear. -
Page 80: Using The Control Button
Changing the Sound During a Performance Using the CONTROL Button This button is used to control the sound while playing. Under initial default settings, modulation is applied while the CONTROL button is held down. By changing the setting, other functions can be assigned, such as switching portamento (an effect that smoothly glides between notes) on and off. - Page 81 Changing the Sound During a Performance If “Control Assign” is set to “Modulation”, change the modulation settings as necessary. • Touch the top or bottom of the touch ring to set each item, such as “Mod Value”. For more information, see “To change the Modulation settings”...
-
Page 82: Using The Pitch Bend Wheel
Changing the Sound During a Performance Using the Pitch Bend Wheel By moving the pitch bend wheel up and down, the pitch of the currently sounding notes can be smoothly raised or lowered, producing an effect similar to saxophone or electric guitar pitch bending techniques. -
Page 83: Enabling/Disabling The Pitch Bend Wheel Operation For Each Part (Upper 1/Upper 2/Lower
Changing the Sound During a Performance Enabling/Disabling the Pitch Bend Wheel Operation for Each Part (Upper 1/ Upper 2/Lower) Display the “WHEEL” screen by performing the operation under “Changing the Pitch Bend Range” (page EN-79) then adjust the settings below. Setting item Values Description... -
Page 84: Using The Metronome
Using the Metronome The Digital Piano’s metronome can play a variety of drum patterns in addition to a standard metronome sound. Starting or Stopping the Metronome While touching the FUNCTION button, touch the a button. The metronome starts. • The red and white LEDs to the left of the a button will flash in time with the metronome beat (first beat: red;... - Page 85 Using the Metronome Setting item Setting value and description If “Guide Type” is “Metronome”: Sets the metronome’s beat. Bell Off Plays a click sound on every beat. 1 Beat Plays a bell sound on every beat. Sets the number of beats between 2 and 9. Pattern 2 Beat to 9 Beat Plays a bell sound on the first beat and a...
- Page 86 Using the Metronome ■ Drum Pattern List Drum Pattern Name Beat Description 8 Beat 1 Simple 8-beat rhythm 8 Beat 2 Simple 8-beat rhythm 8 Beat Shuffle 8-beat shuffle rhythm Triplet8Beat 1 Triplet 8-beat rhythm Triplet8Beat 2 Triplet 8-beat rhythm 6/8 Pop 6-beat rhythm for slow tempo 16 Beat...
-
Page 87: Using The Arpeggiator
Using the Arpeggiator The Arpeggiator automatically plays arpeggios (broken chords) and various other patterns with a single press of the keys. There are many types to choose from, including patterns that play arpeggios from chords being played and many more. Enabling or Disabling the Arpeggiator Select the “12 Control”... - Page 88 Using the Arpeggiator Touch the top or bottom of the touch ring to select the setting you want to change. • The table below shows the setting items, values and descriptions of each. Setting item Values Description Pattern Selects the pattern the Arpeggiator will play. When “On”, the Digital Piano automatically applies the recommended tones and settings for Recommended Setup...
-
Page 89: Saving And Recalling Performance Setups (Registration
Saving and Recalling Performance Setups (Registration) The state of various settings such as tone selection, Layers, Splits, and effects can be registered as a performance setup. Registered settings can also be recalled together simultaneously. This function is called “Registration”. * By using it with the Freeze function (page EN-90), it is possible to recall only a portion of the registered settings. -
Page 90: Saving A Setup Registration
Saving and Recalling Performance Setups (Registration) Saving a Setup Registration Set as many tones, effects, and other registrable items (page EN-92) as you need. Select the “02 Regist Setting” of the F Button Set. See “To change the F Button Set”... -
Page 91: Changing A Registration Bank Name
Saving and Recalling Performance Setups (Registration) Touch one of the F buttons (F1 to F4) to select the destination (REG 1 to REG 4). A confirmation screen appears. To exit the operation without saving, touch the left of the touch ring (NO). -
Page 92: Recalling A Setup Registration
Saving and Recalling Performance Setups (Registration) Recalling a Setup Registration Select the bank of the setup you want to recall by performing Steps 2 through 4 “Saving a Setup Registration” (page EN-87). • This procedure is not necessary if you want to recall the registration from the currently selected bank. -
Page 93: Freeze Function
Saving and Recalling Performance Setups (Registration) Freeze Function By turning on the Freeze function, you can prevent certain setting items from being changed when the registration is recalled. Use the following procedure to select which setting item to freeze. ■ To select freeze items Select “02 Regist Setting”... -
Page 94: Using A Pedal To Cycle Through Multiple Setup Registrations (Sequential Recall
Saving and Recalling Performance Setups (Registration) Using a Pedal to Cycle Through Multiple Setup Registrations (Sequential Recall) Registrations can be sequentially recalled using a pedal connected to the EXPRESSION/ ASSIGNABLE jack. Connect a pedal to the EXPRESSION/ASSIGNABLE jack. • Make sure the pedal type corresponds to the connected pedal (see “To specify the pedal type”... -
Page 95: Registration Memory Data
Saving and Recalling Performance Setups (Registration) Registration Memory Data Setting Items Freeze • Pedal unit, EXPRESSION/ASSIGNABLE pedal, and pitch bend wheel Part On/Off settings Pedal/Wheel • EXPRESSION/ASSIGNABLE pedal functions • Pitch Bend Range • CONTROL Button settings • Knob settings •... -
Page 96: Saving To An External Device
Saving and Recalling Performance Setups (Registration) *1 The “Freeze” column shows the names of parameters included in the “FREEZE” screen. For more information, see “To select freeze items” (page EN-90). *2 Corresponds to the functions displayed as “Knob/CTRL” in the “Category” column of “List of Assignable Functions to the Knobs”... -
Page 97: Using The F Button Set
Using the F Button Set A set of four F buttons, each assigned a function, is called an F Button Set. There are 14 preset F Button Sets that have predefined names and functions and 16 user F Button Sets that the user can freely assign names and functions to. -
Page 98: Editing An F Button Set
Using the F Button Set Editing an F Button Set Assigning a Function to an F Button (Creating a User F Button Set) There are two ways to assign desired functions to F buttons, creating a user F Button Set: •... - Page 99 Using the F Button Set Trace the touch ring to change the setting value for the F1 button. • For details on the displayed settings and the corresponding functions, see “F Button Function List” (page EN-103). • To assign a tone to an F button, you must change the setting value to “Tone Category” and touch the ENTER button to select a tone.
- Page 100 Using the F Button Set Trace the touch ring to select a user F Button Set as the save destination then touch the ENTER button. After “Complete” appears, the display returns to the top screen. [Example 2]: Assigning new functions to an empty user F Button Set and saving it Select an empty user F Button Set.
- Page 101 Using the F Button Set Trace the touch ring to change the desired setting. • For more information on the displayed settings and the assignable F button functions corresponding to those settings, see “F Button Function List” (page EN-103). • To assign a tone to the F button, you must change the setting value to “Tone Category” and touch the ENTER button to select a tone.
- Page 102 Using the F Button Set Touch the right of the touch ring (YES) to save. A screen appears to select which user F Button Set to use as the save destination. • User F Button Sets that have already been assigned functions and saved are marked with a “ ”...
-
Page 103: Changing The Name Of An F Button Set
Using the F Button Set Touch the EXIT button three times to return to the “F BUTTON EDIT” screen. • Regardless of the tone selected in Step 4 above, the “F BUTTON EDIT” screen will display “Tone Category” as the setting value. When you return to the top screen after saving the F Button Set, the tone number and the first two letters of the tone name appear in the F button menu, as shown below. - Page 104 Using the F Button Set Touch the ENTER button. The F Button Set name editing screen appears. Change the F Button Set name to the desired name. • For more information on operations, see “To change a character” (page EN-35), “To insert a character”...
-
Page 105: Erasing An F Button Set
Using the F Button Set Erasing an F Button Set Touch the FUNCTION button to display the FUNCTION menu. Use the touch ring to select “F BUTTON SETTING” > “FB SET CLEAR”. Touch the ENTER button. A screen appears to select the F button set to erase. Touch the top or bottom of the touch ring to select the F button set to erase, then touch the ENTER button. -
Page 106: F Button Function List
Using the F Button Set F Button Function List • The “Function Name” column indicates the value displayed on the “F BUTTON EDIT” screen. • The “F Button Display” column is the text that appears in the F button menu. •... - Page 107 Using the F Button Set Function F Button Function Reference Name Display “Using Chorus (Chorus, Displays the “EFFECT” screen where you Flanger, Short Delay)” Effect EFECT can select the Chorus Type and adjust (page EN-57), the Brilliance. “Adjusting Brilliance” (page EN-58) Turns the Microphone Effect on and off.
- Page 108 Using the F Button Set Function F Button Function Reference Name Display “Playing Back MIDI Data or Backs up the song a little. Audio Data” Rewinds the song. (page EN-107) “Playing Back MIDI Data or Advances the song a little. Audio Data”...
-
Page 109: Listening To Songs (Song Mode
Recorder to Record Performances” (page EN-113). USB flash drive songs: Standard MIDI files (SMF format 0/1) or CASIO MIDI files (CMF format) stored on a USB flash 016 to 999 MID, CMF drive can be played back without having to transfer them to the Digital Piano. -
Page 110: Playing Back Midi Data Or Audio Data
Listening to Songs (SONG Mode) ■ Audio Data The following audio data stored in a USB flash drive can be played back. • WAV file (Linear PCM, 16-bit, 44.1kHz, stereo, file name extension: .WAV) • MP3 file (MPEG-1 Audio Layer3, 44.1kHz/48kHz, 32 to 320kbps variable bit rate (VBR), monaural/ stereo, file name extension: .MP3) Audio recorder songs recorded with this Digital Piano are WAV files (file names “TAKE01.wav”... - Page 111 Listening to Songs (SONG Mode) Select “Song Type” according to the song you want to play. (1) Touch the F4 button (STYPE). (2) Trace the touch ring to select the “Song Type” setting from the following: “MIDI” … Play MIDI data from the internal memory or a USB flash drive (MIDI Mode) “Audio(USB Drv)”...
-
Page 112: Operations While Playing Back Midi Data
Listening to Songs (SONG Mode) Operations While Playing Back MIDI Data Sounding Metronome While Playing Back MIDI Data In the “METRONOME” screen, turn “While Playing” to “On” to have the Metronome sound during MIDI data playback. For more information, see “Changing the Metronome Settings (Tempo, Beat, Pattern, etc.)”... -
Page 113: Operations While Playing Back Audio Data
Listening to Songs (SONG Mode) Operations While Playing Back Audio Data Audio Center Cancel (Vocal Cut) Audio Center Cancel cuts (eliminates or reduces) vocals in the playback audio. Since this function cancels the center-localized sound, sounds other than vocals may also be cut. The degree of the effect depends on the audio data being played. -
Page 114: Recording Performances
• CASIO COMPUTER CO., LTD. takes no responsibility for any damages, lost profits, or claims by third parties arising from the deletion of recorded data due to malfunction, repair, or for any other reason. - Page 115 Recording Performances ■ Playback Features MIDI Recorder Audio Recorder Plays back system track and solo track You can play back audio data from a USB flash (simultaneously or individually). drive. • With the MIDI Recorder, the Digital Piano • The Audio Recorder plays back the waveform automatically performs playback using its of sound recorded as audio data.
-
Page 116: Using The Midi Recorder To Record Performances
Recording Performances Using the MIDI Recorder to Record Performances The MIDI recorder records keyboard performances and pedal operations as MIDI data. Recording with the MIDI Recorder Put the Digital Piano into MIDI Mode. • Under the initial default settings, the Digital Piano is in MIDI Mode. In this case, proceed to step (1) Touch the FUNCTION button to display the FUNCTION menu. - Page 117 Recording Performances (2) Trace the touch ring to select one of the song numbers 011 to 015. • See “NOTE” on page EN-115 for the song number of the MIDI recorder song. Touch the 0REC button. The 0REC button flashes red and the Digital Piano is ready to record. •...
- Page 118 Recording Performances To end recording, touch the 0REC button. The 0REC button will show a white light once again and the SONG mode screen will appear. • If you want to immediately play back the recorded MIDI recorder song, touch the a button. •...
- Page 119 Recording Performances ■ MIDI Recorder Recording Settings A MIDI recorder song has two recording tracks (system track and solo track), and you can choose which track to record to. A precount can also be set to indicate when recording will begin. Perform the operation described in steps 1 through 4 of “Recording with the MIDI Recorder”...
-
Page 120: Recording A Second Track Over The First (System Track + Solo Track
Recording Performances Recording a Second Track Over the First (System Track + Solo Track) You can record to one track while playing back a pre-recorded track of a MIDI recorder song. • If you make a mistake while overdub recording, you can erase and re-record the overdubbed track. For more information, see “Deleting a MIDI Recorder Song (Entire Song/Individual Tracks)”... -
Page 121: Playing Back Midi Recorder Songs
Recording Performances Playing Back MIDI Recorder Songs Touch the a button. The SONG mode screen appears. • If any songs have been recorded (or played) since the Digital Piano was turned on, the last song recorded (or played) will be played. To stop playback, touch the a button. •... -
Page 122: Deleting A Midi Recorder Song (Entire Song/Individual Tracks
Recording Performances Deleting a MIDI Recorder Song (Entire Song/Individual Tracks) “Playing Back MIDI Recorder Songs” (page EN-118) operation to select the MIDI recorder song you want to erase. Touch and hold the 0REC button. The “CLEAR” screen appears. Touch the top or bottom of the touch ring to select the target (the entire song or a track) you want to erase. -
Page 123: Items Reflected In Contents When Recording To The Midi Recorder Song
Recording Performances Items Reflected in Contents When Recording to the MIDI Recorder Song The symbols below are used in the “System” column to indicate items that can be recorded to the system track, and in the “Solo” column to indicate items that can be recorded to the solo track. ✓…... - Page 124 Recording Performances Operation or Setting System Solo ✓ ✓ Part Fine Tune ✓ Scale settings — ✓ Duet settings — Metronome ✓ Tempo — ✓ Beat — *1 Operation of pedals connected to this Digital Piano *2 Not recorded depending on the function assigned to the pedal that is connected to the EXPRESSION/ASSIGNABLE jack.
-
Page 125: Recording A Performance With The Audio Recorder
Recording Performances Recording a Performance with the Audio Recorder The audio recorder records the sound output from the Digital Piano as audio data, as shown below. • Keyboard playing • Audio input from microphone, etc. Recording Using the Audio Recorder Put the Digital Piano into Audio Mode. - Page 126 Recording Performances To start recording, touch the a button. When recording starts, the 0REC button lights up red. • Recording can also be started automatically by pressing a keyboard key and starting to play. Recording can also be started with any of the following operations: −...
- Page 127 Recording Performances • The formats of audio data that can be played on this Digital Piano are shown below. (For playback operations, see “Playing Back a Song from the Audio Recorder” (page EN-125).) WAV format audio data File name extension .WAV Format Linear PCM...
-
Page 128: Playing Back A Song From The Audio Recorder
Recording Performances Playing Back a Song from the Audio Recorder Touch the a button. The SONG mode screen appears. • If any songs have been recorded (or played) since the Digital Piano was turned on, the last song recorded (or played) will be played. To stop playback, touch the a button. •... -
Page 129: Deleting A Song From The Audio Recorder
Recording Performances Deleting a Song from the Audio Recorder “Playing Back a Song from the Audio Recorder” (page EN-125) to select the audio recorder song you want to erase. Touch and hold the 0REC button. A confirmation screen will appear. To cancel the operation, touch the left of the touch ring (NO) at this point. -
Page 130: Adjusting Keyboard Sensitivity
Adjusting Keyboard Sensitivity Changing Keyboard Response to Key Velocity (Touch Response) Touch Response alters tone volume in accordance with keyboard velocity (speed). This provides you some of the same expressivity you get on an acoustic piano. Pressing fast produces louder notes. Pressing slowly produces softer notes. -
Page 131: Adjusting The Timing Of Key Press To Sound (Hammer Response
Adjusting Keyboard Sensitivity Change the value of the “Touch Response” setting. Setting value Description Disables Touch Response. Sound volume is fixed, regardless of key press speed. Makes production of a louder sound easier, so touch feels lighter than Light 2 “Normal”. -
Page 132: Adjusting The Timing Of Key Release To Sound Damping (Key-Off Response
Adjusting Keyboard Sensitivity Adjusting the Timing of Key Release to Sound Damping (Key-off Response) On a grand piano, when a key is released, the damper comes down on the strings and the note is damped. The Digital Piano’s Key-off Response function simulates digitally the timing of the note damping based on how the key is released. -
Page 133: Changing The Pitch
Changing the Pitch Changing the Pitch in Semitone Steps (Transpose) Use the transpose feature to raise or lower the pitch of all notes in semitone steps. This allows you to transpose the key of your playing to another key. Changing the Transpose Setting Select the “12 Control”... -
Page 134: Adjusting The Tuning Separately For Each Part (Upper 1/Upper 2/Lower) (Part Fine Tune
Changing the Pitch Adjusting the Tuning Separately for Each Part (Upper 1/Upper 2/Lower) (Part Fine Tune) Each part can be individually fine-tuned between –99 and +99 cents (100 cents = 1 semitone) relative to the tuning of the entire instrument. By shifting the tuning of each part slightly, you can create a full- bodied ensemble feel. -
Page 135: Changing The Pitch In Octave Units (Octave Shift
Changing the Pitch Changing the Pitch in Octave Units (Octave Shift) Use the Octave Shift feature to raise or lower the pitch of all notes in octave units. Each part (Upper 1, Upper 2, Lower) can be set individually when using the Layer or Split functions. •... -
Page 136: Changing The Scale Tuning (Temperament) Of The Keyboard
Changing the Pitch Changing the Scale Tuning (Temperament) of the Keyboard You can change the scale of the keyboard from the standard equal temperament to another tuning that is more suitable for playing Indian music, Arabic music, classical music, etc. You can select from among the 17 preset scales described below. -
Page 137: Enabling Or Disabling Piano Stretch Tuning
Changing the Pitch If necessary, change the base note of the scale. (1) In the “SCALE TUNING” screen, touch the top or bottom of the touch ring to select the “Scale Base Note”. (2) Trace the touch ring to change the desired base note. Enabling or Disabling Piano Stretch Tuning Generally, a piano is tuned so high notes are relatively higher and low notes are relatively lower. -
Page 138: Splitting The Keyboard For Duet Play
Splitting the Keyboard for Duet Play You can split the keyboard in the center for duet play so the left and right sides have the same ranges. The Duet function is the perfect way to conduct lessons, with the teacher playing on the left side as the student plays the same song on the right side. - Page 139 Splitting the Keyboard for Duet Play Play duets using the left and right sides of the keyboard. • When Duet is active, the left and right pedals serve as damper pedals for the left and right-side of the keyboard, respectively, and the center pedal serves a damper pedal for both left and right. Left side damper pedal Right side damper pedal Left and right side damper pedal...
-
Page 140: Configuring Duet Settings
Splitting the Keyboard for Duet Play Configuring Duet Settings Select the “14 Duet” of the F Button Set. See “To change the F Button Set” (page EN-32). Touch and hold the F1 button (DUET). The “DUET” screen appears. Touch the top or bottom of the touch ring to select the item whose setting value you want to change. -
Page 141: Usb Flash Drive
USB Flash Drive Your Digital Piano supports the following USB flash drive operations. USB Flash Drive Digital Piano (1) USB Flash Drive on the Digital Piano • Playing back audio data on a USB flash drive “Listening to Songs (SONG Mode)”... -
Page 142: Data Types Supported By The Digital Piano
MIDI data recorded with the Digital Piano’s MIDI Recorder. (file name extension: .MRF) • CMF format (CASIO original file format): This file format adds CASIO proprietary data to MIDI data. (file name extension: .CMF) • SMF (Standard MIDI File) Format 0/1: Standard MIDI file format that can be exchanged with a compatible device from another manufacturer. - Page 143 SMF. Of course, playback will be somewhat different when played on another musical instrument. *2 Songs downloaded from the CASIO website, etc. *3 The song is loaded as a user song (song number 001 to 010). See “Data Types of Playable...
-
Page 144: Connecting A Usb Flash Drive To And Detaching It From The Digital Piano
USB Flash Drive Connecting a USB Flash Drive to and Detaching It from the Digital Piano • Be sure to observe the precautions provided in the documentation that comes with the USB flash drive. • Avoid using a USB flash drive under the following conditions. Such conditions can corrupt data stored on the USB flash drive. -
Page 145: Formatting A Usb Flash Drive
USB Flash Drive Formatting a USB Flash Drive Formatting a USB flash drive on the Digital Piano will create a folder named MUSICDAT in the drive’s root directory if a MUSICDAT folder does not already exist there. Use this folder when exchanging data between the Digital Piano and USB flash drive. -
Page 146: Saving Midi Files Or Audio Files For Playback On Your Digital Piano To A Usb Flash Drive
CASIO COMPUTER CO., LTD. shall not be held in any way liable for any use of this Digital Piano that is illegal under copyright laws. - Page 147 USB Flash Drive Touch the top or bottom of the touch ring to select the type of data to save, then touch the ENTER button. • If you choose “ALL”, after touching the ENTER button the file name edit screen will be displayed so proceed to Step 5.
-
Page 148: Loading Usb Flash Drive Data Into The Digital Piano's Internal Memory
USB Flash Drive Loading USB Flash Drive Data into the Digital Piano’s Internal Memory Touch the FUNCTION button to display the FUNCTION Menu. Use the touch ring to select “MEDIA” > “LOAD”, then touch the ENTER button. The “MEDIA LOAD” screen displays a menu for selecting the type of data you want to load. “USER SONG”... -
Page 149: Deleting A Usb Flash Drive File
USB Flash Drive Deleting a USB Flash Drive File Touch the FUNCTION button to display the FUNCTION Menu. Use the touch ring to select “MEDIA” > “DELETE”, then touch the ENTER button. The “MEDIA DELETE” screen displays a menu for selecting the types of files that can be deleted. “USER SONG”... -
Page 150: Renaming A Usb Flash Drive File
USB Flash Drive Renaming a USB Flash Drive File Touch the FUNCTION button to display the FUNCTION Menu. Use the touch ring to select “MEDIA” > “RENAME”, then touch the ENTER button. “MEDIA RENAME” screen appears with a menu to select the types of files that can be renamed. “USER SONG”... -
Page 151: Configuring Midi Settings
Configuring MIDI Settings To change the MIDI settings of the Digital Piano, use the setting items of the FUNCTION Menu (page EN-33) listed in the table below. Setting Item Setting Values and Descriptions The keyboard channel is the MIDI channel that performance “MIDI”... -
Page 152: Wireless Connections
Wireless Connections The included Wireless MIDI & Audio Adaptor can be used to wirelessly connect the Digital Piano to ® external devices. This connection uses Bluetooth wireless technology, and the following two types of connections are possible: • Bluetooth Low Energy MIDI connection … Transmits MIDI data between the Digital Piano and a smart device. -
Page 153: Notification Tones
Wireless Connections Touch the F1 button (ADPTR). The wireless functionality turns off. • Touching the F1 button (ADPTR) toggles the wireless functionality on and off. Notification Tones A change in the Bluetooth connection causes a notification tone to sound. This type of connection: Sounds this notification tone: Connection with a Bluetooth audio device Rising piano tone melody... -
Page 154: Connecting The Digital Piano With A Bluetooth Low Energy Midi Device
Connecting the Digital Piano and a smart device over a Bluetooth Low Energy MIDI connection enables various actions using the dedicated app. For details about the dedicated app, see “About the App for Smart Devices (CASIO MUSIC SPACE)” (page EN-155). If the Digital Piano’s wireless functionality is turned off, turn it on. -
Page 155: Connecting The Digital Piano With A Bluetooth Audio Device
Wireless Connections Connecting the Digital Piano with a Bluetooth Audio Device Connecting this Digital Piano and an external device over Bluetooth audio allows playback from the external device over the Digital Piano’s speakers. To connect via Bluetooth audio, you must first perform a procedure called “audio pairing”... -
Page 156: Deleting Bluetooth Audio Device Pairing Registration
Wireless Connections Select “WU-BT10 AUDIO” on the Bluetooth settings screen of the external device. • When pairing is complete, the indicator appears in the upper right corner of the Digital Piano’s top screen and a notification tone sounds. • Information regarding the external device connected over Bluetooth audio is registered in the Wireless MIDI &... - Page 157 Wireless Connections To delete the pairing registration information, touch the right of the touch ring (YES). “Complete” appears, and the display returns to the “WIRELESS” screen. EN-154...
-
Page 158: Using The Dedicated App
This section describes the “CASIO MUSIC SPACE” dedicated app, which provides additional ways to enjoy your Digital Piano. About the App for Smart Devices (CASIO MUSIC SPACE) You can use the following functions on the Digital Piano when linked with the “CASIO MUSIC SPACE” dedicated app. • Piano Roll •... - Page 159 Using the Dedicated App Connect this Digital Piano to your smart device The available features depends on the connection method. Never connect the Digital Piano with a Bluetooth Low Energy MIDI device and a USB MIDI device at the same time. Wireless connection Cable connection Bluetooth Low...
-
Page 160: Connecting With External Devices
Connecting with External Devices This section describes the connection methods that can be used without using the dedicated app (page EN-155): • Play sound from a smart device (Bluetooth audio connection) Audio playback from a smart device or other Bluetooth audio-compatible device is played through the Digital Piano’s speakers. -
Page 161: Bluetooth Audio Center Cancel (Vocal Cut
Connecting with External Devices Bluetooth Audio Center Cancel (Vocal Cut) Turning on Audio Center Cancel cuts (reduces or eliminates) vocals in the playback sound. Since this function cancels the central sound, it may also cut sounds other than vocals. Its effectiveness depends on the input sound. -
Page 162: Using Midi With A Connected Computer Or Smart Device
MIDI data from your computer or a smart device to the Digital Piano and play notes on the Digital Piano. • For detailed MIDI specifications relating to this Digital Piano and the latest support information, visit the CASIO website below. https://support.casio.com/global/en/emi/manual/PX-S6000/ • For MIDI-related settings, see “Configuring MIDI... - Page 163 Start the (commercially available) music software on your computer. Select “CASIO USB-MIDI” as the MIDI device in the settings of your computer’s music software. • Refer to the user manual of the music software for information on how to select a MIDI device.
-
Page 164: Connecting The Digital Piano With A Smart Device Via Usb Midi
You can use MIDI standard apps when the Digital Piano is connected with a smart device. For a list of devices that can be used, please see the “Operating System Compatibility (iOS/Android)” section on the CASIO website below. https://support.casio.com/global/en/emi/manual/PX-S6000/ • We recommend using devices listed in the “Tested devices (USB-MIDI connection)” section. - Page 165 (micro B-A type) (A-B type) Launch the MIDI-compatible app on your smart device. • If you are using CASIO’s dedicated app, the smart device screen will display “Connecting...”. When a successful connection is made, the message “Connected” will be displayed. EN-162...
-
Page 166: Outputting Digital Piano Notes Through An Amplifier Or Audio Equipment
Connecting with External Devices Outputting Digital Piano Notes Through an Amplifier or Audio Equipment (LINE OUT jacks) You can connect audio equipment or a music amplifier to the Digital Piano and then play through external speakers for more powerful volume and better sound quality. Use commercially available cable for connection. -
Page 167: Connecting To A Musical Instrument Amplifier
Connecting with External Devices Connecting to a Musical Instrument Amplifier Connecting to the LINE OUT L/MONO jack only outputs a mixture of both channels. Use commercially available cable to connect the amplifier to the Digital Piano’s LINE OUT L/MONO jack as shown in the figure below. -
Page 168: Deleting All Data In The Digital Piano's Internal Memory
Deleting All Data in the Digital Piano’s Internal Memory All system contents, including data and settings, can be reset to their initial factory defaults. ■ To return all Digital Piano settings and data to their initial factory defaults (Factory Reset) •... -
Page 169: Troubleshooting
Troubleshooting ● The touch button does not respond. Reason: a. The buttons were touched with a fingernail or stylus. The button was touched by a user wearing a glove that is not suitable for use with touch buttons. b. The sensitivity of the touch buttons is set too low. Solution: a. - Page 170 Troubleshooting ● The pedal has no effect. a. The pedal cable is not properly plugged into the PEDAL UNIT or EXPRESSION/ Reason: ASSIGNABLE jack. Or the plug is incompletely plugged in. b. The pedal type assignment or function assignment to the jack to which the pedal is connected is incorrect.
-
Page 171: Error Messages
Troubleshooting Error Messages Display Cause Action Recording of 1,000 measures or over Use the MIDI recorder to record up to was attempted with the MIDI recorder. bar 999. Limit The recording time limit was reached Use the audio recorder to record up to with the audio recorder. - Page 172 Troubleshooting Display Cause Action When recording with the audio recorder, Use a computer to delete all or some of an attempt was made to start recording TAKE01.WAV to TAKE99.WAV in the beyond the maximum number of songs “MUSICDAT” folder or move them to Too Many Files (99), or there is a file called another folder or drive.
-
Page 173: Reference
Reference Product Specifications Model PX-S6000BK Keyboard 88-key piano keyboard Settings Hammer Response, Key Off Response Duet Adjustable tone range (–2 to +2 octaves) Transpose –12 to 0 to +12 semitones Octave Shift –2 to 0 to +2 octaves Sound Source Number of Tones 350, Layer, Split Maximum Polyphony... - Page 174 For connection of the included sustain pedal (SP-3), a commercially ASSIGNABLE jack available expression pedal or a separately available CASIO sustain pedal, selectable function (expression, master volume, tempo, layer balance, damper (off, on), sostenuto (off, on), soft (off, on), arpeggio...
- Page 175 *2 Standard MIDI file (SMF format 0/1, file name extension: .MID) *3 CASIO original file format. This file format adds CASIO proprietary data to MIDI data. (file name extension: .CMF) *4 MIDI Recorder song file (file name extension: .MRF) *5 WAV format audio file (Linear PCM, 16-bit, 44.1kHz, stereo, file name extension: .WAV)
-
Page 176: Operating Precautions
Doing so creates the risk of malfunction. • The AC adaptor cannot be repaired. If your AC adaptor malfunctions or becomes damaged, contact your original retailer or a CASIO Service Center. • AC adaptor operating environment: Temperature: 0 to 40°C Humidity: 10% to 90% RH •... - Page 177 Reference ■ Using Batteries • Close the battery case lid before using the Digital Piano. Failing to do so may cause injury. • Note that the rear of the Digital Piano around the battery compartment may become hot in use. ■...
-
Page 178: Function Menu Items
Reference FUNCTION Menu Items Listed below are all FUNCTION menu item names and setting values and references in this manual. Some menu items can be called up directly at the touch of a button. The following information is provided in the “Reference” column of the table below, in the following manner. •... - Page 179 Reference Menu Item Setting Values Reference PIANO POSITION (◆[PPOSI]) Standard, Wall, Center, “Selecting the Piano Position Setting” Piano Position Table (page EN-38) MIC FX (◆Touch and hold [MICFX]) “Specifying the Microphone Effect Type” Mic Fx Type Options (page EN-62) Fx On/Off On, Off “Changing Microphone Effect Settings”...
- Page 180 Reference Menu Item Setting Values Reference “Adjusting the Volume Level, Stereo Pan and CHORUS Effects for Each Part” (page EN-65) U1 Part Send U2 Part Send 0 - 127 “List of Mixer Setting Items” (page EN-66) L Part Send KEYBOARD (◆[KEYBD]) TRANSPOSE —...
- Page 181 Reference Menu Item Setting Values Reference “Changing the Sound During a Performance” PEDAL/WHEEL (page EN-67) “EXPRESSION/ASSIGNABLE jack” EXP/ASGN. PEDAL (page EN-68) (◆[PEDAL]) SW, Exp.Type1, Pedal Type “To specify the pedal type” (page EN-68) Exp.Type2 Pedal Target Options “To specify the pedal function”...
- Page 182 Reference Menu Item Setting Values Reference “Selecting the Function Assigned to the CONTROL CONTROL Button” (page EN-77) (◆[CTRL]) “Selecting the Function Assigned to the Control Assign Options CONTROL Button” (page EN-77) (◆FUNCTION + CONTROL) Mod Value 0 - 127 Mod Upper1 Part “To change the Modulation settings”...
- Page 183 Reference Menu Item Setting Values Reference “Saving and Recalling Performance Setups REGISTRATION (Registration)” (page EN-86) “Freeze Function” (page EN-90) FREEZE (◆Touch and hold [FREEZ]) Pedal/Wheel Knob/CTRL Scale Tuning Touch Response Sound Mode Effect Off, On “Registration Memory Data” (page EN-92) Transpose Split Point Arpeggiator...
- Page 184 Reference Menu Item Setting Values Reference MEDIA “USB Flash Drive” (page EN-138) WIRELESS (◆Touch and hold [ADPTR]) Notification Vol 0 - 127 “Notification Tones” (page EN-150) “Pairing the Digital Piano with a Bluetooth Audio Pairing — Audio Device” (page EN-152) “Deleting Bluetooth Audio Device Pairing Pairing Clear —...
- Page 185 Reference Menu Item Setting Values Reference “Setting the Sensitivity of the Touch Buttons Touch Btn Sense –1, 0, +1 and Touch Ring” (page EN-26) “Setting the Sensitivity of the Touch Buttons Touch Ring Sense –3 - 0 - +3 and Touch Ring”...
-
Page 186: Dsp List
Reference DSP List Preset DSP List Listed below are the types of DSP and the effects contained in each module from M1 to M4 for each type. For more information on the effects listed in the M1 to M4 columns, see “List of Effects in the DSP Modules”... - Page 187 Reference Preset DSP Name (Display) Re-Amp 5 Distortion Delay Drive Amp 1 Mono 3-Band EQ Drive Tone Control Mono IR Drive Amp 2 Drive Tone Control Mono IR Tremolo Drive Amp 3 Drive Tone Control Mono IR AutoPan Drive Amp 4 Drive Tone Control Mono IR...
- Page 188 Reference Preset DSP Name (Display) EnhanceAmbi2 Drive Reflection Mono IR Delay Comp Mod 1 Tone Control Compressor Tremolo Tone Control Comp Mod 2 Tone Control Compressor Phaser Reflection Comp Mod 3 Compressor Flanger Phaser Comp Mod 4 Compressor Tremolo Flanger Delay VibraTremolo Mono IR...
-
Page 189: List Of Effects In The Dsp Modules
Reference List of Effects in the DSP Modules Listed below are all the effects included in the DSP modules. For details on the parameters and setting ranges that can be set for each effect, see “Parameter List of DSP Module Effects”... - Page 190 Reference Module DSP Module Display Description Number Name “Wah” effect that can automatically shift the Auto Wah Auto Wah frequency according to the input signal level. Simulates various types of wah pedals. An effect that Modeling Wah Modeling Wah can automatically shift the frequency according to the level of the input signal.
-
Page 191: Parameter List Of Dsp Module Effects
Reference Parameter List of DSP Module Effects Effect Description Settings Parameter Display Name Mono 1-Band EQ This is a single-band monaural equalizer. EQ Freq EQ Frequency Adjusts the center frequency of Equalizer. (page EN-200) EQ Gain EQ Gain Adjusts the gain of Equalizer. –12 - 00 - 12 Input Level Input Level... - Page 192 Reference Effect Description Settings Parameter Display Name Stereo 1-Band EQ This is a single-band stereo equalizer. EQ Freq EQ Frequency Adjusts the center frequency of Equalizer. (page EN-200) EQ Gain EQ Gain Adjusts the gain of Equalizer. –12 - 00 - 12 Input Level Input Level Adjusts the input level.
- Page 193 Reference Effect Description Settings Parameter Display Name Tone Control Monaural tone control that adjusts low, mid, and high frequencies. Low Freq Low Frequency Adjusts the cutoff frequency of Low-range (page EN-200) Low Gain Low Gain Adjusts the Low-range gain. –12 - 00 - 12 Mid Freq Mid Frequency...
- Page 194 Reference Effect Description Settings Parameter Display Name Compressor Compresses the input signal and suppresses level variation. Attack Attack Adjusts the time until compression goes into 000 - 127 effect. A smaller value causes prompt compressor operation, which suppresses the attack of the input signal.
- Page 195 Reference Effect Description Settings Parameter Display Name Enhancer Enhances the profiles of the low range and high range of the input signal. Low Freq Low Frequency Adjusts the low range enhancer frequency. 000 - 127 Low Gain Low Gain Adjusts the low range enhancer gain.
- Page 196 Reference Effect Description Settings Parameter Display Name Flanger Applies wildly pulsating and metallic reverberation to notes. Enables selection of the LFO waveform. Rate LFO Rate Adjusts the LFO rate. 000 - 127 Depth LFO Depth Adjusts the LFO depth. 000 - 127 Waveform LFO Waveform...
- Page 197 Reference Effect Description Settings Parameter Display Name Drive Rotary A rotary speaker simulator that makes overdrive possible. Type Type Selects the rotary speaker type. 0 - 3 OD Gain Overdrive Gain Adjusts overdrive gain. 000 - 127 OD Level Overdrive Level Adjusts the overdrive output level.
- Page 198 Reference Effect Description Settings Parameter Display Name Ring Modulator Multiplies the input signal with an internal oscillator signal to create a metallic sound. OSC Freq OSC Frequency Sets the reference frequency of the internal 000 - 127 oscillator. Rate LFO Rate Adjusts the LFO rate.
- Page 199 Reference Effect Description Settings Parameter Display Name Input Level Input Level Adjusts the input level. 000 - 127 Dry Level Dry Level Adjusts the level of the direct sound. 000 - 127 Wet Level Wet Level Adjusts the level of the effect sound. 000 - 127 ...
- Page 200 Reference Effect Description Settings Parameter Display Name Auto Wah “Wah” effect that can automatically shift the frequency according to the input signal level. Input Level Input Level Adjusts the input level. The input signal can 000 - 127 become distorted when the level of the sound being input, the number of chords, or the Resonance value is large.
- Page 201 Reference Effect Description Settings Parameter Display Name Distortion Distortion, wah, and amp simulator combined into a single effect. Dist Gain Dist Gain Adjusts the distortion input signal gain. 000 - 127 Dist Level Dist Level Adjusts the distortion output level. 000 - 127 Dist Low Dist Low...
- Page 202 Reference Effect Description Settings Parameter Display Name Drive Simulates the drive of a musical instrument amplifier. Type Drive Type Selects the drive type. (page EN-200) Gain Gain Adjusts the driver input signal gain. 000 - 127 Output Level Level Adjusts the drive output level.
- Page 203 Reference Effect Description Settings Parameter Display Name Stereo IR Simulates the acoustic characteristics by stereo IR (Impulse Response) data. L.Categ Left Category Selects the IR data category of the left channel. L.Type Left Type Selects the IR data type of the left channel. R.Categ Right Category Selects the IR data category of the right...
-
Page 204: Amp Cab Type List
Reference Amp Cab Type List Display Number of variations Display Number of variations FD-PRNST FD-TWRV3 FD-TWRV1 FU-OD RL-J12 GB-LANC FD-TWD HK-TM18 FD-DXRV HK-SBL VX-AC3 KH-STDT ML-DC3 KR-RV MB-MK1 LY-IRST MS-STK MB-MK3 FD-TWRV2 MB-F3+DI SL-SLO MB-D5 MB-RCTF MB-DRCT PV-51-SK MB-TX+.5 BASS-CMB MB-TX+DI FD-BMAN MS-VS80... - Page 205 Reference Display Number of variations Display Number of variations SP-1695 RL-CBKB SU-BGR3 LY-3C-AC VH-SP6 AC-SIM VX-A15 AP-EXT-VIN VX-A15TB STR-EXT VX-A30 MG-MIN-VCF-NEG VX-A30TB MG-MIN-VCF-POS YM-DG8 MG-MIN-VCF-TOP YM-F112 MG-MIN-VCF-OVL YM-F115 MG-MIN-VCF-OVL-T RD-PET-PRE SSL-LCUT RD-PET-PRE-TRM SSL-LMCUT RD-MK1-PRE HI-BST RD-MK1-PRE-TRM PARA-BST RD-MK2-PRE BASFIL-DEP RD-MK2-PRE-TRM BASFIL-SHL RD-DMY-PRE EH-SS-SPRK...
-
Page 206: Ir Type List
Reference IR Type List Category Type Category Type Guitar Amp 1 FD-PRNST Guitar Amp 1 DZ-V4 mt Guitar Amp 1 FD-TWNRV1 Guitar Amp 1 DZ-HA ds1 Guitar Amp 1 RL-J12 Guitar Amp 1 DZ-HA ds2 Guitar Amp 1 FD-TWD Guitar Amp 1 EG-TWK cl Guitar Amp 1 FD-DXRV... - Page 207 Reference Category Type Category Type Guitar Amp 1 HK-SBL ds3 Guitar Amp 1 MT-CFT cl2 Guitar Amp 1 KH-STDT cl Guitar Amp 1 MT-CFT cr Guitar Amp 1 KH-STDT od Guitar Amp 1 MT-CFT od Guitar Amp 1 KR-RV ds Guitar Amp 1 OR-O15 cl Guitar Amp 1...
- Page 208 Reference Category Type Category Type Guitar Amp 2 SP-1624 cr Guitar Amp 2 YM-F112a5 fu Guitar Amp 2 SP-1624 od Guitar Amp 2 YM-F112a7 Guitar Amp 2 SP-1695 cl Guitar Amp 2 YM-F112aX Guitar Amp 2 SP-1695 cr Guitar Amp 2 YM-F112aX fu Guitar Amp 2 SP-1695 od...
- Page 209 Reference Category Type Category Type Guitar Amp 2 YM-F112B5X rv Guitar Amp 3 RL-J12-5-L Guitar Amp 2 YM-F112B7X Guitar Amp 3 RL-J12-5-R Guitar Amp 2 YM-F112BXX Guitar Amp 3 RL-J12-FlF-L Guitar Amp 2 YM-F112BXXfub Guitar Amp 3 RL-J12-FlF-R Guitar Amp 2 YM-F115 cl Guitar Amp 3 RL-J12-Lo5-L...
- Page 210 Reference Category Type Category Type Guitar Preamp RL-J12Pr1B25 Bass Amp SW-PB20 cl1 Guitar Preamp RL-J12Pr1B2F Bass Amp SW-PB20 cl2 Guitar Preamp RL-J12Pr2B35d Bass Amp SW-PB20 cl3 Guitar Preamp RL-J12Pr2-25r Bass Amp SW-SM50 cl1 Guitar Preamp RL-J12Pr2B25c Bass Amp SW-SM50 cl2 Guitar Preamp RL-J12Pr2B25v Bass Amp...
- Page 211 Reference Category Type Category Type EP Preamp 1 RD-PETPRE-1FL EP Preamp 1 RD-MK2PRE-5F EP Preamp 1 RD-PETPRE-1FR EP Preamp 1 RD-MK2PRE-FF EP Preamp 1 RD-PETPRE-55L EP Preamp 1 RD-MK2PREMinF EP Preamp 1 RD-PETPRE-55R EP Preamp 1 RD-MK2PRE-0FL EP Preamp 1 RD-PETPRE-5FL EP Preamp 1 RD-MK2PRE-0FR...
- Page 212 Reference Category Type Category Type EP Preamp 2 YM-CPPRE flt Organ Amp LES-McLoHnOfL EP Preamp 2 YM-CPPRE lo- Organ Amp LES-McLoHnOfR EP Preamp 2 YM-CPPRE bs- Organ Amp LES-McLoHnOnL EP Preamp 2 YM-CPPRE mid- Organ Amp LES-McLoHnOnR EP Preamp 2 YM-CPPRE tb- Organ Amp LES-McMxHnOfL...
- Page 213 Reference Category Type Category Type Audio Device RADIO-ZENT R Other Preamp LES-CMBPREdrv Audio Device RECPL-DANS L Other Preamp LES-CMBPREbas Audio Device RECPL-DANS R Other Preamp LES-CMBPREclp Audio Device RECPL-EDN L Other Preamp LES-CMBPRE od Audio Device RECPL-EDN R Other Preamp LES-CMBPREodF Audio Device RECPL-JOPH L...
- Page 214 Reference Category Type Category Type Synth Module MG-M-VCFco5ol Effect 1 APX-ST2-FlHiR Synth Module MG-M-VCFco6ol Effect 1 APX-ST2-MoHiL Synth Module MG-M-VCFco7ol Effect 1 APX-ST2-MoHiR Synth Module MG-M-VCFco8ol Effect 1 STR-EXT gin- Synth Module MG-M-VCFco9ol Effect 1 STR-EXT gin+ Synth Module MG-M-VCFc10ol Effect 1 STR-EXT nsgn- Synth Module...
- Page 215 Reference Category Type Category Type Effect 1 MAE-Pha-Sl Effect 2 BOS-CE1-FMaxR Effect 1 MAE-Pha-Fs Effect 2 BOS-CE1-OvldL Effect 1 MXO-Pha-1 Effect 2 BOS-CE1-OvldR Effect 1 MX-Cho120012L Effect 2 RL-DIMEN-SW1L Effect 1 MX-Cho120012R Effect 2 RL-DIMEN-SW1R Effect 1 MX-Cho121200L Effect 2 RL-DIMEN-SW2L Effect 1 MX-Cho121200R...
- Page 216 Reference Category Type Category Type Equalizer 1 SSL lmcut160 Equalizer 1 SPRK-EQup bas Equalizer 1 SSL lmcut200 Equalizer 1 SPRK-EQup w/b Equalizer 1 SSL lmcut300 Equalizer 2 E-Hb6Q10-04KL Equalizer 1 SSL lmcut400 Equalizer 2 E-Hb6Q10-04KR Equalizer 1 SSL air med Equalizer 2 E-Hb6Q10-05KL Equalizer 1...
- Page 217 Reference Category Type Category Type Equalizer 2 E-Hb6Q14-05KL Equalizer 2 E-Hb6Q20-07KL Equalizer 2 E-Hb6Q14-05KR Equalizer 2 E-Hb6Q20-07KR Equalizer 2 E-Hb6Q14-06KL Equalizer 2 E-Hb6Q20-08KL Equalizer 2 E-Hb6Q14-06KR Equalizer 2 E-Hb6Q20-08KR Equalizer 2 E-Hb6Q14-07KL Equalizer 2 E-Hb6Q20-09KL Equalizer 2 E-Hb6Q14-07KR Equalizer 2 E-Hb6Q20-09KR Equalizer 2 E-Hb6Q14-08KL...
- Page 218 Reference Category Type Category Type Equalizer 3 E-LoCt06 050L Equalizer 3 E-LoCt06 240L Equalizer 3 E-LoCt06 050R Equalizer 3 E-LoCt06 240R Equalizer 3 E-LoCt06 060L Equalizer 3 E-LoCt06 250L Equalizer 3 E-LoCt06 060R Equalizer 3 E-LoCt06 250R Equalizer 3 E-LoCt06 070L Equalizer 3 E-LoCt06 260L Equalizer 3...
- Page 219 Reference Category Type Category Type Equalizer 3 E-LoCt06 430L Equalizer 4 E-40Q2-3-17KL Equalizer 3 E-LoCt06 430R Equalizer 4 E-40Q2-3-17KR Equalizer 3 E-LoCt06 440L Equalizer 4 E-40Q2-3-18KL Equalizer 3 E-LoCt06 440R Equalizer 4 E-40Q2-3-18KR Equalizer 3 E-LoCt06 450L Equalizer 4 E-40Q2-3-19KL Equalizer 3 E-LoCt06 450R Equalizer 4...
- Page 220 Reference Category Type Category Type Equalizer 4 E-40Q2-6-19KL Song 1 S-Brm-HangarL Equalizer 4 E-40Q2-6-19KR Song 1 S-Brm-HangarR Equalizer 4 E-40Q2-6-20KL Song 1 S-Brm-IntermL Equalizer 4 E-40Q2-6-20KR Song 1 S-Brm-IntermR Equalizer 4 E-001Lo12 L Song 1 S-Brm-VWaltzL Equalizer 4 E-001Lo12 R Song 1 S-Brm-VWaltzR Equalizer 4...
- Page 221 Reference Category Type Category Type Song 1 S-Lzt-Annee L Song 2 S-IllNevSmilL Song 1 S-Lzt-Annee R Song 2 S-IllNevSmilR Song 1 S-Lzt-Etude L Song 2 S-ItsTalkTwnL Song 1 S-Lzt-Etude R Song 2 S-ItsTalkTwnR Song 1 S-Lzt-Garop L Song 2 S-LadyBGood L Song 1 S-Lzt-Garop R Song 2...
- Page 222 Reference Category Type Category Type Song 2 S-SoftAs L Song 3 S-Bhm-PfTs1bL Song 2 S-SoftAs R Song 3 S-Bhm-PfTs1bR Song 2 S-SpkLike L Song 3 S-Bhm-PfTst1L Song 2 S-SpkLike R Song 3 S-Bhm-PfTst1R Song 2 S-Longing L Song 3 S-Bhm-PfTst2L Song 2 S-Longing R Song 3...
- Page 223 Reference Category Type Category Type Song 3 S-BhmJp-Flt L Song 3 S-LdyMBc-FulL Song 3 S-BhmJp-Flt R Song 3 S-LdyMBc-FulR Song 3 S-ImgIntFlt L Song 3 S-LdyM1c-IntL Song 3 S-ImgIntFlt R Song 3 S-LdyM1c-IntR Song 3 S-ImgFulFlt L Song 3 S-LdyM1c-FulL Song 3 S-ImgFulFlt R Song 3...
- Page 224 Reference Category Type Category Type Song 4 S-Clk-FulFltL Song 4 S-VInsRe-Fl6L Song 4 S-Clk-FulFltR Song 4 S-VInsRe-Fl6R Song 4 S-Clk-FInt12L Song 4 S-VInsReFl12L Song 4 S-Clk-FInt12R Song 4 S-VInsReFl12R Song 4 S-Clk-Full12L Song 4 S-UrSgIntFltL Song 4 S-Clk-Full12R Song 4 S-UrSgIntFltR Song 4 S-PfManPfFltL...
- Page 225 Reference Category Type Category Type Song 4 S-Mst-10 L Song 5 S-JstWayRe L Song 4 S-Mst-10 R Song 5 S-JstWayRe R Song 4 S-Mst-12 L Song 5 S-MySwtBstInL Song 4 S-Mst-12 R Song 5 S-MySwtBstInR Song 4 S-MplR1-12 L Song 5 S-MySwtBst L Song 4 S-MplR1-12 R...
- Page 226 Reference Category Type Category Type Song 5 S-NoQtrUsIntL Song 5 S-1000miUpGnL Song 5 S-NoQtrUsIntR Song 5 S-1000miUpGnR Song 5 S-NoQtrUs L Song 5 S-WhenLvTkInL Song 5 S-NoQtrUs R Song 5 S-WhenLvTkInR Song 5 S-NoQtrJpIntL Song 5 S-WhenLvTk L Song 5 S-NoQtrJpIntR Song 5 S-WhenLvTk R...
-
Page 227: Microphone Effects List
Reference Microphone Effects List Microphone Effect Type List Listed below are the types of microphone effects and the effects contained in each module from M1 to M3 for each type. For more information on the effects listed in the M1 to M3 columns, see “List of Effects in the Microphone Effects Module”... -
Page 228: List Of Effects In The Microphone Effects Module
Reference List of Effects in the Microphone Effects Module Listed below are all the effects included in the Microphone Effects module. For details on the parameters and setting ranges that can be set for each effect, see “Parameter List of Module Effects”... -
Page 229: Parameter List Of Module Effects
Reference Parameter List of Module Effects Effect Description Settings Parameter Display Name Mono 3-Band EQ This is a three-band monaural equalizer. EQ1 Freq EQ1 Frequency Adjusts the center frequency of Equalizer 1. EQ1 Gain EQ1 Gain Adjusts the gain of Equalizer 1. –12 - 00 - 12 EQ2 Freq EQ2 Frequency... - Page 230 Reference Effect Description Settings Parameter Display Name Limiter Limits the input signal level so it does not rise above a preset level. Limit Limit Adjusts the volume level of the limit at which 000 - 127 limiting is applied. Attack Attack Adjusts the time until the compression effect...
- Page 231 Reference Effect Description Settings Parameter Display Name Chorus Gives notes depth and breadth. Rate LFO Rate Adjusts the LFO rate. 000 - 127 Depth LFO Depth Adjusts the LFO depth. 000 - 127 Waveform LFO Waveform Selects the LFO waveform. Sine, Triangle Feedback Feedback...
- Page 232 Reference Effect Description Settings Parameter Display Name Ring Modulator Multiplies the input signal with an internal oscillator signal to create a metallic sound. OSC Freq OSC Frequency Sets the reference frequency of the internal 000 - 127 oscillator. Rate LFO Rate Adjusts the LFO rate.
- Page 233 Reference Effect Description Settings Parameter Display Name Drive Simulates the drive of a musical instrument amplifier. Type Drive Type Selects the drive type. 1 - 20 Gain Gain Adjusts the driver input signal gain. 000 - 127 Output Level Level Adjusts the drive output level.
-
Page 234: Arpeggiator List
Reference Arpeggiator List Listed below are the Arpeggiator patterns. When the “Recommended Setup” is “On”, when the Arpeggiator is switched from off to on, or when “Pattern” is switched while the Arpeggiator is on, the “Recommended Setup” listed are automatically applied. Recommended Setup Pattern Name The Arpeggiator’s target part Split Point... - Page 235 Reference Recommended Setup Pattern Name The Arpeggiator’s target part Split Point Remarks Arpeggio (Pattern) sound Hold Upper 1 Upper 2 Lower name ✓ ✓ Up Up Down ✓ ✓ Down Down Up ✓ ✓ Sequence Line 1 ✓ ✓ Sequence Line 2 ✓...
- Page 236 *3: For details about RPN and system exclusive messages, see MIDI Implementation at https://support.casio.com/global/en/emi/manual/PX-S6000/ *4: Depends on the knobs and the CONTROL button settings. • The MIDI messages marked with “x” in the “Transmitted” column of the above chart may be output along with certain operations.
- Page 237 PXS6000-E-2A MA2209-A...