Table of Contents
Advertisement
Quick Links
User manual
Wildlife camera
Article number: WCAM130GN
Nedis BV
De Tweeling 28, 5215 MC 's-Hertogenbosch, The Netherlands 06/19
Preface
Thank you for purchasing the Nedis WCAM130GN.
This document is the user manual and contains all the information for correct, e cient and
safe use of the product.
This user manual is addressed to the end user. Read this information carefully before
installing or using the product.
Always store this information with the product for use in the future.
Product description
The Nedis WCAM130GN is a wildlife camera for indoor and outdoor use.
The product is used to take photos and record video images of animal and human activity
when it detects movement.
Intended use
This product is exclusively intended as a wildlife camera.
Consult the local laws and regulation for wildlife cameras before installing and using.
Any modi cation of the product may have consequences for safety, warranty and proper
functioning.
Speci cations
Product
Wildlife camera
EN
Advertisement
Table of Contents

Related Manuals for nedis WCAM130GN


Summary of Contents for nedis WCAM130GN
- Page 1 Always store this information with the product for use in the future. Product description The Nedis WCAM130GN is a wildlife camera for indoor and outdoor use. The product is used to take photos and record video images of animal and human activity when it detects movement.
- Page 2 Article number WCAM130GN User manual Dimensions (l x w x h) 145 x 110 x 74 mm Input voltage DC 6 V Batteries AA batteries, alkaline/NiMH (4x/8x) Memory MicroSD card (2 - 32 GB) (not included) Detection range = 20 m, below 25 °C...
-
Page 3: Safety Instructions
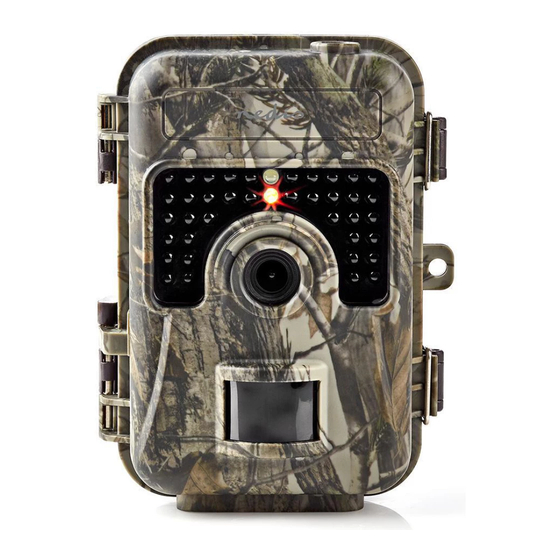
User manual ≤ 160 mA (at DC-6V) Current ≤ 950 mA (when infrared light lights up) ≤ 0.1 mA (standby) Low battery alarm 4.5 V Safety instructions WARNING • Only use the product as described in this manual. •... - Page 4 User manual 1 Mini USB cable 2 Camera strap 3 Strap buckle 4 Display 5 OK button 6 RIGHT button 7 UP button 8 MENU button 9 LEFT button q DOWN button...
-
Page 5: Installation
Check the contents of the package Check that all parts from the parts list are present and that no damage is visible on the parts. If parts are missing or damaged, contact the Nedis B.V. service desk via the website: www.nedis.com. - Page 6 Insert or change batteries User manual To take pictures and video images at night with the infrared light, battery voltage should be more than 4.5V. Open the lock buckles p . Open the wildlife camera. Pull the battery cover i out of the housing. Take the empty batteries out of the battery slots o if present.
- Page 7 User manual DC-6V power cable is not included. Lift the DC protection rubber e located on the bottom of the camera. Plug a DC-6V power cable into the DC power port r . Plug the other end of the DC-6V power cable into a power outlet. Insert or change memory card Use a microSD card with a maximum of 32 GB storage capacity.
- Page 8 Open the wildlife camera. User manual Take the previous microSD card out of the microSD card slot t if present. Insert the new microSD card into the microSD card slot t . Close the wildlife camera. Close the lock buckles p . Attachment There are two ways to attach the camera: With the camera strap 2 or with the tripod mount y .
-
Page 9: Record Video
User manual Switch to manual mode Slide the power switch w to the SET position to enter the manual mode. In this mode you can take pictures or record video images manually. When you do not use the camera for 3 minutes, the display turns off. After 10 minutes of inactivity, the camera turns off completely. -
Page 10: Settings Menu
Press MENU to enter the picture and video images menu. Delete one is selected. User manual To delete the picture or video image currently displayed, press OK. To delete all pictures and video images on the microSD card, follow these steps: Use UP or DOWN to navigate to Delete all. - Page 11 camera will wait until it responds to any User manual subsequent triggers from the PIR sensor after an object is rst detected. During the selected interval, the camera will not take pictures/video images. This prevents the microSD card from lling up with too many redundant images.
- Page 12 les with the new les when the microSD User manual card is full, so the camera keeps working. Alternatively, select Stop saving when full to keep the rst les and neglect new les. Delete all les on the microSD card. It is recommended to format the card if it has Format been used previously in other devices.
-
Page 13: Maintenance
User manual To transfer the pictures and video images from the microSD card to an external device, follow these steps: Plug the mini USB cable 1 into the mini USB slot of the camera u . Plug the other end of the mini-USB cable into the external device, e.g. a computer or a laptop. - Page 14 User manual Designs and speci cations are subject to change without notice. All logos, brands and product names are trademarks or registered trademarks of their respective owners and are hereby recognized as such. Disposal This symbol indicates that this product should not be thrown away with other household waste throughout the EU.