Table of Contents
Advertisement
Advertisement
Table of Contents

Related Manuals for York Fitness Atomic


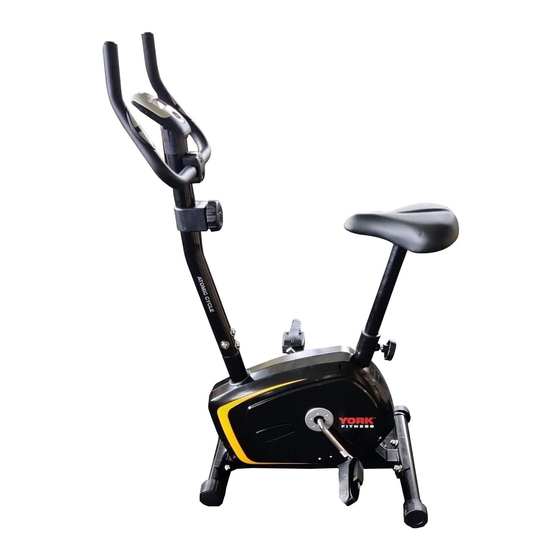
Summary of Contents for York Fitness Atomic
- Page 1 Owner’s Manual Atomic Exercise Cycle 53075 2JANUARY2013 www.yorkfitness.com...
-
Page 2: Table Of Contents
Table of contents Congratulations on CONTENTS purchasing your exercise equipment from Safety information Customer support Assembly instructions Operational instructions You have chosen a high quality, safe and innovative piece of equipment as your training partner and we are certain it will keep you motivated on the way to Care &... -
Page 3: Safety Information
Use only the adjustment setting as described in the • Due to our continuous policy of product instructions. Always use the correct adjustment pin development, York Fitness reserves the right to / fixing. change specifications without notice. • Always check that any pins / fixings are tight and secure before use and after adjustment. -
Page 4: Customer Support
IMPORTANT!! - Please retain your sales receipt, York Fitness Customer Care may request proof of purchase to validate eligibility for warranty service. Warranty cover starts from the date shown on the proof of purchase. ENGLAND... -
Page 5: Assembly Instructions
Assembly instructions Prepare your work area - It is important you assemble the product in a clean and uncluttered space. Work with a friend - We recommend you have someone assist you with the assembly as some of the components are quite heavy. Open the carton - Check any warnings on the carton and make sure you have it the right way up. - Page 6 Assembly instructions BLISTER PACK M-4 x 4 M-5 x 4 M-1 x 4 M-2 x 4 M-3 x 4 (M8*15) (D8) (M10*57) (D10) (M10) M-8 x 2 M-6 x 2 (D8) (M8*30) M-7 x 2 (D8) F-12 x 1 (M12*22*25) STEP 1 M-1 x 4 M-2 x 4...
- Page 7 Assembly instructions STEP 2 STEP 3 Parts Pre-installed E-2 x 3 E-3 x 3 F-12 x 1 F-12 www.yorkfitness.com...
- Page 8 Assembly instructions STEP 4 M-4 x 4 M-5 x 4 F-13 F-13 STEP 5 M-8 x 2 M-7 x 2 M-6 x 2 B-4 x 1 www.yorkfitness.com...
- Page 9 STEP 6 Final Check Your equipment is now assembled. Please make the following final checks: • Make sure all screws / bolts are tightened. • Make sure the equipment is on a flat, level surface. www.yorkfitness.com...
-
Page 10: Operational Instructions
Operational instructions Console How to remove battery: 1. Pull off the battery cover and place two AAA batteries into battery housing on back of monitor, please refer to below illustrations. 2. Insure batteries are correctly positioned and battery springs are in proper contact with batteries. 3. - Page 11 Functions: FUNCTION DESCRIPTION Auto On/Off & Auto Start/Stop As long as the machine is in motion, the monitor is in action. If there is no moving within 4 minutes, monitor will turn off automatically. Auto Scan Press the button until the ARROW points to “SCAN”, the monitor will rotate through all 5 functions Speed, Distance, Time, and Odometer &...
-
Page 12: Care & Maintenance
Operational instructions Hand Pulse Sensors This exercise equipment is fitted with 2 hand pulse sensors. To obtain a pulse reading you must have both your left and right hands on the sensors at the same time. Do not grip the hand sensors too tight and allow the computer a few Hand Pulse Sensor seconds to display the reading. -
Page 13: Troubleshooting
Troubleshooting If you have a problem with your exercise equipment, before you do anything else please check that all the cables have been connected correctly. Loose cables are very common and many problems can be solved by making sure the cables are properly connected. The following table details the most common problems and how to fix them. -
Page 14: Fitness Guide
Fitness guide Fitness guide Starting and Finishing Your Workout Begin and end each workout with a Warm Up / Down session - a few minutes of stretching to help prevent strains, pulls and cramps. Correct Cycling Form • Sit on the cycle, with your feet on the pedals and inside the pedal straps. •... - Page 15 How Long Should I Exercise For? That really depends on your current level of fitness. If you’re just starting out on a new exercise program, you should start gradually and build up - do not try to do too much too quickly. 30 minutes, 3 times a week should be enough. Don’t push yourself too hard - you should never feel exhausted during or following exercise.
-
Page 16: Exploded Drawing
Exploded drawing F-13 F-11 F-12 www.yorkfitness.com... - Page 17 www.yorkfitness.com...
- Page 18 Exploded drawing www.yorkfitness.com...
-
Page 19: Part List
Part list YORK REF. REF. DESCRIPTION QTY. YORK REF. REF. DESCRIPTION QTY. 53075-001 COMPUTER SET 53075-044 BEARING (6000Z) 53075-002 COMPUTER (80146) 53075-045 FLYWHEEL AXLE (Ø10*L134*M10*1) 53075-003 HANDLEBAR SET 53075-046 FLYWHEEL (Ø190*42) 53075-004 HANDELBAR (Ø22*1.5*940) 53075-047 CRANK SET 53075-005 HANDLE PULSE (550) 53075-048 CRANK (B0.5*20;) 53075-006... - Page 20 www.yorkfitness.com...