
Related Manuals for Breville Joule BOV950


Summary of Contents for Breville Joule BOV950
- Page 1 Joule Oven Air Fryer Pro ™ INSTRUCTION BOOK MANUEL D'INSTRUCTIONS MANUAL DE INSTRUCCIONES FR-CA ES-MX...
-
Page 2: Table Of Contents
BREVILLE Contents RECOMMENDS SAFETY FIRST 2 Breville Recommends At Breville we are very ® Safety First safety conscious. We design 9 Components and manufacture consumer 11 Functions products with the safety of you, 14 Connecting Your Oven our valued customer, foremost 15 Oven Functions in mind. - Page 3 ELECTRICAL / POWER included broiling rack and roasting pan, that contain hot SAFETY oil or other hot liquids. • Do not use the appliance near • Do not lay cooking utensils, the edge of a countertop or roasting pans or dishes on the table.
- Page 4 Immediately stop use and call this oven when not in use. Breville Consumer Support. • To switch off the oven, press • Servicing should be performed the START/CANCEL button by an authorized service on the control panel.
- Page 5 • Keep the appliance and its cord • Do not operate the light if the out of reach of children less bulb housing, glass cover, UV than 8 years. filter or enclosure are missing or damaged. • Close supervision is necessary when the appliance is used by WARNING or near children.
- Page 6 Bluetooth , Wi-Fi™ FEDERAL ® SECURITY VIA THE APP COMMUNICATION COMMISSION (FCC) • Connected appliances STATEMENT are designed to deliver a connected experience while CAUTION protecting your data. The installation and configuration The user is cautioned that of these products involves changes or modifications not other digital products in your expressly approved by the party...
- Page 7 generates, uses and can radiate −This equipment should be radio frequency energy and, installed and operated with a if not installed and used in minimum distance of 20cm accordance with the instructions, between the radiator and your may cause harmful interference body.
- Page 8 SHORT CORD NOTICE TO CUSTOMERS INSTRUCTIONS REGARDING MEMORY STORAGE • Your Breville appliance is fitted with a short power supply cord • Please note that in order to to reduce personal injury or better serve our customers, property damage resulting...
-
Page 9: Components
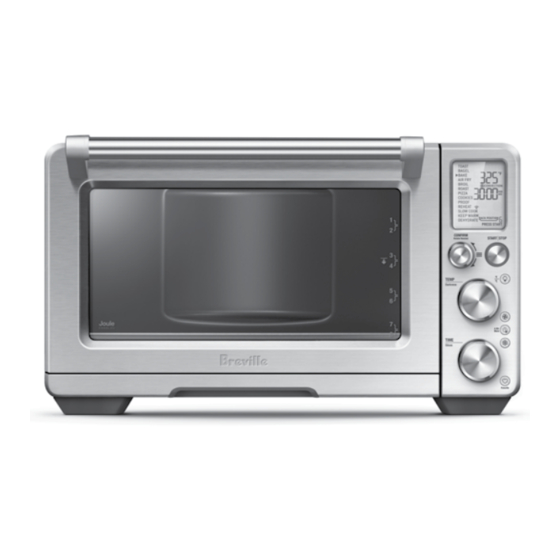
Components CONF Rotate R A. 13’’ non-stick pizza pan F. Oven light B. Wire racks (x 2) G. Door handle Reversible for 8 different rack positions H. Ventilation slots C. 9” x 13” broiling rack I. Crumb tray D. 9’’ x 13’’ enamel roasting pan E. - Page 10 J. LCD screen K. CONFIRM dial and ROTATE REMIND button L. TEMPERATURE dial and Toast and Bagel Darkness control M. TIME dial and Toast and Bagel Slice CONFIRM selection Rotate Remind N. START/STOP button Start and Confirm button when using the connected guided recipes.
-
Page 11: Functions
Functions BEFORE FIRST USE 8. Turn the CONFIRM dial to the right until the indicator reaches the PIZZA function. This guide is designed for first time use For safety and more information, refer to the rest of the Instruction Book. CONFIRM Rotate Remind NOTE... - Page 12 OVEN FUNCTIONS OVERVIEW FUNCTION SUGGESTED OPTIONAL PRESETS PREHEAT RANGE RACK POSITION SETTINGS TOAST FROZEN FOOD Darkness 4 Darkness 1-7 Slices 4 Slices 1-9 A BIT MORE™ BAGEL FROZEN FOOD Darkness 4 Darkness 1-7 Slices 4 Slices 1-10 A BIT MORE™ BAKE CONVECTION/ 325°F...
- Page 13 FUNCTION SUGGESTED OPTIONAL PRESETS PREHEAT RANGE RACK POSITION SETTINGS PROOF Various CONVECTION/ 85°F 80°F – 100°F SUPER 1:00 hour Up to 24 hours CONVECTION Convection TEMPERATURE CONVERSION ROTATE REMIND A BIT MORE™ REHEAT Various CONVECTION/ 325°F 160°F-480°F SUPER 15 Min Up to 2:00 hours Convection CONVECTION...
-
Page 14: Connecting Your Oven
App, which may lead to changes in event cooking experience – Joule Autopilot. functionality and setup steps. Please rely on Breville and ChefSteps create recipes tailored the instructions in the latest version of the App to the oven which provide guidance and to guide you through the setup process. -
Page 15: Oven Functions
Turn the TIME dial to the left to reduce the cooking time or to the right to increase the OPERATING YOUR BREVILLE OVEN cooking time. 1. Insert the wire rack into the desired TIME rack position. -
Page 16: Oven Rack
Ensure the food is centered in as important as the cooking temperature. the oven for the most even cooking. Breville has tested and determined optimum a) Close the oven door. rack positions for certain functions. This b) The timer will continue to count down. -
Page 17: Door Sensor
DOOR SENSOR NOTE If the door is opened during cooking, the timer When cooking food on baking pans or other will pause and the light will turn on. cooking vessels on multiple wire racks, it is When the door is closed, the timer will resume suggested to leave enough room between counting down and the light will stay on for 30 racks and avoid using the top rack position due... - Page 18 2. From the oven interface, press and hold 5. The darkness setting and number of the FAVORITE button. The oven will beep slices can be adjusted before or during the once and a heart icon will appear on the toasting cycle. LCD screen.
- Page 19 Desired toast color Setting NOTE Light 1 or 2 The cooking time is dependent on a number of variables including the temperature in the oven, Medium 3, 4 or 5 so the time may vary, even with the same color Dark 6 or 7 and slices settings.
- Page 20 BAKE FUNCTION >390°F/200°C up to 4 hours The BAKE function cooks food evenly 300°F/150°C - 390°F/200°C up to 8 hours throughout. This function is ideal for baking 210°F/100°C - 300°F/150°C up to 12 hours cakes, muffins, brownies and pastries. The BAKE function is also ideal for cooking <210°F/100°C up to 72 hours...
- Page 21 You can fit a total of 4 air frying/dehydrating AIR FRY cycle. baskets in this oven. Visit www.breville.com for more information on purchasing additional air a) The AIR FRY temperature is displayed as fry/dehydrate baskets.
- Page 22 ROAST FUNCTION The ROAST function is ideal for cooking a variety of meats and poultry. Food will be tender and juicy on the inside and roasted to perfection on the outside. 1. Insert the wire rack into rack position 6. 2.
- Page 23 5. Press the START/STOP button to activate the ROAST function. The button backlight will illuminate red, the oven alert will sound, and the LCD screen will illuminate orange. The LCD screen will indicate a blinking ‘PREHEATING’. 6. Once the oven has finished preheating, an alert will sound, and food can be inserted into the oven.
- Page 24 9. At the end of the PIZZA cycle, the oven 10. Select desired PIZZA temperature, time, alert will sound. The START/STOP button convection, and fresh/frozen settings and backlight will go out and the LCD screen will press the START/STOP button to restart illuminate white.
- Page 25 alert will sound and the LCD screen will illuminate orange. The LCD screen will indicate a blinking ‘PREHEATING’. 6. Once the oven has finished preheating, an alert will sound and food can be inserted into the oven. 7. Place food, positioned on the included roasting pan, pizza pan or other oven-proof dish, on the center of the wire rack so air will flow around all sides of the food.
- Page 26 REHEAT FUNCTION 6. Press the START/STOP button to activate the REHEAT function. The button backlight The REHEAT function is ideal for gently will illuminate red, the oven alert will sound, reheating leftovers without browning or drying and the LCD screen will illuminate orange. them out.
- Page 27 a) The temperature is displayed as the TIPS top figure on the LCD screen. Turn the TEMPERATURE dial to adjust slow TIPS FOR SLOW COOKING cooking to one of two preset temperatures: ‘LOW’ or ‘HIGH’. 1. Ensure cookware is oven-proof and does not exceed 13 pounds when empty.
- Page 28 DEHYDRATE FUNCTION The DEHYDRATE function combines low and stable heat with maximized airflow to evenly dry out foods without cooking or overheating. 1. Arrange food evenly on the included air fry/dehydrate basket. For best results, place food in a single layer and leave space between pieces.
- Page 29 6. The timer will be displayed and begin to count down. The temperature and time can be adjusted during the dehydrating cycle by turning the corresponding TEMPERATURE and TIME dial. The cycle can be stopped at any time by pressing the START/STOP button 7.
- Page 30 Care & Cleaning Before cleaning, ensure the oven is turned off WARNING by removing the power plug from the power outlet. Use extreme caution when cleaning the quartz heating elements. Allow the oven to Allow the oven and all accessories to cool cool completely, then gently rub a soft, damp completely before disassembling and cleaning.
- Page 31 As a result, storing items on top of the oven is not recommended. The only exception is the optional Breville Bamboo Cutting Board and Serving Tray that fits in the ribbed section on top of the oven.
- Page 32 Troubleshooting POSSIBLE PROBLEM EASY SOLUTION • Oven will not switch “ON” Check that the power plug is securely inserted into the outlet. • Insert the power plug into an independent outlet. • Insert the power plug into a different outlet. •...
- Page 33 The LCD screen will display ‘E01’ when there is a non-resettable issue displays ‘E01’ with the appliance. Should this occur, immediately remove the power cord from the power outlet and contact Breville Consumer Support. • The LCD screen The LCD screen will display ‘E02’ when there is a non-resettable issue displays ‘E02’...
- Page 34 Notes...
- Page 35 Joule Oven Air Fryer Pro ™ MANUEL D'INSTRUCTIONS FR-CA...
- Page 36 BREVILLE Contenu RECOMMANDE LA SÉCURITÉ 2 Breville recommande D'ABORD la sécurité d'abord 9 Composants Chez Breville , la sécurité est au ® 11 Fonctions centre de nos préoccupations. 14 Connexion de votre four Nous concevons et fabriquons 15 Fonctions du four nos produits en priorisant −...
- Page 37 • Cet appareil est prévu pour un • Lorsque vous faites fonctionner usage exclusivement domes- le four, gardez un espace mini- tique. Ne l'utilisez dans aucun mal de 10 cm (4 po) des deux type de véhicule en mouvement. côtés de l'appareil et de 15 cm N'utilisez pas l'appareil à...
- Page 38 Breville. • Pour éteindre le four, appuyez • L'entretien doit être effectué sur le bouton MARCHE/ARRÊT par un représentant de service sur le panneau de commande.
- Page 39 SÉCURITÉ DES ENFANTS • Pour réduire le risque D'IN- CENDIE, DE CHOC ÉLEC- • Pour éviter tout risque d'étouf- TRIQUE, D'EXPOSITION À fement pour les jeunes enfants, DES RAYONS UV EXCESSIFS retirez et jetez en toute sécurité OU DE BLESSURES CORPO- le couvercle de protection instal- RELLES : lé...
- Page 40 intelligents, les tablettes, les mo- AVERTISSEMENT dems et les routeurs Wi-Fi. Nous vous recommandons d'appliquer N'utilisez pas de produits net- les meilleures pratiques concer- toyants, de produits de polissage ou de tampons à récurer abrasifs nant la sécurité de ces appareils. qui pourraient endommager le •...
- Page 41 trique subi, même si le brouillage −Consultez le détaillant ou un est susceptible d'en compro- technicien spécialisé en radio mettre le fonctionnement. ou télévision pour obtenir de l'aide. • Déclaration d'IC sur l'exposition REMARQUE aux radiations: Cet équipement a été testé et −Cet équipement est conforme déclaré...
- Page 42 INSTRUCTIONS RELATIVES AVIS AUX CLIENTS À UN CORDON COURT CONCERNANT LE STOC- KAGE DE MÉMOIRE • Votre appareil Breville est équi- pé d'un cordon d'alimentation • Veuillez noter que pour mieux court pour réduire les blessures servir nos clients, un stockage ou les dommages matériels...
- Page 43 Composants CONFI Rotate Re A. Plaque à pizza antiadhésive de 13 po F. Lampe de four B. Grilles métalliques (x 2) G. Poignée de porte Réversibles pour 8 positions de grilles H. Fentes de ventilation différentes I. Plateau ramasse-miettes C. Grille de cuisson 9 po x 13 po D.
- Page 44 J. Écran LCD K. Molette de réglage CONFIRMER et bouton RAPPEL DE ROTATION L. Molette de réglage de TEMPÉRATURE et commande de brunissement du pain grillé et des bagels CONFIRM Rotate Remind M. Molette de réglage de TEMPS et commande de sélection « pain grillé et tranche de bagel »...
- Page 45 6. Déroulez complètement le cordon d'alimentation et insérez la fiche Fonctions d'alimentation dans une prise électrique reliée à la terre. 7. Le bouton s'illuminera en rouge, l'alerte du four retentira et l'écran LCD AVANT LA PREMIÈRE UTILISATION deviendra orangé. Les options de fonction Ce guide est conçu pour la première utilisation apparaîtront avec un indicateur sur le réglage PAIN GRILLÉ.
-
Page 46: Toast
APERÇU DES FONCTIONS DU FOUR FONCTION POSITION RÉGLAGES PRÉCONFI- PRÉCHAUF- GAMME DE GRILLE FACULTATIFS GURATIONS SUGGÉRÉE PAIN ALIMENTS Brunissement 4 Brunissement 1-7 GRILLÉ CONGELÉS Tranches 4 Tranches 1-9 (TOAST) A BIT MORE™ BAGEL ALIMENTS Brunissement 4 Brunissement 1-7 CONGELÉS Tranches 4 Tranches 1-10 A BIT MORE™... -
Page 47: Cookies
FONCTION POSITION RÉGLAGES PRÉCONFI- PRÉCHAUF- GAMME DE GRILLE FACULTATIFS GURATIONS SUGGÉRÉE BISCUITS CONVECTION / 325 °F (165 °C) 300 °F (150 °C) à (COOKIES) SUPER CONVECTION 11 minutes 480 °F (250 °C) Jusqu'à 1 heure CONVERSION DE Convection TEMPÉRATURE ALIMENTS CONGELÉS RAPPEL DE ROTATION... -
Page 48: Connexion De Votre Four
: le Joule AutoPilot (pilote * Nous travaillons constamment à l'amélio- automatique). ration de l'application, ce qui peut entraîner Breville et ChefSteps créent des recettes des changements dans les fonctionnalités adaptées au four qui contiennent des conseils et les étapes de configuration. Veuillez vous et différentes techniques culinaires. -
Page 49: Fonctions Du Four
MOLETTE DE RÉGLAGE DE TEMPÉRATURE Fonctions du four FONCTIONNEMENT DE VOTRE FOUR BREVILLE RÉDUIRE LA AUGMENTER LA TEMPÉRATURE TEMPÉRATURE 1. Insérez la grille dans la position de grille 4. Le chiffre au bas de l'écran LCD indique souhaitée. Les positions de grille sont la température de cuisson préréglée pour le... -
Page 50: Grille De Four
« PRÉCHAUFFAGE » en clignotant aussi importante que la température de cuisson. pendant que le four réchauffe. Breville a testé et déterminé les positions 7. Lorsque le four est prêt à être utilisé, optimales de la grille pour certaines fonctions. -
Page 51: Capteur Sensoriel De La Porte
CAPTEUR SENSORIEL DE LA PORTE 3. Suivez les étapes de la fonction que vous avez sélectionnée et commencez à cuire Si la porte est ouverte pendant la cuisson, vos aliments. la minuterie s'arrêtera et la lumière s'allumera. 4. Lorsqu'il est temps de changer la position Lorsque la porte est fermée, la minuterie des grilles, l'alerte de rappel de rotation reprendra le compte à... -
Page 52: Favoris
1. Insérez la grille dans la position de grille 4. REMARQUE 2. Placez les tranches de pain aussi près que possible du centre de la grille pour un La fonction A BIT MORE™ ne s'activera pas grillage optimal. si aucune fonction de cuisson précédente n'est 3. -
Page 53: Fonction Bagel
Le nombre de tranches est indiqué par le 1. Insérez la grille dans la position de grille 4. dernier chiffre affiché au bas de l'écran LCD. 2. Placez les moitiés de bagel aussi près que Tournez la molette de réglage de TEMPS vers possible du centre de la grille pour un la gauche pour réduire le nombre de tranches grillage optimal. -
Page 54: Fonction Cuire
Tournez la molette de réglage de TEMPS vers 1. Insérez la grille dans la position de grille 6. la gauche pour réduire le nombre de demi- Notez que certains produits de pâtisserie, bagels ou vers la droite pour l'augmenter. tels que les brownies, peuvent être plus Le nombre de tranches varie de «... -
Page 55: Fonction De Friture À Air Chaud
retentira et l'écran LCD deviendra orangé. Le mot « PRÉCHAUFFAGE » s'affichera sur l'écran LCD en clignotant. 6. Une fois que le four aura terminé le préchauffage, une alerte retentira et les aliments pourront être insérés dans le four. 7. Placez les aliments sur le plat à rôtir inclus ou tout autre plat allant au four, au centre de la grille pour que l'air circule de tous côtés. -
Page 56: Fonction Griller
à frire et déshydrater à l'air chaud dans ce four. des trois niveaux de puissance : Niveau Visitez le site www.breville.com pour plus de puissance de grillage « ÉLEVÉ », d'informations sur l'achat de paniers à frire «... -
Page 57: Fonction Rôtir
FONCTION RÔTIR 5. Appuyez sur le bouton MARCHE/ARRÊT pour lancer la fonction RÔTIR. Le bouton La fonction RÔTIR est idéale pour cuire une s'illuminera en rouge, l'alerte du four variété de viandes et de volailles. La nourriture retentira et l'écran LCD deviendra orangé. sera tendre et juteuse à... - Page 58 correspondantes. Le cycle peut être interrompu à tout moment en appuyant sur le bouton MARCHE/ARRÊT. 9. Au terme du cycle PIZZA, le signal d'alerte du four retentira. Le rétroéclairage du bouton MARCHE/ARRÊT s'éteindra et l'écran LCD s'illuminera d'une lumière blanche. REMARQUE Si vous choisissez d'utiliser la plaque à...
-
Page 59: Fonction Biscuits
8. Au terme du cycle, le signal d'alerte du a) La température de cuisson des BISCUITS four retentira. Le rétroéclairage du bouton est affichée en haut sur l'écran LCD. MARCHE/ARRÊT s'éteindra et l'écran LCD Tournez la molette de réglage de s'illuminera d'une lumière blanche. -
Page 60: Fonction Levée De Pain
FONCTION LEVÉE DE PAIN 6. Appuyez sur le bouton MARCHE/ARRÊT pour lancer la fonction LEVÉE DE PAIN. La fonction Levée de pain est conçue Le bouton s'illuminera en rouge, l'alerte pour maintenir avec précision les basses du four retentira et l'écran LCD deviendra températures, offrant un environnement orangé. -
Page 61: Fonction Mijoter (Cuisson Lente)
FONCTION MIJOTER (CUISSON LENTE) La fonction Mijoter propose des profils de cuisson conçus pour de longues périodes de cuisson à basse température. 1. Insérez la grille dans la position de grille 8. 2. Fermez la porte du four. 3. Tournez la molette de réglage CONFIRMER jusqu'à... -
Page 62: Fonction Maintenir Au Chaud
6. Appuyez sur le bouton MARCHE/ARRÊT 3. Faites toujours mijoter les aliments avec pour lancer la fonction MIJOTER. un couvercle pour éviter qu'ils ne se Le bouton s'illuminera en rouge, l'alerte dessèchent. Couvrez les récipients de du four retentira et l'écran LCD deviendra papier d'aluminium avant de mettre leur orangé. -
Page 63: Fonction Déshydrater
FONCTION DÉSHYDRATER La fonction DÉSHYDRATER combine une chaleur faible et stable avec un flux d'air maximisé pour sécher uniformément les aliments sans cuisson ni surchauffe. 1. Disposez les aliments de façon régulière dans le panier à frire à l'air chaud et à... - Page 64 b) Le temps de cuisson est affiché au bas de l'écran LCD. Tournez la molette de réglage de TEMPS pour régler la durée jusqu'à 72 heures. 5. Appuyez sur le bouton MARCHE/ARRÊT pour lancer la fonction DÉSHYDRATER. Le bouton s'illuminera en rouge, l'alerte du four retentira et l'écran LCD deviendra orangé.
-
Page 65: Entretien Et Nettoyage
Nettoyage de l'intérieur Entretien Les parois intérieures du four comportent et nettoyage un revêtement antiadhésif pour un nettoyage facile. Pour nettoyer les éclaboussures qui pourraient survenir pendant la cuisson, essuyez les parois avec une éponge douce et Avant de nettoyer le four, assurez-vous qu'il est humide. -
Page 66: Remplacement De La Lampe
Les seules 3. Retirez l'ampoule usagée en la tirant exceptions sont la planche à découper directement hors de sa douille. en bambou et le plateau de service Breville facultatifs. NE RANGEZ AUCUN ARTICLE SUR LE DESSUS DU FOUR. - Page 67 4. Utilisez un chiffon doux pour insérer la nouvelle ampoule. Utilisez toujours un chiffon doux lorsque vous manipulez l'ampoule et ne touchez pas directement la surface car l'huile de votre peau peut endommager l'ampoule. 5. Pour remettre en place le couvercle en verre, alignez le crochet métallique avec le côté...
-
Page 68: 34 Résolution Des Problèmes
Résolution des problèmes PROBLÈMES SOLUTION FACILE POSSIBLES • Le four ne s'allume pas. Vérifiez que la fiche d'alimentation est correctement insérée dans la prise. • Insérez la fiche d'alimentation dans une prise indépendante. • Insérez la fiche d'alimentation dans une autre prise. •... - Page 69 à la limite maximale définie. Retirez la fiche de la prise de courant, laissez le four refroidir pendant 15 minutes, puis rebranchez-le. • Communiquez avec le Soutien aux consommateurs de Breville si le code d'erreur « E03 » s'affiche toujours. •...
- Page 70 Remarques...
- Page 71 Joule Oven Air Fryer Pro ™ MANUAL DE INSTRUCCIONES ES-MX...
- Page 72 BREVILLE Contenido RECOMIENDA PRIORIZAR 2 Breville recomienda LA SEGURIDAD priorizar la seguridad 9 Componentes En Breville somos muy ® 11 Funciones conscientes de lo importante 15 Vinculación del horno que es la seguridad. 16 Funciones del horno La seguridad es nuestra −...
- Page 73 promocionales antes de usar • Para evitar descargas eléctricas, el horno por primera vez. no sumerja ni el cable de alimentación ni el enchufe • El equipo es para uso exclusivo en agua u otros líquidos. en el hogar. No use el equipo •...
- Page 74 • Para apagar el horno, presione tamente el uso del equipo y el botón START/CANCEL contacte al Centro de servicios (Iniciar/Cancelar) del panel de de Breville. control. El horno está apagado cuando las luces traseras del • La reparación y mantenimiento botón también se apagan.
- Page 75 SEGURIDAD PARA NIÑOS • Para reducir el riesgo de INCENDIO, DESCARGA • Para evitar el peligro de asfixia ELÉCTRICA, EXPOSICIÓN en niños pequeños, retire A RADIACIÓN UV y deseche de forma segura la EXCESIVA O LESIONES cubierta protectora instalada A LAS PERSONAS: en el enchufe.
- Page 76 metálicas que puedan dañar el que implemente buenas revestimiento decorativo de este prácticas con respecto a la equipo. seguridad de estos dispositivos. • Este horno tiene wifi y Bluetooth INSTRUCCIONES integrados, por lo que puede ESPECÍFICAS PARA controlarse a distancia con EL MODELO BOV950 un dispositivo móvil.
- Page 77 recibida, incluidas aquellas −Aumente la separación entre que puedan causar un equipo y el receptor. funcionamiento no deseado. −Conecte el equipo a un tomacorriente en NOTA un circuito diferente al que está conectado el receptor. Este dispositivo ha sido sometido a pruebas que −Consulte al distribuidor determinaron que cumple o a un técnico con experiencia...
- Page 78 AVISO A LOS CABLE DE ALIMENTACIÓN CLIENTES SOBRE EL CORTO ALMACENAMIENTO DE MEMORIA • Su equipo Breville está equipado con un cable de • Tenga en cuenta que el alimentación corto para equipo incluye almacenamiento disminuir el riesgo de de memoria interna a fin lesiones a personas o daños...
-
Page 79: Componentes
Componentes CONFI Rotate Re A. Bandeja antiadherente para pizza de 33 cm F. Luz del horno B. Rejillas (x 2) G. Mango de la puerta Reversibles para 8 posiciones diferentes H. Ranuras de ventilación C. Rejilla para asar de 23 cm x 33 cm I. - Page 80 J. Pantalla LCD K. Selector CONFIRM (Confirmar) y botón ROTATE REMIND (Recordatorio de girar) L. Selector TEMPERATURE (Temperatura) y selector Darkness (Control de tostado de bagels y panes) CONFIRM Rotate Remind M. Selector TIME (Tiempo) y selector Slices (Cantidad de bagels o rebanadas de pan) N.
-
Page 81: Funciones
7. La alerta del horno sonará y la pantalla LCD se iluminará. Las opciones de función Funciones aparecerán con un indicador en la función TOAST (Tostar). 8. Gire el selector CONFIRM (Confirmar) hacia la derecha hasta que el indicador esté ANTES DEL PRIMER USO en la función PIZZA. - Page 82 DESCRIPCIÓN GENERAL DE LAS FUNCIONES DEL HORNO FUNCIÓN POSICIÓN CONFIGURACIÓN AJUSTES PRECA- RANGO SUGERIDA OPCIONAL PREVIOS LENTAR DE LA REJILLA TOAST FROZEN FOOD Tostado 4 Tostado 1-7 (Tostar) (Comidas congeladas) Rebanadas 4 Rebanadas 1-9 A BIT MORE™ (Un poco más) BAGEL FROZEN FOOD Tostado 4...
- Page 83 FUNCIÓN POSICIÓN CONFIGURACIÓN AJUSTES PRECA- RANGO SUGERIDA OPCIONAL PREVIOS LENTAR DE LA REJILLA PIZZA CONVECTION 400 °F (205 °C) Sí 300 °F (150 °C)- (Convección) / 16 min 480 °F (250 °C) SUPER CONVECTION Convection hasta por 1 hora (Superconvección) (Convección) TEMPERATURE Frozen Food...
- Page 84 FUNCIÓN POSICIÓN CONFIGURACIÓN AJUSTES PRECA- RANGO SUGERIDA OPCIONAL PREVIOS LENTAR DE LA REJILLA REHEAT Varios CONVECTION 325°F (165°C) 160 °F (70 °C) - (Recalentar) (Convección) / 15 min 480 °F (250 °C) SUPER CONVECTION Convection Hasta por 2 horas (Superconvección) (Convección) TEMPERATURE CONVERSION...
-
Page 85: Vinculación Del Horno
Además, le da acceso a la experiencia de cocina multifuncional automatizada: Joule Autopilot. NOTA Breville y ChefSteps crean recetas * Trabajamos continuamente para mejorar específicamente para el horno que le la aplicación, por lo que puede haber cambios proporcionan orientación y técnicas mientras en el funcionamiento y los pasos para la cocina. -
Page 86: Funciones Del Horno
SELECTOR Funciones DE TEMPERATURA del horno CÓMO USAR SU HORNO BREVILLE DISMINUIR AUMENTAR TEMPERATURA TEMPERATURA 1. Inserte la rejilla en la posición deseada. Para su conveniencia, las posiciones de las 4. La cifra en la parte inferior de la pantalla rejillas están impresas en el lado izquierdo... -
Page 87: Rejilla Para Horno
LCD mostrará el mensaje PREHEATING (Precalentando) Breville ha probado y determinado las posicio- mientras se calienta el horno. nes óptimas de la rejilla para ciertas funciones. Esta información se resalta en la pantalla. -
Page 88: Sensor De La Puerta
SENSOR DE LA PUERTA 4. Cuando llegue el momento de cambiar las posiciones de las rejillas, sonará la alerta Si la puerta se abre durante la cocción, el del recordatorio de girar y el mensaje Rotate temporizador se pausará y la luz se encenderá. Remind (Recordatorio de girar) parpadeará... -
Page 89: Favorite (Favorito)
FUNCIONES PREESTABLECIDAS: NOTA FUNCIÓN TOAST (TOSTAR) La función A BIT MORE™ (Un poco más) no se podrá activar si no se estaba llevando La función TOAST (Tostar) dora y deja a cabo una función de cocción previamente. crujiente el exterior del pan, mientras mantiene el interior suave y húmedo. -
Page 90: Función Bagel
Siga estas instrucciones generales: FUNCIÓN BAGEL La función BAGEL hará que el interior de su Color deseado Configuración bagel cortado esté crujiente mientras tuesta del tostado ligeramente el exterior. Esta función también es ideal para tostar bollos o panes rebanados Leve 1 o 2 especiales gruesos que requieren tostar... -
Page 91: Función Bake (Hornear)
FUNCIÓN BAKE (HORNEAR) Color deseado Configuración La función BAKE (Hornear) cocina los del tostado alimentos de manera uniforme. Esta función es Leve 1 o 2 ideal para hornear pasteles, muffins, brownies Medio 3, 4 o 5 y masas. La función BAKE (Hornear) también es ideal para cocinar comidas congeladas Tostado 6 o 7... -
Page 92: Función Air Fry (Freír Por Aire)
FUNCIÓN AIR FRY (FREÍR POR AIRE) b) Gire el selector TIME (Tiempo) para seleccionar el tiempo de cocción. Los La función AIR FRY (Freír por aire) combina tiempos máximos de cocción se pueden calor intenso y flujo de aire maximizado configurar de la siguiente manera: para cocinar alimentos y dejarlos crujientes y dorados. -
Page 93: Función Broil (Asar)
Visite pantalla LCD se iluminará de color naranja. www.breville.com para obtener más La pantalla LCD mostrará el mensaje información sobre la compra de rejillas PREHEATING (Precalentando) mientras adicionales para freír por aire/deshidratar. -
Page 94: Función Roast (Rostizar)
5. El nivel y el tiempo de potencia de asado configuración del ajuste CONVECTION se pueden ajustar antes o durante el ciclo (Convección) preestablecida. BROIL (Asar). a) La cifra en la parte superior de la pantalla LCD muestra el nivel de potencia de asado. -
Page 95: Función Pizza
fluya por los costados de los alimentos. 4. La temperatura, el tiempo y la configuración Cierre la puerta del horno. de convección se pueden ajustar antes o durante el ciclo para pizzas. 8. Luego de que la alerta de precalentamiento haya sonado, el temporizador comenzará... -
Page 96: Función Cookies (Galletas)
10. Seleccione la temperatura, la convección NOTA y el tiempo deseados para la PIZZA, como también la configuración fresco/congelado Si usa la bandeja para pizza que viene incluida, y presione el botón START/STOP (Iniciar/ póngala en el horno durante el ciclo de Detener) para volver a iniciar el ciclo para precalentamiento para obtener los mejores pizzas. -
Page 97: Función Proof (Levar)
b) La cifra en la parte inferior de la pantalla 4. Gire el selector CONFIRM (Confirmar) LCD muestra el tiempo del ciclo para hasta que el indicador en la pantalla LCD galletas. Gire el selector TIME (Tiempo) esté en la función PROOF (Levar). La para ajustar el tiempo de hasta 1 hora para cifra en la parte superior de la pantalla temperaturas de 100 °C-250 °C. -
Page 98: Función Reheat (Recalentar)
8. Al final del ciclo PROOF (Levar) sonará a) La cifra en la parte superior en la pantalla la alerta del horno. La luz del botón START/ LCD muestra la temperatura del ciclo para STOP (Iniciar/Detener) desaparecerá y la recalentar. Gire el selector TEMPERATURE pantalla LCD se iluminará... - Page 99 8. Al final del ciclo SLOW COOK (Cocción lenta) el horno cambiará automáticamente al modo KEEP WARM (Mantener caliente). La pantalla LCD mostrará el mensaje KEEP WARM (Mantener caliente) y se iniciará una cuenta regresiva de forma automática de 2:00 H/MIN. El ciclo para mantener calientes los alimentos se puede detener en cualquier momento presionando el botón START/STOP (Iniciar/Detener).
-
Page 100: Función Keep Warm (Mantener Caliente)
6. Corte por la mitad los trozos grandes a) La cifra en la parte superior en la pantalla de carne para permitir que el calor penetre LCD muestra la temperatura del ciclo de forma uniforme. de calentamiento. Gire el selector TEMPERATURE (Temperatura) FUNCIÓN KEEP WARM para ajustar la temperatura de 45 °C... - Page 101 1. Organice los alimentos de manera uniforme 5. Presione el botón START/STOP en la rejilla para freír por aire/deshidratar (Iniciar/Detener) para activar incluida con el horno. Para obtener mejores la función DEHYDRATE (Deshidratar). resultados, ponga los alimentos en una sola La luz del botón se iluminará...
-
Page 102: Cuidado Y Limpieza
Limpieza del interior Cuidado Las paredes del interior del horno cuentan con y limpieza un revestimiento antiadherente para facilitar la limpieza. Para limpiar cualquier salpicadura que pueda ocurrir mientras cocina, limpie las paredes con una esponja suave y húmeda. Antes de limpiar, asegúrese de que el horno Se puede usar un limpiador líquido no abrasivo esté... -
Page 103: Reemplazar El Foco Del Horno
La única excepción es la tabla de cortar de bambú Breville opcional y la bandeja de servir que caben en la sección acanalada en la parte superior del horno. Visite www.breville.com... - Page 104 4. Use un paño suave para insertar el foco nuevo. No toque directamente la superficie del foco con sus dedos, ya que el aceite en ellos puede dañarlo. 5. Para volver a colocar la cubierta de vidrio, alinee el gancho de metal con el lado izquierdo de la carcasa del foco.
-
Page 105: Solución De Problemas
Solución de problemas POSIBLE PROBLEMA SOLUCIÓN SENCILLA • El horno no se enciende Compruebe que el enchufe de alimentación esté bien insertado en el tomacorriente. • Enchufe el cable de alimentación en un tomacorriente independiente. • Enchufe el cable de alimentación en un tomacorriente distinto. •... - Page 106 15 minutos y luego vuelva a enchufarlo. • Si el mensaje E03 continúa apareciendo en la pantalla, póngase en contacto con el Centro de servicios de Breville. • La pantalla LCD muestra La pantalla LCD mostrará el mensaje E06 cuando haya un problema el mensaje E06 no reiniciable con el equipo.
- Page 107 POSIBLE PROBLEMA SOLUCIÓN SENCILLA • La pantalla LCD muestra La pantalla LCD mostrará E11 cuando el horno haya tenido un problema el mensaje E11 con la aplicación. Consulte la aplicación para obtener más información y detalles. • La temperatura cambia Esto es normal.
- Page 108 Notas...
- Page 109 Notas...
- Page 110 Notas...
- Page 111 Notas...
- Page 112 Sitio web: breville.mx/support ® Breville is a registered trademark of Breville Pty. Ltd. A.B.N. 98 000 092 928. Copyright Breville Pty. Ltd. 2021. • Due to continued product improvement, the products illustrated/photographed in this brochure may vary slightly from the actual product.