Table of Contents
Advertisement
SERVICE
COLOR TELEVISION
Refer to the service manual in the GSPN (see the rear cover) for the more information.
COLOR TELEVISION
Chassis : KSCB(N)_CB5H
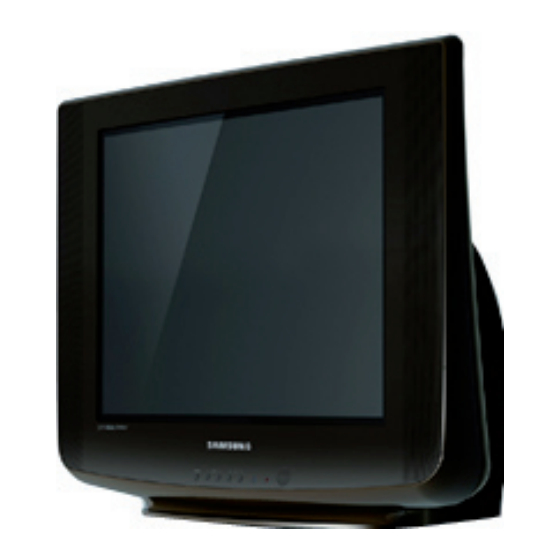
Model : CL21B501HLMXZS
CL21B501HL
Manual
CONTENTS
1. Precaution
2. Product Specification
3. Disassembly & Reassembly
4. Troubleshooting
5. Exploded View & Part List
6. Wiring Diagram
7. Schematic Diagram
Advertisement
Table of Contents

Related Manuals for Samsung CL21B501HL


Summary of Contents for Samsung CL21B501HL
- Page 1 1. Precaution 2. Product Specification 3. Disassembly & Reassembly 4. Troubleshooting 5. Exploded View & Part List 6. Wiring Diagram 7. Schematic Diagram CL21B501HL Refer to the service manual in the GSPN (see the rear cover) for the more information.
- Page 2 In general, a color TV can provide ideal visual quality by adjusting the basic settings such as the vertical size, horizontal size, focus, etc. Display a black and white picture on the screen to check if the picture is clearly displayed. If there are some ‘spotted’ points on the screen when displaying a black and white picture, degauss the screen using the degauss coil. If the spotted points remain, re-adjust the purity and the convergence. This completes the basic performance examination. 4-14 Samsung Electronics...
-
Page 3: How To Access Service Mode
▲/▼ Move the cursor to select an item. Adjust the selected configuration value ◀/▶ 4. W/B Setting Item Data Required Adjustment x: 275± 5 y: 27 5± 5 Y: 45± 3 White Balance White Balance (Standard Data) x: 265± 5 y: 265± 5 Y: 1.5± 0.3 Toshiba Pattern Screen Voltage Same As KSCA Chassis G2 Adjust Samsung Electronics 4-15... -
Page 4: Factory Data
AV OUT SEL CVBS2/CVBS3 CVBS2 DNIe Jr On/Off 2. Hotel Option Item Selection Initial Data Hotel Mode On/Off Power On Band Air/STD Power On Channel 0~99 Power on volume 0~100 Max Volume 0~100 Pannel Button Lock On/Off Power On Source Off/TV/AV1/AV2/DVD 4-16 Samsung Electronics... - Page 5 Troubleshooting Samsung Electronics 4-17...
- Page 6 4. Video Adjust 1 Item Data Initial value Remarks R Cutoff Adjust G Cutoff B Cutoff Adjust R Drive Adjust G Drive B Drive Adjust Sub Bright Adjust Sub Contrast Adjust Bluescreen Contrast Adjust G2 Adjust Bright 9 TR AKB Option Cathode Drive Level W/B adjust Margin 4-18 Samsung Electronics...
- Page 7 Sub Sharpness Video Dependent Coring RF Video S/N Video Dependent Coring AV 6. Video Adjust 3 Item Data Initial value Remarks RF AGC Adjust AGC Voltage IF AGC Speed IF Demodulator Fast Filter IF PLL RF FOA/FOB VCR RF output AV FOA/FOB RF PA/NT Ident Sensitivit AV PA/NT Ident Sensitivit Samsung Electronics 4-19...
- Page 8 Component G cutoff Scart W/B ComponentB cutoff Scart W/B RGB Blanking Mode Secam Blanking Wide Blanking Front Wide Blanking Rear 8. YC Delay Item Data Initial value Remarks PAL Delay SECAM Delay NTSC Delay PAL AV Delay SECAM AV Delay NTSC AV Delay 4-20 Samsung Electronics...
- Page 9 1: active 0: normai operation Bypass Peaking Delay 1:peaking delay bypassed Ratio Pre & After Shoot Ratio posi & Nega Peaks 0 : 123 degree Dynamic Skin 1: 117 degree Gamma & White Stretch 0: No black level shift DC Transfer Ratio 1: black level shift 0: Japanese matrix NTSC Matrix 1: USA matrix DCXO Cap Samsung Electronics 4-21...
-
Page 10: Service Adjustment
2. Press “Power Off → Mute →1 → 8 → 2 → Power On” using the remote control and enter Factory Mode. 3. Enter Deflection Mode. 4. Adjust the V-AMP, V-SHIFT, H-EW and H-SHIFT items so that the width becomes 92 and the height becomes 92. 4-22 Samsung Electronics... - Page 11 7. When the adjustments are complete, display the Lion pattern and check that the picture size has not been changed. If there is no change, finish the adjustments. Samsung Electronics 4-23...
-
Page 12: Replacements & Calibration
Focus VR ■ Adjusting the Screen Voltage 1. Select: Power OFF MuTE POWER ON 2. Initialize all settings to the values appropriate to the corresponding model make sure the video adjust 1 is the factory date,just as the following picture. 4-24 Samsung Electronics... - Page 13 Menu Mute POWER ON 1. Select: 2. Initialize all settings to the values appropriate to the corresponding model. 3. Display the Toshiba pattern and adjust the White Balance using CA100 with the coordinates of the corresponding model. [CA100] Samsung Electronics 4-25...
- Page 14 4. When the adjustment is finished, check the following checklist. - If there is a spot on the screen when turning the TV set off/on, adjust the Screen Voltage again. - If there is a ghost line on the screen, adjust the Screen Voltage again. 4-26 Samsung Electronics...
- Page 15 MEMO Samsung Electronics 4-27...
-
Page 16: Overall Block Description
Schematic Diagram 7. Schematic Diagram 7-1 Circuit Description 7-1-1 Overall Block Description SIDE-A/V (Option) AV IN JACK KTA1505Y T444S Fly back Transformer 78R05 A+6.5V IC301 Vertical Drive A+12V IC801S W6753F A+14V IC601 LSL-OUT Sound AMP LSR-OUT Samsung Electronics... -
Page 17: Power Signal
Schematic Diagram 7-1-2 Power Signal Samsung Electronics... -
Page 18: Partial Block Diagram
Schematic Diagram 7-1-3 Partial Block Diagram 1. Main Block Description SIDE-A/V (Option) AV IN JACK KTA1505Y T444S Fly back Transformer 78R05 A+6.5V IC301 Vertical Drive A+12V IC801S W6753F A+14V IC601 LSL-OUT Sound AMP LSR-OUT Samsung Electronics... - Page 19 MEMO Samsung Electronics...
- Page 20 Schematic Diagram 7-2 Schematic Diagram 7-2-1 Main Board This Document can not be used without Samsung’s authorization. Power Video Audio Samsung Electronics...
- Page 21 Schematic Diagram 7-2-2 Sound This Document can not be used without Samsung’s authorization. Power Video Audio Samsung Electronics...
- Page 22 Schematic Diagram 7-2-3 Power This Document can not be used without Samsung’s authorization. Power Video Audio Samsung Electronics...
- Page 23 Schematic Diagram 7-2-4 CRT This Document can not be used without Samsung’s authorization. Power Video Audio Samsung Electronics...