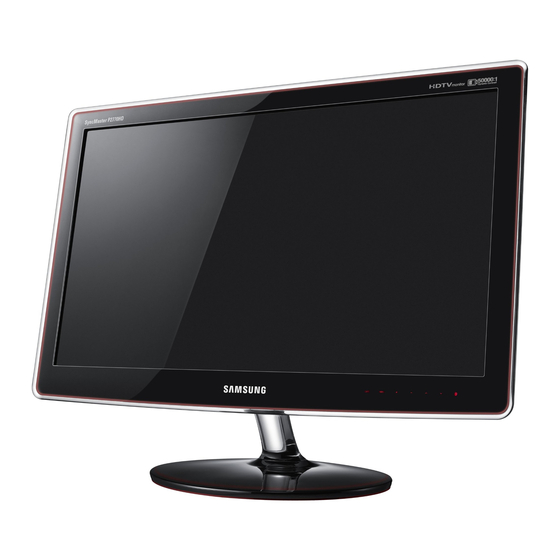
Samsung P2770HD Service Manual
Chassis lem27ds
Hide thumbs
Also See for P2770HD:
- User manual (70 pages) ,
- Manual del usuario (66 pages) ,
- Manual (2 pages)
Table of Contents
Advertisement
SERVICE
TFT-LCD Monitor
P2770HD
Refer to the service manual in the GSPN (see the rear cover) for the more information.
LCD-Monitor
Chassis
: LEM27DS
Model
: P2770HD
Manual
1. Precautions
2. Product specifications
3. Disassembly and Reassemble
4. Troubleshooting
5. Exploded View & Part List
6. Wiring Diagram
Contents
Advertisement
Table of Contents

Related Manuals for Samsung P2770HD


Summary of Contents for Samsung P2770HD
- Page 1 LCD-Monitor Chassis : LEM27DS Model : P2770HD SERVICE Manual TFT-LCD Monitor Contents 1. Precautions 2. Product specifications 3. Disassembly and Reassemble 4. Troubleshooting 5. Exploded View & Part List 6. Wiring Diagram P2770HD Refer to the service manual in the GSPN (see the rear cover) for the more information.
-
Page 2: Table Of Contents
Contents 1. Precautions 1-1. Safety Precautions ......................1-1 1-2. Servicing Precautions ..................... 1-2 1-3. Static Electricity Precautions ..................1-2 1-4. Installation Precautions ....................1-3 2. Product specifications 2-1. Feature & Specifications ....................2-1 2-2. Spec Comparison to the Old Models ................2-3 2-3. - Page 3 Mideast & Africa http://mea.samsungportal.com © 2009 Samsung Electronics Co.,Ltd. This Service Manual is a property of Samsung Electronics Co.,Ltd. All rights reserved. Any unauthorized use of Manual can be punished under applicable Printed in Korea International and/or domestic law.
-
Page 4: Precautions
1. Precautions 1. Precautions 1-1. Safety Precautions Follow these safety, servicing and ESD precautions to prevent damage and to protect against potential hazards such as electrical shock. 1-1-1. Warnings For continued safety, do not attempt to modify the circuit board. Disconnect the AC power and DC power jack before servicing. -
Page 5: Servicing Precautions
1. Precautions 1-2. Servicing Precautions WARNING: An electrolytic capacitor installed with the wrong polarity might explode. Caution: Before servicing units covered by this service manual, read and follow the Safety Precautions section of this manual. Note: If unforeseen circumstances create conflict between the following servicing precautions and any of the safety precautions, always follow the safety precautions. -
Page 6: Installation Precautions
1. Precautions 1-4. Installation Precautions For safety reasons, more than two people are required for carrying the product. Keep the power cord away from any heat emitting devices, as a melted covering may cause fire or electric shock. Do not place the product in areas with poor ventilation such as a bookshelf or closet. The increased internal temperature may cause fire. - Page 7 1. Precautions Memo...
-
Page 8: Product Specifications
-The TV utilizes the HDMI system to implement perfect digital sound and picture quality. Specifications Item Description Model P2770HD LCD Panel TFT-LCD Panel, RGB Vertical stripe, normally White, 27-Inch viewable, 0.3114(H) X 0.3114(V) mm Pixel Pitch Scanning Frequency Horizontal : 30 kHz ~ 81 kHz (Automatic) - Page 9 2. Product specifications Specifications Item Description Model P2770HD Antenna Input 75Ω Sound Characteristic -MAX Internal speaker Out : Right : 3W / Left : 3W -BASS Control Range : -8 dB ~ + 8dB -TREBLE Control Range : -8 dB ~ +8 dB...
-
Page 10: Spec Comparison To The Old Models
2. Product specifications 2-2. Spec Comparison to the Old Models Ecofit-MFM CREAM-MFM Model P2770HD 2333HD Design Screen Size 27” 23” Resolution 1920X1080 (FHD) 60Hz 1920X1080 (FHD) 60Hz Brightness 300cd/m2 300cd/m2 Contrast Ratio 1000:1 1000:1 Response Time Viewing Angle Left/Right/Up/Down : 80˚/80˚/80˚/80˚... -
Page 11: Accessories
Ccde. No Remark Remote Control & BN59-00865A Batteries (AAA x 2) Power Cord 3903-000452 Stand Body BN96-09628C Stand Base BN96-11315A Samsung Electronics Service center D-Sub Cable BN39-00244G User’s Guide, Monitor Driver, BN59-00910C Natural Color Pro Software Cleaning Cloth BN63-01798B Holder-Cable BN96-06529A... -
Page 12: Disassembly And Assembly
3. Disassembly and Assembly 3. Disassembly and Assembly This section describes the disassembly and reassembly sequences for this monitor. Warning: As this monitor has parts that are sensitive to static electricity, be careful when handling them. 3-1. Disassembly Caution: 1. Turn the monitor off before beginning the disassembly process. 2. - Page 13 3. Disassembly and Assembly Description Photo Screws 3. Hold the Front-Cover by its corners and push it downwards. In the same manner, push down on the other corners, lift the Rear-Cover, and disassemble it as shown in the picture below.
- Page 14 3. Disassembly and Assembly Description Photo Screws 4. After disassembling the Rear-Cover, prepare for the internal disassembly as shown in the picture on the right. LVDS LAMP WIRE Function & SPK Wire 5. Remove the LVDS cable. 6. Remove the Lamp wire. 7.
- Page 15 3. Disassembly and Assembly Description Photo Screws 8. Remove the SPK upwards. 9. Remove the Assy Shield-Cover. Disassemble the PCB inside the Assy. 10. Remove the Holder-Boss from the Assy Front- Cover. Caution : It is difficult disassembling the panel without removing the screws.
-
Page 16: Troubleshooting
4. Troubleshooting 4. Troubleshooting 4-1. First Checklist for Troubleshooting Self-Test Feature Check „ Your monitor provides a self test feature that allows you to check whether your monitor is functioning properly. Turn off both your computer and the monitor. Unplug the video cable from the back of the computer Turn on the monitor. -
Page 17: No Power
4. Troubleshooting 4-2. No Power The LED on the front panel of the monitor does not work when the power is connected and the Symptom Power button is pressed. Check if the Power switch on the rear panel of the monitor has been turned on. Check the SMPS fuse and the IP-Board output power. - Page 18 4. Troubleshooting 4-2-1. Circuit diagrams when the power does not turn on...
- Page 19 4. Troubleshooting 4-2-2. Waveforms ① ② ③...
-
Page 20: Pc (Analog) No Screen
4. Troubleshooting 4-3. PC (ANALOG) No Screen The LED power is on but no picture is displayed on the screen when the D-SUB cable is Symptom connected Even though the LED power turns on, the screen is blank when connecting the VGA cable. Check the D-sub cable connections. - Page 21 4. Troubleshooting 4-3-1. Circuit diagrams and waveforms (Analog) when no screen is displayed on the monitor...
- Page 22 4. Troubleshooting 4-3-2. Waveforms ④ ⑤...
-
Page 23: Dvi No Screen
4. Troubleshooting 4-4. DVI No Screen The LED power is on but no picture is displayed on the screen when the DVI cable is Symptom connected. Check if the DVI cable has been connected. Check if the LVDS cable has been properly connected to the LCD panel. Major checkpoints Check if the Inverter board has been connected properly to the lamp connector of the LCD... - Page 24 4. Troubleshooting 4-4-1. Circuit diagrams and waveforms (DVI No Screen) when no screen is displayed on the monitor...
-
Page 25: Hdmi No Screen
4. Troubleshooting 4-5. HDMI No Screen The LED power turns on but the screen is blank when the HDMI cable is connected. Symptom Check the HDMI cable connections. Check whether the LVDS cable is connected correctly to the panel. Major checkpoints Check whether the lamp connector of the panel is connected correctly to the IP board. - Page 26 4. Troubleshooting 4-5-1. Circuit diagrams and waveforms (HDMI No Screen) when no screen is displayed on the monitor 4-11...
- Page 27 4. Troubleshooting 4-5-2. Waveforms ⑧ ⑨ 4-12...
-
Page 28: Faults And Corrective Actions
4. Troubleshooting 4-6. Faults and Corrective Actions Fault Photo Symptoms and Corrective Actions Remarks Symptoms: DVI signals are not recognized. * Refer to the Training Manual for information on inputting the DVI DDC. Causes: This fault occurs when the PC does not recognize the mode information because the DVI DDC has not been input to the monitor. -
Page 29: Adjustment
4. Troubleshooting 4-7. Adjustment 4-7-1. Service Instruction 1. Usually, a color TV-VCR needs only slight touch-up adjustment upon installation. Check the basic characteristics such as height, horizontal and vertical sync. 2. Use the specified test equipment or its equivalent. 3. Correct impedance matching is essential. 4. - Page 30 - Option - Advanced Factory Reset Type WB Movie Model EPA Standard Tuner ALPS ADJUST Region YC_Delay SAMSUNG SHARPNESS Light Effect Audio Amp PQ Others Local Set Other Color Space Exhibition Mode EEPROM RESET - Expert - ADC/WB N/D ADJ...
-
Page 31: White Balance -Calibration
4. Troubleshooting 4-9. White Balance - Calibration 4-9-1 White Balance -Calibration 1. Calibration Comp Calibration PC Calibration HDMI Calibration 4-9-2 Service Adjustment - You must perform Calibration in the Lattice Pattern before adjusting the White Balance. Color Calibration „ Adjust spec. 1. - Page 32 4. Troubleshooting Method of Color Calibration (Component) „ 1) Apply the 720p Lattice (N0. 6) pattern signal to the Component IN port 2) Press the Source key to switch to “Component” mode 3) Enter Service mode 4) Select the “Calibration” menu 5) Select the “Comp Calibration”...
-
Page 33: White Ratio (Balance) Adjustment
4. Troubleshooting 4-9-3 White Balance - Adjustment (low light) (hight light) Sub Bright Sub Contrast 3. W/B R offset R gain G offset G gain B offset B gain (W/B adjustment Condition refer next page) 4-10. White Ratio (Balance) Adjustment You can adjust the white ratio in factory mode (1:Calibration, 3:White-Balance). -
Page 34: Servicing Information
4-11. Servicing Information 4-11-1 USB Download Method Samsung may offer upgrades for TV’s firmware in the future. Upgrades will be possible by connecting a USB drive to the USB port located on your TV. Insert a USB drive containing the firmware upgrade into the USB port on the rear of the TV. - Page 35 4. Troubleshooting 4-12. Software Upgrade 4-12-1. Program Upgrading - MAIN 1. If you select MENU → Support → Software Upgrade on remote control, you’ll see below picture 2. Press ENTER, then you’ll see below picture. Select Yes 3. Micom program is now upgrading as below picture. After Software Upgrade is process by 100%, the monitor is automatically turn off and on.
- Page 36 4. Troubleshooting 4-12-2. Micom Program Upgrade DDC Manager Connection „ 1. Prepare PC to Upgrade the Program. PC for MCU upgrading Connect to Parallel port 2. Prepare the DDC Manager 3. Connect D-sub cable to Target Monitor TV 4. Power on the Target Monitor TV winDDC_V2-39 Program installed Run winDDC 4-21...
- Page 37 4. Troubleshooting Main MIcom Upgrade „ 1. Goto installed Program folder (winDDC_V2-39) 2. Run winDDC 3. Select WinISP Menu 4. Make same setting like picture. 5. Choose Flash memory type - ECOFIT-MFM(P2470HD):WT61P8 4-22...
- Page 38 4. Troubleshooting 6. Load File ( Select file to download) 7. Set Option to load Binary Files 8. Select files (bin file) 9. Click button to load files 10. Select “Flash1” and “Flash2” 4-23...
- Page 39 4. Troubleshooting 11. Check the OK message (Load) 12. Click Auto Program button 13. If you see OK message (Verify), program download is completed After Upgrading Firmware „ Factory mode 1. Factory remote control (SET POWER ON ) INFO -> Factory 2) Normal Remote control (SET POWER OFF) INFO ->...
- Page 40 4. Troubleshooting Sub Micom Upgrade „ 1. Select WinISP Menu 2. Make same setting like picture. 3. Choose Device Type. - ECOFIT-MFM(P2470HD):WT61P8 4. Load File ( Select file to download) 5. Set Option to load Binary Files 6. Select files (hex file) 7.
- Page 41 4. Troubleshooting 8. Check the OK message (Load) 9. Click Auto Program button 10. If you see OK message (Verify), program download is completed 4-26...
-
Page 42: Exploded View & Part List
5. Exploded View & Part List 5. Exploded View & Part List 5-1. LS27EMDKU/EN - Exploded View... -
Page 43: Parts List
BN96-12342G ASSY COVER P-REAR;ECOFIT-MFM(P2770HD),EU M0014 BN94-03179E ASSY PCB MAIN;LS27EMDKU/EN M0027 BN96-12221A ASSY STAND P-BASE;ECOFIT(P2770H),PMMA+AB M0174 BN44-00322A IP BOARD;IP-61135A,Ecofit27"w(MFM),0.7~1 M0215 BN07-00779A LCD-PANEL;M270H1-L01,CM27H11,6bit Hi-FRC BN96-09628C ASSY STAND P-BODY;ECOFIT,PC,ROSE BLACK T0003 BN96-12340F ASSY COVER P-FRONT;LS27EM (P2770HD),EURO T0175 BN96-06823M ASSY SPEAKER P;16ohm,4pin,3W,R:400 / L:6... - Page 44 Code No. Description & Specification Q’ty SA/SNA Remark BN90-02347C ASSY COVER FRONT;ECOFIT-MFM 27,EUROPE BN68-02302A LABEL-MONITOR-POP;ECOFIT-MFM(20/22/23),W T0175 BN96-06823M ASSY SPEAKER P;16ohm,4pin,3W,R:400 / L:6 T0003 BN96-12340F ASSY COVER P-FRONT;LS27EM (P2770HD),EURO ...3 W392 6003-000282 SCREW-TAPTYPE;BH,+,-,B,M3,L8,ZPC(BLK),SW ...3 M0960 BN61-05772A HOLDER-BOSS;LS27EM,HIPS,HB,BK23 ...3 BN63-01474G FELT-STAND;ECOFIT23"(P2370),T0.35,20,127 ...3 CCM1 BN63-02183E COVER-SHEET;Rhcm,PE Vinyl,T0.04,750mm,20...
- Page 45 5. Exploded View & Part List Level Location No. Code No. Description & Specification Q’ty SA/SNA Remark CCMM1 BN73-00250A SILICON/RUBBER;Ecofit-MFM 27",HIGH ROAD M0014 BN94-03179E ASSY PCB MAIN;LS27EMDKU/EN ...3 0202-001463 SOLDER-WIRE;LFC2-W3.0,-,D3,99.79Sn/0.2Cu 6.547 ...3 0202-001608 SOLDER-WIRE FLUX;LFC7-107,D0.8,99.3Sn/0. 0.25 ...3 0204-002420 SOLVENT;1M-1000,C3H70H,96 4.46 ...3 0204-002607 FLUX;DF-234U,13%,14KG,Gravity 0.82...
- Page 46 5. Exploded View & Part List Level Location No. Code No. Description & Specification Q’ty SA/SNA Remark ..4 IC110 1006-001076 IC-DRIVER/RECEIVER;MAX232ECWE+T,SOP,16P, ..4 IC112 1103-000129 IC-EEPROM;24C02,2Kbit,256x8,SOP,8P,5x4mm ..4 IC112 1103-001310 IC-EEPROM;24LC02B,256X8BIT,SOIC,8P,3.91X ..4 IC112 1103-001441 IC-EEPROM;24C1024,1Mbit,128Kx8,SOP,8P,4..4 1105-001931 IC-DDR2 SDRAM;K4T51163Q,DDR2-800,512Mbit ..4 IC115 1107-001777 IC-FLASH MEMORY;MX25L6405DMI-12G,64Mbit, ..4 U309...
- Page 47 5. Exploded View & Part List Level Location No. Code No. Description & Specification Q’ty SA/SNA Remark ..4 R104 2007-000148 R-CHIP;10Kohm,5%,1/16W,TP,1005 ..4 MR36 2007-000153 R-CHIP;22Kohm,5%,1/16W,TP,1005 ..4 AR43 2007-000155 R-CHIP;27Kohm,5%,1/16W,TP,1005 ..4 MR13 2007-000157 R-CHIP;47Kohm,5%,1/16W,TP,1005 ..4 R509 2007-000170 R-CHIP;1Mohm,5%,1/16W,TP,1005 ..4 R111 2007-000171 R-CHIP;0ohm,5%,1/16W,TP,1005 ..4 HDR17...
- Page 48 5. Exploded View & Part List Level Location No. Code No. Description & Specification Q’ty SA/SNA Remark ..4 PRN7 2011-001011 R-NETWORK;10Kohm,5%,1/16W,L,CHIP,8P,TP,3 ..4 RP102 2011-001087 R-NETWORK;75ohm,5%,1/16W,L,CHIP,8P,TP,3..4 MR38 2011-001093 R-NETWORK;100ohm,5%,1/16W,L,CHIP,8P,TP,3 ..4 ZRN10 2011-001261 R-NETWORK;33ohm,5%,1/16W,L,CHIP,8P,TP,2..4 DAR09 2011-001262 R-NETWORK;22ohm,5%,1/16W,L,CHIP,8P,TP,2..4 2203-000125 C-CER,CHIP;1.2nF,10%,50V,X7R,TP,1608,- ..4 AD480 2203-000181...
- Page 49 0903-001552 IC-MICROCONTROLLER;WT61P8-RG480WT,LQFP,4 ...3 T0066 BP62-00017A HEAT SINK-ES;SP-50L2HX,A6063S,T2.0,26.2, ...3 T0066 BP62-00047A HEAT SINK-ES;DLP,A6063S,T2.5,13,13,TAPE M0230 BN96-08740T ASSY CABLE P-FFC;ECOFIT-MFM 27",FFC,SJ09 M0006 BN96-12341D ASSY SHIELD P-COVER;LS27EM(P2770HD),EURO ...3 T0139 6502-000135 CABLE CLAMP;DAWS-2NA,ID10,NTR,NYLON66 ...3 M0131 AA63-01312A GASKET;TORINO,Conductive Fabric,4mm,10mm ...3 BN61-02429C STUD-PEM;PNB,M2.8,D7,L10,ZPC(SIL),SUM24L ...3 BN61-02429D STUD-PEM;PNB,M2.8,D7,L20,ZPC(SIL),SUM24L ...3...
- Page 50 BN68-00513A LABEL-E,PASS;ALL MODEL,YUPO(110G),50X15, ...3 BN68-00907D MANUAL FLYER-WEEE BATTERY;COMM,SAMSUNG,2 ...3 BN68-00907F MANUAL FLYER-00,WEE;comm,Samsung,23Lang, ...3 BN68-01925H MANUAL FLYER-WARRANTY CARD;comm,Samsung, ...3 BN68-02186A MANUAL FLYER-TOC GUIDE;COMM,SAMSUNG,10 L ...3 BN68-02214B MANUAL FLYER-01,QSG;P2270HD,SyncMaster,1 ...3 BN68-02462B LABEL-STICKER;CIS,T0.05,93,40,TV-MONITOR ...3 T0010 BN96-06529A ASSY HOLDER P-WIRE;MCKINLEY,ABS HB,BK23 ..4 6902-000336 BAG ZIPPER;LDPE,T0.05,W70,L80,TRP,0.500g ..4...
- Page 51 BAG ROLL;LDPE,T0.05,W2400,L1000,TRP,30.0 0.04 T0527 BH68-40364A LABEL-SUMMARY;G52,G72,ART,100G,WHT,BLK,W BH69-00457B PACKING INNER-00,PAD;COMM,T3.0,930,1000, T0527 BN68-00129A LABEL SHIPPING-00;LABEL SHIPPING,ART-PAP BN69-00391Y PAD-ANGLE;CB,T5,W2100,L50,YEL,403g BN69-01939P PALLET-WOOD;26LB350,WOOD,W1040,D740,H120 BN69-04063A CUSHION-01,SET;LS27EM(P2770HD),EPS,16.7g BN92-05438C ASSY LABEL;LS27EMDKU T0527 AA68-03752B LABEL-STICKER;WW,ALL,Art Paper(90g),25,3 CCM1 BN68-01570A LABEL RATING;ALL,SS,PE,T0.05,90,45,Dark BN91-04558B ASSY SHIELD;ECOFIT-MFM 27,W/W CIS1 BN74-00021A TAPE-FILAMENT;Filament tape,clear,#8915, 0.06...
- Page 52 5. Exploded View & Part List 5. Exploded View & Part List 5-1. LS27EMDKU/EN - Exploded View...
- Page 53 BN96-12342G ASSY COVER P-REAR;ECOFIT-MFM(P2770HD),EU M0014 BN94-03179E ASSY PCB MAIN;LS27EMDKU/EN M0027 BN96-12221A ASSY STAND P-BASE;ECOFIT(P2770H),PMMA+AB M0174 BN44-00322A IP BOARD;IP-61135A,Ecofit27"w(MFM),0.7~1 M0215 BN07-00779A LCD-PANEL;M270H1-L01,CM27H11,6bit Hi-FRC BN96-09628C ASSY STAND P-BODY;ECOFIT,PC,ROSE BLACK T0003 BN96-12340F ASSY COVER P-FRONT;LS27EM (P2770HD),EURO T0175 BN96-06823M ASSY SPEAKER P;16ohm,4pin,3W,R:400 / L:6...
- Page 54 Code No. Description & Specification Q’ty SA/SNA Remark BN90-02347C ASSY COVER FRONT;ECOFIT-MFM 27,EUROPE BN68-02302A LABEL-MONITOR-POP;ECOFIT-MFM(20/22/23),W T0175 BN96-06823M ASSY SPEAKER P;16ohm,4pin,3W,R:400 / L:6 T0003 BN96-12340F ASSY COVER P-FRONT;LS27EM (P2770HD),EURO ...3 W392 6003-000282 SCREW-TAPTYPE;BH,+,-,B,M3,L8,ZPC(BLK),SW ...3 M0960 BN61-05772A HOLDER-BOSS;LS27EM,HIPS,HB,BK23 ...3 BN63-01474G FELT-STAND;ECOFIT23"(P2370),T0.35,20,127 ...3 CCM1 BN63-02183E COVER-SHEET;Rhcm,PE Vinyl,T0.04,750mm,20...
- Page 55 5. Exploded View & Part List Level Location No. Code No. Description & Specification Q’ty SA/SNA Remark CCMM1 BN73-00250A SILICON/RUBBER;Ecofit-MFM 27",HIGH ROAD M0014 BN94-03179E ASSY PCB MAIN;LS27EMDKU/EN ...3 0202-001463 SOLDER-WIRE;LFC2-W3.0,-,D3,99.79Sn/0.2Cu 6.547 ...3 0202-001608 SOLDER-WIRE FLUX;LFC7-107,D0.8,99.3Sn/0. 0.25 ...3 0204-002420 SOLVENT;1M-1000,C3H70H,96 4.46 ...3 0204-002607 FLUX;DF-234U,13%,14KG,Gravity 0.82...
- Page 56 5. Exploded View & Part List Level Location No. Code No. Description & Specification Q’ty SA/SNA Remark ..4 IC110 1006-001076 IC-DRIVER/RECEIVER;MAX232ECWE+T,SOP,16P, ..4 IC112 1103-000129 IC-EEPROM;24C02,2Kbit,256x8,SOP,8P,5x4mm ..4 IC112 1103-001310 IC-EEPROM;24LC02B,256X8BIT,SOIC,8P,3.91X ..4 IC112 1103-001441 IC-EEPROM;24C1024,1Mbit,128Kx8,SOP,8P,4..4 1105-001931 IC-DDR2 SDRAM;K4T51163Q,DDR2-800,512Mbit ..4 IC115 1107-001777 IC-FLASH MEMORY;MX25L6405DMI-12G,64Mbit, ..4 U309...
- Page 57 5. Exploded View & Part List Level Location No. Code No. Description & Specification Q’ty SA/SNA Remark ..4 R104 2007-000148 R-CHIP;10Kohm,5%,1/16W,TP,1005 ..4 MR36 2007-000153 R-CHIP;22Kohm,5%,1/16W,TP,1005 ..4 AR43 2007-000155 R-CHIP;27Kohm,5%,1/16W,TP,1005 ..4 MR13 2007-000157 R-CHIP;47Kohm,5%,1/16W,TP,1005 ..4 R509 2007-000170 R-CHIP;1Mohm,5%,1/16W,TP,1005 ..4 R111 2007-000171 R-CHIP;0ohm,5%,1/16W,TP,1005 ..4 HDR17...
- Page 58 5. Exploded View & Part List Level Location No. Code No. Description & Specification Q’ty SA/SNA Remark ..4 PRN7 2011-001011 R-NETWORK;10Kohm,5%,1/16W,L,CHIP,8P,TP,3 ..4 RP102 2011-001087 R-NETWORK;75ohm,5%,1/16W,L,CHIP,8P,TP,3..4 MR38 2011-001093 R-NETWORK;100ohm,5%,1/16W,L,CHIP,8P,TP,3 ..4 ZRN10 2011-001261 R-NETWORK;33ohm,5%,1/16W,L,CHIP,8P,TP,2..4 DAR09 2011-001262 R-NETWORK;22ohm,5%,1/16W,L,CHIP,8P,TP,2..4 2203-000125 C-CER,CHIP;1.2nF,10%,50V,X7R,TP,1608,- ..4 AD480 2203-000181...
- Page 59 0903-001552 IC-MICROCONTROLLER;WT61P8-RG480WT,LQFP,4 ...3 T0066 BP62-00017A HEAT SINK-ES;SP-50L2HX,A6063S,T2.0,26.2, ...3 T0066 BP62-00047A HEAT SINK-ES;DLP,A6063S,T2.5,13,13,TAPE M0230 BN96-08740T ASSY CABLE P-FFC;ECOFIT-MFM 27",FFC,SJ09 M0006 BN96-12341D ASSY SHIELD P-COVER;LS27EM(P2770HD),EURO ...3 T0139 6502-000135 CABLE CLAMP;DAWS-2NA,ID10,NTR,NYLON66 ...3 M0131 AA63-01312A GASKET;TORINO,Conductive Fabric,4mm,10mm ...3 BN61-02429C STUD-PEM;PNB,M2.8,D7,L10,ZPC(SIL),SUM24L ...3 BN61-02429D STUD-PEM;PNB,M2.8,D7,L20,ZPC(SIL),SUM24L ...3...
- Page 60 BN68-00513A LABEL-E,PASS;ALL MODEL,YUPO(110G),50X15, ...3 BN68-00907D MANUAL FLYER-WEEE BATTERY;COMM,SAMSUNG,2 ...3 BN68-00907F MANUAL FLYER-00,WEE;comm,Samsung,23Lang, ...3 BN68-01925H MANUAL FLYER-WARRANTY CARD;comm,Samsung, ...3 BN68-02186A MANUAL FLYER-TOC GUIDE;COMM,SAMSUNG,10 L ...3 BN68-02214B MANUAL FLYER-01,QSG;P2270HD,SyncMaster,1 ...3 BN68-02462B LABEL-STICKER;CIS,T0.05,93,40,TV-MONITOR ...3 T0010 BN96-06529A ASSY HOLDER P-WIRE;MCKINLEY,ABS HB,BK23 ..4 6902-000336 BAG ZIPPER;LDPE,T0.05,W70,L80,TRP,0.500g ..4...
- Page 61 BAG ROLL;LDPE,T0.05,W2400,L1000,TRP,30.0 0.04 T0527 BH68-40364A LABEL-SUMMARY;G52,G72,ART,100G,WHT,BLK,W BH69-00457B PACKING INNER-00,PAD;COMM,T3.0,930,1000, T0527 BN68-00129A LABEL SHIPPING-00;LABEL SHIPPING,ART-PAP BN69-00391Y PAD-ANGLE;CB,T5,W2100,L50,YEL,403g BN69-01939P PALLET-WOOD;26LB350,WOOD,W1040,D740,H120 BN69-04063A CUSHION-01,SET;LS27EM(P2770HD),EPS,16.7g BN92-05438C ASSY LABEL;LS27EMDKU T0527 AA68-03752B LABEL-STICKER;WW,ALL,Art Paper(90g),25,3 CCM1 BN68-01570A LABEL RATING;ALL,SS,PE,T0.05,90,45,Dark BN91-04558B ASSY SHIELD;ECOFIT-MFM 27,W/W CIS1 BN74-00021A TAPE-FILAMENT;Filament tape,clear,#8915, 0.06...
-
Page 62: Wiring Diagram
6. Wiring Diagram 6. Wiring Diagram 6-1. Wiring Diagram - Main Board... - Page 63 6. Wiring Diagram 6-2. Wiring Diagram - Main Board LVDS Connector (Connect with panel) Power Connector Connect with IP board PC Analog PC Stereo Headphone RF ANT. HDMI Function Connector 8P (Connect with function Assy) Digital Audio Output (Optical) USB (Program Update) Speaker R (Red) Speaker L (Yellow) Audio R/ L, Component...
-
Page 64: Connector Functions
6. Wiring Diagram 6-3. Connector Functions Connector Functions CN1005 Transmits LVDS signals from the Main board to the panel * When a problem occurs: The Blank Screen and No Power errors may occur. CN8003 VGA signal input terminal * When a problem occurs: The No RGB Output error may occur. CN901 DVI signal input terminal * When a problem occurs: The No DVI Output error may occur. - Page 65 6. Wiring Diagram Memo...