Table of Contents
Advertisement
Quick Links
Advertisement
Table of Contents

Related Manuals for AEG LFR71844B


Summary of Contents for AEG LFR71844B
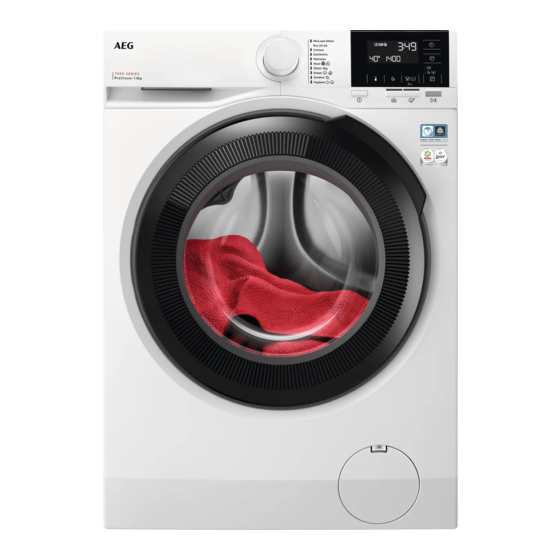
- Page 1 LFR71844B User Manual Washing Machine USER MANUAL...
-
Page 2: Table Of Contents
18. ENVIRONMENTAL CONCERNS..............40 FOR PERFECT RESULTS Thank you for choosing this AEG product. We have created it to give you impeccable performance for many years, with innovative technologies that help make life simpler – features you might not find on ordinary appliances. Please spend a few minutes reading to get the very best from it. -
Page 3: Safety Information
ENGLISH SAFETY INFORMATION Before beginning the installation and use of this appliance, carefully read the supplied instructions. The manufacturer is not responsible for any injuries or damage that are the result of incorrect installation or usage. Always keep the instructions in a safe and accessible location for future reference. - Page 4 1.2 General Safety This appliance is for washing domestic-type, machine- • washable laundry only. This appliance is designed for single household • domestic use in an indoor environment. This appliance may be used in, offices, hotel guest • rooms, bed & breakfast guest rooms, farm guest houses and other similar accommodation where such use does not exceed (average) domestic usage levels.
-
Page 5: Safety Instructions
ENGLISH approved by AEG (see more details in chapter "Accessories - Stacking kit"). 2. SAFETY INSTRUCTIONS 2.1 Installation 2.2 Electrical connection The installation must comply WARNING! with relevant national Risk of fire and electric regulations. shock. • Remove all the packaging and the •... - Page 6 • Do not use an extension hose if the has been discontinued: motor and inlet hose is too short. Contact the motor brushes, transmission between Authorised Service Centre for the motor and drum, pumps, shock replacement of the inlet hose.
-
Page 7: Product Description
• The steam has a quick and easy way that is not an accessory supplied by to refresh the clothes. The gentle AEG, secure the appliance in the fixing steam programmes remove odours plates. and reduce creases in dry fabrics so Read carefully the instructions supplied they need little ironing. -
Page 8: Technical Data
The rating plate reports the model name (A), product number (B), electrical ratings (C) and serial number (D). Mod. xxxxxxxxx Prod.No. 910000000 00 000V ~ 00Hz 0000 W 00000000 4. TECHNICAL DATA Dimension Width/ Height/ Total depth 59,6 cm /84,7 cm /60,2 cm... - Page 9 ENGLISH CAUTION! Do not lay washing machine on its front. 3. Put the appliance back into an upright position. Remove the power supply cable and the drain hose from the hose holders. 5.2 Positioning and levelling 1. Install the appliance on a flat hard floor.
- Page 10 When the appliance is installed on a plinth or a tumble dryer is stacked on the washing machine, use the accessories described in chapter 'Accessories'. Read carefully the instructions supplied with the appliance and with the accessory. WARNING! The inlet water shall not exceed 25 °C.
- Page 11 ENGLISH Make sure that the plastic guide cannot move when the appliance drains. 5. Without the plastic hose guide, to a sink spigot - Put the drain hose in the spigot and tighten it with a clamp. Refer to the illustration. Make sure that the drain hose end is not immersed in the water.
-
Page 12: Accessories
Read carefully the instructions supplied with the accessory. Only appropriate accessories approved by AEG ensure the safety standards of the appliance. If unapproved parts are used, any claims will be invalidated. 6.2 Fixing plate kit... -
Page 13: Control Panel
ENGLISH 7. CONTROL PANEL 7.1 Control panel description 11 10 Programme dial Stains/Prewash skipping touch button Display Plus Steam touch button Time Save touch button Extra Rinse touch button Delay Start touch button Spin reduction touch button Option skipping touch button •... - Page 14 Rinsing phase indicator. It flashes during rinse phase. Spinning and draining phase indicator. It flashes during spin and drain phase. Anti-crease phase indicator. Read the paragraph Plus Steam for more details. Steam phase indicator. The digital indicator can show: •...
-
Page 15: Dial And Buttons
ENGLISH 8. DIAL AND BUTTONS 8.1 On/Off The display shows only the spin speeds available Pressing this button for a few seconds for the set programme. allows to activate or deactivate the • Activate the Rinse Hold option. appliance. Two different tunes sound The final spin is not performed. - Page 16 • Stains This option increases the Select this option to add an anti-stain programme duration. phase to a programme in order to treat heavily soiled or stained laundry The related indicator comes on. with stain remover. 8.8 Plus Steam...
-
Page 17: Programmes
ENGLISH 8.10 Delay Start the selected delay time and the appliance begins the countdown. With this option you can delay the start of a programme in a more convenient time. 8.11 Start/Pause Touch the button repeatedly to set the Touch the Start/Pause button to start, required delay. - Page 18 Programme Programme description Outdoor Do not use fabric softener and make sure that there is no softener residue in the detergent dispenser. Outdoor clothing, technical, sport fabrics, waterproof and breathable jackets, shell jackets with a removable fleece or inner insulation.
- Page 19 ENGLISH Default tempera‐ Maximum load Reference spin ture Programme speed Temperature Spin speed range range 40 °C 1400 rpm Cottons 8 kg 95 °C - Cold 1400 rpm - 400 rpm 40 °C 1200 rpm Synthetics 3 kg 60 °C - Cold 1200 rpm - 400 rpm 30 °C 1200 rpm...
- Page 20 OPTIONS ■ ■ ■ Prewash ■ ■ ■ ■ ■ ■ ■ ■ Rinse Only ■ ■ ■ ■ ■ ■ ■ ■ Spin/Drain ■ ■ ■ ■ ■ ■ Extra Rinse ■ ■ ■ Plus Steam ■ ■...
-
Page 21: Settings
• Items that are not suitable for tumble drying. The fragrance dose bottles • Items with label "Dry clean only". are available on AEG web shop or by authorised After the steam treatment dealer. the laundry can be humid. -
Page 22: Before First Use
10.2 Acoustic signals hundreds) for 2 seconds and 76 (tens and units). To deactivate the acoustic signals when If the procedure does not the programme is completed touch the work (due to timeout, wrong Stains/Prewash and the Plus Steam... - Page 23 ENGLISH 3. Press the On/Off button for a few CAUTION! seconds to activate the appliance. Make sure that no laundry A short tune sounds. The appliance stays between the seal and automatically proposes a default the door. There is a risk of programme.
- Page 24 Always follow the instructions that you find on the packaging of the detergent products, but we recommend that you do not exceed the maximum indicated level ( ). This quantity will however guarantee the best washing results. After a washing cycle, if necessary, remove any detergent residue from the detergent dispenser.
- Page 25 ENGLISH The display shows the maximum 1. Touch the Start/Pause button to declared load for the programme, the pause the appliance. The related default temperature, the default spin indicator flashes. speed, the washing phase indicators 2. Touch the Delay Start button (when available) and an indicative repeatedly until the display shows the programme duration.
- Page 26 12.10 Interrupting a programme again. The ProSense Technology phase can be repeated up to programme and changing the three times (see point 1). options Important! If the laundry amount will not When the programme is running, you be reduced, the washing programme can change only some options: starts anyway, despite the overload.
- Page 27 ENGLISH In the display the related door lock 4. Keep the door and the detergent indicator goes off. dispenser slightly ajar to prevent mildew and odours. 5. Close the water tap. 12.14 Draining water out after end of cycle If you have chosen a programme or an option that does not empty out the water of the last rinse, the programme is completed, but:...
-
Page 28: Hints And Tips
• You do not use the appliance for 5 Turn the programme dial to set a new minutes before you touch the Start/ cycle. Pause button. If you set a programme or an Press the button On/Off to activate option that ends with water the appliance again. -
Page 29: Care And Cleaning
ENGLISH 13.3 Detergent type and • sudsing, • reduced washing effect, quantity • inadequate rinsing, • a greater impact for the environment. The choice of detergent and use of correct quantities not only affects your 13.4 Ecological hints wash performance, but also helps to avoid waste and protect the environment: To save water, energy and to help •... - Page 30 14.1 Periodic cleaning 14.3 External cleaning schedule Clean the appliance with mild soap and warm water only. Fully dry all the Periodic cleaning helps to extend the surfaces. Do not use a scouring pads or life of your appliance.
- Page 31 ENGLISH drained out with the water. Regularly Occasionally, at the end of a examine the seal. Coins, buttons, other cycle the display may show small items can be recovered at the end the icon : this is a of the cycle. recommendation to perform the “drum cleaning”.
- Page 32 Use a small brush WARNING! to clean the recess. • Do not remove the filter while the appliance operates. • Do not clean the pump if the water in the appliance is hot. Wait until the water...
- Page 33 ENGLISH 180˚ 5. When the bowl is full of water, turn 11. Put the filter back into the special the filter back and empty the guides by turning it clockwise. Make container. sure that you tighten the filter 6. Repeat the steps 4 and 5 until the correctly to prevent leakages.
-
Page 34: Troubleshooting
45° 20° 2. Remove the inlet hose from the 14.11 Emergency drain appliance by loosening the ring nut. If the appliance cannot drain the water, carry out the same procedure, described in 'Cleaning the drain pump' paragraph. If necessary, clean the pump. - Page 35 ENGLISH 15.1 Alarm Codes and Possible failures The appliance does not start or it stops during operation. First try to find a solution to the problem (refer to the tables). WARNING! Deactivate the appliance before carrying out any check. With some problems, the display shows an alarm code and the Start/Pause button may flash continuously: Problem Possible solution...
- Page 36 If the display shows other alarm codes, deactivate and activate the appliance. If the problem continues, contact the Authorised Service Centre. In case of different problem with the washing machine check the table below for possible solutions. Problem Possible solution •...
-
Page 37: Consumption Values
ENGLISH Problem Possible solution • Increase the detergent quantity or use a different detergent. • Use special products to remove the stubborn stains before The washing results you wash the laundry. are not satisfactory. • Make sure that you set the correct temperature. •... - Page 38 Values and programme duration may differ depending on different conditions (e.g. room temperature, water temperature and pressure, load size and type of laundry, supply voltage) and also if you change the default setting of a programme. 16.3 According to UK...
-
Page 39: Quick Guide
ENGLISH Programme Litres h:mm °C Delicates 0.35 55.0 1:10 35.00 1200 30°C Wool 0.40 50.0 1:10 30.00 1200 30°C 1) Reference indicator of the spin speed. 2) Suitable for washing heavily soiled textiles. 3) Suitable for washing lightly soiled cottons, synthetic and mixed fabrics. 4) It also performs as quick washing cycle for lightly soiled laundry. -
Page 40: Environmental Concerns
Clean the filter regularly and, especially, if the alarm code appears on the display. 17.3 Programmes Programmes Load Product description MixLoad 69min Cotton and synthetic items. This programme ensures a 5 kg good washing performance in a short time. - Page 44 www.aeg.com/shop...