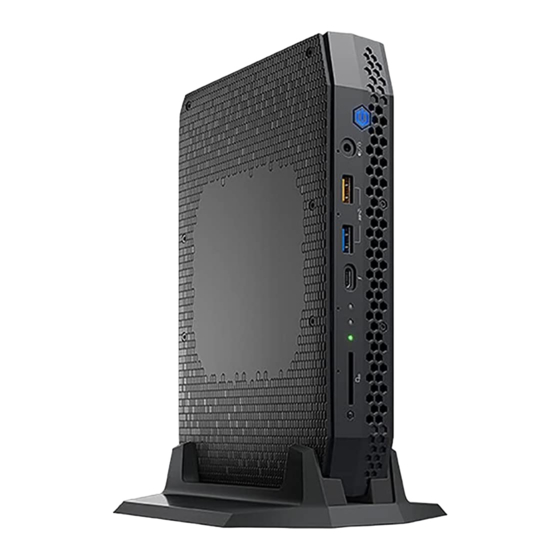
Intel NUC 11 Enthusiast User Manual
Hide thumbs
Also See for NUC 11 Enthusiast:
- User manual (131 pages) ,
- User manual (22 pages) ,
- User manual (18 pages)
Summary of Contents for Intel NUC 11 Enthusiast
- Page 1 Intel® NUC 11 Enthusiast Kit - NUC11PHKi7C Intel® NUC 11 Enthusiast Mini PC - NUC11PHKi7CAA User Guide <January 2021>...
- Page 2 You may not use or facilitate the use of this document in connection with any infringement or other legal analysis concerning Intel products described herein. You agree to grant Intel a non-exclusive, royalty-free license to any patent claim thereafter drafted which includes subject matter disclosed herein.
-
Page 3: Table Of Contents
Contents Introduction ........................5 Before You Begin ............................5 Installation Precautions ..........................6 Observe Safety and Regulatory Requirements ................. 6 Open the Chassis ......................7 System Memory ........................ 8 Change the M.2 SSD ..................... 11 Close the Chassis ......................13 Attaching and using the VESA Bracket (Optional) ........ - Page 4 Revision History Date Revision Description <Jan 2021> Initial release.
-
Page 5: Introduction
This User Guide provides step-by-step installation instructions for these products: • Intel® NUC 11 Enthusiast Kit - NUC11PHKi7C • Intel® NUC 11 Enthusiast Mini PC - NUC11PHKi7CAA Before You Begin CAUTIONS The steps in this guide assume you’re familiar with computer terminology and with the safety practices and regulatory compliance required for using and modifying computer equipment. -
Page 6: Installation Precautions
Installation Precautions When you install and test the Intel NUC, observe all warnings and cautions in the installation instructions. To avoid injury, be careful of: • Sharp pins on connectors • Sharp pins on circuit boards • Rough edges and sharp corners on the chassis •... -
Page 7: Open The Chassis
Open the Chassis 1. Unscrew the 8 screws on the top side of the chassis (A) and lift the cover (B): 2. Unscrew the 5 screws on the metal plate (C) and lift it (D):... -
Page 8: System Memory
System Memory Intel® NUC 11 Enthusiast Kit - NUC11PHKi7C and Intel® NUC 11 Enthusiast Mini PC - NUC11PHKi7CAA have two DDR4 SO-DIMM sockets. Be sure to select memory modules that meet these requirements: • 1.2V low voltage memory • 3200/2666MHz SO-DIMMs •... - Page 9 5. Insert the bottom edge of the module at a 45-degree angle into the socket (A). 6. When the module is inserted, push down on the outer edge of module until the retaining clips snap into place (B). Make sure the clips are firmly in place (C).
- Page 10 To remove a SO-DIMM, follow these steps: 1. Observe the precautions in "Before You Begin" on page 5. 2. Turn off all peripheral devices connected to the computer. Turn off the computer and disconnect the power cord. 3. Remove the computer’s top chassis cover and metal plate. 4.
-
Page 11: Change The M.2 Ssd
Change the M.2 SSD Intel® NUC 11 Enthusiast Kit - NUC11PHKi7C and Intel® NUC 11 Enthusiast Mini PC - NUC11PHKi7CAA support dual 80 and single 110mm SSDs. There is pre-installed SSD available out of the box for the NUC11PHKi7CAA SKU: Intel®... - Page 12 To install a different M.2 SSD: 1. Remove the small silver screw from the 110mm or 80mm metal standoff on the board (A). 2. Remove the pre-installed SSD from the connector if there are any. 3. Make sure there is the metal standoff in the right position, depending on the length of the SSD you are going to install 4.
-
Page 13: Close The Chassis
Close the Chassis After all components have been installed, close the Intel NUC chassis. Intel recommends this be done by hand with a screwdriver to avoid over-tightening and possibly damaging the screws. 1. Place the top metal plate on the NUC chassis (A) and secure the screws with the screwdriver (B). -
Page 14: Attaching And Using The Vesa Bracket (Optional)
Attaching and using the VESA Bracket (Optional) Follow the instructions to attach and use the VESA mount brackets: 1. Using the 4 small black screws that were included in the box, attach the VESA bracket to the back of the monitor of TV (A) 2. - Page 15 3. Place and slide the Intel NUC onto the VESA mount bracket (C and D)
-
Page 16: Connect Power
Connect Power Each Intel NUC model includes either a region-specific AC power cord or no AC power cord. Product codes Power cord type No power cord included. An AC power cord needs to be purchased separately. The connector on the power adapter is a C13 type connector. - Page 17 1. Connect the power cord to the adapter (A) 2. Plug the power cord into the wall (B) 3. Plug the power adapter into the NUC (C)
-
Page 18: Install An Operating System
Install an Operating System Supported Operating Systems for a list of Intel-validated Windows* operating systems. Refer to Operating System Installation for system requirements and installation steps. -
Page 19: Install The Latest Device Drivers And Software
Install the Latest Device Drivers and Software Here are the options for keeping device drivers current: • Allow the to detect out-of- Intel® Driver & Support Assistant (Intel® DSA) date drivers • Manually download drivers, BIOS, and software from Download Center: NUC11PHKi7C NUC11PHKi7CAA The following device drivers and software are available. - Page 20 Mouser Electronics Authorized Distributor Click to View Pricing, Inventory, Delivery & Lifecycle Information: Intel RNUC11PHKI7CAA6 RNUC11PHKI7CAA0 RNUC11PHKI7CAA1 RNUC11PHKI7CAA2 RNUC11PHKI7C000 RNUC11PHKI7C001 RNUC11PHKI7C002 RNUC11PHKI7C003 RNUC11PHKI7C004 RNUC11PHKI7C005 RNUC11PHKI7C006...


