NETGEAR ReadyNAS 4200 Hardware Manual
Hide thumbs
Also See for ReadyNAS 4200:
- Hardware manual (56 pages) ,
- Software manual (135 pages) ,
- Installation manual (2 pages)

Related Manuals for NETGEAR ReadyNAS 4200


Summary of Contents for NETGEAR ReadyNAS 4200
- Page 1 ReadyNAS 4200 H ardwa re M a nua l 350 East Plumeria Drive San Jose, CA 95134 May 2010 202-10628-01 v1.0...
- Page 2 To improve internal design, operational function, and/or reliability, NETGEAR reserves the right to make changes to the products described in this document without notice. NETGEAR does not assume any liability that may occur due to the use or application of the product(s) or circuit layout(s) described herein.
-
Page 3: Table Of Contents
Table of Contents Chapter 1 Getting Started Control Panel, Status Displays, Ports, and Drive Bays ....6 Front Panel ..........6 Disk Tray, Release, and Tray Handle . - Page 4 ReadyNAS 4200 Hardware Manual Appendix A Default Settings and Specifications Factory Default Settings ........32 Technical Specifications .
-
Page 5: Chapter 1 Getting Started
Getting Started Rea dy NAS 42 0 0 This chapter provides an overview of the unit’s physical features. Topics discussed in this chapter include: Control Panel, Status Displays, Ports, and Drive Bays • Rack Mount Setup • Choosing a Setup Location •... -
Page 6: Control Panel, Status Displays, Ports, And Drive Bays
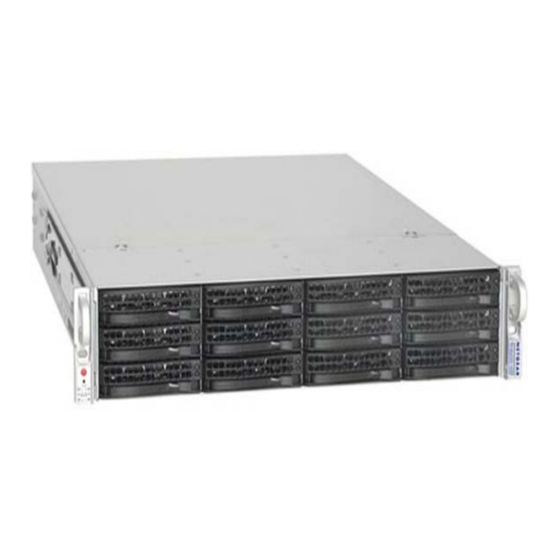
ReadyNAS 4200 Hardware Manual Control Panel, Status Displays, Ports, and Drive Bays This section introduces the ReadyNAS control panel, status display, ports, and disk bays. Front Panel Twelve disk bays with hot-pluggable disk trays that each include two status lights. -
Page 7: Rear Panel
ReadyNAS 4200 Hardware Manual Rear Panel Dual power supplies PS2 keyboard and mouse ports Two USB ports RS232 console port VGA monitor port Two Gigabit Ethernet ports with failover and link aggregation Two 10 G Ethernet ports Chapter 1: Getting Started... -
Page 8: Rack Mount Setup
ReadyNAS 4200 Hardware Manual Rack Mount Setup Use the included rack mount hardware to install the unit according to the following instructions. DANGER: A unit with installed drives can weigh more than 80 pounds. So as to avoid injury or damage to the equipment, plan to perform the rack mount installation with appropriate assistance. -
Page 9: Choosing A Setup Location
The rack mounting kit contains two rail assemblies. Each assembly consists of two sections: an inner fixed chassis rail that secures directly to the ReadyNAS 4200 chassis and an outer fixed rack rail that secures directly to the rack itself. Extend the rail assembly by pulling it outward. - Page 10 ReadyNAS 4200 Hardware Manual Use the provided mounting screws to mount the inner rails to the system chassis. Fasten the backs of the outer rails to the rack with screws. Press the release to extend the rails. Hang the hooks of the rails into the rack holes, and fasten the rails to the rack.
-
Page 11: Initial Setup, Ip Address, And Login Password
Default password: netgear1 • Both the user name and password are case-sensitive. For information about using ReadyNAS 4200 RAIDar and FrontView software to log in, configure, and manage your system, see the ReadyNAS for Business Software Manual. Chapter 1: Getting Started... -
Page 12: Safety Warning
ReadyNAS 4200 Hardware Manual Safety Warning The equipment contains no operator access areas and is certified for installation only by trained personnel, according to the installation instructions provided with each unit. The socket-outlet shall be installed near the equipment and shall be easily accessible. -
Page 13: General Safety Precautions
ReadyNAS 4200 Hardware Manual General Safety Precautions Follow these rules to ensure general safety: Keep the area around the ReadyNAS 4200 clean and free of clutter. • The ReadyNAS 4200 weighs approximately 82 pounds when fully loaded. When lifting •... -
Page 14: Electrostatic Discharge (Esd) Precautions
Install the heaviest components on the bottom of the rack first, and then work up. • Use a regulating uninterruptible power supply (UPS) to protect the ReadyNAS 4200 from • power surges, and voltage spikes and to keep your system operating in case of a power failure. -
Page 15: Chapter 2 Diagnostics And Maintenance
Diagnostics and Maintenance This chapter includes topics on system status, system shutdown, using the diagnostics menu, and adding, replacing, or formatting disks. Control Panel Diagnostic and Status Information • Performing System Shutdown • Understanding the System Diagnostics Boot Menu • Reinstall Firmware using OS Reinstall Option •... -
Page 16: Control Panel Diagnostic And Status Information
ReadyNAS 4200 Hardware Manual Control Panel Diagnostic and Status Information The control panel for the ReadyNAS 4200 is located on the bottom left corner of the unit. Each function on the control panel is described in the table below. Disk present and activity light... - Page 17 ReadyNAS 4200 Hardware Manual Item Activity Description Green: Power is on and LAN cable connected. LAN LEDs Blink green: LAN activity. Off: LAN cable disconnected. On (Green) Blink (Green) Red: Power failure. Power Off: Normal operation. diagnostic On (Red) Red: Overheating or fan failure.
-
Page 18: Performing System Shutdown
Using the FrontView Browser User Interface The FrontView > Shutdown Options screen offers the option to power off or reboot the ReadyNAS 4200. You also have the option of performing a full file system check or a quota check on the next boot. -
Page 19: Understanding The System Diagnostics Boot Menu
ReadyNAS 4200 Hardware Manual Understanding the System Diagnostics Boot Menu This section introduces the system diagnostics boot menu. Control Panel Selecting Boot Menu Options To select a boot menu option:. 1. Enable the boot menu by using a paper clip to hold in the Reset button while powering the unit on. - Page 20 ReadyNAS 4200 Hardware Manual OS Reinstall: While keeping the data volume in tact, re-install the RAIDiator firmware on the ReadyNAS, reset the admin password, and change the DHCP assignment to DHCP client. This is helpful if you have lost your admin password and want to set it back to the default, if errors in your network settings have made it impossible to connect to the ReadyNAS, or if you suspect that the operating system on your disk may somehow be corrupt.
-
Page 21: Reinstall Firmware Using Os Reinstall Option
ReadyNAS 4200 Hardware Manual Reinstall Firmware using OS Reinstall Option To reinstall the RAIDar firmware on the ReadyNAS without touching the data volume, follow these steps. While using a paper clip or push pin to gently press in the Reset button, power on the unit. -
Page 22: Using The Boot Menu To Format A Raid Volume
ReadyNAS 4200 Hardware Manual Using the Boot Menu to Format a RAID Volume WARNING! Using the Factory Default boot menu option will erase all the data on the hard disks. Do a full backup before using the Factory Default option. - Page 23 ReadyNAS 4200 Hardware Manual Press and hold the Reset button for 3 seconds to confirm the menu selection and proceed with that option. The system does the following: a. Blinks both LEDs twice to confirm the selection. b. Proceeds with clearing the disks.
- Page 24 ReadyNAS 4200 Hardware Manual Select either the Expandable Volume (X-RAID2) or the Flexible Volume (Flex-RAID) radio button, configure the options accordingly, and click Create volume now. The volume and initialization process begins. If no action is taken within 10 minutes, the system defaults to Note: X-RAID2 with 10 GB reserved for snapshots.
-
Page 25: Adding Or Replacing Disks
ReadyNAS 4200 Hardware Manual Adding or Replacing Disks Adding and replacing failed disks are similar processes. Be sure to check the Hardware Compatibility list on the NETGEAR Note: Support site for a list of disks that have been qualified for the ReadyNAS 4200 to assure that you use a suitable disk. -
Page 26: Failed Disk Notification
ReadyNAS 4200 Hardware Manual Failed Disk Notification When a disk fails in your ReadyNAS, you are notified of the failure by e-mail. The FrontView Health screen provides information about the failed disk. The disk tray of the ReadyNAS 4200 includes a failed disk LED that turns amber when its disk fails. -
Page 27: Replacing A Failed Disk
ReadyNAS 4200 Hardware Manual Replacing a Failed Disk ReadyNAS supports hot-swap bays, so there is no need to power it down when a disk fails. To replace the failed disk: View the disk tray failed disk LED to identify which disk has failed. -
Page 28: Replacing System Components
ReadyNAS 4200 Hardware Manual Replacing System Components You can replace failed components such as power supplies, fans, and the system battery. This section explains how to replace failed components. You might need to access the inside of the system to replace failed components. -
Page 29: Replacing A System Fan
ReadyNAS 4200 Hardware Manual Replacing a System Fan Fan speed is controlled by system temperature, as monitored by the RAIDiator firmware. If a fan fails, the remaining fans ramp up to full speed, the overheat/fan fail LED on the control panel turns on, and an email alert are sent to the system administrator. -
Page 30: Replacing A Power Supply
ReadyNAS 4200 Hardware Manual Replacing a Power Supply The ReadyNAS 4200 has a 700 watt redundant power supply consisting of two power modules. Each power supply module has an auto-switching capability, which enables it to automatically sense and operate at a 100V - 240V input voltage. -
Page 31: Appendix A Default Settings And Specifications
Default Settings and Specifications This appendix provides the factory default settings and system specifications. Factory Default Settings • Technical Specifications • Appendix A: Default Settings and Specifications | 31... -
Page 32: Factory Default Settings
ReadyNAS 4200 Hardware Manual Factory Default Settings To return the ReadyNAS to its factory default configuration settings shown below, see “Reinstall on page 21. Firmware using OS Reinstall Option” Feature Default Login User login URL when the ReadyNAS https://192.168.168.168/admin 4200 is not connected to a DHCP server... -
Page 33: Technical Specifications
ReadyNAS 4200 Hardware Manual Technical Specifications The table below lists the system specifications. Feature Specification Electrical Power supplies (PSU) Two 700W server rated AC power supplies Input 100-240V AC, 50/60Hz Power consumption 170W typical with 6 1TB disks Thermal Cooling Fans... -
Page 34: Appendix B Notification Of Compliance
Notification of Compliance Certificate of the Manufacturer/Importer It is hereby certified that the TBD has been suppressed in accordance with the conditions set out in the BMPT-AmtsblVfg 243/1991 and Vfg 46/1992. The operation of some equipment (for example, test transmitters) in accordance with the regulations may, however, be subject to certain restrictions. - Page 35 Hereby, NETGEAR Inc., declares that this Radiolan is in compliance with the essential requirements and other relevant provisions of Directive 1999/5/EC. Español Por medio de la presente NETGEAR Inc. declara que el Radiolan cumple con los [Spanish] requisitos esenciales y cualesquiera otras disposiciones aplicables o exigibles de la Directiva 1999/5/CE.
- Page 36 [Swedish] de väsentliga egenskapskrav och övriga relevanta bestämmelser som framgår av direktiv 1999/5/EG. Íslenska Hér með lýsir NETGEAR Inc. yfir því að Radiolan er í samræmi við grunnkröfur og [Icelandic] aðrar kröfur, sem gerðar eru í tilskipun 1999/5/EC. Norsk NETGEAR Inc. erklærer herved at utstyret Radiolan er i samsvar med de [Norwegian] grunnleggende krav og øvrige relevante krav i direktiv 1999/5/EF.
- Page 37 FCC Declaration Of Conformity We, NETGEAR, Inc., 350 East Plumeria Drive, Santa Clara, CA 95134, declare under our sole responsibility that the model MS2110 TBD complies with Part 15 of FCC Rules. Operation is subject to the following two conditions: •...
-
Page 38: Index
Index fan, replace firmware activity light front panel airflow FrontView battery general safety replace grounding battery, replace boot menu mechanical loading changing between X-RAID and Flex-RAID circuit overload compliance netgear1 components control panel operating temperature default IP diagnostics ports disk bays power disk failure power supply, replace... - Page 39 ReadyNAS 4200 Hardware Manual safety setup location Shutdown socket-outlet status display system specifications technical specifications tray handle weight Index | 39...