
Related Manuals for Planar VitalScreen S VSS17SX


Summary of Contents for Planar VitalScreen S VSS17SX
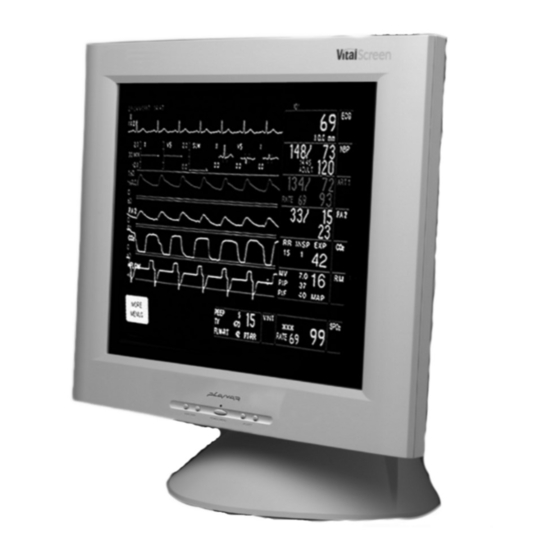
- Page 1 OPERATIONS MANUAL ™ VitalScreen 17" Medically Certified Display VSS17SX / VSS17SX-TR QUICK LINKS Table of Contents Index About the Display Display Installation Display Controls Troubleshooting Ordering Parts Warranty...
- Page 2 Planar is a registered trademark and VitalScreen is a trademark of Planar Systems, Inc. DOCUMENT HISTORY...
-
Page 3: Table Of Contents
Contents Regulatory Compliance ......iv About This Manual ....... . . v Conventions . -
Page 4: Regulatory Compliance
(EMC) laws. Planar Systems, Inc. has made great efforts to support the medical device industry, in particular, medical device manufacturers and medical device system integrators. -
Page 5: About This Manual
Planar Systems, Inc., located in Beaverton, Oregon, USA, is the manufacturer of these displays in the meaning of the directive. As required by the MDD in Article 14, Planar Systems, Inc., not residing in the European Economic Area (EEA), has a European representative, Planar Systems, Inc.—Espoo, Finland. -
Page 6: Product Information
• Replace any cord or cable that is frayed or damaged with another of the same type and rating as supplied by Planar. The safety and regulatory listings and certifications are based on the cable supplied by Planar. - Page 7 Cleaning Use only the products listed below for cleaning the display. The instructions products differ for cleaning the screen and cleaning the plastic enclosure. Be sure you use only the specific products approved for either the screen or the enclosure. Always apply the product to a clean nonabrasive cloth and then wipe the screen or plastic enclosure.
- Page 8 viii Symbol This table explains the symbols appearing on the display or power explanations supply adapter. Symbol Description Proof of conformity to applicable European Economic Community Council directives and two harmonized standards published in the official journal of the European Communities. The product has been tested and certified by CSA to C22.2 No.
-
Page 9: About The Vitalscreen S
About the VitalScreen S ™ The architecture of the VitalScreen S display incorporates an AMLCD TFT flat panel that produces a clear display with low radiation emission. This technology greatly reduces the radiation-related health concerns associated with CRT monitors. More significant, the VitalScreen S display is medically certified under UL 2601 and IEC 60601-1. -
Page 10: Identifying The Components
Model VSS17SX / VSS17SX-TR Identifying the Components The VitalScreen S display provides easy access to all controls and peripheral ports. The following illustrations of the front and back panels identify the display controls and ports. Front panel 1 2 3 4 5 LCD screen A 17-inch diagonal AMLCD. - Page 11 About the VitalScreen S Back panel 1 2 3 Power input port Port for the power connector. (locking mini DIN connector) Audio Line In Jack for the audio cable. (You can also connect the CD-ROM Line Out to this jack.) Touchscreen port Port for the RS-232 cable;...
-
Page 12: Adjusting The Orientation/Viewing Angle
Model VSS17SX / VSS17SX-TR Adjusting the Orientation/Viewing Angle You can rotate your VitalScreen S from landscape to portrait and tilt it to various viewing angles. The side view of the display shows the angle settings possible, ranging from -5 to 25 degrees. Plug and Play The VSS17SX display series complies with the VESA DDC1 and DDC2B protocols for analog mode. -
Page 13: Installing The Display
Installing the Display To install the VitalScreen S display, connect the power supply first. Next, connect the VGA cable. Then connect the stereo speaker and touchscreen cables if appropriate. The illustrations in this section are meant to show connections to the proper ports. -
Page 14: Connecting The Video Cable
Model VSS17SX / VSS17SX-TR Connecting the Video Cable 1 Turn off your computer and display before connecting the two units. 2 Plug the video cable into the D-sub VGA connector port on the back panel. 3 Plug the other end of the cable into the VGA port on the computer. -
Page 15: Connecting The Stereo Speakers
If so, the volume has been preset to the maximum. Although the display speakers are adequate for most audio applications, Planar does not recommend using the display speakers as the exclusive audio source for medical alarms or applications critical for audio performance. -
Page 16: Connecting The Optional Touch Screen
Model VSS17SX / VSS17SX-TR Connecting the Optional Touch Screen 1 Plug the RS232 cable into the RS232 port on the back panel. 2 Plug the other end of the cable to the RS232 serial port on your computer. 3 Load the touchscreen driver from the CD enclosed. Power Management System The VitalScreen S display complies with the VESA DPMS standard. -
Page 17: Display Controls
Display Controls This chapter explains the onscreen display (OSD) menu: the user interface for controlling various aspects of the VitalScreen S display. The VitalScreen S display features an intuitive, menu-driven, onscreen display. Using the OSD menu, you can adjust functions such as brightness, image fine-tuning, and speaker volume. -
Page 18: Hot Key Functions
Model VSS17SX / VSS17SX-TR Hot Key Functions Three Hot Key functions allow you to make quick adjustments to the display setting, volume, and contrast. Auto Adjust. Press the Function UP button to apply a display setting automatically. A small Auto Adjust OSD is also displayed. -
Page 19: Function Menus
Display Controls Function Menus The following tables describe the main menus and submenus. Monitor–Control Menu Allows you to adjust the display Monitor-Control. characteristics such as the horizontal or vertical position, display phase, display clock, and factory reset. Adjusting these settings is necessary if the results from the Auto Adjust function are not satisfactory. - Page 20 Model VSS17SX / VSS17SX-TR OSD–Control Menu Allows you to adjust the position of the OSD-Control. onscreen display. Pressing the Adjust PLUS or MINUS button displays the OSD-Control submenu. Use the Function LEFT or RIGHT button to select a submenu item. Press the Adjust PLUS or MINUS button OSD-H-Position.
- Page 21 Display Controls Graphic–Control Menu Allows you to adjust the display Graphic-Control. contrast, brightness, sharpness, and color settings. Pressing the Adjust PLUS or MINUS button displays the Graphic-Control submenu. Use the Function LEFT or RIGHT button to select a submenu item. Press the Adjust PLUS or MINUS button to Contrast.
- Page 22 Model VSS17SX / VSS17SX-TR MISC–Control Menu Allows you to select the display language, MISC-Control. adjust the volume setting, and view system information. Pressing the Adjust PLUS or MINUS button displays the MISC-Control submenu. Use the Function LEFT or RIGHT button to select a submenu item. Press the Adjust PLUS or MINUS button to Language.
-
Page 23: Appendix A: Technical Information
Technical Information VSS17SX/VSS17SX-TR Specification Color AMLCD TFT flat-panel unit 17-inch SXGA (1280 x 1024) Control Functions Power Software Power switch with LED indicator (Press to turn OFF, over 1 (one) sec. to turn ON) Onscreen display (OSD) Main Menu Submenu Auto Adjust Monitor Control Horizontal Position/Vertical... -
Page 24: Appendix B: Supported Timing
Supported Timing Vertical Horizontal Scanning Scanning Sync Polarity or Dot Clock Frequency Frequency Composite Sync Item Standard Resolution (MHz) (Hz) (kHz) (H/V) NEC PC98 640x400 25.20 70.15 31.50 NEC PC98 640x400 21.05 56.42 24.83 MAC 13-inch mode 640x480 30.24 66.67 35.00 MAC 16-inch mode 832x624... -
Page 25: Appendix C: Troubleshooting
Troubleshooting Problem Display indicates “Over Range” This problem occurs when the frequency range is out of display specifications, or the incoming resolution is higher than 1280 x 1024. The video data turns off and this warning message appears. Solution Check that the scanning frequency is in a horizontal range of 24 to 80 kHz and a vertical range of 55 to 75 Hz. -
Page 26: Index
Index AC power, connecting Exit menu , 2, Adjust button adjusting display adjusting viewing angle front panel audio line Function buttons back panel Graphic-Control menu cleaning instructions identifying components components, identifying information connecting ordering parts AC power product stereo speakers technical touch screen installing display... - Page 27 Index onscreen display (OSD) menu technical information ordering parts timing, supported orientation, screen touch screen OSD-Control menu cleaning connecting troubleshooting power indicator management system unpacking display switch product information VESA DPMS repair service cable, connecting rotation connector RS232 connector viewing angle, adjusting safety instructions warranty screen orientation...
- Page 28 Planar, and to any drawings or specifications furnished to Planar by the Buyer if approved by Planar. This warranty shall be effective only if Planar receives notice of such defect or nonconformance during the period of the warranty.
- Page 29 (503) 748-1493. You will need the unit’s serial number and a brief description of the problem to receive an RMA number. In Europe, call Planar Customer Service at +358 9 420 01 between 8 and 4 . Eastern European time, Monday through Friday, or fax your request to +358 9 420 0200.
- Page 30 Ordering Information Non-touch display Use the information in these tables to order parts for the VSS17SX non-touch display. VSS17SX Display Part Number VSS 17SX 17-inch SXGA VitalScreen S 997-2727-00 Medically Certified Display with desk stand and US power cord VSS 17SX 17-inch SXGA VitalScreen S 997-2727-01 Medically Certified Display with desk stand and European power cord...
- Page 31 Resistive-touch Use the information in these tables to order parts for display the VSS17SX-TR resistive-touch display. VSS17SX-TR Display Part Number VSS 17SX-TR 17-inch SXGA VitalScreen S 997-2728-00 Medically Certified Display with desk stand and US power cord VSS 17SX-TR 17-inch SXGA VitalScreen S 997-2728-01 Medically Certified Display with desk stand and European power cord...
- Page 32 Corporate Headquarters Americas Medical Sales Europe, Middle East & Africa Medical Sales Planar Systems, Inc. Planar Systems, Inc. 1195 NW Compton Drive 400 Fifth Avenue Planar Systems, N.V. Beaverton, OR 97006-1992 USA Waltham, MA 02451-8738 USA Leuvensesteenweg 122c (503) 748-1100 phone...