Advertisement
Quick Links
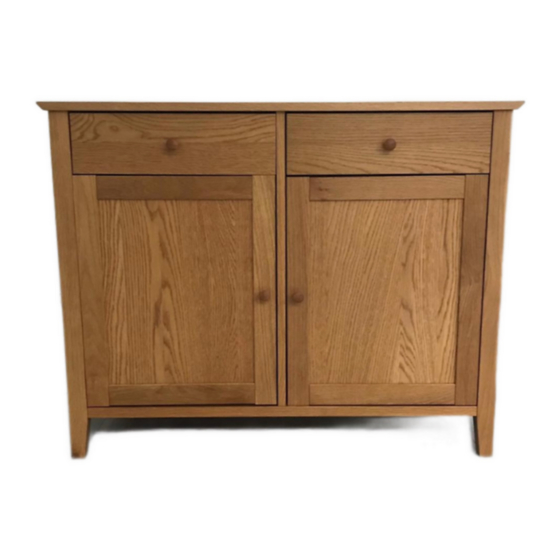
John Lewis
ELLIS 2 DOOR 2 DRAWER SIDBOARD
Thank you for purchasing this Ellis 2 Door 2 Drawer Sideboard. Please read the instructions carefully
before use to ensure safe and satisfactory operation of this product.
Pre-assembly preparation
Please ensure instructions are read in full before attempting to assemble this product.
Necessary Tools
A cross head screwdriver only should be used to assemble this unit , an electric drill may cause damage to the
product and is not recommended.
Please check the pack contents before attempting to assemble this product. A full checklist of components is
given in this leaflet. If any components are missing, please contact the retailer from whom you bought this
product.
This product takes approximately 90 MINUTES to assemble with 2 PEOPLE.
All assembly should be performed on a flat, stable, clean and soft surface.
This product is HEAVY, it should be assembled as near as possible to the point of use. TAKE CARE
WHEN LIFTING to avoid personal injury and (or) damage to the product
The fitting pack contains SMALL ITEMS which should be KEPT AWAY FROM YOUNG CHILDREN.
IMPORTANT: Retain these instructions for future reference..
Stock Number: 87702732
( Included )
Page :
IW-17-4335-201-0
1
Advertisement

Related Manuals for John Lewis ELLIS 87702732


Summary of Contents for John Lewis ELLIS 87702732
- Page 1 John Lewis ELLIS 2 DOOR 2 DRAWER SIDBOARD Stock Number: 87702732 Thank you for purchasing this Ellis 2 Door 2 Drawer Sideboard. Please read the instructions carefully before use to ensure safe and satisfactory operation of this product. Pre-assembly preparation Please ensure instructions are read in full before attempting to assemble this product.
- Page 2 Page : 2 IW-17-4335-201-0...
- Page 3 Fittings and parts checklist Back panels Left drawer sides Right side panel Left side panel Doors Drawer backs Top panel Removable shelfs Drawer bottoms Bottom panel Drawer fronts Partition panel Right drawer sides Hinge Door stopper Small minifix bolt Ø6 x 34 Wood shelf support Hinge mounting plate Small minifix housing...
- Page 4 Wall fixing - if in doubt seek professional advice Page : 4...
- Page 5 Step By Step Assembly Instructions Step 1 : Attach 4 x dowels (G) into right side panel ( 1 ) and left side panel (2) : Attach 1 0 x large minifix bolts (E) into right side panel ( 1 ), left side panel (2) and and top panel (3) : Attach 4 x hinge mounting plates (B) to right side panel ( 1 ) and left side Fitting...
- Page 6 Step 2 : Attach 4 x dowels (G) to partition panel (5) : Attach 4 x door stoppers (J) to partition panel (5) using 4 x flat cross head screws (H). Fitting G x 4 J x 4 H x 4 Step 3 : Attach partition panel (5) to bottom panel (4) using 2 x hex head screws (D) use hex key (N) to tighten.
- Page 7 Step 4 : Attach right side panel ( 1 ) to bottom panel (4). : Insert 2 x minifix housings (F) into bottom panel (4). : Use screwdriver to turn minifix housings (F) clockwise to fix. Fitting F x 2 Step 5 : Attach left side panel ( 2 ) to bottom panel (4).
- Page 8 Step 6 : Attach top panel (3) to left side panel ( 2 ), right side panel ( 1 ) and partition panel (5). : Insert 6 x minifix housings (F) into left & right side panels and partition panel as shown. : Use screwdriver to turn minifix housings (F) clockwise to fix.
- Page 9 Step 8 : Position hinges (4) on doors (7) onto hinge mounting plates (B) in left side panel (2) and right side panel ( 1 ) as shown. Step Step 2 Page : 9 IW-17-4335-201-0...
- Page 10 HINGE ADJUSTMENT INSTRUCTIONS Step 9 by screw adjustment. (9.2) FRONT-TO-BACK by slackening and retightening the hinge-arm mounting screw. via slots on mounting plate by slackening and retightening the screws on mounting plate Page : IW-10-0010-0060-0 (Type 2) IW-17-4335-201-0...
- Page 11 Step 1 0 : Attach 4 x hinge cover cap (P) to hinges as shown. : Attach 2 x handles (R) to doors (7) using 2 x metric cross head bolts (Q). : Attach 8 x wood shelf supports (K) to pre-drilled holes on left side panel, partition panel and right side panel as shown.
- Page 12 Step 11 Assembly instructions for drawer box. For parts 9 , 1 0, 11 , 1 2 and 1 3 . : Attach 8 x small minifix bolts (S) to both drawer : Place right drawer sides ( 1 0) and left drawer sides ( 11 ) fronts (9) as shown.
- Page 13 Step 1 2 : Attach 2 x handles (R) to drawer fronts (9) using 2 x metric cross head bolts (Q). : Place drawers into unit. Fitting R x 2 Q x 2 Complete Page : IW-17-4335-201-0...
-
Page 14: Care And Maintenance
It is recommended that before moving the heavy object to a new location it is completely dis-assembled to avoid personal injury or damage to the furniture. Please be careful to retain all fitting when doing this. PLEASE KEEP THESE INSTRUCTIONS FOR FUTURE REFERENCE John Lewis Partnership 171 Victoria Street, London, SWIE 5NN www.johnlewis.com Page :...