Advertisement
Quick Links
Advertisement

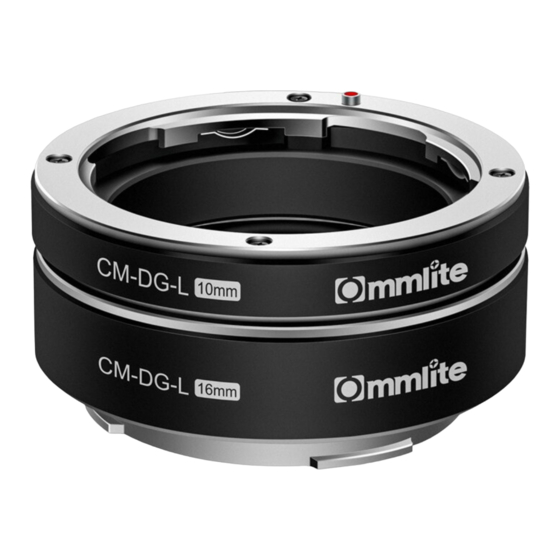
Summary of Contents for Commlite CM-DG-L
- Page 1 Automatic Macro Extension Tube for Panasonic/Leica/Sigma L-Mount Camera User Manual...
- Page 3 Description Thanks for purchasing COMMLITE CM-DG-L Notice The extension tube is only suitable for macro shooting and can not focus infinitely after installed The focusing distance is limited after installing the extension tube, and the focusing range is different with different focal lengths so you can adjust...
- Page 4 Main Features 1. Focus on Exact Macro Shooting 2. Support Exact TTL Exposure and Auto-focus 3. Support Electronic Aperture Control and EXIF INFO. Transmitting 4. Two Ring Designs(10mm/16mm), Three Di¬fferent Combinations 5. Compatible with All Panasonic/Leica/Sigma L-mount Cameras 6. All Aluminum Alloy Material, Stable and Durable Components Metal Signal Contact Metal Signal Contact...
- Page 5 Assemble and Disassemble 1. Assemble Step 1 . Connect the L-Mount lens to CM-DG-L Extension Tube Refer to the follow illustration, press down the ‘lens release button’ of the Extension Tube, align the red mark on the L-Mount lens to the...
- Page 6 Step 2 . Connect the Extension Tube to L-Mount camera Refer to the follow illustration, press down the ‘lens release button’ of the L-Mount camera, align the red mark on the Extension Tube to the corresponding mark on the camera, and turn clockwise until tightened...
- Page 7 2. Disassemble Step 1 . Turn off the camera power, then take off the Extension Tube which is connected with L-Mount lens from L-Mount camera Refer to the follow illustration, press down the ‘lens release button’ of the L-Mount camera, turn counterclockwise the Extension Tube which is connected with L-Mount lens until it can be easily taken off...
- Page 8 Step 2 . Take off the L-Mount lens from the L-Mount Extension Tube Refer to the follow illustration, press down the ‘lens release button’ of the Extension Tube, turn counterclockwise the L-Mount lens until it can be easily taken off...
- Page 9 Specifications Compatible Lens L-Mount Lens Compatible Camera L-Mount Camera Front Installation L-Mount Lens Rear Installation L-Mount Camera Camera-Mount Outer Diameter 61mm Lens-Mount Outer Diameter 63mm Length 32mm Net Weight...
- Page 11 松下/徕卡/适马相机L卡口自动近摄接圈 产品使用说明书...
- Page 13 前 言 感谢您购买咔莱CM-DG-L 注意事项 接圈只适用于拍微距, 装上接圈后, 不能无限远合焦 装上接圈后, 对焦距离有限, 不同焦距的可对焦范围不同, 您可以通过改变 物体与相机的距离或者操作主镜头的变焦装置来调整焦距 加装近摄接圈后, 需要增加曝光 (建议您配合外闪及脚架使用) 支持自动对焦, 但如果被摄物体深度非常浅, 也会使对焦不实, 如想严密对 焦, 建议切到手动对焦模式...
- Page 14 主要功能 1. 专注于精准微距拍摄 2. 支持精准的TTL曝光及自动对焦 3. 电子光圈可调, EXIF信息传输 4. 10mm,16mm两组接圈设计, 三种不同搭配选择 5. 适用于所有松下/徕卡/适马L卡口相机 6. 全铝合金材质, 稳固耐用 部件名称 电子信号触点 电子信号触点 镜头安装标记 镜头释放拨杆 镜头安装标记 相机连接端 镜头连接端...
- Page 15 安装及拆卸近摄接圈 1. 安装 步骤1. 将L卡口镜头安装到CM-DG-L近摄接圈上 如图, 按下近摄接圈上的镜头释放拔杆, 将L卡口镜头上的红色标记对准近 摄接圈镜头端卡口上的相应标记, 顺时针方向旋入至拧紧为止...
- Page 16 步骤2. 将近摄接圈安装到L卡口相机 如图, 按下L卡口相机上的镜头释放按钮, 将近摄接圈上的红色标记对准 相机端卡口处的红色标记, 顺时针方向旋入至拧紧为止...
- Page 17 2. 拆卸 步骤1. 关闭相机电源, 然后将安装着L卡口镜头的近摄接圈从L卡口相机上取下 如图, 按下L卡口相机的镜头释放按钮, 逆时针旋转连接着L卡口镜头的近 摄接圈直至可轻松取下为止...
- Page 18 步骤2. 将L卡口镜头从近摄接圈上取下 如图, 按下近摄接圈的镜头释放拨杆, 逆时针旋转镜头直至可轻松取下为 止...
- Page 19 规格与技术参数 兼容镜头 L卡口镜头 兼容相机 L卡口机身 正面安装 L卡口镜头 背面安装 L卡口机身 相机端外围直径 61mm 镜头端外围直径 63mm 总长度 32mm 重量...
- Page 24 ShenZhen Commlite Technology Co.,LTD Email:support@commlite.com Web:www.commlite.com...
