Zanussi ZOP37902 User Manual
Hide thumbs
Also See for ZOP37902:
- User manual (56 pages) ,
- User manual (24 pages) ,
- User manual (28 pages)

Related Manuals for Zanussi ZOP37902


Summary of Contents for Zanussi ZOP37902
- Page 1 User Manual GETTING STARTED? EASY. ZOP37902 NL Gebruiksaanwijzing Oven EN User Manual Oven...
-
Page 2: Veiligheid Van Kinderen En Kwetsbare Mensen
VEILIGHEIDSINFORMATIE Lees zorgvuldig de meegeleverde instructies voor installatie en gebruik van het apparaat. De fabrikant is niet verantwoordelijk voor letsel en schade veroorzaakt door een foutieve installatie. Bewaar de instructies van het apparaat voor toekomstig gebruik. VEILIGHEID VAN KINDEREN EN KWETSBARE MENSEN Dit apparaat kan worden gebruikt door kinderen van 8 jaar en •... -
Page 3: Elektrische Aansluiting
Gebruik nooit agressieve reinigingsmiddelen of scherpe • metalen schrapers om de glazen deur schoon te maken, deze kunnen krassen veroorzaken op het oppervlak, waardoor het glas zou kunnen breken. Als de voedingskabel beschadigd is, moet de fabrikant, een • erkende serviceverlener of een gekwalificeerd persoon deze vervangen teneinde gevaarlijke situaties te voorkomen. - Page 4 • Sluit de deur van het apparaat volledig voordat u • Dit apparaat is uitsluitend bestemd om mee te de stekker in het stopcontact steekt. koken. Het mag niet worden gebruikt voor • Dit apparaat voldoet aan de EEG-richtlijnen. andere doeleinden, zoals het verwarmen van een kamer.
- Page 5 – eventueel grote hoeveelheden etensresten, reinigingsproces van alle pyrolytische ovens en olie of gemorst vet / afzetttingen. kunnen mogelijk ook kleine hoeveelheden – eventueel verwijderbare objecten (inclusief schadelijke gassen veroorzaken. plateaus, zijrails, etc., die met het product • Rookgassen die vrijkomen uit alle pyrolytische zijn meegeleverd), in het bijzonder potten en ovens / kookresten zoals beschreven, zijn niet pannen met antiaanbaklaag, ovenroosters,...
-
Page 6: Beschrijving Van Het Product
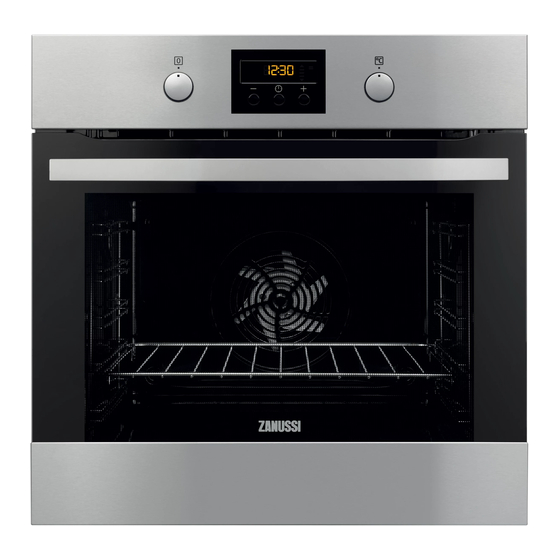
BESCHRIJVING VAN HET PRODUCT ALGEMEEN OVERZICHT Bedieningspaneel Knop voor de ovenfuncties Elektronische tijdschakelklok Knop voor de temperatuur Verwarmingselement Lampje Ventilator Verwijderbare inschuifrail Roosterhoogtes ACCESSOIRES • Grill-/braadpan Voor braden en roosteren of als schaal om vet • Bakrooster op te vangen. Voor kookgerei, bak- en braadvormen. -
Page 7: Dagelijks Gebruik
Zie "De duur instellen" om een nieuwe tijd in te 2. Laat het apparaat een uur werken. stellen. 3. Stel de functie en de maximumtemperatuur VOORVERWARMEN 4. Laat het apparaat 15 minuten werken. Verwarm het apparaat voor om het resterende vet Accessoires kunnen heter worden dan normaal. - Page 8 Ovenfunctie Toepassing Multi hetelucht Voor het besparen van stroom als u droog gebakken voedsel (vochtig) bakt en bereidt. Ook om gebakken voedsel in bakblikken op één rekniveau te bakken. Deze functie wordt gebruikt om de energie-efficiëntieklasse vast te stellen overeenkomstig EN50304.
- Page 9 Knop Functie Beschrijving KLOK De klokfunctie instellen. PLUS De tijd instellen. CONTROLELAMPJE BIJ VOORVERWARMEN geven aan dat de oventemperatuur toeneemt of afneemt. Als u een ovenfunctie inschakelt, gaan de balkjes op het display een voor een branden. De balkjes KLOKFUNCTIES TABEL KLOKFUNCTIES Klokfunctie Applicatie...
-
Page 10: Gebruik Van De Accessoires
DE KOOKWEKKER INSTELLEN een willekeurige knop of open de deur van de oven om het geluid te stoppen. 1. Druk steeds opnieuw op op het display verschijnt en "00" knippert. Als u de KOOKWEKKER instelt als de 2. Druk op om de KOOKWEKKER in te functie DUUR of EINDE... -
Page 11: Extra Functies
• Alle accessoires hebben links en rechts bovenaan kleine inkepingen om de veiligheid te verhogen. Deze inkepingen zorgen er ook voor dat ze niet omkantelen. • Door de verhoogde lijst die om het rooster loopt, is kookgerei beveiligd tegen wegglijden. EXTRA FUNCTIES GEBRUIK VAN HET KINDERSLOT Het kinderslot voorkomt dat het apparaat per... -
Page 12: Algemene Informatie
bakresultaten veranderen en de emaillelaag De temperaturen en baktijden in de beschadigen. tabellen zijn slechts als richtlijn bedoeld. Deze zijn afhankelijk van de VOOR DE BEREIDING VAN GEBAK recepten en de kwaliteit en de • De ovendeur mag pas worden geopend als hoeveelheid van de gebruikte driekwart van de baktijd is verstreken. - Page 13 Boven-/onderwarmte Multi hetelucht Opmerkin- Gerecht Tijd (min) Temperatuur Rooster- Temperatuur Rooster- (°C) hoogte (°C) hoogte Strudel 60 - 80 Op een bakplaat Confituur- 2 (links en 30 - 40 In een ca- taart rechts) kevorm van 26 cm Cake, 40 - 50 In een ca- zacht kevorm...
- Page 14 Boven-/onderwarmte Multi hetelucht Opmerkin- Gerecht Tijd (min) Temperatuur Rooster- Temperatuur Rooster- (°C) hoogte (°C) hoogte Schuimge- 80 - 100 Op een bakjes - bakplaat één niveau Schuimge- 2 en 4 80 - 100 Op een bakjes - bakplaat twee ni- veaus 12 - 20 Op een...
- Page 15 Boven-/onderwarmte Multi hetelucht Opmerkin- Gerecht Tijd (min) Temperatuur Rooster- Temperatuur Rooster- (°C) hoogte (°C) hoogte Rogge- 30 - 45 In een brood broodvorm 2 (2 en 4) 25 - 40 6 - 8 Broodjes broodjes op een bakplaat 230 - 250 230 - 250 10 - 20 Op een...
- Page 16 Vlees Boven-/onderwarmte Multi hetelucht Opmerkin- Gerecht Tijd (min) Temperatuur Rooster- Temperatuur Rooster- (°C) hoogte (°C) hoogte Rundvlees 50 - 70 Op een bakrooster Varkens- 90 - 120 Op een bakrooster Kalfsvlees 90 - 120 Op een bakrooster Engelse 50 - 60 Op een rosbief, bakrooster...
- Page 17 Boven-/onderwarmte Multi hetelucht Opmerkin- Gerecht Tijd (min) Temperatuur Rooster- Temperatuur Rooster- (°C) hoogte (°C) hoogte Forel / 40 - 55 3 - 4 vis- Zeebra- Tonijn / 35 - 60 4 - 6 filets zalm CIRCULATIEGRILL Rundvlees Gerecht Aantal Temperatuur (°C) Tijd (min) Roosterhoogte Rosbief of ossen-...
- Page 18 Gerecht Hoeveelheid (kg) Temperatuur (°C) Tijd (min) Roosterhoogte Kalfsschenkel 1.5 - 2 160 - 180 120 - 150 1 of 2 Lamsvlees Gerecht Hoeveelheid (kg) Temperatuur (°C) Tijd (min) Roosterhoogte Lamsbout, ger- 1 - 1.5 150 - 170 100 - 120 1 of 2 oosterd lamsv- lees...
- Page 19 Gerecht Temperatuur (°C) Tijd (min) Roosterhoogte Aardappelgratin 180 - 200 60 - 75 Moussaka 150 - 170 60 - 75 Lasagne 170 - 190 55 - 70 Cannelloni 170 - 190 55 - 70 Broodpudding 170 - 190 45 - 60 Rijstpudding 170 - 190 40 - 50...
-
Page 20: Onderhoud En Reiniging
Groenten Roosterhoogte Gerecht Temperatuur (°C) Tijd (u) 1 stand 2 standen Bonen 60 - 70 6 - 8 1 / 4 Paprika's 60 - 70 5 - 6 1 / 4 Groente in het 60 - 70 5 - 6 1 / 4 zuur Paddenstoelen... -
Page 21: De Ovendeur Reinigen
Trek de inschuifrail bij de voorkant uit de zijwand. Trek de geleider bij de achterkant uit de zijwand en verwijder deze. Installeer de inschuifrails in de omgekeerde Als het vuil niet volgorde. eenvoudig te ver- wijderen is. Tijds- PYROLYTISCHE REINIGING duur van de proce- dure: 1 uur 30 min. - Page 22 De ovendeur kan dichtslaan als u de LET OP! Gebruik het apparaat nooit glasplaten probeert te verwijderen als zonder de glasplaten. de deur nog gemonteerd is. 90° Open de deur volledig en houd de twee deurscharnieren vast. Til de hendels op de twee scharnieren omhoog en draai ze. Sluit de ovendeur halverwege tot de eerste openingsstand.
-
Page 23: Het Lampje Vervangen
HET LAMPJE VERVANGEN Leg een doek op de bodem van de binnenkant van het apparaat. Dit voorkomt schade aan het afdekglas en de ovenruimte. WAARSCHUWING! Gevaar voor elektrocutie! Maak de zekering los voordat u de lamp vervangt. De lamp en het afdekglas kunnen heet zijn. - Page 24 Probleem Mogelijke oorzaak Oplossing De oven wordt niet warm. De klok is niet ingesteld. Stel de klok in. De oven wordt niet warm. De benodigde kookstanden Zorg ervoor dat de instellingen zijn niet ingesteld. correct zijn. De oven wordt niet warm. De automatische uitschakeling Raadpleeg "Automatisch uit- is actief.
-
Page 25: Montage
Probleem Mogelijke oorzaak Oplossing Het apparaat staat aan maar De demofunctie is ingescha- 1. Schakel de oven uit. wordt niet warm. De ventilator keld. 2. Druk op de -toets en werkt niet. Op het display ver- houd deze ingedrukt. schijnt "Demo". 3. - Page 26 INBOUW BEVESTIGING VAN HET APPARAAT AAN HET KASTJE min. 550 min. 560 ELEKTRISCHE INSTALLATIE min. 550 De fabrikant is niet verantwoordelijk indien u deze veiligheidsmaatregelen min. 560 uit hoofdstuk 'Veiligheidsinformatie' niet opvolgt. Dit apparaat wordt geleverd met een netsnoer. KABEL Kabeltypes die van toepassing zijn op de installatie of vervanging: H07 RN-F, H05 RN-F, H05 RRF, H05 VV-F, H05...
- Page 27 ENERGIEZUINIGHEID PRODUCTKAART EN INFORMATIE VOLGENS EU 65-66/2014 Naam leverancier Zanussi Modelidentificatie ZOP37902XK Energie-efficiëntie Index 81.2 Energie-efficiëntieklasse Energieverbruik bij een standaardbelasting, stand boven + 0.93 kWh/cyclus onderwarmte Energieverbruik bij een standaardbelasting, stand hetelucht 0.69 kWh/cyclus Aantal ruimten Warmtebron Electriciteit Volume 72 l...
- Page 28 niet weg met het huishoudelijk afval. Breng het product naar het milieustation bij u in de buurt of neem contact op met de gemeente.
-
Page 29: Safety Information
SAFETY INFORMATION Before the installation and use of the appliance, carefully read the supplied instructions. The manufacturer is not responsible if an incorrect installation and use causes injuries and damages. Always keep the instructions with the appliance for future reference. CHILDREN AND VULNERABLE PEOPLE SAFETY This appliance can be used by children aged from 8 years and •... -
Page 30: Safety Instructions
Do not use harsh abrasive cleaners or sharp metal scrapers to • clean the glass door since they can scratch the surface, which may result in shattering of the glass. If the supply cord is damaged, it must be replaced by the •... -
Page 31: Pyrolytic Cleaning
• Make sure that the ventilation openings are not CARE AND CLEANING blocked. WARNING! Risk of injury, fire, or • Do not let the appliance stay unattended during damage to the appliance. operation. • Deactivate the appliance after each use. •... -
Page 32: Product Description
• Unlike all humans, some birds and reptiles can WARNING! Risk of electrical shock. be extremely sensitive to potential fumes emitted during the cleaning process of all Pyrolytic Ovens. • Before replacing the lamp, disconnect the – Remove any pets (especially birds) from the appliance from the power supply. -
Page 33: Before First Use
BEFORE FIRST USE 3. Press to set the current minutes. WARNING! Refer to Safety chapters. 4. Press to confirm. This is necessary only when you set the time for the first time. Later INITIAL CLEANING the new time will be saved automatically after 5 seconds. -
Page 34: Oven Functions
3. To deactivate the appliance turn the knobs for the oven functions and temperature to the off position. OVEN FUNCTIONS Oven function Application Off position The appliance is off. True Fan Cooking To bake on up to 3 shelf positions at the same time and to dry food. -
Page 35: Heat-Up Indicator
DISPLAY A. Timer B. Heat-up and residual heat indicator C. Water drawer (selected models only) D. Core temperature sensor (selected models only) E. Door lock (selected models only) F. Hours / minutes G. Clock functions BUTTONS Button Function Description MINUS To set the time. -
Page 36: Using The Accessories
First you set the seconds, then the minutes and To confirm the settings of the clock then the hours. At first, the time is calculated in minutes and functions, press or wait 5 seconds seconds. When the time you set is longer than for an automatic confirmation. -
Page 37: Additional Functions
• All accessories have small indentations at the top of the right and left side to increase safety. The indentations are also anti-tip devices. • The high rim around the shelf is a device which prevents cookware from slipping. Wire shelf and the deep pan together: Push the deep pan between the guide bars of the shelf support and the wire shelf on the guide bars above. -
Page 38: Hints And Tips
interrupts the power supply. The oven activates again automatically when the temperature drops. HINTS AND TIPS components when you cook. This can change WARNING! Refer to Safety chapters. the baking results and cause damage to the enamel. The temperature and baking times in BAKING CAKES the tables are guidelines only. - Page 39 Top / Bottom Heat True Fan Cooking Food Time (min) Comments Temperature Shelf posi- Temperature Shelf posi- (°C) tion (°C) tion Buttermilk 80 - 100 In a 26 cm cheese- cake cake mould Apple 2 (left and 80 - 100 In two 20 cake (Ap- right)
- Page 40 Top / Bottom Heat True Fan Cooking Food Time (min) Comments Temperature Shelf posi- Temperature Shelf posi- (°C) tion (°C) tion Biscuits / 140 - 150 2 and 4 35 - 40 In a baking pastry tray stripes - two levels Biscuits / 140 - 150 1, 3 and 5...
- Page 41 Bread and pizza Top / Bottom Heat True Fan Cooking Food Time (min) Comments Temperature Shelf posi- Temperature Shelf posi- (°C) tion (°C) tion White 60 - 70 1 - 2 pieces, bread 500 gr per piece Rye bread 30 - 45 In a bread Bread 2 (2 and...
- Page 42 Meat Top / Bottom Heat True Fan Cooking Food Time (min) Comments Temperature Shelf posi- Temperature Shelf posi- (°C) tion (°C) tion Beef 50 - 70 On a wire shelf Pork 90 - 120 On a wire shelf Veal 90 - 120 On a wire shelf English...
-
Page 43: Turbo Grilling
Fish Top / Bottom Heat True Fan Cooking Food Time (min) Comments Temperature Shelf posi- Temperature Shelf posi- (°C) tion (°C) tion Trout / 40 - 55 3 - 4 fish Sea bream Tuna fish / 35 - 60 4 - 6 fillets Salmon TURBO GRILLING Beef... -
Page 44: Moist Fan Baking
Lamb Food Quantity (kg) Temperature (°C) Time (min) Shelf position Leg of lamb, 1 - 1.5 150 - 170 100 - 120 1 or 2 roast lamb Saddle of lamb 1 - 1.5 160 - 180 40 - 60 1 or 2 Poultry Food Quantity (kg) -
Page 45: Drying - True Fan Cooking
Food Temperature (°C) Time (min) Shelf position Apple cake 150 - 160 45 - 60 White bread 180 - 190 45 - 55 DEFROST Defrosting time Further defrosting Food Quantity (g) Comments (min) time (min) Chicken 1000 100 - 140 20 - 30 Place the chicken on an upturned saucer placed on... -
Page 46: Care And Cleaning
Fruit Shelf position Food Temperature (°C) Time (h) 1 position 2 positions Plums 60 - 70 8 - 10 1 / 4 Apricots 60 - 70 8 - 10 1 / 4 Apple slices 60 - 70 6 - 8 1 / 4 Pears 60 - 70... -
Page 47: Cleaning Reminder
During the Pyrolysis the oven lamp is off. Do not start the Pyrolysis if you did not 5. When the oven is at its set temperature, the fully close the oven door. In some door locks. The display shows the symbol models, the display shows "C3"... -
Page 48: Replacing The Lamp
90° Open the door fully and hold the two door hinges. Lift and turn the levers on the two hinges. Close the oven door halfway to the first opening position. Then pull forward and remove the door from its seat. Put the door on a soft cloth on a stable surface. -
Page 49: Troubleshooting
The back lamp 3. Replace the lamp with a suitable 300 °C heat- 1. Turn the lamp glass cover counterclockwise to resistant lamp. remove it. 4. Install the glass cover. 2. Clean the glass cover. TROUBLESHOOTING WARNING! Refer to Safety chapters. WHAT TO DO IF... -
Page 50: Service Data
Problem Possible cause Remedy The display shows "F102". • You did not fully close the • Fully close the door. door. • Deactivate the oven with • The door lock is defective. the house fuse or the safety switch in the fuse box and activate it again. -
Page 51: Securing The Appliance To The Cabinet
INSTALLATION SECURING THE APPLIANCE TO THE WARNING! Refer to Safety chapters. CABINET BUILDING IN min. 550 min. 560 ELECTRICAL INSTALLATION The manufacturer is not responsible if you do not follow the safety precautions from the Safety chapters. min. 550 This appliance is supplied only with a main cable. CABLE min. -
Page 52: Energy Efficiency
ENERGY EFFICIENCY PRODUCT FICHE AND INFORMATION ACCORDING TO EU 65-66/2014 Supplier's name Zanussi Model identification ZOP37902XK Energy Efficiency Index 81.2 Energy efficiency class Energy consumption with a standard load, conventional 0.93 kWh/cycle mode Energy consumption with a standard load, fan-forced mode 0.69 kWh/cycle... - Page 56 WWW.ZANUSSI.COM/SHOP...