Advertisement
Quick Links
QUICK START GUIDE
For a full explanation of all features and instructions, please refer to the User Guide.
(Available for download from motorolanursery.com).
1. Setting up your Digital Video Baby Monitor
A. Connecting the Power Supply for the Baby Unit
• Insert the DC plug of the power adapter
• Connect the other end of the power
• The baby unit turns on and the power
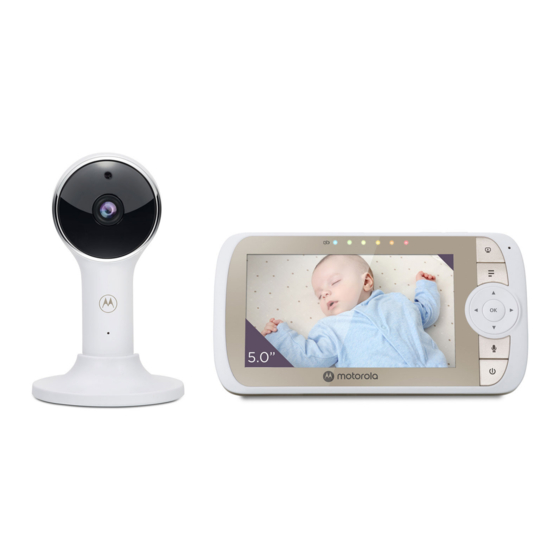
MODELS:
VM65 CONNECT
VM65-2 CONNECT
Note
VM65-3 CONNECT
Only use the supplied power adapter
VM65-4 CONNECT
(DC5V/1000mA).
WARNING:
B. Fixing magnetic mount to the wall
• Mark the position of the screw holes on
Strangulation
hazard. Children
the wall.
have STRANGLED
• Install wall anchors (Not provided)
in cords. Keep this
suitable for the wall type and mounting
cord out of the
screws if needed.
reach of children
• Fasten the mounting screws (Not
(more than 3 feet
provided) to the wall.
away). Do not
• Position the cable behind the base as
remove the tags
the picture shows before hooking the
from the AC
base on the wall.
Adapters. Only use
the AC Adapters
provided.
C. Connecting the Power Supply of the Parent Unit
• Connect the small plug of the power adapter
to the parent unit and the other end to the
electrical outlet. Only use the enclosed adapter
(5VDC/1000mA).
• A rechargeable battery (Lithium ion battery
2000mAh) inside the Parent Unit allows you to
move it without losing the link and picture from
the Baby Unit. The battery provides up to 5 hours
operation of the Parent Unit. We recommend
charging for at least 16 hours before first use, and
when the Parent Unit indicates the battery is low.
• Press and hold the POWER button 0 on the
Parent Unit to turn it ON.
D. Desktop Stand of the Parent Unit
• Flip out the stand on the back of the Parent Unit
• We recommend to rotate it by 90 degree to set up the desktop stand.
Step 1
Step 2
2. Basic operation of the keys
Parent unit
0
ON/OFF button
Press and hold to switch the Parent Unit ON/OFF.
Press to tilt the camera upward or downward.
+-
UP/DOWN buttons
Press to adjust menu setting when menu is active.
LEFT/RIGHT
Press to pan the camera left or right.
<>
buttons
Press to access menu options when menu is active.
M
MENU button
Press to open menu options or exit the menu.
O
OK button
Press to confirm a selection.
V
VIDEO button
Press to turn the LCD screen ON/OFF.
T
TALK button
Press and hold to talk to your baby.
Volume button
Press -/+ to select volume level of the Parent Unit.
RESET button
Press and hold with a small pin to reset the unit.
Baby Unit
Press and hold to pair with the parent unit or Motorola
PAIR button
Nursery Wi-Fi® Setup.
3. Setting up the Baby Unit for Wi-Fi® internet viewing
A. Install Motorola Nursery App.
• Scan the QR code with your smart device and download
Motorola Nursery App from the App Store for iOS devices
or from the Google Play™ Store for Android™ devices.
• Install Motorola Nursery App on your device.
B. View on Compatible Smartphones and Tablets
Connect to Internet
Camera
via Wi-Fi ®
1. Open the Motorola Nursery App on your compatible smartphone or tablet.
2. Follow the in-app instructions to create your account and connect to your device.
Please take note of the following minimum system requirements:
Smartphones/Tablets: iOS 10.0, Android™ 7.0
Wi-Fi ® requirements:
At least 0.6 Mbps upload bandwidth per Smart Monitoring Companion, test your Internet
speed at: http://www.speedtest.net/
EU EN
into the DC socket on the back of the
Baby Unit.
adapter to a suitable electrical outlet.
MODELLER:
indicator lights up blue.
VM65 CONNECT
VM65-2 CONNECT
VM65-3 CONNECT
VM65-4 CONNECT
UYARI:
Boğulma tehlikesi.
Kablolar çocukları
BOĞABİLİR. Bu
kabloyu çocukların
erişemeyeceği yerde
(1 metrenin üzerinde
bir mesafede)
Pair button
tutunuz. AC Adaptör
etiketlerini
çıkarmayınız.
Yalnızca temin edilen
AC Adaptörlerini
kullanınız.
Reset button
Compatible
Viewing Devices
HIZLI BAŞLANGIÇ KILAVUZU
Tüm özellikler ve talimatların tam açıklamaları için lütfen Kullanım Kılavuzuna bakınız.
(dale.com.tr web sitesinden indirebilrisiniz.)
1. Video Bebek Kameranızın Kurulumu
A. Güç Kaynağını Bebek Ünitesine Bağlama
• Güç adaptörünün DC fişini, Bebek
ünitesinin arkasındaki DC girişine takınız.
• Güç adaptörünün diğer ucunu elektrik
prizine takınız.
• Bebek ünitesi açılır ve güç göstergesi
ışığı Mavi yanar.
Not
Sadece paketten çıkan güç adaptörünü
kullanınız (DC5V/1000mA).
B. Manyetik altlığı d uvara sabitleme
• Vida deliklerinin konumunu duvarda
işaretleyiniz.
• Duvar tipine uygun dübelleri (Pakete
dahil değildir) ve montaj vidalarını
yerleştiriniz.
• Montaj civatalarını (Pakete dahil değildir)
duvara monte ediniz.
PAIR tuşu
• Altlığı duvara sabitlemeden önce şekilde
görüldüğü üzere kabloyu altlığın arkasına
yerleştiriniz
C. Güç kaynağını Ebeveyn Ünitesine Bağlama
• Güç adaptörünün küçük fişini ebeveyn
ünitesine ve diğer ucunu da elektrik prizine
takınız. Sadece paketten çıkan güç adaptörünü
kullanınız (5VDC/1000mA).
• Ebeveyn Ünitesi içerisinde bulunan şarj edilebilir pil
(Lityum iyon batarya 2000mAh) sayesine üniteyi,
Bebek Ünitesi ile bağlantı ve görüntü kaybı
olmaksızın başka yere taşıyabilirsiniz. Bu pil ile
Ebeveyn Ünitesi 5 saat boyunca çalışmaya devam
eder. İlk kullanımdan önce ve Ebeveyn Ünitesi pil
seviyesi düşük sinyali verdiği zaman, pilini en az 16
saat boyunca şarj etmenizi öneririz.
• Ebeveyn Ünitesini AÇIK konuma getirmek için
üzerindeki GÜÇ tuşu 0'a basınız ve basılı tutunuz.
D. Ebeveyn Ünitesinin Masaüstü Stand ı
• Ebeveyn Ünitesinin arkasındaki standı çıkarın.
• Masaüstü standı yerleştirmek için onu 90 derece döndürmeniz tavsiye edilir.
Sıfırlama tuşu
Adım 1 Adım 2
2. Tuşların temel işlevleri
Ebeveyn ünitesi
AÇMA/KAPAMA tuşu
Ebeveyn Ünitesini AÇMAK/KAPAMAK için basınız ve basılı tutunuz.
Kamerayı yukarı veya aşağı çevirmek için basınız.
YUKARI/AŞAĞI tuşları
Menü açıkken menü ayarlarını değiştirmek için basınız.
LEFT/RIGHT
Kamerayı sola veya sağa çevirmek için basınız.
buttons
Menü açıkken menü seçeneklerine erişmek için basınız.
Menü tuşu
Menü seçeneklerini açmak veya menüden çıkmak için basınız.
OK tuşu
Seçiminizi onaylamak için basınız.
VIDEO tuşu
LCD ekranını AÇMAK/KAPAMAK için basınız.
KONUŞMA tuşu
Bebeğinizle konuşmak için basınız ve basılı tutunuz.
Ses seviyesi tuşu
Ebeveyn Ünitesi ses seviyesi seçmek için -/+ tuşuna basınız.
SIFIRLAMA tuşu
Üniteyi sıfırlamak için küçük bir pim ile basınız ve basılı tutunuz.
Bebek Ünitesi
Ebeveyn ünitesi ile eşleştirmek veya Motorola Nursery Wi-Fi®
PAIR tuşu
Kurulumu için basınız ve basılı tutunuz.
3.
Wi-Fi® internette görüntüleme için Bebek Ünitesi ayarları
A. Motorola Nursery Uygulamasını Kurun
• QR kodunu akıllı cihazınız ile taratınız ve iOS cihazlarda
App Store ve Android™ cihazlarda Google Play™
kullanarak Motorola Nursery Uygulamasını indiriniz.
• Cihazınıza Motorola Nursery Uygulamasını kurun.
B. Uyumlu Akıllı Telefonlar, Tabletler ve Bilgisayarlarda İzleyin.
Wi-Fi® ile İnternete Bağlanm
Uyumlu Görüntüleme Cihazları
Kamera Wi-Fi®
1. Motorola Nursery Uygulamasını uyumlu akıllı telefon veya tabletinizde açınız.
2. Motorola Nursery hesabınızı oluşturmak ve cihazınıza bağlanmak için uygulama içi
talimatları takip ediniz.
Lütfen şu minimum sistem gereksinimlerini dikkate alınız::
Akıllı telefonlar/Tabletler: iOS 10.0, Android™ 7.0
Wi-Fi® gereksinimleri:
Akıllı Görüntüleme Cihazı başına minimum 0,6 Mbps yükleme bant genişliği (internet
hızınızı bu siteden test edebilirsiniz: http://www.speedtest.net/
TR
A. Подключение Детского Устройства к источнику питания
B. Закрепление магнитного крепления на стене
ВНИМАНИЕ:
C. Подключение Родительского Устройства к источнику питания
D. Настольная подставка для Родительского Устройства
Родительское Устройство
Кнопка ВКЛ/ВЫКЛ
Кнопки ВВЕРХ/
ВНИЗ
Кнопки ВЛЕВО/
ВПРАВО
Кнопка МЕНЮ
Кнопка OK
Кнопка ВИДЕО
Кнопка РАЗГОВОР
Кнопка Громкость
Кнопка RESET
Детское Устройство
Кнопка СОПРЯЖЕНИЕ
A. Установите приложение Motorola Nursery.
B. Просмотр на совместимых смартфонах и планшетах.
Минимальные системные требования:
Смартфон/Планшет: iOS 10.0, Android™ 7.0 :
Требования к Wi-Fi®:
Пропускная способность минимум 0,6 Mbps для каждой камеры. Для проверки скорости
соединения используйте сервис: http://www.speedtest.net/
RU
источнику питания.
индикатор питания
загорится синим.
Внимание
Используйте блок питания, который поставляется в
комплекте (DC5V/1000mA).
0
Motorola Nursery
Advertisement

Related Manuals for Motorola VM65 CONNECT


Summary of Contents for Motorola VM65 CONNECT
- Page 1 Kamera Wi-Fi® Viewing Devices 1. Open the Motorola Nursery App on your compatible smartphone or tablet. 1. Motorola Nursery Uygulamasını uyumlu akıllı telefon veya tabletinizde açınız. 2. Follow the in-app instructions to create your account and connect to your device.
- Page 2 Ürün veya 18 Genel Bilgi Aksesuarların anormal kullanıma ya da şartlara usage or conditions; or (d) other acts which are not the fault of MOTOROLA or MZGW, are maruz kalması; (d) MOTOROLA / MZGW’nin hatası olmayan diğer eylemler.