Table of Contents
Advertisement
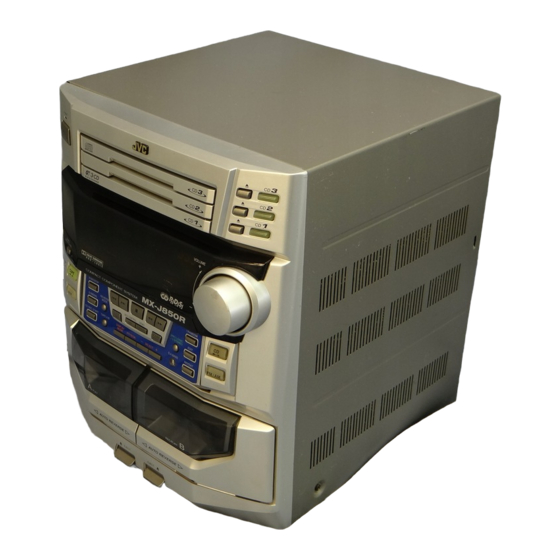
COMPACT COMPONENT SYSTEM
KOMPAKT-KOMPONENTEN-SYSTEM
SYSTEME DE COMPOSANTS COMPACT
KOMPACTO KOMPONENTEN-SYSTEEM
SISTEMAS DE COMPONENTES COMPACTOS
IMPIANTO A COMPONENTI COMPATTO
CA-MXJ850R
SOUND
MODE
S.A.BASS
SLEEP
DISPLAY
MODE
PTY/EON
– SELECT +
PRO LOGIC
3 STEREO
TEST TONE
A
TAPE
–
CENTER
+
CENTER MODE
B
LEVEL
TAPE
–
REAR
+
DELAY TIME
REC PAUSE
LEVEL
L
BALANCE
R
FM MODE
SHIFT
+
FADE
MUTING
–
RM–SMXJ75R REMOTE CONTROL
STANDBY
COMPACT
DIGITAL AUDIO
PLAY & EXCHANGE
PHONES
PANEL
OPEN / CLOSE
TAPE
COMPU
PLAY
CONTROL
AUX
PLAY
AUTO REVERSE
EJECT
INSTRUCTIONS
BEDIENUNGSANLEITUNG
MANUEL D'INSTRUCTIONS
GEBRUIKSAANWIJZING
MANUAL DE INSTRUCCIONES
ISTRUZIONI
3
CD
2
CD
1
CD
VOLUME
+
–
C D
FM AM
/
REC/PLAY
AUTO REVERSE
EJECT
For Customer Use:
Enter below the Model No. and Serial No.
which are located either on the rear, bot-
tom or side of the cabinet. Retain this
information for future reference.
Model No.
Serial No.
GVT0044-006A
[ E ]
Advertisement
Table of Contents

Related Manuals for JVC CA-MXJ850R


Summary of Contents for JVC CA-MXJ850R
- Page 1 COMPACT COMPONENT SYSTEM KOMPAKT-KOMPONENTEN-SYSTEM SYSTEME DE COMPOSANTS COMPACT KOMPACTO KOMPONENTEN-SYSTEEM SISTEMAS DE COMPONENTES COMPACTOS IMPIANTO A COMPONENTI COMPATTO CA-MXJ850R PHONES COMPU SOUND MODE S.A.BASS SLEEP PLAY CONTROL DISPLAY MODE PTY/EON – SELECT + PRO LOGIC 3 STEREO TEST TONE TAPE –...
- Page 2 L or coloured red. IF IN DOUBT - CONSULT A COMPETENT ELECTRICIAN. Per l'Italia: "Si dichiara che il questo prodotto di marca JVC è conforme alle prescrizioni del Decreto Ministeriale n.548 del 28/08/95 pubblicato sulla Gazzetta Ufficiale della Repubblica Italiana n.301 del 28/12/ 95."...
- Page 3 CAUTION To reduce the risk of electrical shocks, fire, etc.: 1. Do not remove screws, covers or cabinet. 2. Do not expose this appliance to rain or moisture. ACHTUNG Zur Verhinderung von elektrischen Schlägen, Brandgefahr, usw: 1. Keine Schrauben lösen oder Abdeckungen enlfernen und das Gehäuse nicht öffnen.
- Page 4 3 Base: Collocare su una superficie piana. Consentire un’adeguata ventilazione dell’impianto appoggiandolo su un tavolinetto alto almeno 10 cm. 15 cm 1 cm 15 cm CA-D3S CA-MXJ850R – G-3 – Side view Seitenansicht Côté Zijaanzicht Vista lateral Vista laterale 15 cm...
- Page 5 IMPORTANT FOR LASER PRODUCTS/ WICHTIGER HINWEIS FÜR LASER-PRODUKTE / IMPORTANT POUR LES PRODUITS LASER / BELANGRIJKE INFORMATIE VOOR LASERPRODUKTEN / IMPORTANTE PARA LOS PRODUCTOS LÁSER / IMPORTANTE PER I PRODOTTI LASER REPRODUCTION OF LABELS/ANBRINGUNGSORTE FÜR LASER-PRODUKTE/REPRODUCTION DES ETIQUETTES/VERKLARING VAN DE LABELS/REPRODUCCIÓN DE ETIQUETAS/RIPRODUZIONE DELLE ETICHETTE 1 CLASSIFICATION LABEL, PLACED ON REAR ENCLOSURE 1 KLASSIFIKATIONSETIKETTE AN DER RÜCKSEITE 1 ETIQUETTE DE CLASSIFICATION, PLACÉE A L'ARRIÈRE DU...
- Page 6 Introduction We would like to thank you for purchasing one of our JVC products. Before operating this unit, read this manual carefully and thoroughly to obtain the best possible performance from your unit, and retain this manual About This Manual This manual is organized as follows: •...
-
Page 7: Table Of Contents
Contents Location of the Buttons and Controls ... 3 Front Panel ... 4 Remote Control ... 5 Getting Started ... 6 Unpacking ... 6 Putting the Batteries into the Remote Control ... 6 Connecting Antennas ... 6 Connecting Speakers ... 7 Connecting Other Equipment ... -
Page 8: Location Of The Buttons And Controls
Location of the Buttons and Controls Become familiar with the buttons and controls on your unit. Powered Rolling Panel PANEL OPEN / CLOSE Press PANEL OPEN/ CLOSE to open the panel. To close the panel, press the button again. STANDBY PHONES PANEL OPEN / CLOSE... -
Page 9: Front Panel
Display Window PRO LOGIC 3 STEREO SLEEP DAILY REC STEREO MONO TA NEWS INFO See pages in the parentheses for details. Front Panel 1 Disc trays (standby/on) button and STANDBY lamp (10) 3 Display window 4 Remote sensor 5 PANEL OPEN/CLOSE button (10) Pressing this button also turns on the unit. -
Page 10: Remote Control
Remote Control SOUND S. A. BASS SLEEP MODE DISPLAY PTY/EON – SELECT + MODE PRO LOGIC 3 STEREO TEST TONE TAPE – CENTER CENTER MODE LEVEL TAPE REAR – DELAY TIME LEVEL REC PAUSE BALANCE FM MODE SHIFT FADE MUTING –... -
Page 11: Getting Started
Getting Started Unpacking After unpacking, check to be sure that you have all the following items. The number in the parentheses indicates the quantity of the pieces supplied. • AM loop antenna (1) • FM antenna (1) • Remote control (1) •... -
Page 12: Connecting Speakers
AM (MW/LW) antenna ANTENNA AM LOOP AM EXT FM 75 COAXIAL AM loop antenna (supplied) Connect the AM loop antenna to the AM LOOP terminals as illustrated. Turn the AM loop antenna until you have the best reception. To connect an outdoor AM antenna When reception is poor, connect a single vinyl-covered wire to the AM EXT terminal and extend it horizontally. -
Page 13: Connecting Other Equipment
To connect a center speaker and rear speakers By connecting a center speaker and rear speakers, you can enjoy Dolby Surround equipped with this unit. Center speaker RIGHT LEFT REAR CENTER Right rear speaker • Connect the right rear speaker to the REAR RIGHT jack. •... - Page 14 To connect audio equipment with an optical digital input terminal You can record CD sound onto the connected digital equipment. CD OPTICAL DIGITAL OUTPUT Protective plug Before connecting the other equipment, remove the protective plug from the terminal. To optical digital input Audio equipment with an optical digital...
-
Page 15: Common Operations
Common Operations Setting the Clock Before operating the unit any further, first set the clock built in this unit. Press PANEL OPEN/CLOSE. The unit is turned on and the Powered Rolling Panel opens automatically. Press CLOCK/TIMER. The hour digits start flashing on the display. Press 4 or ¢... -
Page 16: Adjusting The Volume
Adjusting the Volume You can adjust the volume level only while the unit is turned Turn VOLUME clockwise to increase the volume or counterclockwise to decrease When using the remote control, press VOLUME + to increase the volume or press VOLUME – to decrease it. For private listening Connect a pair of headphones to the PHONES jack. -
Page 17: Creating Your Own Sound Mode - Manual Mode
Surround modes *: D.CLUB: Increases resonance and bass. HALL: Adds depth and brilliance to the sound. STADIUM: Adds clarity and spreads the sound, like in an outdoor stadium. SEA modes: ROCK: Boosts low and high frequency. Good for acoustic music. POP: Good for vocal music. -
Page 18: Listening To Fm And Am (Mw/Lw) Broadcasts
Listening to FM and AM (MW/LW) Broadcasts Tuning in a Station On the unit ONLY: Press FM/AM. The unit automatically turns on and tunes in the previously tuned station (either FM or AM — MW/LW). The Powered Rolling Panel automatically opens. •... -
Page 19: Receiving Fm Stations With Rds
Receiving FM Stations with RDS RDS allows FM stations to send an additional signal along with their regular program signals. For example, the stations send their station names, as well as information about what type of program they broadcast, such as sports or music, etc. When tuned to an FM station which provides the RDS service, the RDS indicator lights up on the display. -
Page 20: Switching To A Program Type Of Your Choice Temporarily
Switching to a Program Type of Your Choice Temporarily By receiving EON data sent by FM RDS stations, the EON function allows the unit to switch temporarily to a broadcast program of your choice (TA, NEWS, and INFO) from a different station. -
Page 21: Playing Back Cds
Playing Back CDs Loading CDs Press 0 for the disc tray (CD1 to CD3) you want to load a CD onto. The unit automatically turns on and the disc tray comes out. The Powered Rolling Panel also opens automatically. Place a disc correctly on the circle of the disc tray, with its label side up. -
Page 22: Programming The Playing Order Of The Tracks - Program Play
To locate a particular point in a track During play, press and hold 1 or ¡. • 1: Fast reverses the disc. • ¡: Fast forwards the disc. When using the remote control, press and hold 1 / 4 or ¢ / ¡. To go to another track Press 4 or ¢... -
Page 23: Playing At Random - Random Play
To check the program contents Before playing, you can check the program contents by pressing 1 / 4 or ¢ / ¡ on the remote control. • ¢ / ¡: Shows the programed tracks in the programed order. • 1 / 4: Shows them in the reverse order. To modify the program Before play, you can erase the programed tracks shown on the display by pressing CANCEL. -
Page 24: Playing Back Tapes
Playing Back Tapes You can play back type I, type II, and type IV tapes without changing any settings. Playing Back a Tape Press EJECT (0) for the deck you want to use. For Deck A Put a cassette in, with the exposed part of the tape down. -
Page 25: Using Dolby Surround
Using Dolby Surround Dolby Surround has been developed to reproduce the important elements of the acoustic surround at home. To listen to the sound of video software bearing the mark * which includes the same encoded surround DOLBY SURROUND information as found in Dolby Stereo films, the unit can provide you with Dolby Surround decoder. -
Page 26: Enjoying Playback With Dolby Surround
ONLY FOR “PRO LOGIC” Press DELAY TIME repeatedly to select the proper delay time of the rear speaker output. • Each time you press the button, the delay time changes as follows. DELAY1 DELAY2 DELAY4 DELAY3 DELAY1: Select this when the distance from you to your rear speakers is greater than that to the front speakers. -
Page 27: Recording
Recording IMPORTANT: • It may be unlawful to record or play back copyrighted material without the consent of the copyright owner. • The recording level is automatically set correctly, so it is not affected by the VOLUME control. Thus, during recording you can adjust the sound you are actually listening to without affecting the recording level. -
Page 28: Dubbing Tapes
To stop recording temporarily (except when the playback source is deck A), press REC PAUSE on the remote control. To resume recording, press TAPE 2 3. To remove the cassette, press EJECT 0 for deck B. To record on both sides — Reverse Mode Press REVERSE MODE so that the Reverse Mode indicator lights up as —... -
Page 29: Auto Edit Recording
Auto Edit Recording By using Auto Edit Recording, you can record the CD tracks to fit the tape. Auto Edit Recording makes a program by selecting the CD tracks in numerical order. However, to prevent the end of the last track on the front side from being cut off, the last track is selected so as to fit on the remaining tape length. -
Page 30: Using The Timers
Using the Timers There are three timers available — Recording Timer, Daily Timer, and Sleep Timer. Before using the timers, you need to set the clock built in the unit. (See page 10.) Using Daily Timer With Daily Timer, you can wake to your favorite music or radio program. -
Page 31: Using Recording Timer
When selecting “– CD – – –” 1) Press 4 or ¢ to select the disc number, then press SET. 2) Press 4 or ¢ to set the track number, then press SET. The unit enters volume setting mode. When selecting “TUNER FM” or “TUNER AM”... -
Page 32: Using Sleep Timer
Set the on-time you want the unit to turn on. 1) Press 4 or ¢ to set the hour, then press SET. 2) Press 4 or ¢ to set the minute, then press SET. “OFF TIME” appears for 2 seconds, then the unit enters off-time setting mode. -
Page 33: Additional Information
Additional Information Description of the PTY codes: NEWS: News. AFFAIRS: Topical program expanding or enlarging upon the news — debate, or analysis. INFO: Program the purpose of which is to impart advice in the widest sense. SPORT: Program concerned with any aspect of sports. EDUCATE: Educational programs. -
Page 34: Troubleshooting
Troubleshooting If you are having a problem with your unit, check this list for a possible solution before calling for service. If you cannot solve the problem from the hints given here, or the unit has been physically damaged, call a qualified person, such as your dealer, for service. -
Page 35: Specifications
Specifications Amplifier Output Power (IEC 268-3/DIN) Front: 75 W per channel, min. RMS, both channels driven into 6 kHz with no more than 0.9% total harmonic distortion. Center: 25 W, min. RMS, driven into 8 total harmonic distortion. Rear: 12.5 W per channel, min. RMS, both channels driven into 16 kHz with no more than 0.9% total harmonic distortion. - Page 36 VICTOR COMPANY OF JAPAN, LIMITED EN, GE, FR, NL, SP, IT 0400MWMMDWJEM...