Table of Contents
Advertisement
�����
������
�����
�
�
�
�
�
�
���
������
�
�������
���� ����� �����
������
����
��
���
���
����
��
�������
�����
�� ���
���
����
��
���
����
�����
��� �������
��������
Important Note:
In the spaces below, enter the model and serial number of your television (located at the rear
of the television cabinet). Staple your sales receipt or invoice to the inside cover of this guide.
Keep this user's guide in a convenient place for future reference. Keep the carton and original
packaging for future use.
Model Number:
Serial Number:
Color Television Users Guide
�
�
�
����
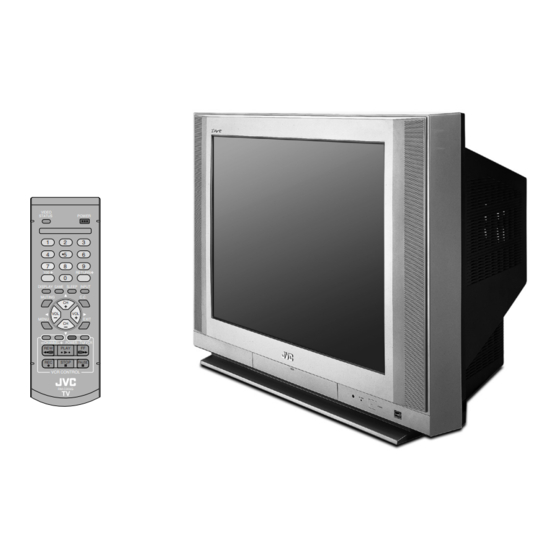
Illustration of AV-32CF35 and RM-C203G
For Models:
AV-27SF35
AV-32SF35
AV-27CF35
AV-32CF35
AV-27WF35
AV-32WF35
LCT1563-001A-A
0204KGI-II-IM
Advertisement
Table of Contents

Related Manuals for JVC I'Art AV-27CF35


Summary of Contents for JVC I'Art AV-27CF35
- Page 1 Keep this user's guide in a convenient place for future reference. Keep the carton and original packaging for future use. Model Number: Serial Number: Color Television Users Guide Illustration of AV-32CF35 and RM-C203G For Models: AV-27SF35 AV-32SF35 AV-27CF35 AV-32CF35 AV-27WF35 AV-32WF35 LCT1563-001A-A 0204KGI-II-IM...
- Page 2 Changes or modifications not approved by JVC could void the warranty. • When you don’t use this TV set for a long period of time, be sure to disconnect both the power plug from the AC outlet and antenna for your safety.
- Page 3 They may result in a shock or fire hazard. Call your service technician for replacement. 4 Do not allow anything to rest on or roll over the power cord, and do not place the TV set where power cord is subject to traffic or abuse.
- Page 4 Therefore: — Never block the bottom ventilation slots of a portable TV set by placing it on a bed, sofa, rug, etc. — Never place a TV set in a “built-in” enclosure unless proper ventilation is provided. — Never cover the openings with a cloth or other material.
- Page 5 PORTABLE CART WARNING (Symbol provided by RETAC) 13 For added protection of the TV set during a lightning storm or when the TV set is to be left unattended for an extended period of time, unplug it from the wall outlet and disconnect the antenna. This will prevent damage to product due to lightning storms or power line surges.
-
Page 6: Table Of Contents
Unpacking your TV ... . 7 TV Models ....8 TV Remote Control ... 9 Getting Started . -
Page 7: Quick Setup
Quick Setup Thank you for your purchase of a JVC Color Television. Before you begin setting up your new television, please check to make sure you have all of the following items. In addition to this guide, your television box should include: 1 Television ��... -
Page 8: Tv Models
NOTE: Before you connect your television to another device, please refer to the proper diagrams for your specific TV and remote. These will help assist you in understanding how to connect your television to another device, as well as use the remote to set up your television. -
Page 9: Tv Remote Control
� � � � ��� ������ � ������� ���� ����� ����� ������ ���� �� ��� ��� ���� ���� �� ������� ����� �� ��� ��� ���� �� ��� ���� ����� ��� ������� �������� RM-C203G MODELS: AV-27SF35 AV-27CF35 AV-27WF35 AV-32SF35 AV-32CF35 AV-32WF35... -
Page 10: Getting Started
The right and left buttons will turn the volume up or down. These buttons are also marked with four arrows and are used with JVC’s onscreen menu system. To use the onscreen menus, press the M button. -
Page 11: Connecting Your Devices
• To connect a DVD player, see Diagram #3. A DVD player is optional. • If you have a satellite television system, please refer to the satellite TV manual. ���... - Page 12 � � Notes: • If your VCR is a mono sound unit, it will have only one audio out jack. Connect it to the TV’s LEFT AUDIO INPUT. • Use the S-Video connection if possible for superior picture quality. • Your VCR must be turned on to view premium cable channels.
- Page 13 Quick Setup Notes: • Green, blue and red are the most common colors for DVD cables. Some models may vary colors. Please consult the user’s manual for your DVD player for more information. • Be careful not to confuse the red DVD cable with the red audio cable. It is best to complete one set of connections (DVD or audio output) before starting the other to avoid accidentally switching the cables.
-
Page 14: Connecting To A Camcorder
������� ��������� 1) Connect a white composite cable from the LEFT AUDIO OUTPUT on the back of the TV to the LEFT AUDIO INPUT on the amplifier. 2) Connect a red composite cable from the RIGHT AUDIO OUTPUT on the back of the TV to the RIGHT AUDIO INPUT on the amplifier. -
Page 15: Interactive Plug In Menu
When you turn your television on for the first time the interactive plug-in menu will appear. The plug-in menu helps you to get your TV ready to use by letting you set your preferences for: • The language in which you want the onscreen menus to appear. -
Page 16: Auto Clock Set
Quick Setup Auto Clock Set Before you use any of your TV’s timer functions, you must first set the clock. You may precisely set your clock using the XDS time signal broadcast by most public broadcasting stations. If you do not have this in your area, you will have to set the clock manually. See manual clock set below. - Page 17 You can now begin watching your television, or you can continue on in this guide for more information on programming your remote control, or using the JVC onscreen menu system to customize your television viewing experience.
-
Page 18: Onscreen Menus
If you press the M onscreen display will skip to the next menu screen. If you use the Menu button on the TV’s front panel instead of the remote, an additional menu screen showing input will appear. The “interactive plug-in menu”... -
Page 19: Onscreen Menu System
Examples of the Onscreen Menus are shown below. Detailed explanations on using each menu follow later in this guide. For information about the interactive plug-in Menu, see pages 15 - 17. (AV-27CF35 and AV-32CF35 ONLY). -
Page 20: Initial Setup
Initial Setup Auto Tuner Setup The auto tuner setup function is described on page 17 as the interactive plug-in menu (AV-27CF35 and AV-32CF35 ONLY). If you need to run the auto tuner setup again, follow the steps below. Press the M... -
Page 21: V-Chip
• See also “Set Lock Code”, page 27. V-Chip Your TV is equipped with V-Chip technology which enables you to block channels or content that you feel to be inappropriate for children, based on US and Canada rating guidelines. V-Chip has no effect on video signals from a DVD discs, VCR tapes or Camcorder connection. -
Page 22: Unrated Programs
• Sports • Some Commercials Note: • TV programs or movies that do not have rating signals will be blocked if the unrated category is set to BLOCK. Directions to Block Unrated Programs You can block programs that are not rated. - Page 23 These programs are specifically for adults and may be unsuitable for anyone under 17 years of age. TV MA programs may have extensive V, S, L, or D. In addition to the ratings categories explained above, information on specific kinds of content are also supplied with the V-Chip rating.
-
Page 24: Setting Us V-Chip Ratings
Directions to set US V-Chip Ratings Line up the cursor in the column (TV PG, TV G, etc.) with the content row (V/FV, S, etc.) and press the π or † to move the cursor to the correct location. Press feature on or off. -
Page 25: Directions To Set Movie (Mpaa) Ratings
Movies Ratings NR – Not Rated This is a film which has no rating. In many cases these films were imported from countries which do not use the MPAA ratings system. Other NR films may be from amateur producers who didn’t intend to have their film widely released. -
Page 26: Directions To Set Canadian V-Chip Ratings
Initial Setup Canadian V-Chip Ratings E – Exempt Exempt programming includes: news, sports, documentaries and other information programming, talk shows, music videos, and variety programming. C – Programming Intended for Children Violence Guidelines: There will be no realistic scenes of violence. Depictions of aggressive behavior will be infrequent and limited to portrayals that are clearly imaginary, comedic or unrealistic in nature. -
Page 27: Set Lock Code
Set Lock Code Channel guard and V-Chip settings are protected by a four-digit lock code. Your TV comes preset with a lock code of “0000”. You may change the code to any four-digit number you wish. To change the lock code, follow the steps below. -
Page 28: Language
Initial Setup Language The language function is described on page 15 as the interactive plug-in menu (AV-27CF35, AV-32CF35 ONLY). If you need to choose the language again, follow the steps below. Press the M button To LANGUAGE π † √®... -
Page 29: Front Panel Lock
Front Panel Lock This allows you to lock the keys on the front of the TV, so that a child may not accidentally change your viewing preferences. Press the M button To FRONT PANEL LOCK π † √® To turn ON or OFF... -
Page 30: Video Input Label
Initial Setup Video Input Label This function is used to label video input connections for the onscreen displays. Press the M button To VIDEO INPUT LABEL π † √® To operate � � � � � � � � � � � � � � � � To select the desired video input π... -
Page 31: Picture Adjust
The color function lets you make all the colors in the TV picture appear either more vivid or subtle. PICTURE Picture allows you to adjust the levels of black and white on the TV screen, giving you a darker or brighter picture overall. BRIGHT You can adjust the overall brightness of the TV picture with the Bright control. -
Page 32: Color Temperature
Picture Adjust Color Temperature You can decide how strong or dull the colors appear on the TV screen. Press the M button To COLOR TEMPERATURE π † √® To enter √® To set LOW or HIGH Press the E button when finished Note: If you press the 0 button, you can reset the setting to the factory default setting. -
Page 33: Sound Adjust
Notes: • Keep the TV in stereo mode to get the best sound quality. The sound will work in stereo mode even if a certain broadcast is in mono sound only. • Choose the mono setting to reduce excessive noise on a certain channel or broadcast. -
Page 34: Clock Timers
Clock/Timers Set Clock The set clock function is described on page 16 as the interactive plug-in menu. (AV-27CF35 and AV-32CF35 ONLY). You can choose to set the clock automatically, or manually. If you need to set the clock again, follow the steps below. -
Page 35: On/Off Timer
• After a power interruption, the timer settings must be reset. • If you turn on your TV set before the on time, when the TV reaches the on time that you set, the "SWITCHING TO ON TIMER" will appear. This means that the TV is going to change to your on/off timer setting. -
Page 36: World Clock
Clock/Timers World Clock The world clock feature provides time differences for some of the major cities around the world in real time. Press the M button To WORLD CLOCK π † √® To operate √® To next page Press the E button when finished Notes: •... -
Page 37: Button Functions
124, press 100+, 2 (Two), 4 (Four). Channel +/– Use these buttons to move up or down all the available channels your TV is able to recieve. Volume +/– Use these buttons to raise or lower the TV’s volume level. -
Page 38: Return
• Return+ works only with the CH+/– buttons. Pressing any number key will cancel Return+. Input Selects the signal input source for the television: TV (for Antenna or Cable) or Video-1, 2, or V2-Component or Video-3 for video devices like VCR’s, DVD players, or camcorders. -
Page 39: Display
“CLOCK NOT SET”, “SLEEP TIMER OFF”, and “ON/OFF TIMER OFF” respectively. Sleep The Sleep Timer can turn the TV off for you after you fall asleep. Program it to work in intervals of 15 minutes, for a total time of up to 180 minutes. -
Page 40: Video Status
VCR Buttons Note: The remote controls can only be used with JVC-brand VCRs You can use this remote control to operate the basic functions of your VCR. These functions include: play, record, rewind, fast-forward, stop, pause, channel scan, TV/VCR, power on, and power off. -
Page 41: Appendices
�������� ����� �� �� ����� � ��� �� ��� ����� ���� ������ ���������� � ����� ��� � ����� ���� �� ������� ������� �� � ����� ������� ����� �� �� ������� � ��� ������� ����� �� ������������� �� ����� � ��� ����� ���� ����� �� ��� ����������� ��� ���� ��� �... -
Page 42: Warranty
DISTRICT OF COLUMBIA AND COMMONWEALTH OF PUERTO RICO. WHAT WE WILL DO: If this product is found to be defective within the warranty period, JVC will repair or replace defective parts at no charge to the original owner. Such repair and replacement services shall be rendered by JVC during regular business hours at JVC authorized service centers. - Page 43 OF MERCHANTABILTY, IS LIMITED TO THE DURATION OF THE EXPRESS WARRANTY HEREIN. JVC SHALL NOT BE LIABLE FOR ANY LOSS OF USE OF THE PRODUCT, INCONVENIENCE, OR ANY OTHER DAMAGES, WHETHER DIRECT, INCIDENTAL OR CONSEQUENTIAL (INCLUDING, WITHOUT LIMITATION, DAMAGE TO TAPES, RECORDS...
-
Page 44: Authorized Service Centers
To prevent electrical shock, do not open the cabinet. There are no user serviceable parts inside. Please refer to qualified service personnel for repairs. Accessories To purchase accessories for your JVC product, please call toll free: 1 (800) 882-2345 or on the web at www.JVC.com... -
Page 45: Specifications
����� ��������� ������ ��������� ����� ����� ������ ����� ����������� ������ ���� ����� ������ �������� ������� �������� �������� ����� ����� ������� ����� ���� ��������� ����� ����� ����� ������ ����� ����� ���������� ���� ����� ���� ������ ���� � ��� ����������� Specifications subject to change without notice. ���������... -
Page 46: Notes
Notes... - Page 47 Notes...
- Page 48 JVC COMPANY OF AMERICA JVC CANADA, INC. Division of JVC Americas Corp. 21 Finchdene Square 1700 Valley Road Scarborough, Ontario Wayne, New Jersey, 07470 Canada, M1X 1A7...