Table of Contents
Advertisement
Quick Links
CAMCORDER
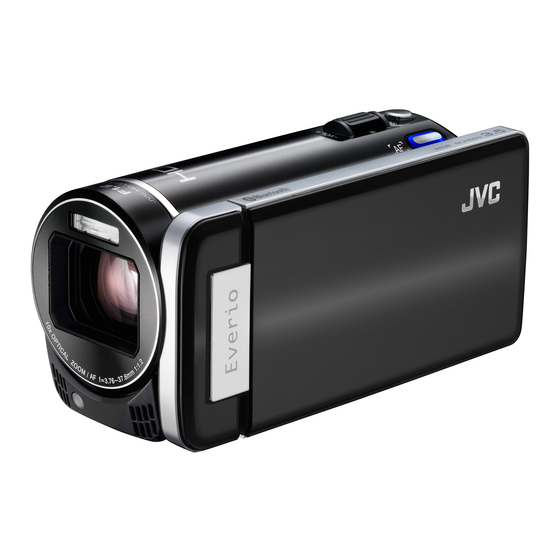
GZ-HM970/GZ-HM870/GZ-HM860 B
Basic User Guide
Thank you for purchasing this JVC product.
Before use, please read the Safety Precautions and Cautions on p. 2 and p. 32 to ensure safe
use of this product.
Detailed User Guide
.
A "Basic User Guide" (this manual) and a "Detailed User Guide" are available for this
product.
For more details on operating this product, please refer to the "Detailed User Guide"
at the following website.
http://manual.jvc.co.jp/index.html/
o
You can also access the website from the built-in application
o
software of this unit.
LYT2328-001A-M
EN
Advertisement
Table of Contents

Related Manuals for JVC Everio GZ-HM860


Summary of Contents for JVC Everio GZ-HM860
- Page 1 CAMCORDER GZ-HM970/GZ-HM870/GZ-HM860 B Basic User Guide Thank you for purchasing this JVC product. Before use, please read the Safety Precautions and Cautions on p. 2 and p. 32 to ensure safe use of this product. Detailed User Guide A “Basic User Guide” (this manual) and a “Detailed User Guide” are available for this product.
-
Page 2: Safety Precautions
AC Adapter, shut it down and unplug it immediately. Continue using the unit or AC Adapter under these conditions could lead to fire or electric shock. Contact your JVC dealer. Do not attempt to repair the malfunction yourself. •... - Page 3 Make a backup of important recorded data JVC will not be responsible for any lost data. It is recommended to copy your important recorded data to a disc or other recording media for storage.
-
Page 4: Precautions On Playing Back 3D Images
3D effect may be weak if viewed from an angle other than the front. The LCD monitor appears darker when 3D images are displayed. Change the display to 2D when it is difficult to see, such as when using this unit outdoors. For more information, refer to the Detailed User Guide http://manual.jvc.co.jp/index.html/... - Page 5 Guardians should pay close attention to children as health problems may result if fatigue and discomfort are not noticed immediately. 50” TV: approx. 1.9 m, 54” TV: approx. 2.0 m For more information, refer to the Detailed User Guide http://manual.jvc.co.jp/index.html/...
-
Page 6: Table Of Contents
A “Basic User Guide” (this manual) and a “Detailed User Guide” are available for this product. For more details on operating this product, please refer to the “Detailed User Guide” at the following website. http://manual.jvc.co.jp/index.html/ You can also access the website from the built-in application software of this unit. -
Page 7: Names Of Parts And Functions
AV Connector (p. 21, 26) Grip Belt (p. 11) Tripod Mounting Hole Battery Release Lever (p. 10) SD Card Slot (p. 11) For more information, refer to the Detailed User Guide http://manual.jvc.co.jp/index.html/ time (for video only) and battery power. such as recording date. -
Page 8: Names Of Buttons And Functions On The Lcd Monitor
Press and hold this button to fix the displays. Press this button again to release the displays. For more information, refer to the Detailed User Guide http://manual.jvc.co.jp/index.html/ Playback Screen (Video) 00:01:23 Recording/Playback Mode Button Switches between recording and playback modes. -
Page 9: Using The Touch Screen
Help Button (p. 27) Menu Items (p. 27) Return Button COMMON Menu Button Close Button Playback Screen 00:01:23 00:12:34 For more information, refer to the Detailed User Guide http://manual.jvc.co.jp/index.html/ SCENE SELECT FOCUS FOCUS ASSIST FOCUS ASSIST COLOR Index Screen 2011 2011... -
Page 10: Igetting Started
* The AC adapter shown in the illustration is AC-V10M (for GZ-HM870/GZ-HM860). CAUTION Be sure to use JVC battery packs. If you use any other battery packs besides JVC battery packs, safety and performance cannot be guaranteed. Charging time: Approx. 2 h 30 m (using supplied battery pack) * The charging time is when the unit is used at 25°C. -
Page 11: Grip Adjustment
Push the card inward once, then pull it out straight. Adjust the length of the belt Open the cover and insert an SD card. (Base) For more information, refer to the Detailed User Guide http://manual.jvc.co.jp/index.html/ Attach the pad Terminal Side... - Page 12 SD card without stopping when the remaining recording time on the built-in memory runs out. (For details on “SEAMLESS RECORDING”, refer to the Detailed User Guide.) For more information, refer to the Detailed User Guide http://manual.jvc.co.jp/index.html/...
- Page 13 A Perform steps A - C from “To use an SD card”. B Tap “FORMAT SD CARD”. COMMON FORMAT SD CARD C Tap “FILE”. FORMAT SD CARD D Tap “YES”. E After formatting, tap “OK”. For more information, refer to the Detailed User Guide http://manual.jvc.co.jp/index.html/ FILE...
-
Page 14: Clock Setting
Tap “<” or “>” to select the city name. CLOCK/AREA SETTING SAVE For more information, refer to the Detailed User Guide http://manual.jvc.co.jp/index.html/ To reset the clock Set the clock with “CLOCK ADJUST” from the “COMMON” menu. A Open the LCD monitor. -
Page 15: Irecording
If the mode is H Manual, press the S button to switch. The mode changes between Intelligent Auto and Manual with every press. (Wide angle) Recording Media Battery Indicator 10:00 Remaining 0:00:00 [0:54] Recording Time For more information, refer to the Detailed User Guide http://manual.jvc.co.jp/index.html/ Zooming (Telephoto) -
Page 16: Face Registration
In addition, the setting screen can be displayed by pressing the AF button. (for GZ-HM870/GZ- HM860) For details, refer to “Capturing Subjects Clearly (TOUCH PRIORITY AE/AF)” in the Detailed User Guide. For more information, refer to the Detailed User Guide http://manual.jvc.co.jp/index.html/... -
Page 17: Still Image Recording
Take a still image. Press fully 10:00 [6630] Focus Recording in Progress For more information, refer to the Detailed User Guide http://manual.jvc.co.jp/index.html/ Lights up in green when focused Lights up during still image recording Recording Media Battery Indicator Remaining Number... -
Page 18: Iplayback
LCD monitor. If you are using a 3D compatible TV, you can also play back 3D images by connecting with an HDMI cable. (p. 20) For more information, refer to the Detailed User Guide http://manual.jvc.co.jp/index.html/ Volume adjustment during playback Turn down... - Page 19 Advances to the next still image Returns to the previous still image Rotates 90 degrees counterclockwise Rotates 90 degrees clockwise Continuous playback of images taken by continuous shooting For more information, refer to the Detailed User Guide http://manual.jvc.co.jp/index.html/ During still image playback...
-
Page 20: Playing Back On Tv
3D mode, 3D images will appear on the TV. (for GZ-HM970) If you experience fatigue or discomfort while viewing 3D images, it is recommended to play back in 2D mode. (for GZ-HM970) For more information, refer to the Detailed User Guide http://manual.jvc.co.jp/index.html/ HDMI Mini Cable (Provided) Green... - Page 21 Adjust the TV’s screen accordingly. Set “HDMI OUTPUT” in the “COMMON” menu to “CERTAIN TV TYPES”. Set to 3D mode on the TV. For more information, refer to the Detailed User Guide http://manual.jvc.co.jp/index.html/ Video Input Audio Input (L) Audio Input (R)
-
Page 22: Icopying
“AVCHD DVD” enables you to copy (record) videos to a DVD in the high definition quality. Note that they cannot be played back on devices that do not support AVCHD. For more information, refer to the Detailed User Guide http://manual.jvc.co.jp/index.html/ Standard Quality HD Quality... -
Page 23: Creating Discs With A Dvd Writer Or External Blu-Ray Drive
*1 The AC adapter shown in the illustration is AC-V10M (for GZ-HM870/GZ-HM860). *2 Mini-A (Male) – A (Female) (Part number: QAM0852-001) Consult your nearest JVC service center. NOTE The recordable time on the disc varies according to the way of recording. -
Page 24: Copying All Files
“UNSAVED SCENES” (video)/ “UNSAVED IMAGES” (still image): Videos or still images that have never been copied are automatically selected and copied. For more information, refer to the Detailed User Guide http://manual.jvc.co.jp/index.html/ Tap “EXECUTE”. ALL SCENES REQUIRED DISC SPACE DVD:2 / DVD(DL):1... - Page 25 Videos and still images cannot be copied to the same disc. Files that are not on the index screen during playback cannot be copied. Special files cannot be copied either. For more information, refer to the Detailed User Guide http://manual.jvc.co.jp/index.html/ QUIT 2011 CHECK QUIT SAVE...
-
Page 26: Dubbing Files By Connecting To A Dvd Recorder Or Vcr
Start recording. Start playback on this unit (p. 18) and press the record button on the recorder. After playback is complete, stop the recording. For more information, refer to the Detailed User Guide http://manual.jvc.co.jp/index.html/ VCR/DVD Recorder AC Adapter To AC Outlet... -
Page 27: Ifurther Information
Use of this software is authorized according to the terms of the software license. (for inquires regarding this unit) When contacting the nearest JVC office or agency in your country (refer to the JVC Worldwide Service Network at http://www.jvc-victor.co.jp/english/worldmap/index-e.html) about this software, please have the following information ready. -
Page 28: Recordable Time/Number Of Images
6,500 1,600×1,200 (4:3) 9,999 640×480 (4:3) 9,999 1,920×1,080 (16:9) 9,999 For more information, refer to the Detailed User Guide http://manual.jvc.co.jp/index.html/ SDHC/SDXC Card 4 GB 8 GB 16 GB 40 m 1 h 20 m 1 h 20 m 2 h 50 m... - Page 29 40 m 1 h 45 m 1 h 5 m 3 h 5 m 1 h 55 m For more information, refer to the Detailed User Guide http://manual.jvc.co.jp/index.html/ Continuous Recording Time GZ-HM870/GZ-HM860 Continuous Time Recording Time 1 h 15 m...
-
Page 30: Troubleshooting
B Remove the AC adapter and battery pack from this unit, reattach them, open the LCD monitor and this unit powers on automatically. 5 If the above do not solve the problem, consult your nearest JVC dealer or JVC service center. -
Page 31: Warning Indications
“FORMAT SD CARD” in the “COMMON” menu. (All data will be deleted.) When time-lapse recording is stopped with the recorded time less than “0:00:00:14”, the video will not be saved. For more information, refer to the Detailed User Guide http://manual.jvc.co.jp/index.html/ Page... -
Page 32: Cautions
... do not drop or subject to strong impact. For more information, refer to the Detailed User Guide http://manual.jvc.co.jp/index.html/ Recording Medium Terminals • Be sure to follow the guidelines below to prevent corruption or damage to your recorded data. - Page 33 If the camcorder drops, you may be injured and the camcorder may be damaged. When a child uses the unit, there must be parental guidance. For more information, refer to the Detailed User Guide http://manual.jvc.co.jp/index.html/...
-
Page 34: Specifications
GZ-HM970/GZ-HM870 Built-in memory (32 GB), SD/SDHC/SDXC card (commercially available), Eye-Fi card (commercially available) GZ-HM860 Built-in memory (16 GB), SD/SDHC/SDXC card (commercially available), Eye-Fi card (commercially available) Clock battery Rechargeable battery For more information, refer to the Detailed User Guide http://manual.jvc.co.jp/index.html/... - Page 35 * When using the AC adapter overseas, please prepare a commercially available converter plug for the country or region of visit. The specifications and appearance of this product are subject to changes for further improvement without prior notice. For more information, refer to the Detailed User Guide http://manual.jvc.co.jp/index.html/...
- Page 36 Index A AC adapter ... 10, 32 AV Connection ... 21, 26 Battery Pack ... 10, 32 C Clock Adjust ... 14 Component Connection ... 20 D Date/Time Setting ... 14 Deleting Files ... 18 Dubbing (Duplicate) ... 26 Format SD Card ... 13 ©...