Table of Contents
Advertisement
Quick Links
Advertisement
Table of Contents

Related Manuals for Fisher-Price HGB72


Summary of Contents for Fisher-Price HGB72
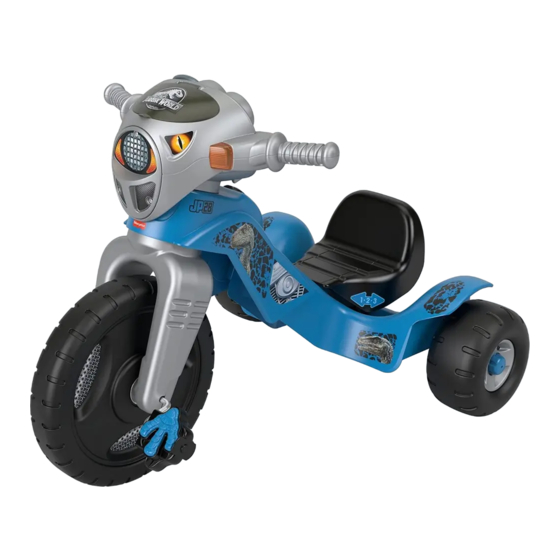
- Page 1 HGB72 OWNER’S MANUAL MANUAL DEL USUARIO GUIDE DE L’UTILISATEUR...
-
Page 2: Table Of Contents
INDEX ÍNDICE INDEX BEFORE YOU BEGIN • ANTES DE EMPEZAR • AVANT DE COMMENCER ......3 DANGERS AND WARNINGS • PELIGROS Y ADVERTENCIAS • DANGERS ET AVERTISSEMENTS ....................5 PARTS • PIEZAS • PIÈCES ......................6 ASSEMBLY • MONTAJE • ASSEMBLAGE ................... 8 ATTACHING THE SEAT •... -
Page 3: Before You Begin Antes De Empezar Avant De Commencer
BEFORE YOU BEGIN ANTES DE EMPEZAR AVANT DE COMMENCER Read this manual carefully for important safety information. Product features and decorations may vary from the images. Lee este manual detenidamente para obtener información importante de seguridad. Las características y las decoraciones del producto pueden ser distintas a las de la imagen. Lire attentivement le présent guide pour obtenir des renseignements importants sur la sécurité. - Page 4 Age: 2-6 years. Weight Limit: 27 kg (60 lb). Edad: De 2 a 6 años. Capacidad máxima: 27 kg. Âge : 2 à 6 ans. Poids maximal : 27 kg (60 lb). Choose areas for riding that are free of obstacles. Learn to stop safely. Use with caution as this product requires skill to operate safely to avoid falls, collisions, and injuries to yourself (the rider) and others.
-
Page 5: Dangers And Warnings • Peligros Y Advertencias • Dangers Et Avertissements
WARNING TO AVOID SERIOUS INJURY: • Continuous adult supervision is required. • Never use near cars and other motor vehicles, near streets, steps, sloped driveways, hills, roadways, alleys, swimming pools or other bodies of water. • Always wear shoes. • Never allow more than one rider. ADVERTENCIA PARA EVITAR LESIONES GRAVES: •... -
Page 6: Parts Piezas Pièces
PARTS PIEZAS PIÈCES... - Page 7 WARNING ADVERTENCIA ATTENTION Adult assembly required. Choking hazard to children under the age of 3 years – contains small parts prior to assembly. Requiere montaje por parte de un adulto. Peligro de asfixia para niños menores de 3 años, contiene piezas pequeñas antes del montaje. Assemblage par un adulte requis.
-
Page 8: Assembly Montaje Assemblage
ASSEMBLY MONTAJE ASSEMBLAGE... - Page 10 Place a cap nut on the end of the straight axle. Tap the cap nut with a hammer. Pon una tuerca ciega en el extremo del eje recto. Golpea la tuerca ciega con un martillo. Placer un écrou borgne à l’extrémité de l’essieu. Frapper l’écrou borgne avec un marteau.
- Page 11 Fit two pedal hubs onto the pedal axle tabs. Make sure the tabs fit into the slot in each pedal hub. Ajusta dos conexiones de pedal en las lengüetas del eje de los pedales. Asegúrate de que las lengüetas se ajusten en las ranuras en cada conexión de los pedales.
- Page 12 While holding the pedal hubs on the pedal axle assembly, insert the pedal axle through the hole in the center of the front wheel. Mientras sujetas las conexiones de los pedales en la unidad del eje de los pedales, inserta el eje de los pedales en el orificio del centro de la rueda delantera.
- Page 13 Push the pedal hubs into the center of the front wheel until they are flush with the surface of the front wheel. Empuja las conexiones de los pedales en el centro de la rueda delantera hasta que estén parejas con la superficie de la rueda delantera.
- Page 14 Pull the pedal up to be sure it is secure. If you can remove it, you have not secured it properly. Tap it with the hammer again. Jala hacia arriba el pedal para cerciorarte de que esté seguro. Si se desprende, significa que no está...
- Page 15 #8 x ¾ ” (1,9 cm) Screw Tornillo #8 de 1,9 cm Vis n° 8 de 1,9 cm (¾ po) #8 x ¾ ” (1,9 cm) Screw Tornillo #8 de 1,9 cm Vis n° 8 de 1,9 cm (¾ po)
- Page 16 Insert the fork post up through the hole in the neck of the frame. Make sure the fork is positioned so that the fork covers face the rear wheels. Inserta el poste de la horquilla en el orificio del cuello del armazón. Asegúrate de que la horquilla esté...
- Page 17 Insert the #8 x 3” (7,6 cm) screw through the hole in the handlebar and into the fork post so that part of the screw (about ¾” - 1,9 cm) is still visible. Tighten the screw. Inserta el tornillo #8 de 7,6 cm a través del orificio en el manubrio y en el poste de la horquilla de modo que parte...
- Page 18 #6 x ½” (1,3 cm) Screw Tornillo #6 de 1,3 cm Vis n° 6 de 1,3 cm (½ po) Fit the small pegs on the seat retainer into the holes in the seat. Introduce las clavijas pequeñas del retenedor del asiento en los orificios del asiento.
-
Page 19: Attaching The Seat Acoplamiento Del Asiento Fixation De La Selle
ATTACHING THE SEAT ACOPLAMIENTO DEL ASIENTO FIXATION DE LA SELLE... - Page 20 Lower Position Posición baja Position inférieure Middle Position Upper Position Posición media Posición alta Position centrale Position supérieure The seat can be attached to the frame in any of three positions, depending on the size of your child. Check your child’s fit on the trike by observing the seat to pedal distance, as it is being ridden.
-
Page 21: Removing The Seat Extracción Del Asiento Retrait De La Selle
REMOVING THE SEAT EXTRACCIÓN DEL ASIENTO RETRAIT DE LA SELLE Turn the frame on its side. Squeeze the seat retainer tabs toward one another and lift the seat from the frame. Pon el armazón de lado. Aprieta las lengüetas del retenedor del asiento una hacia la otra y levanta el asiento del armazón. -
Page 22: Decoration Decoración Décoration
DECORATION DECORACIÓN DÉCORATION For best results, avoid repositioning a label once it has been applied to the trike. Para obtener mejores resultados, evita reposicionar una calcomanía después de pegarla en el triciclo. Pour de meilleurs résultats, éviter de repositionner tout autocollant une fois qu’il a été apposé. -
Page 24: Battery Installation Instalación De Las Pilas Installation Des Piles
BATTERY INSTALLATION INSTALACIÓN DE LAS PILAS INSTALLATION DES PILES Loosen and remove the screws from the headlight cover. Remove the headlight cover. Afloja y retira los tornillos de la cubierta del faro. Retira la cubierta del faro. Desserrer et retirer les vis du couvre-phare. -
Page 25: Use Uso Utilisation
USE USO UTILISATION Sounds Music Turn Signal Sonidos Música Luz para girar Sons Musique Clignotant Turn Signal CB Radio Luz para girar Radio CB Clignotant Radio CB Ignition Botón de arranque Allumage • Turn the ignition, “VROOOM!” • Press the turn signal buttons for sounds and blinking lights. •... -
Page 26: Las Pilas • Mises En Garde Au Sujet Des Piles
BATTERY SAFETY INFORMATION INFORMACIÓN DE SEGURIDAD ACERCA DE LAS PILAS MISES EN GARDE AU SUJET DES PILES In exceptional circumstances, batteries may Lors de circonstances exceptionnelles, leak fluids that can cause a chemical burn injury des substances liquides peuvent s’écouler des or ruin your product. -
Page 27: Information • Información • Renseignements
INFORMATION INFORMACIÓN RENSEIGNEMENTS FCC STATEMENT (UNITED STATES ONLY) Nota: Los cambios o modificaciones no expresamente autorizados por el fabricante responsable del This equipment has been tested and found to cumplimiento de las normas puede cancelar la comply with the limits for a Class B digital device, autoridad del usuario de usar el equipo. - Page 28 UNITED STATES Fisher-Price, Inc., 636 Girard Avenue, East Aurora, NY 14052. Consumer Services: 1-800-432-5437. CANADA Mattel Canada Inc., 6155 Freemont Blvd., Mississauga, Ontario L5R 3W2. Consumer Services/Service à la clientèle : 1-800-432-5437. www.service.mattel.com. MÉXICO Importado y distribuido por Mattel de México, S.A. de C.V., Miguel de Cervantes Saavedra No.