Table of Contents
Advertisement
Quick Links
Hardware Installation
Installation of the NVIDIA Skyway gateway requires attention to the mechanical and power elements of the appliance and precautions must be taken for
the rack-mounted equipment.
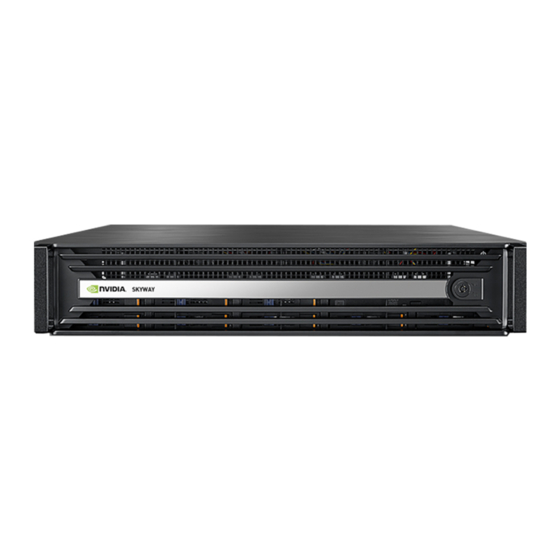
The system platform can be rack-mounted and is designed for installation in a standard 19" rack. The power side of the system includes a hot-swap power
supply unit (PSU), space for an optional second PSU (purchased separately) for redundancy, and replaceable fan trays. There is one possible airflow
direction. It is necessary to validate that the system airflow direction is compatible with the system, rack, and PSUs. The rear panel of the system has the
QSFP28 ports, system LEDs, and management connection ports.
Use a rack capable of supporting the mechanical and environmental characteristics of a fully-populated platform.
The rack mounting holes conform to the EIA-310 standard for 19-inch racks. Take precautions to guarantee proper ventilation in order to
maintain good airflow at ambient temperature.
NVIDIA Skyway Installation
The installation procedure of NVIDIA Skyway involves the following steps.
Step
Procedure
1
Follow safety warning procedures.
2
Pay attention to the system considerations within the host chassis.
3
Follow the safety precautions
4
Unpack the package and confirm all required components are present.
5
Mount the appliance in a rack enclosure.
6
Use the supplied cables to connect the system
7
Power on the system.
Safety Warnings
Safety warnings are provided here in the English language. For safety warnings in other languages, refer to the Safety Instructions for Gateway
document available on
Please observe all safety warnings to avoid injury and prevent damage to system components. Note that not all warnings are relevant to all models.
Installation Instructions
Read all installation instructions before connecting the equipment to the power source.
Bodily Injury Due to Weight
Use enough people to safely lift this product.
Heavy Equipment
This equipment is heavy and should be moved using a mechanical lift to avoid injuries.
https://www.nvidia.com/en-us/networking/
Direct Link
Refer to
Safety Warnings
Refer to
System Requirements
Refer to
Safety Precautions
Refer to
Unpacking the Package
Refer to
Rack Mounting
Refer to
Cable Installation
Refer to
Initial Power-On
.
.
.
.
.
.
.
.
Advertisement
Table of Contents

Summary of Contents for Nvidia Skyway
- Page 1 Hardware Installation Installation of the NVIDIA Skyway gateway requires attention to the mechanical and power elements of the appliance and precautions must be taken for the rack-mounted equipment. The system platform can be rack-mounted and is designed for installation in a standard 19” rack. The power side of the system includes a hot-swap power supply unit (PSU), space for an optional second PSU (purchased separately) for redundancy, and replaceable fan trays.
- Page 2 Risk of Electric Shock! With the fan module removed power pins are accessible within the module cavity. Do not insert tools or body parts into the fan module cavity. For AC powered switch systems: Disconnecting one power supply only disconnects one module. To isolate the unit completely, all connected power supplies must be disconnected.
- Page 3 Local and National Electrical Codes This equipment should be installed in compliance with local and national electrical codes. Installation Codes This device must be installed according to the latest version of the country national electrical codes. For North America, equipment must be installed in accordance to the applicable requirements in the US National Electrical Code and the Canadian Electrical Code.
- Page 4 Taiwan RoHS Declaration - Gateway Systems Taiwan BSMI Class A Statement - Warning to the User!
-
Page 5: System Requirements
Unpacking the Package Safety Precautions The NVIDIA Skyway appliance is installed in systems that operate with voltages that can be lethal. Before opening the case of the system, observe the following precautions to avoid injury and prevent damage to system components. -
Page 6: Installing The Server In A Rack
The NVIDIA Skyway appliance can be mounted in a rack using the optional rack mounting kit. We strongly recommend that the minimum depth of cabinet is 1100mm. Installing the Server in a Rack Before mounting the NVIDIA Skyway appliance in a rack, ensure that all internal components have been installed and that the unit has been fully tested. - Page 7 Step 3: Mount the cabinet member to the posts. Align the positioning pin to the desired complete U location, and pull the bracket forwards to lock it to the post. The bracket is locked to the post after a “click” sound is heard. Step 4: Release the locking latch upward.
- Page 8 Step 6: Install the chassis. As shown, insert the inner member to the cabinet member. Make sure the ball retainer is in the open position. If the ball retainer is not on the front position, it might cause damage to the slides. After the inner member goes in, push up/down the disconnect lever to unlock the slides and keep pushing the chassis to the fully-closed position.
-
Page 9: Cable Installation
Power Cable The NVIDIA Skyway appliance is shipped with two power supply units. Each supply unit has a separate AC receptacle. The appliance accepts voltages of 100-127 VAC and 200-240 VAC for all possible power supply units. The power cords should be a standard 3-wire AC power cards, including a safety ground, and rated for 15A or higher. -
Page 10: Initial Power-On
ConnectX-6 IB ports should be physically connected to IB switches (e.g. with split-cables, providing 2x HDR100 connections from 2x ConnectX-6(s) to 1 Quantum port). and what I am missing is like a "zoom in" into the actual Skyway , show how to connect splitter cables from the IB switch to it and how to use regular HDR cables Initial Power-On The system’s input voltage is specified in the...