Table of Contents
Advertisement
Quick Links
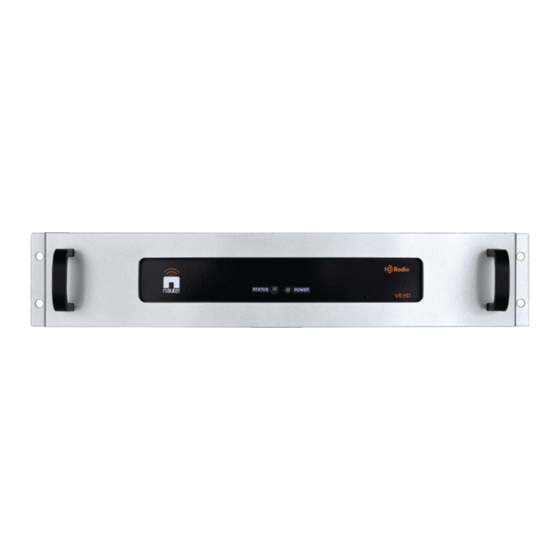
VSHD Exciter
FOR USE WITH VS SERIES
TRANSMITTERS
Technical Instruction Manual
Issue 2.0 .......... 04 May 2017
Nautel Limited
10089 Peggy's Cove Road,
Hackett's Cove, NS, Canada B3Z 3J4
T.877 6 nautel (628835) or +1.902.823.2233
F.+1.902.823.3183 info@nautel.com
U.S. customers please contact:
Nautel Inc.
201 Target Industrial Circle, Bangor ME 04401
T.877 6 nautel (628835) or +1.207.947.8200
F.+1.207.947.3693 info@nautel.com
e-mail: support@nautel.com
www.nautel.com
Copyright 2017 NAUTEL. All rights reserved.
Advertisement
Table of Contents

Related Manuals for Nautel VSHD Exciter

Summary of Contents for Nautel VSHD Exciter
- Page 1 Hackett's Cove, NS, Canada B3Z 3J4 T.877 6 nautel (628835) or +1.902.823.2233 F.+1.902.823.3183 info@nautel.com U.S. customers please contact: Nautel Inc. 201 Target Industrial Circle, Bangor ME 04401 T.877 6 nautel (628835) or +1.207.947.8200 F.+1.207.947.3693 info@nautel.com e-mail: support@nautel.com www.nautel.com Copyright 2017 NAUTEL. All rights reserved.
- Page 3 If the Buyer receives a replacement module, as part of Nautel’s module exchange program, the old module must be returned to Nautel within 30 days of receipt of the new module, at the buyers expense. If the old module is not received after 30 days, the customer will be invoiced. The buyer is responsible for installing the replacement/repaired module in the transmitter.
- Page 4 Exercise of such warranty shall be between the Buyer and the third party provider. 13. Nautel provides telephone and email support for its products for the life of the product at no charge. After the warranty period, parts and on-site support for the equipment are offered at a rate to be determined upon request.
- Page 5 When the warranty has expired, a charge of 80% of the list price for all exchanged modules is made. If the faulty module is returned to Nautel within 30 days, a credit is issued reducing this charge by one half to 40% of the list price.
- Page 7 Operation of this equipment in a residential area is likely to cause harmful interference in which case the user will be required to correct the interference at his own expense. VSHD Exciter Technical Instruction Manual May.4.17...
- Page 9 Configuring RF Drive Source 3-19 3.1.5 Front Panel Indicators 3-19 3.1.6 Exgine Web Interface 3-20 SOFTWARE UPGRADES 3-23 MAINTENANCE GENERAL BATTERY REPLACEMENT EXCITER PWB REPLACEMENT PARTS LISTS WIRING INFORMATION ELECTRICAL SCHEMATICS AND ASSEMBLY DETAIL DRAWINGS VSHD Exciter Technical Instruction Manual May.4.17...
-
Page 10: Table Of Contents
List of Tables Packing Supplies, VSHD Exciter Nautel part # 211-8981-01 3-1a RF Output Maximum TPO (MER Priority, MP1) 3-11 3-1b RF Output Maximum TPO (Efficiency Priority, MP1) 3-11 3-1b HD Maximum Output TPO (MP1) 3-12 RF Output Minimum Power Ratings (MP1) 3-12 Manufacturers’... - Page 11 Release Control Record Issue Date Reason 4 May 2017 New hardware release of product (NAE103B) VSHD Exciter Technical Instruction Manual May.4.17...
-
Page 13: Vshd Exciter
VS transmitter’s technical documentation are covered in this manual. The VSHD exciter can be purchased and shipped with a VS series transmitter or provided as an HD upgrade. In the case of an upgrade, Nautel provides the Exgine hardware and DTS (formerly iBiquity Digital Radio) software required to broadcast your signal in HD. - Page 14 Allow sufficient clearance on the sides of the VSHD exciter for adequate ventilation. CAUTION Do not block the vents in the side of the VSHD exciter. This is especially important in higher ambient temperature environments. 1.5.3 Weights The VSHD exciter weighs approximately 19 lbs (8.6...
- Page 15 To operate in IBOC mode, the VS transmitter had to be modified from its original configuration to work with the VSHD exciter. RF drive for the VS transmitter system is provided by the VSHD Exciter for IBOC operation. The following modifications were...
- Page 17 Adhere to any warnings or instructions posted on the shipping container. Packing lists provide detailed listings of shipment contents. Test results shipped with the exciter may be required in later steps. Remove the VSHD exciter from the shipping container and prepare for installation as follows: Remove all plastic cap-plugs from BNC connectors on the rear of the exciter.
- Page 18 When mounting the equipment in a standard 19” equipment rack, provide adequate support at the bottom of the VSHD exciter. The VSHD exciter cannot support itself through front panel mounting only. New rail mounting hardware is provided. Airflow and cooling must also be considered.
- Page 19 Figure 2-1: Parts required for Installation VSHD Exciter Technical Instruction Manual Page 2-3 Section 2 Installation Issue 2.0...
-
Page 20: Slider Assembly Release
Attach part ‘A’ of the rack slider to rack mount assembly parts ‘C’, ‘D’ and ‘E’. Repeat • for the opposite side and tighten all hardware. See Figure 2-4. VSHD Exciter Technical Instruction Manual Page 2-4 Issue 2.0 Section 2 Installation... -
Page 21: Slider Assembly To Rack Mount
Use spacer ‘L’ between slider and rack mount assembly as necessary to secure hardware passing through part ‘D’ only. For Nautel racks, install eight nut retainers ‘H’ on the rack rails to align with four • holes in the front of each rack mount assembly. Install four ‘A’ screws in the outside nut retainers and tighten. -
Page 22: Mounting The Slides
‘A’ screws and ‘M’, ‘N’, and ‘O’ securing hardware. Tighten all hardware. See Figure 2-6. NOTE Front screws may have been installed in the previous step. Figure 2-6: Mounting the Slides VSHD Exciter Technical Instruction Manual Page 2-6 Issue 2.0 Section 2 Installation... -
Page 23: Mounting The Vshd Exciter
NOTE Before mounting the VSHD exciter in its host rack, refer to paragraph 2.3.3.1.3 to determine if it is necessary to configure the MPX input’s jumper setting. 2.3.3.4 Mounting the VSHD Exciter Attach part ‘B’ of the rack slider assembly to the exciter, ensuring correct orientation. - Page 24 Ferrite toroids (Nautel Part # LP23) and an ac line cord (Nautel Part # JN50) are included in the Installation Kit (Nautel Part # 211-8982-01) with the VSHD exciter.
-
Page 25: Vshd Exciter - Rear View
Dimensions = mm (inches) VSHD Exciter – Rear View Issue 2.0 Not to Scale Figure 2-8 Page 2-9 (2-10 Blank) - Page 27 1.0 V and 5 V pk-pk. The input impedance for each input is 1210 Ω. If you are using the BAL/UNBAL MPX IN connector (A1J6) for an unbalanced input, remove the VSHD exciter’s top cover and change the jumper setting for E1 on the exciter/control PWB (see Figure 7-11). Re-install the top cover.
- Page 28 AES out on the REMOTE I/O-A D-sub connector (A1J2A; + on pin 12, - on pin 24, shield on pin 13). Nautel provides a cable (W2) in the Installation Kit (Nautel Part # 211-8982-01) with the VSHD exciter, if necessary. Both ends of this cable contain solder cup D-sub connectors, which allows the customer to install any additional wiring on the VSHD exciter’s ANALOG AUDIO IN connector or associated VS transmitter’s REMOTE I/O-A...
- Page 29 Commissioning instructions (setting up and configuring an external exciter and location of transmitter connectors). NOTE The lengths of cables in the “VSHD System Cables” bag require that the VSHD exciter be mounted in close proximity to the VS transmitter. For example, the Cat-5e cable (W1) is approximately two feet in length.
- Page 30 NOTE The VSHD exciter is part of an IBOC system with a VS series transmitter and should be commissioned in conjunction with the VS transmitter. Refer to the turn-on or commissioning procedures of the VS transmitter for more information (see the VS Installation Manual).
- Page 31 (formerly iBiquity Digital Radio Corp.) “HD Radio FM Transmission System Specification” mask for Hybrid or All-Digital transmission. Verify that the Average PA Dissipation meter does not exceed 180 W at any time. Contact Nautel if necessary. NOTE Refer to the VS transmitter’s Operations and Maintenance Manual for details on general operation of the VS transmitter.
-
Page 33: Am-Am Correction
Exgine PWB via a web-based browser. 3.1.1 Viewing Tool Menu Panels (AUI only) The number of tool menu options increase when using the VSHD exciter (see Figure 3-1 compared to Figure 2-17 of the VS transmitter’s Operations and Maintenance Manual). - Page 34 Use the left (◄) and right (►) arrow buttons as fine adjustments. Use the up (▲) arrow button to maximize (if it was minimized) or the down (▼) arrow button to minimize (if it was maximized) the panel size. VSHD Exciter Technical Instruction Manual Page 3-2 Issue 2.0...
- Page 35 Use the left (◄) and right (►) arrow buttons as fine adjustments. Use the up (▲) arrow button to maximize (if it was minimized) or the down (▼) arrow button to minimize (if it was maximized) the panel size. VSHD Exciter Technical Instruction Manual Page 3-3 Section 3 Operation...
-
Page 36: Power Distribution Graph
Use the up (▲) arrow button to maximize (if it was minimized) or the down (▼) arrow button to minimize (if it was maximized) the panel size. Figure 3-4: Power Distribution VSHD Exciter Technical Instruction Manual Page 3-4 Issue 2.0... -
Page 37: Signal Constellation
MER value of no less than 14 dB. Use the scroll bar to select a higher or lower sub- carrier for viewing. Some sub-carriers are for timing and synchronization. Others are modulated with data/content. Use the maximize or minimize buttons as required. Figure 3-5: Signal Constellation VSHD Exciter Technical Instruction Manual Page 3-5 Section 3 Operation Issue 2.0... -
Page 38: Oscilloscope
To view the actual audio input’s signal, disable the test signal generator (refer to the VS transmitter’s Operations and Maintenance manual). Figure 3-6: Oscilloscope (Left/Right Audio input shown) VSHD Exciter Technical Instruction Manual Page 3-6 Issue 2.0 Section 3 Operation... - Page 39 3.1.2 Managing Presets The preset page’s Mode options increase when using the VSHD exciter (for the AUI, see Figure 3-7 compared to Figure 2.39 of the VS transmitter’s Operations and Maintenance Manual; for the front panel UI, see Figure 3-8 compared to Figure 2.48 of the VS transmitter’s Operations and Maintenance Manual).
- Page 40 HD PowerBoost is now standard as of VS SW 4.4. Transmitters shipped prior to VS SW 4.4 that haven’t been upgraded may get 3 dB foldback and associated license alarms if “Priority Efficiency” is selected. Nautel recommends upgrading the software to VS SW 4.4 or later. VSHD Exciter Technical Instruction Manual Page 3-8 Issue 2.0...
- Page 41 Timeout Minutes: sets the delay, in minutes, between modulation loss detection and the resulting action. Enter a value in the allowable range of 0 and 255 minutes. VSHD Exciter Technical Instruction Manual Page 3-9 Section 3 Operation Issue 2.0...
- Page 42 4.5% (-12 dBr) to 71.3% (12 dBr); default is 17.9% (0 dBr). Convert to dBr as follows: MPX RMS in dBr = 20 log 10 [MPX RMS in % * (75 kHz/100%) * (√2/19 kHz)] VSHD Exciter Technical Instruction Manual Page 3-10 Issue 2.0 Section 3 Operation...
-
Page 43: Preset Editing Menu
FM+HD (-20 dB) FM+HD (-14 dB) FM+HD (-10 dB) VS300 314 W 233 W 133 W 1131 W 855 W 651 W VS2.5 2518 W 2081 W 1511 W VSHD Exciter Technical Instruction Manual Page 3-11 Section 3 Operation Issue 2.0... - Page 44 IBOC Settings: See Figure 3-11. When you select IBOC Settings from the Preset editing options screen (viewable only when IBOC Mode is set to HD or FM+HD), you can edit various IBOC operating parameters. Figure 3-11: IBOC Settings menu Page 3-12 VSHD Exciter Technical Instruction Manual Issue 2.0 Section 3 Operation...
- Page 45 PowerBoost: Use the up and down buttons to select Max MER Priority or Efficiency • Priority, then press the ‘accept’ (checkmark) button to save the change. Press the cancel (X) button to discard changes and return to the previous menu. VSHD Exciter Technical Instruction Manual Page 3-13 Section 3 Operation Issue 2.0...
-
Page 46: System Settings Page - Iboc Settings
3.1.3 Changing System Settings The AUI’s System Settings page’s selection options increase when using the VSHD exciter (see Figure 3-13 compared to Figure 2-86 of the VS transmitter’s Operations and Maintenance Manual). The following additional pages are available: System Settings►IBOC Settings – see 3.1.3.1 ... -
Page 47: System Settings Page - Spectrum/Efficiency Optimizer
PA voltage is at maximum. If the spectral mask still cannot be met and the setting for it is enabled, the transmitter power set-point will be reduced. Figure 3-14: System Settings Page – Spectrum/Efficiency Optimizer VSHD Exciter Technical Instruction Manual Page 3-15 Section 3 Operation... - Page 48 Optimizer menu. Within any of the editing screens, use the up and down buttons to edit a setting. Press the accept (checkmark) button to save the change. Press cancel (X) to discard changes and return to the previous menu. VSHD Exciter Technical Instruction Manual Page 3-16 Issue 2.0...
- Page 49 Default setting is 0.0 dB. Figure 3-16: HD Optimizer Screens VSHD Exciter Technical Instruction Manual Page 3-17 Section 3 Operation Issue 2.0...
- Page 50 NOTE The Exgine IP address must be entered manually; there is no DHCP option to auto-assign its IP address. Figure 3-17: User Settings Page – Exgine Settings Page 3-18 VSHD Exciter Technical Instruction Manual Issue 2.0 Section 3 Operation...
- Page 51 • flashing red/green – RF on, major fault (e.g., no HD data, no reverse path) POWER – LED that indicates the status of ac power applied to the VSHD exciter. The LED is green when ac power is applied. Figure 3-19: VSHD Front Panel Indicators...
-
Page 52: Configuration Tab
This section describes how to monitor and troubleshoot the VSHD exciter’s internal Exgine PWB using a web-based browser. If HD data is being applied to the VSHD exciter via a local area network (LAN) connection, determine the IP address of the Exgine using the associated transmitter’s user interface (see 3.1.3.3) and enter the address into the web browser’s address bar on a PC or laptop that is... -
Page 53: Statistics Tab
Figure 3-20: Statistics tab Figure 3-21: Status tab VSHD Exciter Technical Instruction Manual Page 3-21 Section 3 Operation Issue 2.0... -
Page 54: Alarms Tab
Figure 3-22: Alarms tab Figure 3-23: Configuration tab VSHD Exciter Technical Instruction Manual Page 3-22 Issue 2.0 Section 3 Operation... - Page 55 The VSHD exciter and VS transmitter upgrades are part of the same .tgz file. If the VSHD exciter is selected, the VS transmitter will automatically detect that the VSHD is present. If necessary, refer to section 4 of the VS transmitter’s Operations and Maintenance Manual for the software upgrade procedure.
- Page 57 To replace the exciter PWB’s battery, perform the following steps: (a) Gain access to the exciter PWB (A1) by removing the top cover and retain hardware. (b) Replace battery BT1 on the VSHD exciter PWB. Refer to Figure 7-11 for the location of the PWB.
- Page 58 CAUTION The exciter PWB is static sensitive and must be handled in a static protected manner. To replace the VSHD exciter PWB (A1), perform the following steps: (a) Disconnect all cabling and ac power to the VSHD exciter. (b) Remove the exciter’s top cover and retain hardware.
- Page 59 (k) Reconnect all internal and external cables to the exciter PWB. If necessary, refer to Figure 2-8 and 7-10 of this manual for connector mating details for A1. VSHD Exciter Technical Instruction Manual Page 4-3 Section 4 Maintenance...
- Page 60 Main Menu ► System Settings ► Calibration ► Cal Values screen. Enter the recorded scale factors in the Fwd Scale and Rfld Scale screens. (p) Restore RF power and verify proper operation. VSHD Exciter Technical Instruction Manual Page 4-4 Issue 2.0...
-
Page 61: Manufacturers' Code Index
OEM (CAGE) code for that part in the following website: https://www.logisticsinformationservice.dla.mil/BINCS/ Upon entering the OEM (CAGE) code number, manufacturer pertinent information (address, telephone number, fax number, etc.) shall be displayed. Please contact Nautel if a part cannot be obtained. Table 5-1: Manufacturers’ Code Index... - Page 62 NAE103B VSHD Exciter Technical Instruction Manual Page 5-2 Issue 2.0 Section 5 Parts Lists...
-
Page 63: Wiring Lists Provided
TABLE TITLE Table 6-2 Wiring List – VSHD Exciterxxx Table 6-3 Connector Mating Information – VSHD Exciter Table 6-4 Connector Mating Information – VSHD Exciter/VS Transmitter Interconnect VSHD Exciter Technical Instruction Manual Page 6-1 Section 6 Wiring Lists Issue 2.0... - Page 64 Table 6-2: Wiring List – VSHD Exciter Source Destination Wire # Colour Size Remarks U3-L Gray U3-N Gray U3-GND Yllw/Green U3-L U2-L Gray U3-N U2-N Gray U3-GND U2-GND Yllw/Green U1-GND Yllw/Green U2-(+5V) P4-6 White U2-COM P4-5 Black U2-COM P4-7 Black...
- Page 65 U4J1 W5J1 EXT 10 MHz W5P1 A3J3 W6P1 A3J4 W6P2 A1J13 Table 6-4: Connector Mating Information – VSHD Exciter/VS Transmitter Interconnect Connector Mate W1P1 XMTR - XMTR LINK W1P2 EXCTR - XMTR LINK W2P1 XMTR - REMOTE I/O A W2P2...
- Page 67 In positive logic, 'high' represents the active (true) state and 'low' represents the inactive (false) state. In negative logic, 'low' represents the active state and 'high' represents the inactive state. VSHD Exciter Technical Instruction Manual Page 7-1 Section 7 Electrical Schematics and Assembly Detail Drawings...
- Page 68 Figure 7-2 Electrical Schematic – VS300 & VSHD Exciter (Control/Monitor Stage) Figure 7-3 Electrical Schematic – VS300 & VSHD Exciter (RF Drive & RF Power Stage) Figure 7-4 Assembly Detail – Modified VS300 for use with VSHD Exciter Figure 7-5 Electrical Schematic –...
- Page 69 IS TRANSMITTER DEPENDENT: J1 FOR VS300 J4 FOR VS300 J3 FOR VS1 OR VS2.5 J1 FOR VS1 OR VS2.5 Electrical Schematic – Interconnections Between VS Transmitter and VSHD Exciter Issue 2.0 Not to Scale Figure 7-1 Sheet 1 of 1...
- Page 70 PILOT SAMPLE OUT EXCITER HD DATA (+) HD DATA (-) +15V OUT +15V OUT FROM EXTERNAL EXT 10 MHz SOURCE S2110157 V3 Electrical Schematic – VS300 & VSHD Exciter (Control/Monitor Stage) Issue 2.0 Not to Scale Figure 7-2 Sheet 1 of 1...
- Page 71 PA TEMP 1 PA TEMP 1 GND 0.01 PART OF B5920 INTERFACE PWB ASSY S2110123 V4 Electrical Schematic – VS300 & VSHD Exciter (RF Drive and RF Power Stage) Issue 2.0 Not to Scale Figure 7-3 Sheet 1 of 1...
- Page 72 Assembly Detail – Modified VS300 for use with VSHD Exciter Issue 2.0 Not to Scale Figure 7-4 Sheet 1 of 1...
- Page 73 HD DATA (+) PILOT SAMPLE OUT HD DATA (-) +15V OUT +15V OUT FROM 10 MHz IN EXTERNAL SOURCE S2110124 V3 Electrical Schematic – VS1 & VSHD Exciter (Control/Monitor Stage) Issue 2.0 Not to Scale Figure 7-5 Sheet 1 of 1...
- Page 74 REFLD PWR RF_IN ENBL REFLD 1000 0.01 SMPL ADL5501 FLTR 10.0K VRMS REFLD PWR SAMPLE S2110141 V1 Electrical Schematic – VS1 & VSHD Exciter (RF Drive and RF Power Stage) Issue 2.0 Not to Scale Figure 7-6 Sheet 1 of 1...
- Page 75 DENOTES TB3 DISTRIBUTION B2L1 B2P1 FAN 2 V (+) DENOTES TB4 B2P1 FAN 2 V (-) FAN TACH 2 S2110213 V1 Electrical Schematic – VS2.5 & VSHD Exciter (Control/Monitor Stage) Issue 2.0 Not to Scale Figure 7-7 Sheet 1 of 2...
- Page 76 HD DATA (+) +15V OUT HD DATA (-) +15V OUT PILOT SAMPLE OUT FROM EXTERNAL 10 MHz IN SOURCE S2110214 V3 Electrical Schematic – VS2.5 & VSHD Exciter (Control/Monitor Stage) Issue 2.0 Not to Scale Figure 7-8 Sheet 2 of 2...
- Page 77 REFLD PWR RF_IN ENBL 1000 0.01 SMPL ADL5501 FLTR 10.0K VRMS REFLD PWR SAMPLE S2110215 V1 Electrical Schematic – VS2.5 & VSHD Exciter (RF Drive and RF Power Stage) Issue 2.0 Not to Scale Figure 7-9 Sheet 1 of 1...
- Page 78 B1P1 FAN V+ BOOTLOADER FAN TACH 1 DS1:A DSP JTAG FAN V- TEST / DEBUG DS1:B FPGA JTAG S2110076 V2 J8:B MPX/PILOT SAMPLE Electrical Schematic – VSHD Exciter (NAE103A/B) Issue 2.0 Not to Scale Figure 7-10 Sheet 1 of 1...
- Page 79 +27 V POWER SUPPLY EXGINE PWB AC POWER ENTRANCE BAL/UNBAL jumper E1 EXCITER PWB LED PWB PA MODULE LVPS Assembly Detail – VSHD Exciter – Top View (cover removed) Issue 2.0 Not to Scale Figure 7-11 Sheet 1 of 1...