Advertisement
Quick Links
Advertisement

Summary of Contents for Navicom Dynamics HarbourPilot Mk 5
- Page 1 HarbourPilot Mk 5 Getting Started...
- Page 2 Power Ensure HarbourPilot Mk 5 and display are charged Plan Check WiFi connectivity between HarbourPilot MK 5 and Display Electronic charts are up to date Tidal data entered into ECS to confirm extent of navigable water Route planned and entered into PPU software Display in “Sleep Mode”...
- Page 3 Connect the mains lead to the charger and plug it into the wall outlet. Do not switch on the wall outlet. Step 2 Plug the charger lead into the HarbourPilot Mk 5, making sure the plug is locked. Step 3 Switch on the charger at the wall outlet.
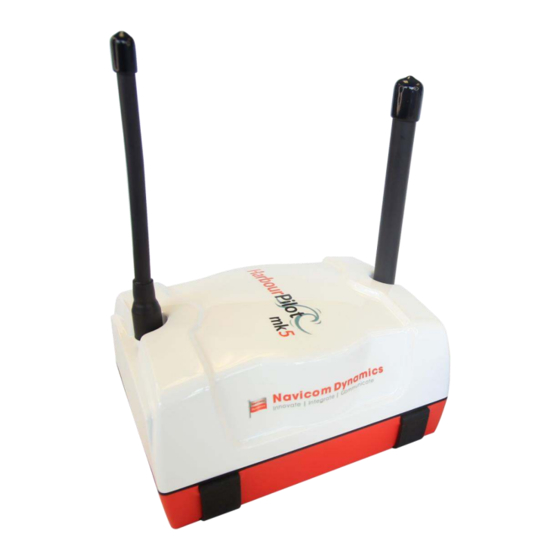
- Page 4 Preparations Before use, ‐ check that Harbour Pilot Mk5 is fully charged! HP Mk 5 has an internal lithium-ion rechargeable battery and supports fast charging. Charging procedure:...
- Page 5 Preparations Before use, ‐ check that Harbour Pilot Mk5 is fully charged! HP Mk 5 has an internal lithium-ion rechargeable battery and supports fast charging. Charging procedure:...
-
Page 6: Charge Indicator
Preparations The battery LEDs indicate the level of charge in the HP Mk5. It is recommended that the unit is placed on continuous charge Charge Indicator when not in use. If this is not feasible, create a procedure that ensures the unit is fully charged on a regular basis. A fully charged HP Mk 5 will function for approximately 16 hrs. - Page 7 Lights and Indications HP Mk5 Indicator lights The indications on the HP Mk5 provide the user with a comprehensive understanding of the function of the PPU Battery Levels – Percentage power remaining. Power indicator – unlit shows power is off Wifi or Bluetooth connection with display –...
- Page 8 Positioning Commencing Pilotage – HarbourPilot Mk 5 setup For accurate Heading the Master ( smaller round) and Slave ( larger with aerial) Antennas should line up as closely as possible ideally either Athwart ships or Fore and Aft for a simple setup.
- Page 9 HP Mk 5 WiFi Connection – HarbourPilot Mk5 set Establish a WiFi link between your iPad and the HarbourPilot Enable Auto-Join Select the HP ***** from available Networks Once connected the blue tick will show and the Link light on the HarbourPilot will turn green with a successful connection Remember to enable Auto Join to prevent accidental disconnection...
- Page 10 Status Number will populate with a valid connection In Settings / NMEA & AIS Standard WiFi Devices Data will appear in Status and Toggle on NMEA & AIS Diagnostics Toggle on Navicom Dynamics Then select Harbour Pilot NMEA & AIS...
- Page 11 In Settings / NMEA & AIS WiFi section will remain blank Standard WiFi Devices Toggle on NMEA & AIS Data will appear in Status and Toggle on Navicom Dynamics Diagnostics Then select Harbour Pilot Bluetooth Devices and Settings NMEA & AIS...
- Page 12 In Settings / Vessels / Own-Ship / Ext GPS Antenna Position Enter Distance to Bow (of HarbourPilot Mk5) Master Antenna Enter Distance from Centerline (of HarbourPilot Mk 5) Master Antenna Select Ownship Heading Adjustment Select appropriate orientation of Master and Slave Antenna Slave is Forward –...
- Page 13 Qastor 3.2 WiFi Connection – HarbourPilot Mk5 set Navicom Dynamics PPUs In Main Menu select Select Harbour Pilot then enter Interface, TCP Host Name and My Vessel then TCP Port as shown above Positioning Device...
- Page 14 Qastor 3.2 Bluetooth Connection – HarbourPilot Mk5 set up (Not possible with an iPad) Select Harbour Pilot then Navicom Dynamics PPUs Select Serial in Interface. Enter In Main Menu select : the correct COM port which is obtained from the Bluetooth...
- Page 15 Qastor 3.2 Select Positioning Device in the My Vessel Enter PPU position details in menu Antenna Offset section...
- Page 16 Qastor 2.5 WiFi Connection – HarbourPilot Mk5 set In File Menu select : Communications Set Up Ensure “Standard NMEA” is selected Then Select HP***** with TCP Device Type and Description...
- Page 17 Qastor 2.5 WiFi Connection – HarbourPilot Mk5 set In File Menu select : Communications Set Up Select the position of the Heading antenna relative to the Master antenna. Navicom Dynamics PPUs...
- Page 19 With HP Mk5 a dual frequency receiver – L1 & L2 is used in each antenna The PPU receives the signal from the satellites and calculates their relative position between eachother. Using Pseudo range calculations it works out the relative direction of one antenna from the other.
- Page 20 HarbourPilot Mk5 Oops! HDG Derivation – what could go wrong? Where’s my laptop gone!?! • Cause - Multi Path errors • Errors caused when a satellite signal reaches the receiver from two or more paths, one directly from the satellite and the others reflected from nearby buildings or other surfaces.