Icom IC-FR3000 Instruction Manual
Vhf/uhf fm repeater
Hide thumbs
Also See for IC-FR3000:
- Service manual (136 pages) ,
- Sales handbook (74 pages) ,
- Remote control manual (14 pages)
Table of Contents
Advertisement
Quick Links
Advertisement
Table of Contents

Related Manuals for Icom IC-FR3000


Summary of Contents for Icom IC-FR3000
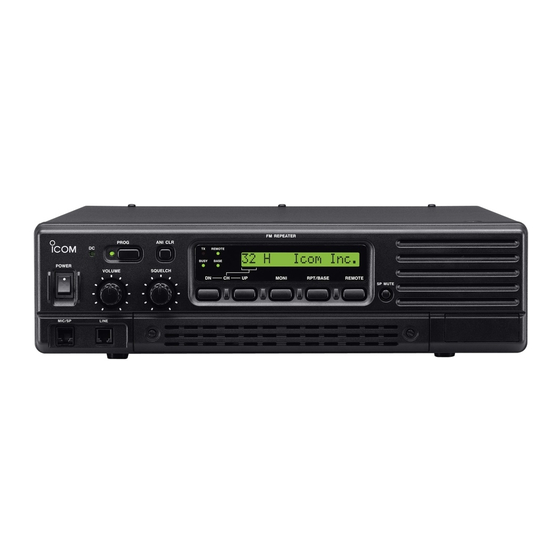
- Page 1 INSTRUCTION MANUAL VHF FM REPEATER iFR3000 UHF FM REPEATER iFR4000...
-
Page 2: Explicit Definitions
CAUTION: This repeater is intended for use as a fixed base station with the antenna located outdoors on the rooftop or on antenna tower. Icom, Icom Inc. and the of Icom Incorporated (Japan) in the United states, the United Kingdom, Germany, France, Spain, Russia and/or other coun- tries. DEFINITION... -
Page 3: Declaration Of Conformity
There are no user serviceable parts for a telephone cir- cuit inside of this IC-FR3000 or IC-FR4000. NOTICE: Connection to party line service is subject to state tariffs. Contact the state public utility commission, public service commission or corporation commission for information. -
Page 4: Forward
Thank you for purchasing this Icom product. The IC- FR3000/FR4000 VHF/UHF FM REPEATER and built with Icom’s state of the art technology and craftsmanship. With proper care, this product should provide you years of trouble-free operation. We want to take a couple of moments of your time to thank you for making the IC-FR3000/FR4000 your re- peater of choice, and hope you agree with Icom’s phi-... -
Page 5: Table Of Contents
D Receiving ... 12 D Transmitting ... 12 5 MAINTENANCE ... 13–14 I Troubleshooting ... 13 I Fuse replacement ... 14 6 SPECIFICATIONS AND OPTIONS ... 15–16 I Specifications ... 15 D IC-FR3000 ... 15 D IC-FR4000 ... 15 I Options ... 16... -
Page 6: Panel Description
• When setting up a repeater system using IC- FR3000/FR4000 only, select a repeater operating mode. • When using IC-FR3000/FR4000 as full (or half) duplex transceiver or setting up a repeater system connecting an external controller, select a base operating mode. -
Page 7: I Rear Panel
!6 ANI CLEAR SWITCH [ANI CLR] Push for 1 sec. to clear the received ANI ID indica- tion on the display and returns to original indication. NOTE: This switch is no function available for some versions. !7 DEALER-PROGRAMMABLE SWITCH [PROG] Toggles the pre-programmed function ON or OFF when pushed. -
Page 8: D Remote Connector
PANEL DESCRIPTION D Remote connector Pin No. Pin Name –AFOUT +AFOUT –EXTMOD +EXTMOD D Accessory connector Pin No. Pin Name BUSY OUT Output terminal for busy signal. Output terminal for coaxial switching (antenna switching) COAXIAL SW signal. M/S IN Input terminal for master/slave signal. Input terminal for selecting memory channel. -
Page 9: Panel Description ......................... 1
Accessory connector (continued) Pin No. Pin Name M/S OUT Output terminal for master/slave signal. Input terminal for selecting memory channel. Input terminal for selecting memory channel. Input terminal for selecting memory channel. EXT PTT Input terminal for PTT signal. Output terminal for RSSI (Received Signal Strength Indica- RSSI tor) signal. -
Page 10: Installation And Connections
After unpacking, immediately report any damage to the delivering carrier or dealer. Keep the shipping cartons. For a description and a diagram of accessory equip- ment included with the IC-FR3000/FR4000 series, see ‘Supplied accessories’ on p. iii of this manual. I Selecting a location... -
Page 11: I Required Connections
CAUTION: DO NOT short pin 1 to ground as this can damage the internal 9 V regulator. DC voltage is applied to pin 1 for microphone operation. Take care when using a non-Icom microphone. Crimp Make sure the back up battery is correctly connected. -
Page 12: I Advanced Connections
INSTALLATION AND CONNECTIONS I Advanced connections * This illustration is example only. Telephone connector type is different for some countries. EXTERNAL SPEAKER Use a 4 Ω speaker. EXT SP TX/TX•RX [REMOTE] (p. 3) Used for external equipment control. LINE CONNECTOR (Front panel view) q NC (No connection) w L1 input/output e L2 input/output... -
Page 13: I Power
Make sure the [POWER] switch is turned OFF when connecting an AC power cable and a backup battery (emergency power supply). The IC-FR3000/FR4000 series can operate with an AC or DC power supply. If AC power is interrupted when operating the repeater with an AC power supply, power is automatically provided to the [BATTERY] terminals. - Page 14 INSTALLATION AND CONNECTIONS • Top side installation q Remove the 1 screw (M4 × 8) from both side of the MB-78. w Remove the handles from bottom bar. And turn the handles upside down, then replace the handles right side and left side. e Attach the handles to the bar, then tighten the screws.
-
Page 15: Installation And Connections .................................. 5
D Using the optional MB-77 An optional MB-77 WALL MOUNT BRACKET for mounting the repeater to a flat surface. RWARNING: NEVER mount the repeater on the MB-77 by yourself. At least two people are required to mount the repeater since it weights approx. 12 kg (26 lb). -
Page 16: Optional Unit Installation
OPTIONAL UNIT INSTALLATION I Opening the repeater’s case Follow the case and cover opening procedures shown here when an optional unit is installed or adjust the in- ternal units, etc. CAUTION: DISCONNECT the AC power cable and/or DC power cable from the repeater. Other- wise, there is danger of electric shock and/or equip- ment damage. -
Page 17: Operation
Push [POWER] to turn power ON. w If the repeater is programmed for a power on pass- word by an Icom Dealer, input digit codes directly. • The keys in the table below can be used for password input. -
Page 18: Maintenance
If you are unable to locate the cause of a problem or solve it through the use of this chart, contact the near- est Icom Dealer or Service Center. POSSIBLE CAUSE • Re-connect the DC power cable correctly. -
Page 19: I Fuse Replacement
I Fuse replacement If a fuse blows or the repeater stops functioning, try to find the source of the problem, and replace the dam- aged fuse with a new, rated fuse. D LOGIC unit q Remove the bottom cover as shown on p. 11. w Remove 8 screws from the LOGIC shielding plate, then remove the plate. -
Page 20: Specifications And Options
SPECIFICATIONS AND OPTIONS I Specifications Specifications are measured in accordance with EIA/TIA-603. D D IC-FR3000 General • Frequency coverage : 150.000–174.000 MHz* 148.000–172.000 MHz* * Depends on version • Channel specing : 12.5/25.0 kHz (Narrow/Wide) • PLL channel step : 5.0, 6.25 kHz (2.5 kHz repeater operation only) •... -
Page 21: I Options
Transmitter • RF output power : 50 W • Modulation system : Variable reactance frequency modulation system • Max. frequency deviation : ±5.0 kHz (Wide), ±2.5 kHz (Narrow) • Spurious emissions : 70 dB • Adjacent channel power : More than 70 dB (Wide), More than 60 dB (Narrow) •... - Page 22 MEMO...
- Page 23 MEMO...
- Page 24 Count on us! A-6228H-1EX-w Printed in Japan 1-1-32 Kamiminami, Hirano-ku, Osaka 547-0003 Japan © 2003 Icom Inc.