Fisher & Paykel AQUASMART WL26CW1 Service Supplement Manual
Phase 7 hi-efficiency washer
Hide thumbs
Also See for AQUASMART WL26CW1:
- Installation instructions & user manual (124 pages) ,
- Installation instructions and user manual (124 pages) ,
- Product information (52 pages)

Related Manuals for Fisher & Paykel AQUASMART WL26CW1


Summary of Contents for Fisher & Paykel AQUASMART WL26CW1
- Page 1 PHASE 7 AQUASMART™ – HI-EFFICIENCY WASHER Service Supplement Supplementary Manual to 517792A 517794B...
- Page 2 517794B...
- Page 3 517794B FEBRUARY 2007 The specifications and servicing procedures outlined in this manual are subject to change without notice. The latest version is indicated by the reprint date and replaces any earlier editions. Fisher & Paykel Appliances Inc 5800 Skylab Road Huntington Beach CA 92647 Phone: 1 888 936 7872...
- Page 4 517794B FISHER & PAYKEL PHASE 7 ELECTRONIC WASHING MACHINE Covering the following product codes Market Model Number Product Code North America WL26CW1 96215...
-
Page 5: Table Of Contents
517794B CONTENTS SPECIFICATIONS ........................ 7 Model Information ......................7 Dimensions ........................7 Maximum Capacity (AS/NZS 2040.1:2005) ..............7 Water Consumption ......................7 Water Fill Temperature (Approximate Factory Settings)..........7 Wash Motor ........................8 Pump Motor ........................8 Water Valves ........................8 Thermistor........................ - Page 6 517794B SmartPump™ Test Routine ..................21 8.5.1 Bypassing......................21 NECK RING......................... 21 OUT OF BALANCE DETECTION - BUMP DETECT............22 INNER BOWL........................23 11.1 Balance Ring......................23 11.2 Bowl Base ........................23 SUSPENSION RODS ......................23 LID LOCK ..........................25 DIAGNOSTIC MODE......................26 14.1 Service Screen......................26 14.1.1 Warning Status Screen / Fault Status Screen............26 14.1.2...
-
Page 7: Specifications
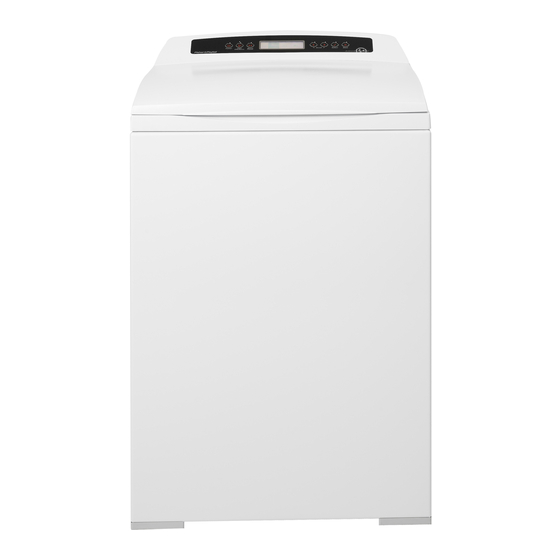
517794B SPECIFICATIONS Model Information AquaSmart™ introduces the new Fisher & Paykel model numbering system, which provides a clearer description of the product and its features. The new model numbering system will come in to affect with each new model released. The model WL26CW1 is explained below. -
Page 8: Wash Motor
517794B Wash Motor Electronically commutated 36 pole direct drive 3 Phase brushless DC Motor. Motor Resistance per Phase 16Ω +/- 10% @ 68 F (20 Pump Motor The motor is a fully electronically controlled 325V, 3 phase, 6 pole, brushless DC motor. The speed of the motor will vary depending on whether it is draining or recirculating the water. -
Page 9: Top Deck
517794B 1.12 Top Deck Polypropylene 1.13 Inner Bowl Stainless steel: Grade 430T Bowl base and balance ring: Polypropylene Inner Bowl Weight 24lb 3oz (10.965kg) +/- 10oz (275g) Inner Bowl Speed Fast Spin 1,000 RPM Medium Spin 700 RPM Slow Spin 300 RPM Stir Speed 25 RPM... -
Page 10: Control Panel
517794B 1.24 Control Panel 1.25 Important Screw / Bolt Torque Settings Below are the important screw torque settings on the AquaSmart™ washer. These settings must be adhered to. For all other screws and bolts that are not listed, we recommended that they are tightened sufficiently without being over-tightened. -
Page 11: The Unique Aquasmart™ Wash
517794B THE UNIQUE AQUASMART™ WASH The AquaSmart™ is a SmartDrive™ based washing machine that has two modes of washing, High Efficiency & Conventional. It is essentially a front loader and a top loader washer in one. Both washing modes start the same way, with a detergent activating wash. Detergent Activating Wash AquaSmart™... -
Page 12: Electronics
517794B ELECTRONICS Motor Control Module The Motor Control Module used on the AquaSmart™ washer is similar to the other Phase 7 washers in its physical size and shape, however the electronics have different software to control the unique aspects of this machine. Therefore the Motor Control Module is specific to this machine and is not interchangeable with any other Phase 7 machines. -
Page 13: Control Panel
517794B PCB and Housing – Part number 421052 The PCB, which contains the capacitive touch buttons and LCD, is mounted within a plastic housing. The PCB housing is clipped into the console at the bottom, and secured with four screws along the top. CONTROL PANEL 1. -
Page 14: Dispensing System
517794B Dispensing System Two hoses of different lengths run underneath the top deck and connect to either the detergent dispenser or the fabric softener. The detergent dispenser hose has cream elbows. The fabric softener hose has grey elbows. Moulded into the top deck at the valve end are identification letters (‘D’... -
Page 15: Low Profile Agitator
517794B An internal piston within the nozzle moves with the amount of water pressure against it. When the water pressure is high, more holes in the nozzle are exposed, and the backpressure on the dispensing valves is less. When the pressure is low, more backpressure is created, which ensures that either during detergent dispensing or fabric softener dispensing the dispensing system takes priority. -
Page 16: Smart Pump
517794B SMART PUMP™ SmartPump™ provides a more flexible and efficient pumping system than a conventional pump/diverter valve combination. SmartPump™ can be diverted quickly, it reacts faster and is better controlled. In addition, SmartPump™ has the capability of pumping to a much higher head whilst maintaining a constant volume flow rate regardless of pump efficiency degradations due to age. -
Page 17: Rotor And Stator
517794B 8.1.4 Rotor and Stator The rotor and stator magnetically interact with each other in order to convert electrical energy into rotational movement of the rotor Rotor The rotor assembly is a complete unit that is permanently fixed into the pump housing. The resulting cavity is charged with water, which acts as a lubricant. -
Page 18: Smartpump™ Spare Parts
517794B SmartPump™ Spare Parts The following spare parts service kits are available for SmartPump™. Hood And Cap (SmartPump™ Kit) - 479418 Flapper (SmartPump™) - 420403 Seal (SmartPump™) Housing PKD - 479420 Pump (SmartPump™) Assembly Kit - 479417 Connector cover Note: The pump assembly is supplied with the connector removed from the stator shield. -
Page 19: Slr Feature
517794B SLR Feature Feature stands Simplified Leak Recirculation. This feature has been added so that should the flapper not completely seal against the housing of the pump when draining, water can bypass through this hole and back into the pump, avoiding recirculating back into the bowl and on to the clothes load. -
Page 20: Testing Smartpump™ At The Stator
517794B If the meter shows an incorrect reading, we would recommend testing the stator from underneath the machine, as there could be a fault in the wiring harness. To test the stator it will need to be removed from the machine (refer to Section 17.12). 8.4.2 Testing SmartPump™... -
Page 21: Smartpump™ Test Routine
517794B SmartPump™ Test Routine Use the following procedure to test the SmartPump™. It is equally important to test both the drain and recirculation modes. In diagnostic mode the lid lock is disabled, which allows the technician to visually inspect both aspects of the pump. 1. -
Page 22: Out Of Balance Detection - Bump Detect
517794B The straps serve two purposes: 1. To limit radial bowl motion during agitate. 2. As the straps stabilise the bowl, it also improves wash performance. If one or more straps break, this can cause an increase in out of balance activity, which again may lead to cabinet damage and noise from loose straps. -
Page 23: Inner Bowl
517794B INNER BOWL SmartDrive™ AquaSmart™ 11.1 Balance Ring The inner bowl for AquaSmart™ has a new top balance ring, which has 2 internal chambers instead of just one as on SmartDrive™ bowls. Both chambers are ½ filled with water. The physical appearance of the balance rings changes from a square profile to a curved profile. 11.2 Bowl Base The new bowl base on large SmartDrive™... - Page 24 517794B Lugs to which the neck ring straps attach Grease filled damper IMPORTANT ™ It is important that these suspension rods are used only for AquaSmart machines. These rods haven’t been tested on conventional SmartDrives, however if they were to be fitted it is likely that there will be an increased level of noise and vibration on spin.
-
Page 25: Lid Lock
517794B LID LOCK AquaSmart™ uses the same lid lock that is used on the Phase 6 series 11 & 12 and previous Phase 7 machines, and is locked during the complete cycle. The Lid Lock symbol (padlock) appears in the top right hand corner of the screen, letting you know at a glance if you can open the lid or not. -
Page 26: Diagnostic Mode
517794B DIAGNOSTIC MODE Press & Hold for 2 seconds To enter the DIAGNOSTIC MODE, turn the power on at the power point and off at the console. Press and hold the HI-EFFICIENCY button and then press the SELECT button. Keep the buttons pressed for at least 2 seconds, after which time two beeps will sound and the screen on the right above will appear. -
Page 27: Machine Status Screen
517794B 14.1.2 Machine Status Screen In the top half of the screen it displays the following information. Size is the size of machine, (650mm = Large) HVDC is for on line testing in the factory. WL displays the water level in mm. T is the actual temp of the inlet chamber water. -
Page 28: Recycle Feature
517794B With the RESTART feature on: If a fault occurs in the machine, the diagnostic system will detect it. However, instead of displaying a fault code immediately, the machine will try to RESTART. If the fault was only of temporary nature, the machine will restart and finish the cycle. If there is a continuous fault the machine will try to RESTART a number of times. -
Page 29: Data Download
517794B 14.3 Data Download To activate the data download, enter the diagnostic mode (refer to Section 14), then press the START/PAUSE button. The LED above the High Efficiency button will be on and flickering. LED for data download Place the download pen over this LED and follow the instructions supplied with the data download program. -
Page 30: Wiring Diagram
517794B WIRING DIAGRAM... -
Page 31: Service Procedures
517794B SERVICE PROCEDURES Note: Prior to carrying out any service procedures, ensure that the machine has been isolated from the power supply. 17.1 Accessing Components In Console Area (a) Remove the lid. (b) Remove the two screws at the rear of the console securing the console to the top deck. (c) Tilt the console forward. -
Page 32: Raising Top Deck
517794B 17.4 Raising Top Deck Remove the lid. Carefully remove the two lid buffers from the front side top of the deck by levering upwards, taking care not to damage the top deck. Remove the two screws under the buffers securing the top deck to the cabinet. -
Page 33: Removal Of Dispensing Hoses
517794B 17.7 Removal Of Dispensing Hoses Follow procedures to raise the top deck (refer to Section 17.4). Follow procedures for removal of inlet valve assembly. Remove hose clips from the hoses located at the front of the top deck. Remove the hose(s). Reassembly: Refit in the reverse manner, ensuring each hose is fitted to the correct position and that they are... -
Page 34: 17.10 Removal Of Low Profile Agitator
517794B The top of the nozzle must be dry before refitting the neck ring Reassembly: Prior to fitting the neck ring, ensure the recirc nozzle is fitted to the outer bowl correctly. Fit the straps to the neck ring. Fit the neck ring to the outer bowl, ensuring that all the clips are engaged. -
Page 35: Removal Of Pump Hood & Cap (Impeller & Flapper Inspection)
517794B Reassembly: Refit the agitator, ensuring that it is pushed as far down as it can go. Insert the bolt into the shaft. Hand tighten until the first click has been felt, then using the open-ended or adjustable spanner, tighten a further 4 more clicks. Over tightening will cause excessive damage to the castellations on the agitator, and may... -
Page 36: Removal Of Stator (Smartpump™) - Testing / Inspection Purposes Only
517794B 17.12 Removal of Stator (SmartPump™) – Testing / Inspection Purposes Only Note: The stator is not available as a separate spare part, Use this procedure for inspecting and testing the stator only. (a) Lay machine down or against a wall. Alignment arrows leaning the machine against a wall, ensure that the machine is stable, and take... -
Page 37: 17.14 Removal Of Recirculation Hose
517794B Reassembly: (a) Fit the Housing Pump o’ring to the Outer Bowl. When replacing or refitting the pump housing, a new o’ring must be fitted. (b) Refit the Pump Housing. Note: This should be done with the Pump Cap & Hood in place, but it is not essential. (c) Press the pump to its home position as much as possible by hand, then use the bolts to evenly torque the pump down. -
Page 38: Specialised Service Procedures
517794B SPECIALISED SERVICE PROCEDURES 18.1 Pump Housing - Stripped Bolt Procedure On the pump housing there are two bolt hole positions. These positions are used when the housing is assembled to the base of the outer bowl in the factory. On servicing, should either or both bolts strip in the outer bowl, the other ‘blanked off’... - Page 39 517794B (a) Follow procedures for removal of pump hood & cap (refer to Section 17.11). (b) Spin the impeller by hand (it should be free to turn in both directions). If there is any resistance, try and locate the object. If the object can be located, remove and recheck for free movement of the impeller.
- Page 40 517794B...
-
Page 41: Notes
517794B NOTES...