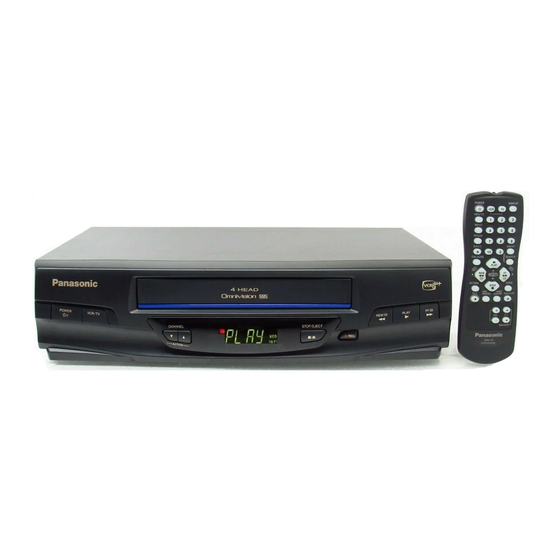
Panasonic PVQ-V200 Service Manual
Hide thumbs
Also See for PVQ-V200:
- User manual (36 pages) ,
- Operating instructions manual (36 pages) ,
- Service manual (2 pages)
Advertisement
Quick Links
PVQ-V200 / PV-V4020 / VHQ-400 / VHQ-40M / PV-V4520 / PV-
SPECIFICATIONS
2000 Matsushita-Kotobuki Electronics Industries LTD. All rights
reserved. Unauthorized copying and distribution is a violation of
law.
1. SAFETY PRECAUTIONS
GENERAL GUIDELINES
1. IMPORTANT SAFETY NOTICE
ORDER NO. MKE0001000C1
Video Cassette Recorder
B3
V4540
Advertisement

Related Manuals for Panasonic PVQ-V200


Summary of Contents for Panasonic PVQ-V200
- Page 1 ORDER NO. MKE0001000C1 Video Cassette Recorder PVQ-V200 / PV-V4020 / VHQ-400 / VHQ-40M / PV-V4520 / PV- V4540 SPECIFICATIONS 2000 Matsushita-Kotobuki Electronics Industries LTD. All rights reserved. Unauthorized copying and distribution is a violation of law. 1. SAFETY PRECAUTIONS GENERAL GUIDELINES...
- Page 2 There are special components used in this equipment which are important for safety. These parts are marked by in the Schematic Diagrams, Circuit BoardLayout, Exploded Views and Replacement Parts List. It is essential that these critical parts should be replaced with manufacturer's specified parts to prevent shock, fire or other hazards.
-
Page 3: Prevention Of Electro-Static Discharge
2. Connect a 1.5 k , 10 W resistor, in parallel with a 0.15 capacitor, between each exposed metallic part on the set and a good earth ground, as shown in figure 1. 3. Use an AC voltmeter, with 1 k /V or more sensitivity, to measure the potential across the resistor. - Page 4 reasons prior to applying power to the unit under test. 2. After removing an electrical assembly equipped with ES devices, place the assembly on a conductive surface such as aluminum foil, to prevent electrostatic charge buildup or exposure of the assembly.
-
Page 5: Service Notes (Please Read)
4. SERVICE NOTES (PLEASE READ) 4.1. SERVICE NOTES 4.1.1. SIMPLIFIED FAULT FINDING DATA Simplified Self-Diagnostic System facilitates finding the cause of the fault. A 4 digit fault code will be displayed in F.I.P. The Simplified Fault finding data is stored in the Memory IC (IC6005). This data is cleared after it is displayed, and then the POWER button is pressed back on. - Page 6 Fig. 1-5 Fig. 1-6 3. While pressing VCR/TV button on VCR with power turned off, press any operation button on either VCR, or remote to detect that a key has been pressed. The 1st digit changes to "0" only when key is detected. Fig.
- Page 7 4. When 1 to 4 listed in Lock code occurs, Lock data will be stored into EEPROM IC (Current data, Last Lock data, and the Last Lock data before last). Lock data displayed in F.I.P. will be changed by pressingCH DOWN button. Fig.
- Page 8 After replacing the Cylinder Unit, press COUNTER RESET button on remote in this mode. Only Total lapsed time with Cylinder rotation (hour) will be cleared to 0. 2. To release from Usage Screen Mode, press any operation button on VCR in this mode. VCR will return to normal operation mode. 4.1.3.
- Page 9 Note: 1. Alternative method in Service Position (2) 2 piled VHS Cassette Tapes can be substituted for the Frame as shown in Fig. 2-2. 2. When recording in Service Position (2), short the S-Tab SW. Pins on foil side of Main C.B.A. to turn this SW. on. Fig.
- Page 10 DISASSEMBLY/ASSEMBLY PROCEDURES. 4.1.5. HOT CIRCUIT Primary circuit exists on the Main C.B.A. This circuit is identified as " HOT " on the C.B.A. and in the Service Manual. Use extreme care to prevent accidental shock when servicing. 4.1.6. SERVICE MODE In order to inhibit detection of the Supply&...
- Page 11 To release from this mode, press PLAY or STOP button. 4.1.8. CAUTION FOR INSTALLATION OF FRONT PANEL ASS'Y CAUTION: Opener Lever may be damaged when Front Panel Ass'y is installed, with Cassette Door-Lid of Front Panel Ass'y and Opener Lever of Cassette Up Ass'y set incorrectly. Install the Front Panel Ass'y as follows: 1.
- Page 12 (Electrical Method) Apply+10.0 V DC Power Supply to the Loading Motor terminals. Loading DC+ to Portion "a," DC - to Portion "b" Unloading DC - to Portion "a," DC+ to Portion "b" CAUTION: Before applying DC Power Supply, be sure to disconnect the Motor Leads from the Connector P2503.
- Page 13 4.1.10. HOW TO REMOVE A JAMMED TAPE CAUTION: Wiper Arm Unit may be damaged or its spring may be out of place when the jammed tape is removed by force. Remove a jammed tape as follows: 4.1.10.1. Manual Method When a tape jam is encountered, check the tape loading condition and use the following procedure to remove a tape jam.
- Page 14 2. Remove the tape from the tape path. 3. Rewind the tape into the cassette by rotating the Center Clutch Unit counterclockwise. 4. Unhook Spring (A) of the Drive Rack Arm. 5. Remove Screw (A). 6. Lift the Cassette Up Ass'y. While pulling the Cassette Up Ass'y out far enough so that it clears the Drive Rack Arm, slide the Drive Rack Unit as indicated by the arrow to remove the cassettetape from the Cassette Up Ass'y.
- Page 15 2. Perform Step 2 through Step 7 of Method -1. 4.1.10.1.3. Method -3: 1. Perform Step 2 through Step 7 of Method -1. Note: After repairing mechanical trouble, make sure that all gear alignments are correct, especially the Wiper Arm Unit and Drive Rack Unit of Cassette Up Ass'y.
- Page 16 Unit counterclockwise. 5. Eject the cassette by applying+10.0 V DC Power Supply again. 4.1.11. BLACK SCREWS ON THE CHASSIS Black Screws are used on the Mechanism Chassis to identify screws that require adjustment. 4.1.12. HOW TO RESET ALL VCR MEMORY FUNCTIONS To reset (clear) the select language, channel auto set and set clock functions to their initial power on condition (power on, nocassette inserted), hold down the PLAY and CH UP buttons on the unit togetherfor more than 5 seconds.
- Page 17 (266°F ~ 302°F) (130°C ~150°C) for about 2 minutes. Note: A. Leadless components must not be reused after removal. B. Excessive mechanical stress and rubbing of the component electrode must be avoided. 2. Removing the leadless component Grasp the leadless component body with tweezers and alternately apply heat to both electrodes.
- Page 18 board. 4.1.17. MODEL NO. IDENTIFICATION MARK Use Marks shown in the chart below to distinguish the different models included in this Service Manual. 4.2. IC, TRANSISTOR AND CHIP PART INFORMATION 4.2.1. HOW TO READ THE IDENTIFICATION MARK OF CHIP COMPONENTS.
-
Page 19: Disassembly/Assembly Procedures
4.2.2. HOW TO READ THE VALUES OF THE CYLINDRICAL TYPE CHIP COMPONENTS. The widest color band must be read first for value. 1. RESISTOR There are two types (ERD10LLJ... and ERD10TLJ...) of chip parts. A. ERD10LLJ: Refer to above type. B. - Page 20 5.1.2. Disassembly Method How to read chart shown above: A:Order of Procedure steps. When reassembling, perform steps(s) in reverse order. These numbers are also used as the identification (location) No. of parts in Figures. B: Part to be removed or installed. C: Fig.
- Page 21 5.1.2.1. Notes in chart 1. Installation of Top Cover Install the Top Cover front portion at a downward angle so that the tab on the Front Panel Ass'y fits into the hole in the Top Cover. Then, lower the rear portion into place and tighten 2 Screws (S-1) and 2 Screws (S-2).
- Page 22 Lever of Cassette Up Ass'y set incorrectly. A. When installing the Front Panel Ass'y, swing the Cassette Door- Lid all the way open until the Cassette Door tab clears the Opener Lever. B. Make sure that all locking tabs are aligned properly. Then, press the Front Panel straight in.
- Page 23 Fig. D4 C. Install the Mechanism Chassis and Cassette Up Ass'y straight onto the Main C.B.A. so that the Sensor LED clears the hole in the Mechanism Chassis and that 5 Connectors (P6201, P6202, P3551, P4001,and P4451 ( Model: E,F)) are aligned and seated securely.
- Page 24 5.2.2. Inner Parts Location Fig. J1-1...
- Page 25 5.2.3. EJECT Position Confirmation Fig. J1-2...
- Page 26 5.2.4. Grounding Plate Unit, Full Erase Head, and Cylinder Unit Fig. J2-1...
- Page 27 5.2.4.1. Reassembly Notes 1. Adjustment of Grounding Plate Unit A. After installing, make sure that the Grounding Plate Unit, on the top side of mechanism chassis, is positioned on the front side of the Cylinder shaft so that the center line of the plateis just less than 1.0 mm measured from the center of the Cylinder shaft.
- Page 28 2. After replacing the Cylinder Unit, clear the Total lapsed time with Cylinder rotation (hour) to 0. Refer to "USAGE SCREEN MODE" in SERVICE NOTES. 5.2.5. Capstan Belt, Support Angle, Intermediate Gear B, and Main Cam Gear Fig. J3-1...
- Page 29 5.2.5.1. Reassembly Notes 1. Alignment of Main Cam Gear, Drive Rack Arm, and Main Rod A. Confirm that the hole on Main Rod is a Through Hole with a hole on chassis. B. Confirm that the hole on Drive Rack Arm is a Through Hole with a hole on chassis.
- Page 30 2. Confirmation/Alignment of Intermediate Gear B, Main Cam Gear, and Intermediate Gear A A. Confirm that the Hole A on Lift Gear is a Through Hole with a hole on chassis. B. Confirm that the hole on Intermediate Gear A is aligned with the hole on Lift Gear.
- Page 31 Hole with Hole A on Support Angle in EJECT mode. The each mode Hole on Main Cam Gear should be a Through Hole with Hole B on SupportAngle in each mode. Fig. J3-5 4. Main Cam Gear Kit A. Main Cam Gear is supplied as a Main Cam Gear Kit only (Kit No.
- Page 32 Fig. J4-1 5.2.6.1. Reassembly Notes 1. Installation of Center Clutch Unit A. Fit the Center Clutch Unit into the Changing Gear. Fig. J4-2 5.2.7. Reel Gear and Main Rod Fig. J5-1...
- Page 33 5.2.7.1. Reassembly Notes 1. Alignment of Main Rod and T Loading Arm Unit A. Align the Gear of T Loading Arm Unit with Gear of Main Rod. Confirm that the Hole on Main Rod is a Through Hole with a hole on chassis.
- Page 34 5.2.8.1. Reassembly Notes 1. Application of Silicon Grease CAUTION: When installing the IC2501 (AN3845SC) or Capstan Stator C.B.A., be sure to apply Silicon Grease (VFK1301) as shown. Be careful not to touch other parts with greased portion to prevent grease depletion.
- Page 35 2. Installation of Capstan Rotor Unit and Oil Seal A. Install the 2 Oil Seals into the Capstan Holder Unit. Then, insert the Capstan Rotor Unit Shaft into the hole of the Capstan Holder Unit so that shaft passes through 2 Oil Seals. Be carefulnot to scratch the Shaft or Capstan Holder Unit.
- Page 36 5.2.9.1. Reassembly Notes 1. Alignment of T Loading Arm Unit and S Loading Arm Unit A. Install the S Loading Arm Unit onto the chassis. B. Install the T Loading Arm Unit so that the hole on T Loading Arm Unit is aligned with the hole on S Loading Arm Unit. C.
- Page 37 Note: 1. Only for early products; the Assist Spring is used. When servicing the Assist Spring or the Tension Arm Unit, replace only the Tension Arm Unit with a new one and remove the Assist Spring. 5.2.10.1. Reassembly Notes 1. How to distinguish between S Reel Table and T Reel Table Fig.
- Page 38 5.2.12. Opener Piece, Drive Rack Arm, Pinch Arm Unit, P5 Arm Unit, and Intermediate Gear A Fig. J10-1 5.2.12.1. Reassembly Notes 1. Installation/Alignment of Intermediate Gear A, Lift Gear and P5 Arm Unit A. Rotate the Lift Gear so that Hole A on Lift Gear is a Through Hole with a hole on chassis.
- Page 39 Fig. J10-2 2. Installation of Opener Piece A. Install the Opener Piece so that the slot of the Opener Piece is inserted to the Pin of Pinch Arm Unit Fig. J10-3 5.2.13. Motor Block Unit, Audio Control Head Unit, Lift Gear, Capstan Holder Unit, and Tension Arm Boss Fig.
- Page 40 5.3. CASSETTE UP ASS'Y SECTION 5.3.1. Top Plate, Wiper Arm Unit, and Holder Unit Fig. K1-1...
- Page 41 5.3.1.1. Reassembly Notes 1. Alignment of Wiper Arm Unit and Drive Rack Unit A. Slide the Drive Rack Unit to the far right as indicated by the arrow. B. Install the Wiper Arm Unit so that the hole on the Wiper Arm Unit is aligned with the hole on the Drive Rack Unit.
- Page 42 2. Installation of Holder Unit A. Turn the Wiper Arm Unit so that the grooves on each end are aligned with the each groove on Side Plate L and R. B. Insert Holder Unit boss (A) and (B) into the grooves as shown in Fig.
-
Page 43: Adjustment Procedures
5.3.2. Opener Lever and Drive Rack Unit Fig. K2 6. ADJUSTMENT PROCEDURES 6.1. SERVICE FIXTURES AND TOOLS 6.2. MECHANICAL ADJUSTMENT 6.2.1. CLEANING PROCEDURE FOR THE UPPER CYLINDER UNIT 1. While slowly turning the Upper Cylinder Unit counterclockwise by hand, gently rub the Video Heads with a Head Cleaning Stick (VFK27) moistened with Ethanol. - Page 44 Fig. M1 Note: A. Do not rub vertically or apply excess pressure to the Video Heads. Do not turn the Upper Cylinder Unit clockwise while cleaning. B. After cleaning, use a Dry Head Cleaning Stick (VFK27) to remove any Ethanol remaining on the cylinder tape path. Otherwise, tape damage will occur.
- Page 45 Fig. M2-1 3. If the reading is out of specification, make sure that there is no dust or foreign material between the Brake Pad of Tension Control Arm Unit and the S Reel Table. After cleaning, the reading of tension measurement is still out of specification, replace the Tension Arm Unit and the Tension Control Arm Unit.
- Page 46 If the FG Signal is not properly picked up, Servo Operation cannot be achieved. Equipment Required: Oscilloscope Specification: 0.1 mm ~ 0.13 mm 1. Remove the VCR Chassis Unit and then place it upside down. 2. Remove the Main C.B.A. 3.
- Page 47 1. Place the unit in Service Position (2). Refer to "SERVICE POSITION " in SERVICE NOTES. 2. Supply a Video Signal to the video input jack. 3. Insert a cassette tape and place the unit in SLP recording mode. 4. Connect the oscilloscope to Pin 9 of P6201 on the Main C.B.A. Confirm that the signal level is greater than 20 mV [P-P].
- Page 48 Post Adjustment Driver (VFK0329) 1. Insert the alignment tape. 2. Press and hold VCR/TV button and CH DOWN buttons on VCR together over 5 seconds in power off condition. The power comes on and the unit goes into service mode. 3.
- Page 49 7. After adjustment, confirm that the tape travels without curling at P2 and P3 posts. Fig. M4-3 8. To release from Tracking center mode, press PLAY or STOP button. 6.2.2.2.2. AUDIO CONTROL HEAD TILT ADJUSTMENT Purpose: To confirm that the tape runs smoothly. In particular, confirm that the tape properly picks up the Audio Signal at the upper part of the head and the Control Signal at the lower part of the head.
- Page 50 6.2.2.2.3. AUDIO CONTROL HEAD HEIGHT ADJUSTMENT The height of the Audio Control Head replacement part is preset at the factory. Purpose: To be sure the tape runs properly along the Control Head. Symptom of Misadjustment: If the control signal is not properly picked up, Servo Operation cannot be achieved.
- Page 51 Symptom of Misadjustment: If the position of the Audio Control Head is not properly adjusted, the Audio S/N Ratio is poor. 1. Connect the oscilloscope to the audio output jack on the rear side of the deck. 2. Play back the 6 kHz Monaural Audio portion of the alignment tape. 3.
- Page 52 fixture either clockwise or counterclockwise so that the envelope is at maximum. Fig. M8 7. Tighten Black Screw (D). 8. To release from Tracking center mode, press PLAY or STOP button. Note: Old type of H-Position Adjustment Driver (VFK0136) can be used for this adjustment.
- Page 53 6.3.4. PG SHIFTER ADJUSTMENT Purpose: Determine the Video Head Switching Point during Playback. Symptom of Misadjustment: May cause Head Switching Noise and/or Vertical Jitter. Test Point: TP3001 (Main C.B.A.), TP6205 (Main C.B.A.) Specification: T= 6 H±0.5 H (0.38 ms±0.03 ms) Mode: SP Playback Equipment:...
- Page 54 3. Connect the channel-1 scope probe to TP3001 and the channel-2 scope probe to TP6205. Used TP6205 as a trigger. 4. Adjust value so that the trailing edge of the head switching pulse is placed 6 H±0.5 H (0.38 ms±0.03 ms) before the start of the vertical sync pulse by pressing CH UP and CH DOWN buttonson the remote control.
-
Page 55: Schematic Diagrams
7. SCHEMATIC DIAGRAMS 7.1. SCHEMATIC DIAGRAM AND CIRCUIT BOARD LAYOUT NOTES 7.2. MAIN I (SYSTEM CONTROL/SERVO) SCHEMATIC DIAGRAM 7.3. MAIN II (SIGNAL PROCESS/AUDIO) SCHEMATIC DIAGRAM 7.4. MAIN III (POWER SUPPLY) SCHEMATIC DIAGRAM 7.5. MAIN IV (Hi-Fi) SCHEMATIC DIAGRAM (E, F) 7.6. -
Page 56: Circuit Board Layout
7.7. MAIN VI (CYLINDER DRIVE/ADVANCE) SCHEMATIC DIAGRAM 7.8. HEAD AMP (A)/ AUDIO CONTROL HEAD SCHEMATIC DIAGRAM 7.9. HEAD AMP (B, C, D)/ AUDIO CONTROL HEAD SCHEMATIC DIAGRAM 7.10. Hi-Fi AUDIO/VIDEO HEAD AMP (E, F)/ AUDIO CONTROL HEAD SCHEMATIC DIAGRAM 7.11. CAPSTAN STATOR SCHEMATIC DIAGRAM 7.12. - Page 57 MAIN C.B.A. Q1080 TP1080 TP1081 D1082 +22V SW+22V REGULATOR (FROM IC6001(84)) SW+23V ON (H) Q1081 Q1082 NOT USED D1086 +14V REGULATOR (PVQ-V200,PV-V4020, PV-V4520,PV-V4540) (FROM IC6001(86)) F1001 L1001 T1001 Q1083 SW+14V ON (H) 125V/1.6A AC CORD P1001 D1001 C1011 TP1002 D1005 LINE...
- Page 58 REC VIDEO SIGNAL PB VIDEO SIGNAL MAIN C.B.A. HEAD AMP C.B.A. (FOR 4HEAD MODEL) J6003 (FROM IC6001(23)) HEAD SW PULSE IC3501 (HEAD AMP) UHF/VHF TUNER/TV (WITH 2 HEAD) TP3501 DEMODULATOR UNIT (FROM IC6001(98)) ROTARY SW (WITH 4 HEAD) VIDEO VIDEO LP/SLP IC3101 P3503...
- Page 59 REC AUDIO SIGNAL PB AUDIO SIGNAL MAIN C.B.A. UHF/VHF TUNER/TV DEMODULATOR UNIT AUDIO AUDIO Q4001 (WITHOUT Hi-Fi AUDIO) Q4002 C4018 R4018 Q4003 IC3001 (AUDIO PROCESS) AUDIO CONTROL HEAD UNIT (WITHOUT AGC DET REC-OFF HEAD AMP C.B.A TUNER FRONT A/V JACK) LINE J4002 AUDIO...
- Page 60 REC AUDIO SIGNAL PB AUDIO SIGNAL MAIN C.B.A. UHF/VHF TUNER/TV DEMODULATOR UNIT J4204 (TO IC6001(82)) (FROM IC6001(26)) MTS MODE 3.58MHz Q4201 J4203 (TO IC6001(60)) AUDIO (FROM IC3001(79)) BUFFER AUDIO DEFEAT(H) 3.58MHz (TO IC6001(29)) (WITH SPATIALIZER) Hi-Fi PB(H) R4227 NOT USED HEAD AMP C.B.A.
- Page 61 CAPSTAN STATOR C.B.A. MAIN C.B.A. IC2501 (LOADING MOTOR DRIVE) IC6001 (SYSTEM CONTROL MICROCONTROLLER) P2502 P6201 LOADING MOTOR SW6002 (MODE SELECT SWITCH) FORWARD(H) PIN NO. OF IC6001 LOADING MOTOR P2502 P6201 TP6019 LOADING MODE (97) (96) (95) REVERSE(H) MOTOR MODE SW POSITION C FF/REW P2503 TP6018...
- Page 62 AUDIO CONTROL HEAD UNIT HEAD AMP C.B.A. MAIN C.B.A. TP6206 IC6001 (SERVO MICROCONTROLLER) TP6003 P4092 P4091 P2601 P6202 (FROM IC3001(40)) CONTROL REC CTL ENVELOPE ENVELOPE P4092 P4091 P2601 P6202 HEAD DETECTOR VOLTAGE PB-ON NEGATIVE PB CTL SLICER CAPSTAN STATOR C.B.A. V-LOCK 1/2 Vcc (TO IC3001(13))
- Page 63 MAIN C.B.A. IC6001 IC6301 DISPLAY TUBE Q6301 (SYSTEM CONTROL MICROCONTROLLER ) (INDICATOR PANEL CONTROL) SCAN 1 SCAN 2 Q6302 PIN 93 PIN 94 GRID DATA 8 VCR/TV Q6303 /REV PIN40 KEY DATA 8 DATA 9 PLAY Q6304 KEY DATA 9 PIN 41 DATA 10 KEY DATA 10...
- Page 64 IMPORTANT SAFETY NOTICE: Main C.B.A. replacement note for models PVQ-V200, PV-V4020, and PV-V4520: VEPS6061AA or VEPS6061AD for PVQ-V200, VEPS6060GA or VEPS6060GB for PV-V4020, VEPS6060HA or VEPS6060HC for PV-V4520 are used as Main C.B.A. REPLACE ONLY WITH THE SAME TYPE 1.6A 125V FUSE.
- Page 65 IMPORTANT SAFETY NOTICE: FOR PROPER PARTS CONTENT FOR THE MODEL YOU ARE SERVICING, VEPS6061AA or VEPS6061AD for PVQ-V200, VEPS6060GA or VEPS6060GB for PV-V4020, VEPS6060HA or VEPS6060HC for PV-V4520 are used as Main C.B.A. REPLACE ONLY WITH THE SAME TYPE 1.6A 125V FUSE.
- Page 66 L3502 L3503 L3504 L3505 R3507 OF MODELS & MARKS L3502 P3503 TP3501 P3502 P3503 L3503 MODEL MARK P3502 TP3501 PVQ-V200 PV-V4020 VHQ-400 VHQ-40M C3501 P2601 P3501 PV-V4520 P2601 P4401 P3501 PV-V4540 VJBS5034 VJBS5032 NOTE: FOR SCHEMATIC DIAGRAM AND CIRCUIT BOARD LAYOUT NOTES, REFER TO BEGINNING OF SCHEMATIC SECTION.
- Page 67 MAIN C.B.A. COMPARISON CHART P4092 P4091 OF MODELS & MARKS P4091 (4 Pins) MODEL MARK PVQ-V200 PV-V4020 VHQ-400 Connector No. on Main C.B.A. VHQ-40M PV-V4520 PV-V4540 Not Used Note : Refer to item 3 of Schematic Diagram Notes for mark "Z".
- Page 68 Main C.B.A. replacement note for models PVQ-V200, PV-V4020, and PV-V4520: NOTE: MODEL MARK VEPS6061AA or VEPS6061AD for PVQ-V200, VEPS6060GA or VEPS6060GB for PV-V4020, VEPS6060HA or VEPS6060HC for PV-V4520 are used as Main C.B.A. FOR SCHEMATIC DIAGRAM AND CIRCUIT BOARD LAYOUT NOTES, DATA 8 VCR/TV However, for parts standardization, only VEPS6061AA for PVQ-V200, VEPS6060GA for PV-V4020 and VEPS6060HA for PV-V4520 are supplied as a replacement.
- Page 69 PVQ-V200 REFER TO BEGINNING OF SCHEMATIC SECTION. for products using Type-B. PV-V4020 PVQ-V200, PV-V4020, and PV-V4520 Either Type-A or B is used as a AC cord for these models. VHQ-400 CAUTION: FOR CONTINUED PROTECTION AGAINST FIRE HAZARD, IMPORTANT SAFETY NOTICE:...
- Page 70 COMPARISON CHART OF MODELS & MARKS MODEL MARK PVQ-V200 PV-V4020 VHQ-400 REC VIDEO SIGNAL REC AUDIO SIGNAL JK3002 VHQ-40M U6301 LNM144AP01 (LED DISPLAY PANEL) AUDIO IN VIDEO PV-V4520 NOTE: Hi-Fi TIMER FOR SCHEMATIC DIAGRAM AND CIRCUIT BOARD LAYOUT NOTES, PV-V4540 REFER TO BEGINNING OF SCHEMATIC SECTION.
- Page 71 COMPARISON CHART NOTE: OF MODELS & MARKS FOR SCHEMATIC DIAGRAM AND CIRCUIT BOARD LAYOUT NOTES, MODEL MARK REFER TO BEGINNING OF SCHEMATIC SECTION. PVQ-V200 PV-V4020 VHQ-400 VHQ-40M PV-V4520 PV-V4540 Not Used CYLINDER SERVO CAPSTAN SERVO REC AUDIO SIGNAL PB AUDIO SIGNAL...
- Page 72 COMPARISON CHART OF MODELS & MARKS MODEL MARK PVQ-V200 PV-V4020 NOTE: FOR SCHEMATIC DIAGRAM AND CIRCUIT BOARD LAYOUT NOTES, VHQ-400 REFER TO BEGINNING OF SCHEMATIC SECTION. VHQ-40M PV-V4520 PV-V4540 Not Used AUDIO CONTROL HEAD P.C.B. REC AUDIO SIGNAL PB AUDIO SIGNAL...
- Page 73 COMPARISON CHART OF MODELS & MARKS MODEL MARK PVQ-V200 NOTE: PV-V4020 FOR SCHEMATIC DIAGRAM AND CIRCUIT BOARD LAYOUT NOTES, VHQ-400 REFER TO BEGINNING OF SCHEMATIC SECTION. VHQ-40M PV-V4520 PV-V4540 Not Used AUDIO CONTROL HEAD P.C.B. REC AUDIO SIGNAL PB AUDIO SIGNAL...
- Page 74 COMPARISON CHART OF MODELS & MARKS MODEL MARK PVQ-V200 PV-V4020 NOTE: FOR SCHEMATIC DIAGRAM AND CIRCUIT BOARD LAYOUT NOTES, VHQ-400 REFER TO BEGINNING OF SCHEMATIC SECTION. VHQ-40M PV-V4520 PV-V4540 Not Used AUDIO CONTROL HEAD P.C.B. REC AUDIO SIGNAL PB AUDIO SIGNAL...
- Page 75 COMPARISON CHART NOTE: OF MODELS & MARKS FOR SCHEMATIC DIAGRAM AND CIRCUIT BOARD LAYOUT NOTES, MODEL MARK REFER TO BEGINNING OF SCHEMATIC SECTION. PVQ-V200 PV-V4020 VHQ-400 NOTE: VHQ-40M WHEN INSTALLING THE IC2501(AN3845SC) OR CAPSTAN STATOR C.B.A., BE SURE PV-V4520 TO APPLY SILICON GREASE(VFK1301). REFER TO "CAPSTAN STATOR C.B.A."...
- Page 76 HAVE FOR SCHEMATIC DIAGRAM AND CIRCUIT BOARD LAYOUT NOTES, SPECIAL CHARACTERISTICS IMPORTANT FOR SAFETY. REFER TO BEGINNING OF SCHEMATIC SECTION. MODEL MARK WHEN REPLACING ANY OF THESE COMPONENTS, PVQ-V200 USE ONLY THE SPECIFIED PARTS. PV-V4020 VHQ-400 VHQ-40M PV-V4520 PV-V4540 Not Used A,B,C,D HEAD AMP C.B.A.
- Page 77 COMPARISON CHART OF MODELS & MARKS NOTE: FOR SCHEMATIC DIAGRAM AND CIRCUIT BOARD LAYOUT NOTES, MODEL MARK REFER TO BEGINNING OF SCHEMATIC SECTION. PVQ-V200 REC VIDEO SIGNAL PB VIDEO SIGNAL REC AUDIO SIGNAL CYLINDER SERVO PV-V4020 PB AUDIO SIGNAL VHQ-400...
- Page 78 IC3001 VIDEO/AUDIO PROCESS IC-DETAIL BLOCK DIAGRAM, AN3479FBP-A REC VIDEO SIGNAL PB VIDEO SIGNAL REC AUDIO SIGNAL PB AUDIO SIGNAL VREG TUNER I C BUS COMPOSITE LINE2 LINE1 3.58MHz BURST CHROMA UP/DOWN PHASE COMPONENT AGC DET COMPEN- COMPONENT COLOR SATOR KILLER ARTIFICIAL Y/C MIX 2FSC...
- Page 79 COMPARISON CHART OF MODELS & MARKS MODEL MARK PVQ-V200 NOTE: PV-V4020 FOR SCHEMATIC DIAGRAM AND CIRCUIT BOARD LAYOUT NOTES, REFER TO BEGINNING OF SCHEMATIC SECTION. VHQ-400 VHQ-40M PV-V4520 PV-V4540 Not Used REC AUDIO SIGNAL PB AUDIO SIGNAL TO MAIN I...
- Page 80 IC4201 Hi-Fi AUDIO MTS/SAP PROCESS IC-DETAIL BLOCK DIAGRAM, AN3662FBP REC AUDIO SIGNAL PB AUDIO SIGNAL A-MUTE(H) MUTE DEMODULATOR I2C BUS NOISE REDUCTION /COMPRESSOR /EXPANDER PILOT DETECTOR SWITCHING NOISE ST PLL COMPENSATOR STEREO FILTER DEMODULATOR PB LPF DEMODULATOR LIMITER 75us DE-EMPHASIS R CH REC LPF MUTE...
- Page 81 NOTE: FOR SCHEMATIC DIAGRAM AND CIRCUIT BOARD LAYOUT NOTES, REFER TO BEGINNING OF SCHEMATIC SECTION. MAIN C.B.A. (POWER SUPPLY/VIDEO/AUDIO SECTION) MODE PLAY MODE PLAY MODE PLAY MODE PLAY MODE PLAY MODE PLAY MODE PLAY MODE PLAY MODE PLAY PIN NO. PIN NO.
- Page 82 NOTE: FOR SCHEMATIC DIAGRAM AND CIRCUIT BOARD LAYOUT NOTES, REFER TO BEGINNING OF SCHEMATIC SECTION. MAIN C.B.A. (SYSTEM CONTROL/SERVO SECTION) CAPSTAN STATOR C.B.A. MODE PLAY STOP MODE PLAY STOP MODE PLAY STOP MODE PLAY STOP MODE PLAY STOP MODE PLAY STOP MODE PLAY STOP PIN NO.
- Page 83 OF MODELS & MARKS PIN NO. PIN NO. PIN NO. PIN NO. PIN NO. PIN NO. PIN NO. PIN NO. PIN NO. MODEL MARK IC3501 IC3501 IC3501 PVQ-V200 PV-V4020 VHQ-400 VHQ-40M PV-V4520 PV-V4540 Not Used 11.8 11.8 11.8 11.9 12.0 11.9 12.0 11.9 12.0...
- Page 84 +280mVp-p +260mVp-p +1.000Vp-p +280mVp-p +240mVp-p +100.0mVp-p V1 +4.40Vp-p OF MODELS & MARKS MODEL MARK PVQ-V200 PV-V4020 VHQ-400 PIN 20 OF IC3001 CH1 TP3002 CH1 TP3002 CH1 TP3002 PIN 12 OF IC3001 PIN 71 OF IC3001 PIN 13 OF IC3001 CUE/REV...
- Page 85 HEAD AMP C.B.A. +5.00Vp-p +4.80Vp-p COMPARISON CHART +2.40Vp-p +5.00Vp-p +2.000Vp-p +100.50Vp-p +2.500VDC OF MODELS & MARKS MODEL MARK PVQ-V200 PV-V4020 VHQ-400 PIN 27 OF IC4201 TP6206 CH1 TP3501 REC SLP TP6205 REC/PB POWER ON CH1 PIN 33 OF IC3801 REC/PB...
- Page 86 10.2. MECHANISM (BOTTOM) SECTION...
- Page 87 10.3. CASSETTE UP COMPARTMENT SECTION...
- Page 88 10.4. CHASSIS FRAME AND CASING PARTS SECTION...
- Page 89 10.5. PACKING PARTS AND ACCESSORIES SECTION...
-
Page 90: Replacement Parts Lists
11. REPLACEMENT PARTS LISTS BEFORE REPLACING PARTS, READ THE FOLLOWING: 11.1. REPLACEMENT NOTES 11.1.1. General Notes 1. Use only original replacement parts:... - Page 91 To maintain original function and reliability of repaired units, use only original replacement parts which are listed with their part numbers in the parts list. 2. IMPORTANT SAFETY NOTICE Components identified by the sign have special characteristics important for safety. When replacing any of these components, use only the specified parts.
- Page 92 5. Main Cam Push Nut (Ref. No. 414) is not reusable. If removed, install a new one. 11.1.3. Electrical Replacement Notes 1. Item numbers with capital letter E (Example: E1, E2,...) in the Ref. No. column are shown in the exploded views. 2.
- Page 93 AC cord to Connector P1001. 11. Main C.B.A. replacement note for models PVQ-V200, PV-V4020, and PV-V4520: VEPS6061AA or VEPS6061AD for PVQ-V200, VEPS6060GA or VEPS6060GB for PV-V4020, VEPS6060HA or VEPS6060HC for PV- V4520 are used as Main C.B.A. However, for parts...
- Page 94 are interchangeable. Only interchangeable part is supplied as a replacement. 12. EEPROM IC (IC6005), Main C.B.A. replacement note: After replacing EEPROM IC (IC6005) or Main C.B.A., be sure to perform the "PG SHIFTER ADJUSTMENT" in ELECTRICAL ADJUSTMENT procedures. 11.2. MECHANICAL REPLACEMENT PARTS LIST 11.2.1.
- Page 95 Ref. No. Part No. Part Name& Description Remarks VBSS0033 FULL ERASE HEAD VXKS0890 MOTOR BLOCK UNIT LSDB0045 TENSION ARM BOSS VXDS0212 CAPSTAN HOLDER UNIT LSMD0209 OPENER PIECE VVGS0009 MAIN CAM GEAR KIT LSDR0004 S REEL TABLE OR LSDR0002 S REEL TABLE LSDR0005 T REEL TABLE OR LSDR0003...
- Page 96 Ref. No. Part No. Part Name& Description Remarks VXLS1091 IDLER ARM UNIT VXPS0391 CAPSTAN ROTOR UNIT LSMA0387 STOPPER ANGLE LSMM0002 MAIN ROD VXLS1099 S LOADING ARM UNIT VXLS1098 T LOADING ARM UNIT LSDG0116 REEL GEAR LSDG0111 INTERMEDIATE GEAR B LSMA0423 SUPPORT ANGLE LSDV0007 CAPSTAN BELT SUQARE,RUBBER 2MM 2...
- Page 97 Ref. No. Part No. Part Name& Description Remarks LSQF0243 ( D) LSQF0192 ( F ) INFRARED REMOTE CONTROL UNIT LSSQ0207 ( A ) LSSQ0206 ( B ) LSSQ0209 ( C,D ) LSSQ0205 ( E ) LSSQ0217 ( F ) VJAS0212 VHF CONNECTING CABLE W/PLUG LSPN0153 FRONT CUSHION,STYROFOAM...
- Page 98 Ref. No. Part No. Part Name& Description Remarks VEPS6061AA MAIN C.B.A. E.S.D. RTL ( A ) VEPS6060GA MAIN C.B.A. E.S.D. RTL ( B ) VEPS6061GC MAIN C.B.A. E.S.D. RTL ( C ) VEPS6060GC MAIN C.B.A. E.S.D. RTL ( D ) VEPS6060HA MAIN C.B.A.
- Page 99 Ref. No. Part No. Part Name& Description Remarks Q1001 2SC4533LP.KT OR 2SC5130LF608 Q1002 2SD2259 Q1003 2SC4081T106R CHIP OR 2SD1819A(R,S) CHIP Q1004 2SA1037K146R CHIP OR 2SB709A(R,S) CHIP Q1005 2SA1576A106R CHIP OR 2SB1218ARS CHIP Q1051 2SD1581(T) OR 2SD2159(T) Q1052 2SC2412K1 CHIP OR 2SD601(R,S) CHIP Q1053 2SD2097TV2R...
- Page 100 OR 2SB709A CHIP DIODES Ref. No. Part No. Part Name& Description Remarks D1001 S1WBA60-4062 D1002 EG01V1 OR ERA18-04V3 OR RMPG06J6203 ( A ) EG01 OR ERA18-04 ( C ) D1003 ERA18-04V3 ( A ) ERA18-04 ( C ) D1005 EG01V1 OR ERA18-04V3 OR RMPG06J6203 ( A )
- Page 101 Ref. No. Part No. Part Name& Description Remarks OR 1SS133T D6325 MA165 OR 1SS119 OR 1SS133T D6326 MA165 OR 1SS119 OR 1SS133T RESISTORS Ref. No. Part No. Part Name& Description Remarks R1001 VRESC2TK275T +-10% 1/2W 2.7M ( A ) VRESC2TK275 +-10% 1/2W 2.7M OR VRESC2TK275C +-10% 1/2W 2.7M OR VRESC2TK275T +-10% 1/2W 2.7M...
- Page 102 Ref. No. Part No. Part Name& Description Remarks R1025 VRESE2TJ150 1/2W 15 R1051 ERJ6GEYJ122V MGF CHIP 1/10W 1.2K R1052 ERDS2TJ153 R1053 ERDS2TJ153 R1057 ERDS2TJ331 R1058 ERDS2TJ104 100K R1068 ERDS2T0 R2601 ERJ6GEYJ330V MGF CHIP 1/10W 33 R2602 ERJ6GEYJ330V MGF CHIP 1/10W 33 R2603 ERJ6GEYJ330V MGF CHIP 1/10W 33...
- Page 103 Ref. No. Part No. Part Name& Description Remarks R4014 ERJ6GEYJ472V MGF CHIP 1/10W 4.7K R4015 ERJ6GEYJ222V MGF CHIP 1/10W 2.2K R4016 ERJ6GEYJ471V MGF CHIP 1/10W 470 R4017 ERJ6GEYJ101V MGF CHIP 1/10W 100 R4018 ERJ6GEYJ392V MGF CHIP 1/10W 3.9K R4027 ERJ6GEY0R00V MGF CHIP 1/10W 0 R4028 ERJ6GEYJ332V...
- Page 104 R6074 ERDS2TJ272 2.7K Ref. No. Part No. Part Name& Description Remarks R6076 ERJ6GEYJ103V MGF CHIP 1/10W 10K R6077 ERJ6GEYJ102V MGF CHIP 1/10W 1K R6078 ERJ6GEYJ221V MGF CHIP 1/10W 220 R6079 ERJ6GEYJ221V MGF CHIP 1/10W 220 R6080 ERJ6GEYJ103V MGF CHIP 1/10W 10K R6081 ERJ6GEYJ104V MGF CHIP 1/10W 100K...
- Page 105 Ref. No. Part No. Part Name& Description Remarks C1001 ECKNTS103MF8 CERAMIC+-20% 250V 0.01 OR VCKSTQG103ZY CERAMIC+80%-20% 125V 0.01 OR VCKSUQD103MY CERAMIC+-20% 125V 0.01 ( A ) ECKATS103MF CERAMIC+-20% 250V 0.01 OR ECKETS103MF CERAMIC+-20% 125V 0.01 OR VCKSEKD103PZ CERAMIC+100%-0% 125V 0.01 OR VCKSEMD103PZ CERAMIC+100%-0% 125V 0.01 OR VCKST3G103MY CERAMIC+-20% 250V 0.01 OR VCKSU3D103MY CERAMIC+-20% 125V 0.01...
- Page 106 Ref. No. Part No. Part Name& Description Remarks C1006 ECKW2H221KB5 CERAMIC 500V 220P C1007 VCUSQAH224KB C CHIP 50V 0.22 C1009 VCYSBRE183KX CERAMIC 25V 0.018 C1010 ECUV1H103ZFN C CHIP+80%-20% 50V 0.01 C1011 ECA1HHG4R7I ELECTROLYTIC 50V 4.7V C1012 ECEA1PEE331 ELECTROLYTIC 18V 330 C1013 ECA1EM331B ELECTROLYTIC 25V 330...
- Page 107 Ref. No. Part No. Part Name& Description Remarks C2603 ECEA1EKA4R7 ELECTROLYTIC 25V 4.7 C2604 ECUV1C104KBN C CHIP 16V 0.1 C2605 ECUV1C104KBN C CHIP 16V 0.1 C2606 ECUV1C104KBN C CHIP 16V 0.1 C2607 ECUV1E104ZFN C CHIP+80%-20% 25V 0.1 C2608 ECUV1E104ZFN C CHIP+80%-20% 25V 0.1 C2609 ECUV1E104ZFN C CHIP+80%-20% 25V 0.1...
- Page 108 Ref. No. Part No. Part Name& Description Remarks C3105 ECUV1H103ZFN C CHIP+80%-20% 50V 0.01 C3106 ECUV1H103ZFN C CHIP+80%-20% 50V 0.01 C3108 ECUV1H102KBN C CHIP 50V 1000P C3109 ECEA0JKA101 ELECTROLYTIC 6.3V 100 C3302 ECUV1A105ZFV C CHIP+80%-20% 10V 1 C3303 ECUV1H121JCN C CHIP+-5% 50V 120P C3306 ECEA1HKAR47 ELECTROLYTIC 50V 0.47...
- Page 109 Ref. No. Part No. Part Name& Description Remarks C7001 ECEA0JKA101 ELECTROLYTIC 6.3V 100 C7005 ECUV1E183KBN C CHIP 25V 0.018 C7010 ECUV1H102KBN C CHIP 50V 1000P C7024 ECUV1H103KBN C CHIP 50V 0.01 COILS Ref. No. Part No. Part Name& Description Remarks L1001 ELF15N005AB LINE FILTER 0.5A 18M...
- Page 110 Ref. No. Part No. Part Name& Description Remarks P1001 LSJP0807 CONNECTOR 2P ( A ) P3551 LSJP0085 CONNECTOR 10P ( A ) VJPS0882 CONNECTOR 12P ( C ) P4001 VJSS0888 FE CONNECTOR 2P P6201 LSJP0089 CONNECTOR 12P P6202 LSJP0088 CONNECTOR 12P SWITCHES Ref.
- Page 111 Ref. No. Part No. Part Name& Description Remarks T1001 ETS28AD2J3NP ORETS28AD2J3PP OR VTPS0041-1 OR VTPS0041-2 ( A ) ETS28AD2J3NC OR ETS28AD2J3PC OR VTPS0041-1 OR VTPS0041-2 OR VTPS0042-1 OR VTPS0042-2 ( C ) T4101 EIQ7QF018Q JACKS Ref. No. Part No. Part Name& Description Remarks JK3001 LSJH0028...
- Page 112 Ref. No. Part No. Part Name& Description Remarks IC1001 PS2501-1-X IC, LINEAR ERROR V. DET OR 0N3131-R.KT IC, LINEAR ERROR V. DET OR 0N3131-S.KT IC, LINEAR ERROR V. DET IC2601 AN3808K IC, LINEAR CYLINDER MOTOR DRIVE IC3001 AN3479FBP-A IC, LINEAR VIDEO/AUDIO PROCESS IC3101 MN3885S IC, CCD 1H DELAY...
- Page 113 Ref. No. Part No. PartName& Description Remarks OR 2SB1218ARS CHIP Q4002 2SD1819A(R,S) CHIP Q4003 2SD1819A(R,S) CHIP Q4004 DTA114TU CHIP OR UN5115 CHIP Q4005 DTC114TU CHIP OR UN5215 CHIP ( E,F ) Q4006 DTC114TU CHIP OR UN5215 CHIP Q4007 DTC114TU CHIP OR UN5215 CHIP ( E,F )
- Page 114 Ref. No. Part No. Part Name& Description Remarks D1001 S1WBA60-4062 D1002 EG01V1 OR ERA18-04V3 OR RMPG06J6203 ( B,E,F ) EG01 OR ERA18-04 ( D ) D1003 ERA18-04V3 ( B,E,F ) ERA18-04 ( D ) D1005 EG01V1 OR ERA18-04V3 OR RMPG06J6203 ( B,E,F ) EG01 OR ERA18-04...
- Page 115 Ref. No. Part No. Part Name& Description Remarks ( D,F ) D3007 MA4051-M ZENER 5.1V OR 04AZ5.1ZTPA7 ZENER 5.1V ( D,F ) D4209 MA165 OR 1SS119 OR 1SS133T ( E,F ) D6001 VEKS5708 SENSOR LED UNIT D6003 MA165 OR 1SS119 OR 1SS133T D6325 MA165...
- Page 116 Ref. No. Part No. Part Name& Description Remarks OR ERD25FPJ100 OR VRESF4FJ100P 10 ( D ) R1014 ERJ6GEYJ221V MGF CHIP 1/10W 220 R1015 ERJ6GEYJ221V MGF CHIP 1/10W 220 R1016 ERJ8GEYJ562V MGF CHIP 1/8W 5.6K R1017 ERJ6GEYJ103V MGF CHIP 1/10W 10K R1018 ERJ6GEYJ183V MGF CHIP 1/10W 18K...
- Page 117 R3036 ERJ6GEYJ122V MGF CHIP 1/10W 1.2K...
- Page 118 Ref. No. Part No. Part Name& Description Remarks R3041 ERJ6GEYJ750V MGF CHIP 1/10W 75 R3051 ERJ6GEYJ221V MGF CHIP 1/10W 220 R3052 ERJ6GEYJ221V MGF CHIP 1/10W 220 R3301 ERJ6GEYJ102V MGF CHIP 1/10W 1K R3302 ERJ6GEYJ392V MGF CHIP 1/10W 3.9K R3305 ERJ6GEYJ152V MGF CHIP 1/10W 1.5K R4001 ERJ6GEYJ103V...
- Page 119 Ref. No. Part No. Part Name& Description Remarks ( E,F ) R4205 ERJ6GEYJ473V MGF CHIP 1/10W 47K ( F ) R4206 ERJ6GEYJ473V MGF CHIP 1/10W 47K ( F ) R4207 ERJ6GEYJ822V MGF CHIP 1/10W 8.2K ( F ) R4208 ERJ6GEYJ822V MGF CHIP 1/10W 8.2K ( F ) R4209...
- Page 120 Ref. No. Part No. Part Name& Description Remarks R6028 ERJ6GEYJ103V MGF CHIP 1/10W 10K R6029 ERJ6GEYJ561V MGF CHIP 1/10W 560 R6030 ERJ6GEYJ102V MGF CHIP 1/10W 1K R6033 ERDS2TJ681 R6035 ERJ6GEYJ102V MGF CHIP 1/10W 1K R6036 ERJ6GEYJ563V MGF CHIP 1/10W 56K R6037 ERJ6GEYJ391V MGF CHIP 1/10W 390...
- Page 121 Ref. No. Part No. Part Name& Description Remarks R6365 ERJ6GEYJ104V MGF CHIP 1/10W 100K R6366 ERJ6GEYJ104V MGF CHIP 1/10W 100K R6367 ERJ6GEYJ104V MGF CHIP 1/10W 100K R6368 ERJ6GEYJ104V MGF CHIP 1/10W 100K R6369 ERJ6GEYJ104V MGF CHIP 1/10W 100K R6370 ERJ6GEYJ121V MGF CHIP 1/10W 120 R6371 ERJ6GEYJ223V...
- Page 122 Ref. No. Part No. Part Name& Description Remarks C1003 ECKNNB332ME8 CERAMIC+-20% 125V 3300P OR ECKNTS332ME8 CERAMIC+-20% 250V 3300P OR VCKSTQG332MX CERAMIC+-20% 125V 3300P OR VCKSUQD332MX CERAMIC+-20% 125V 3300P ( B,E,F ) ECKATS332ME8 CERAMIC+-20% 250V 3300P OR ECKDNB332ME8 CERAMIC+-20% 125V 3300P OR ECKETS332ME8 CERAMIC+-20% 125V 3300P OR VCKSEKD332MY CERAMIC+-20% 125V 3300P OR VCKSEVD332MY CERAMIC+-20% 125V 3300P...
- Page 123 ECKATS101MB CERAMIC+-20% 250V 100P...
- Page 124 Ref. No. Part No. Part Name& Description Remarks OR ECKDRS101MBY CERAMIC+-20% 125V 100P OR ECKETS101MB CERAMIC+-20% 125V 100P OR ECKMRS101MBY CERAMIC+-20% 125V 100P OR VCKSEJD101KW CERAMIC 125V 100P OR VCKSTJG101KW CERAMIC 125V 100P OR VCKSTLG101KW CERAMIC 125V 100P OR VCKSUJD101KW CERAMIC 125V 100P OR VCKSULD101KW CERAMIC 125V 100P ( D ) C1027...
- Page 125 C3021 ECUV1C224ZFV C CHIP+80%-20% 16V 0.22...
- Page 126 Ref. No. Part No. Part Name& Description Remarks C3022 ECUV1E104ZFN C CHIP+80%-20% 25V 0.1 C3023 ECEA0JKA101 ELECTROLYTIC 6.3V 100 C3024 ECEA0JKA470 ELECTROLYTIC 6.3V 47 C3025 ECUV1H103ZFN C CHIP+80%-20% 50V 0.01 C3026 ECUV1E104ZFN C CHIP+80%-20% 25V 0.1 C3027 ECUV1C224ZFV C CHIP+80%-20% 16V 0.22 C3028 ECEA1CKA100 ELECTROLYTIC 16V 10...
- Page 127 Ref. No. Part No. Part Name& Description Remarks C4008 ECEA0JKA470 ELECTROLYTIC 6.3V 47 C4009 ECEA1CKA100 ELECTROLYTIC 16V 10 C4010 ECUV1E273KBN C CHIP 25V 0.027 C4011 ECUV1H822KBN C CHIP 50V 8200P C4012 ECEA1HKA010 ELECTROLYTIC 50V 1 C4014 ECEA1HKA010 ELECTROLYTIC 50V 1 C4015 ECUV1E104ZFN CCHIP+80%-20% 25V 0.1...
- Page 128 Ref. No. Part No. Part Name& Description Remarks ( E,F ) C4227 ECUV1C224ZFV C CHIP+80%-20% 16V 0.22 ( E,F ) C4228 ECUV1H103KBN C CHIP 50V 0.01 ( E,F ) C4229 ECUV1H103ZFN C CHIP+80%-20% 50V 0.01 ( E,F ) C4230 ECEA0JKA470 ELECTROLYTIC 6.3V 47 ( E,F ) C4451...
- Page 129 Ref. No. Part No. Part Name& Description Remarks C6201 ECUV1H102KBN C CHIP 50V 1000P C6203 ECUV1H103KBN C CHIP 50V 0.01 C6208 ECUV1C104KBN C CHIP 16V 0.1 C6214 ECUV1H102KBN C CHIP 50V 1000P C6216 ECUV1H103KBN C CHIP 50V 0.01 ( F ) C6217 ECUV1E104ZFN C CHIP+80%-20% 25V 0.1...
- Page 130 Ref. No. Part No. Part Name& Description Remarks L1001 ELF15N005AB LINE FILTER 0.5A 18M OR VLQS0166 LINE FILTER 0.5A 18M OR VLQS0167 LINE FILTER 0.5A 18M ( B,E,F ) ELF15N005A LINE FILTER 0.5A 18M OR LSLQ0287 LINE FILTER 0.5A 18M OR VLQS0166 LINE FILTER 0.5A 18M OR VLQS0167...
- Page 131 Ref. No. Part No. Part Name& Description Remarks SW6001 LSSH0002 LEAF SWITCH-SAFETY TAB SW6002 LSSS0012 MODE SELECT SWITCH SW6301 EVQ11A09K PUSH SWITCH SW6303 EVQ11A09K PUSH SWITCH SW6306 EVQ11A09K PUSH SWITCH SW6307 EVQ11A09K PUSH SWITCH SW6309 EVQ11A09K PUSH SWITCH SW6310 EVQ11A09K PUSH SWITCH SW6313 EVQ11A09K PUSH SWITCH...
- Page 132 Ref. No. Part No. Part Name& Description Remarks JK3001 LSJH0028 AUDIO/VIDEO JACK SOCKET ( B,D ) LSJH0029 AUDIO/VIDEO JACK SOCKET ( E,F ) JK3002 LJP68005A FRONT AUDIO/VIDEO JACK SOCKET MKA ( D ) LSJH0031 FRONT AUDIO/VIDEO JACK SOCKET ( F ) MISCELLANEOUS Ref.
- Page 133 Ref. No. Part No. Part Name& Description Remarks C2504 ECUV1H103ZFN C CHIP+80%-20% 50V 0.01 C2506 ECUV1H103ZFN C CHIP+80%-20% 50V 0.01 C2507 ECUV1H103ZFN C CHIP+80%-20% 50V 0.01 C2508 ECUV1E104KBN C CHIP 25V 0.1 C2509 ECUV1E104KBN C CHIP 25V 0.1 C2510 ECUV1E104KBN C CHIP 25V 0.1 C2511 ECUV1E104ZFN C CHIP+80%-20% 25V 0.1 C2517...
- Page 134 COILS Ref. No. Part No. Part Name& Description Remarks L3501 ELESN101KA PIN HEADERS Ref. No. Part No. Part Name& Description Remarks P2601 LSJS0096 CONNECTOR 12P P3501 LSJS0093 CONNECTOR 10P P4091 LSJWM6N085AC CONNECTOR CABLE W/OUT PLUG,40 VP-P 11.3.5. HEAD AMP C.B.A. ( B,C,D ) INTEGRATED CIRCUITS Ref.
- Page 135 PIN HEADERS Ref. No. Part No. Part Name& Description Remarks P2601 LSJS0096 CONNECTOR 12P P3501 VJSS0883 CONNECTOR 12P P4091 LSJWM6S085AC CONNECTOR CABLE W/OUT PLUG,AC 40 VP-P 11.3.6. Hi-Fi AUDIO/VIDEO HEAD AMP C.B.A. ( E,F ) INTEGRATED CIRCUITS Ref. No. Part No. Part Name&...
- Page 136 Ref. No. Part No. Part Name& Description Remarks P2601 LSJS0096 CONNECTOR 12P P3501 VJSS0883 CONNECTOR 12P P4091 LSJWM6N085AC CONNECTOR CABLE W/OUT PLUG,40 VP-P P4401 LSJS0095 CONNECTOR 4P 11.3.7. ELECTRICAL PARTS LOCATED ON CHASSIS Ref. No. Part No. Part Name& Description Remarks LSJA0281-S AC CORD KIT W/PLUG,125V...