Advertisement
Quick Links
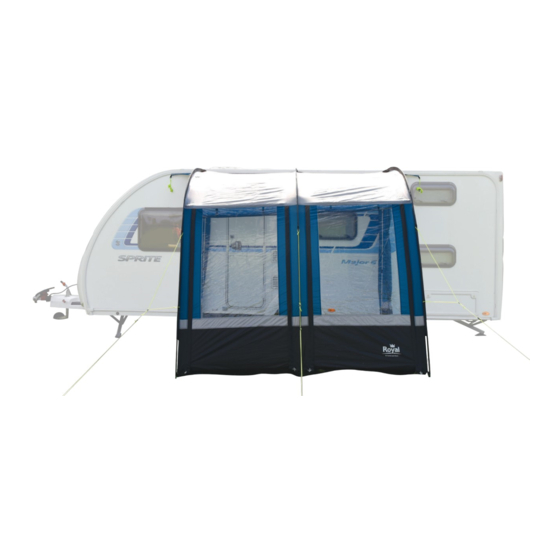
Oxhill 260 Awning
Your awning will have:
• Flysheet
• 3 Fibre glass roof poles
• 2 Rear poles
• 2 Adjustable roof support poles
• 2 front canopy poles
1. Assemble the fi bre glass roof poles, these are shock corded together and just need slotting together and lay them
out on the ground.
2. Slide the awning beading into the channel on the caravan making sure it is on a horizontal section.
3. Starting at one end of the awning, push a fi bre glass roof pole through the pole sleeve and connect the pole to
the top of the awning. Then place the end of the pole into the ring and pin system at the bottom of the awning.
The pin is on an adjustable webbing strap that should be loosened when inserting the pole but always retighten
the straps afterwards to ensure the awning is tensioned correctly.
4. Repeat this process for all remaining fi bre glass poles.
5. Assemble the 2 rear poles together, go inside the awning and insert the fl at end into the pocket at the top rear
corner and the bottom spike into the ground and tension. Repeat on the other side.
6. Go inside the awning and close all doors with the 2 adjustable roof support poles. Put one end into the pocket
in the front corner of the awning and the other into the pocket at the opposite side. Tension the pole and tighten
with clip. Repeat for the other roof support pole in the middle section of the roof.
7. Using the ladder bands and pegs provided, peg the rear corners of the awning closest to the caravan, making sure
the awning wall is pegged slightly underneath the van and peg out the front corners. Pegs should be positioned
at a 45˚ angle to ensure maximum grip. Peg all other points around the awning, pegging the points either side of
the doorways fi rst – these doorways should be cross pegged (the points should be pulled across each other).
8. Peg out all guy ropes at a 45˚ angle to the awning.
9. To fi t the draught skirt slide the draught skirt through the awning channel located at the bottom of the caravan.
10. The wheel arch cover can be fi tted using a fi gure of 8 rail (not supplied) that is attached to the draught skirt and
held in place above the wheel arch using awning suction cups (not supplied).
11. To convert the front panel of your awning into a canopy, fully unzip a panel door and lift up away from the fl oor.
Place a pole into the metal eyelet that is situated at the end of the fabric then the opposite end of the pole to go
into the ground. Repeat on the other side.
302627 - Oxhill 260 Awning Instructions.indd 1
• Draught skirt
• Wheel arch cover
• Pegging ladders
• Bag of metal pegs
www.royal-leisure.co.uk
Weight:
12.8kg
260
20/10/2017 16:17
Advertisement

Summary of Contents for Royal Oxhill 260
- Page 1 Place a pole into the metal eyelet that is situated at the end of the fabric then the opposite end of the pole to go into the ground. Repeat on the other side. www.royal-leisure.co.uk 302627 - Oxhill 260 Awning Instructions.indd 1 20/10/2017 16:17...
- Page 2 Cleaning Dirt and stains can be removed by brushing with a mild pure soap solution. Never use detergents and do not scrub. Rinse well and fully dry before packing away. www.royal-leisure.co.uk 302627 - Oxhill 260 Awning Instructions.indd 2 20/10/2017 16:17...