Linksys Instant Wireless Series Fast Start Manual
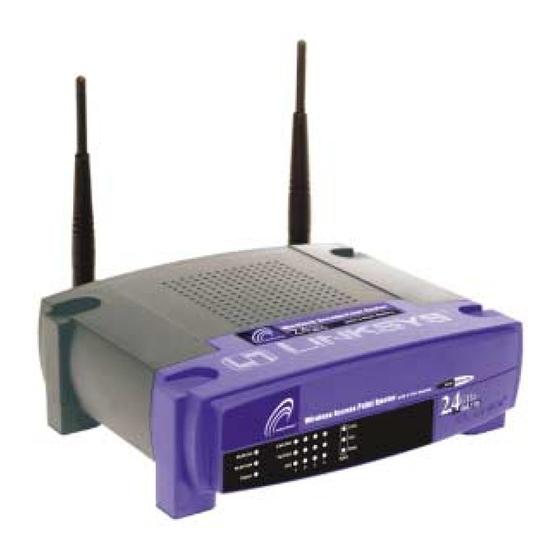
Wireless access point router with 4-port switch
Hide thumbs
Also See for Instant Wireless Series:
- User manual (47 pages) ,
- User manual (9 pages) ,
- User manual (24 pages)

Related Manuals for Linksys Instant Wireless Series


Summary of Contents for Linksys Instant Wireless Series
- Page 1 Instant Wireless™ Series Wireless Access Point Router with 4-Port Switch Use this Guide to install: BEFW11S4 Fast Start Guide...
- Page 2 EC DECLARATION OF CONFORMITY (EUROPE) Table of Contents Linksys Group declares that the Instant Wireless™ Series products included in the Instant Wireless™ Series conform to the specifications listed below, following the provisions of the EMC Directive 89/336/EEC and Low Voltage Directive 73/23/EEC: •...
-
Page 3: Table Of Contents
COPYRIGHT & TRADEMARKS Table of Contents Copyright © 2002 Linksys, All Rights Reserved. Instant Wireless is a trademark of Linksys. Microsoft, Windows, and the Windows logo are registered trademarks of Microsoft Corporation. All other trademarks and brand names are the property of their respective proprietors. -
Page 4: Introduction
The PCs connected to the Router share this connection. tion, details about setting up the Router wirelessly will not be addressed in this Fast Start Guide. Those who wish to set up the Router through their wire- less connection should refer to the Linksys website at www.linksys.com. - Page 5 Instant Wireless™ Series Wireless Access Point Router with 4-Port Switch B. Using an Ethernet cable, connect the Step 1: Connect the Router LAN or Ethernet port of the cable or DSL modem to the Router’s WAN port. In Step 1, you will connect the Router to your cable or DSL modem and to your home or business computers.
- Page 6 Wireless Access Point Router with 4-Port Switch Instant Wireless™ Series If you are running: Step 2: Configure the PCs Windows 95, Windows 98, Windows Me A. Click the Start button, click Settings and open the Control Panel. From there, dou- ble-click the Network icon to open the Network screen.
- Page 7 Wireless Access Point Router with 4-Port Switch Instant Wireless™ Series If you are running: If you are running: Windows 2000 Windows XP A. Click the Start button, click Settings and The following instructions assume you are run- open the Control Panel. From there, dou- ning Windows XP’s default interface.
- Page 8 The instructions from your ISP tell you how to set up your PC for Internet access. sitive and must not exceed 32 characters. The default SSID is "linksys " but Since you are now using the Router to share Internet access among several com- you should change this to a personal wireless network name.
- Page 9 Note: You only need to configure the Router from one computer. If you need and password to access the advanced setting information, please refer to the Linksys support website at Internet, perform these steps: support.linksys.com or the User Guide on the Setup Wizard CD-ROM.
-
Page 10: Help
If you have additional setup needs or you wish to get information on the enter at least one DNS address. Advanced Features, please visit kb.linksys.com or see the User Guide, which con- 6. Click the Apply button to save the settings. - Page 11 Instant Wireless™ Series Wireless Access Point Router with 4-Port Switch • • My WAN Link LED isn’t lit. What should I check? The IP Address field should show an IP address of 192.168.1.100 or Check that the cable you are using between your cable or DSL modem 192.168.1.xxx, with “xxx”...
-
Page 12: Configuring Wireless Security
24-bit Initialization Vector (40 + 24 = 64). Wireless vendors may In the "Enter Network Password" box, leave the "User Name" field blank and use either name. Linksys uses the term “64-bit” when referring to this level of type admin as the password. Then, click OK. - Page 13 • WEP (64Bit or 128B) Select the level of encryption from the drop-down box. 128-bit WEP encryption is unique to Linksys and may conflict with 1. From the Web-based Utility’s Setup tab, select Mandatory under the WEP other vendors’ WEP encryption.
-
Page 14: Configuring Wireless Security In Windows Xp
Configuring Wireless Security in Windows XP Connections icon, shown in Figure C-4. As Windows XP does not allow for the use of the Linksys Passphrase feature with the wireless PC adapters, you will need to manually enter the key gener- ated in the previous section. - Page 15 Instant Wireless™ Series Wireless Access Point Router with 4-Port Switch If a “Connect to Wireless Network” window appears, in the Available 6. When the “Wireless Networks section, click the desired wireless network, specified by the Network Connection Router’s SSID. Then, double-click the Wireless Network Connection icon. Properties”...
- Page 16 Instant Wireless™ Series 8. The “Wireless Network Properties” window (shown in Figure C-10) will appear. Click the check box for the Data encryption (WEP enabled) option. Remove the check from the Network Authentication (Shared mode) and The key is provided for me automatically fields. In the "Network key"...
- Page 17 COPYRIGHT ET MARQUES Table des matières Copyright © 2002 Linksys, Tous droits réservés. Instant Wireless est une marque de commerce de Linksys. Microsoft, Windows et le logo Windows sont des marques déposées de Microsoft Corporation. Toutes les autres marques de commerce et tous les autres noms commerciaux appartiennent à...
- Page 18 Ethernet. Bien que le routeur puisse être installé au moyen d’une connexion sans fil, cette configuration n’est pas décrite dans ce Guide de démarrage rapide. Si vous souhaitez installer le routeur en employant une connexion sans fil, reportez-vous aux informations présentées sur le site Web Linksys à l’adresse www.linksys.com.
- Page 19 Instant Wireless™ Series Routeur de point d’accès sans fil avec commutateur 4 ports B. À l’aide d’un câble Ethernet, raccordez le Étape 1 : connexion du routeur port Ethernet du modem câble ou DSL au port WAN du routeur. À l’étape1, vous allez connecter le routeur à votre modem câble ou DSL, ainsi qu’aux ordi- nateurs de votre domicile ou bureau.
- Page 20 Routeur de point d’accès sans fil avec commutateur 4 ports Instant Wireless™ Series Si vous utilisez : Étape 2 : configuration des PC Windows 95, Windows 98, Windows Me Dans le menu Démarrer, choisissez Paramètres et ouvrez le Panneau de config- uration.