Table of Contents
Advertisement
Quick Links
Advertisement
Table of Contents

Related Manuals for Bosch HSG856X.1


Summary of Contents for Bosch HSG856X.1
- Page 1 Oven HSG856X.1 User manual and installation instructions [en]...
-
Page 2: Table Of Contents
en Safety Table of contents 1 Safety Observe the following safety instructions. 1.1 General information INFORMATION FOR USE ¡ Read this instruction manual carefully. Safety .............. 2 ¡ Keep the instruction manual and the Preventing material damage ....... 5 product information safe for future refer- ence or for the next owner. -
Page 3: Safety
Safety en The telescopic shelves become hot when the 1.4 Safe use appliance is in use. Always place accessories in the cooking com- ▶ Allow hot telescopic shelves to cool down partment the right way round. before touching them. → "Accessories", Page 10 ▶ Only touch hot telescopic shelves with WARNING ‒ Risk of fire! oven gloves. - Page 4 en Safety Children may breathe in or swallow small WARNING ‒ Risk of electric shock! parts, causing them to suffocate. Incorrect repairs are dangerous. ▶ Keep small parts away from children. ▶ Repairs to the appliance should only be ▶ Do not let children play with small parts. carried out by trained specialist staff.
- Page 5 Preventing material damage en 2 Preventing material damage Fruit juice dripping from the baking tray leaves stains 2.1 General that cannot be removed. ATTENTION! When baking very juicy fruit flans, do not pack too ▶ Alcoholic vapours may catch fire in the hot cooking much on the baking tray.
-
Page 6: Environmental Protection And Saving En- Ergy
en Environmental protection and saving energy If descaling solution comes into contact with the control Cleaning the water tank in the dishwasher will damage panel or other delicate surfaces, it will damage them. Remove descaling solution immediately with water. Do not clean the water tank in the dishwasher. ▶... -
Page 7: Familiarising Yourself With Your Appliance
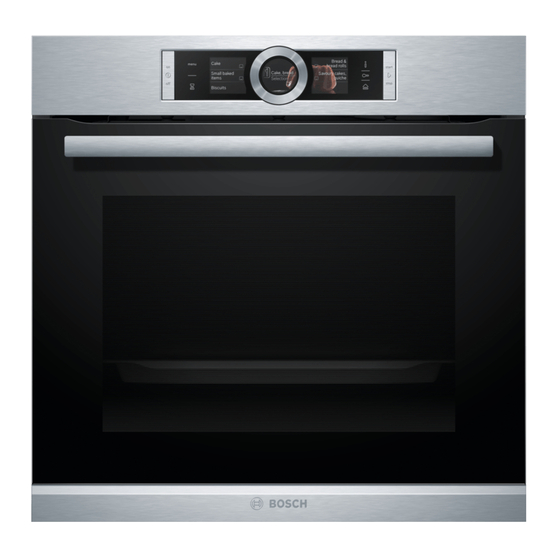
Familiarising yourself with your appliance en 4.2 Buttons Use the buttons on the left- and right-hand side of the control panel to switch your device or the operating mode on and off. Button Function On/Off Switch the appliance on or off. Start/Stop Short press: Start or pause operation. - Page 8 en Operating modes ¡ Residual heat indicator When you open the appliance door, the light in the cooking compartment switches on. If the appliance When the appliance is switched off, the display ring door remains open for longer than 15 minutes, the light shows the residual heat in the cooking compart- switches off again.
-
Page 9: Operating Modes
Operating modes en Operating Operating mode mode Assist Programmed, recommended settings Cleaning Select the cleaning function for the for various types of food. cooking compartment. → "Assist", Page 21 → "Cleaning function EcoClean", Page 26 Steam Gently prepare food with types of steam → "Cleaning assistance", Page 27 heating. -
Page 10: Accessories
en Accessories Symbol Type of heating Temperature What it's used for and how it works range Possible additional options Keeping food warm 60–100 °C Keep cooked food warm. Plate warming 30–70 °C Plate warming. 5.2 Types of steam heating This is where you can find an overview of the types of steam heating and their use. Symbol Type of heating Temperature Steam... - Page 11 Accessories en Accessories Perforated steam container, Steaming large quantities of food. size XL Meat thermometer High-precision roasting or cooking. → "Meat probe", Page 19 6.1 Information on accessories Wire rack Insert the wire rack with the open side facing the appliance door and Some accessories are only suitable for certain types of the curved lip ...
-
Page 12: 7.1 Before Using For The First Time
You will find a comprehensive range of products for your appliance in our brochures and online: You can combine the wire rack with the universal pan www.bosch-home.com to catch any liquid that drips down. Accessories vary from one appliance to another. When... -
Page 13: Basic Operation
Press to switch the appliance on. ▶ a The Bosch logo appears in the display. The types of heating then appear. 8.2 Switching off the appliance Switch your appliance off when you are not using it. The appliance will switch itself off automatically if it is not used for a certain period of time. -
Page 14: Rapid Heating
en Rapid heating Press the type of heating that you want to use. 8.3 Starting operation If you cannot see the type of heating in the touch You must start each operation. displays, use the control ring to scroll though the se- ATTENTION! lection list. -
Page 15: Time-Setting Options
Time-setting options en 10 Time-setting options Your appliance has different time-setting options, with Press to confirm. which you can control its operation. a The red symbol goes out. 10.1 Overview of the time-setting options 10.3 Setting the cooking time You can set a cooking time and end time for the opera- You can set a cooking time for operation of up to 23 tion. - Page 16 en Steam Press "End time". To stop the signal early, press any touch field. ‒ Use the control ring to delay the end time. To set another cooking time, press "Cooking ‒ Once the operation has started, the end time can no time"...
- Page 17 Steam en Slide the full water tank back into the recess . Note: If the water tank runs dry during operation, a When doing so, make sure that the water tank clicks notification appears in the display. Operation is into place in the retainers . stopped.
- Page 18 en Steam Press "Added steam". ATTENTION! Use the control ring to set the steam setting. Drying the water tank in the hot cooking compartment leads to damage to the water tank. Steam setting Added steam Do not dry the water tank in the hot cooking com- ▶...
- Page 19 Meat probe en 12 Meat probe Cook with precision by inserting the meat probe into Poultry Insert the meat probe into the thickest the food and setting a core temperature on the appli- part of the breast, pushing it in as far as ance.
-
Page 20: Steam
en Meat probe Press "Core temperature". 12.4 Forecast for the duration of the a The core temperature is highlighted in white. operation Use the control ring to set the core temperature. If your appliance is connected to Home Connect, the For some types of heating, you can set added appliance can forecast the expected duration of the steam. -
Page 21: Meat Probe
Assist en 13 Assist The "Assist" operating mode helps you to use your ap- Baking sensor pliance to prepare different dishes by selecting the op- The appliance automatically bakes some dishes with timum settings automatically. the baking sensor. appears in the display. You do not have to imple- 13.1 Cookware ment any further settings. - Page 22 en Assist 13.5 Adjusting the dish Category Foods Preserving, Preserving food Your appliance offers you a wide range of different extracting Extracting juice dishes. You can use the control ring to scroll through juice, steril- Bottles, sterilise the various selection lists. ising Note: Once it has started, you can no longer change or Reheating, Vegetables...
-
Page 23: Childproof Lock
Childproof lock en When the cooking time has elapsed: a The appliance starts to heat and the cooking time To stop the signal early, press any touch field. counts down. ‒ If you want to continue cooking again, press a When the time has elapsed, a signal sounds. The ‒... -
Page 24: Sabbath Mode
en Cleaning and servicing 16.2 Changing the basic settings Basic setting Selection Button tone Switched on Requirement: The appliance is switched on. Switched off (tone remains Press . ) Press "Basic settings". Display brightness 5 settings Press the required basic setting and use the control ring to change it. -
Page 25: Cleaning And Servicing
Cleaning and servicing en Appliance front Surface Suitable cleaning agents Information Stainless steel ¡ Hot soapy water To prevent corrosion, remove any limescale, grease, starch or albu- min (e.g. egg white) stains on stainless steel fronts immediately. ¡ Special stainless steel cleaning products Apply a thin layer of the stainless steel cleaning product with a soft cloth. - Page 26 en Cleaning function EcoClean Area Suitable cleaning agents Information Accessories ¡ Hot soapy water Soak any heavily soiled areas and use a brush or steel wool. ¡ Oven cleaner Enamelled accessories are dishwasher-safe. Do not use stainless steel wool on steam containers made from stainless steel.
-
Page 27: Cleaning Assistance
Cleaning assistance en 18.1 Cleaning recommendation 18.3 Setting the cleaning function The appliance records the type and duration of the op- Ventilate the kitchen while the cleaning function is run- eration and, if required, recommends which cleaning ning. function to use. WARNING ‒ Risk of burns! When you switch on the appliance, a notification ap- The outside of the appliance gets very hot when the pears in the display stating that you should use the... -
Page 28: Descaling
en Descaling Requirement: The cooking compartment must have a The appliance starts to heat and the cooking time cooled down. counts down. a When the time has elapsed, a signal sounds. The Open the appliance door and remove the remaining time shown in the display is zero. water with an absorbent sponge cloth. -
Page 29: Drying
Drying en 21 Drying To prevent residual moisture, dry the cooking compart- To use the "Drying" function, set "Drying". ‒ ment following operation. → "Setting the drying process", Page 29 ATTENTION! Setting the drying process If there is water on the cooking compartment floor Requirement: → "Drying the cooking compartment", when operating the appliance at temperatures above Page 29... -
Page 30: Appliance Door
en Appliance door 23 Appliance door To clean the appliance door thoroughly, you can disas- Press on the right-hand pressure surface until semble the appliance door. the hook is released. 23.1 Detaching the appliance door WARNING ‒ Risk of injury! Components inside the appliance door may have sharp edges. - Page 31 Appliance door en Snap the hooks on the left and right of the con- Open the locking levers on the left- and right-hand densate tray into the gap . hinges . a The locking levers are open. The hinges are now se- cured and cannot snap shut.
- Page 32 en Appliance door If necessary, you can remove the condensate Slide the intermediate pane into the left- and right- trough for cleaning. hand retainers . Open the appliance door. ‒ Tilt the condensate trough upwards and remove ‒ Push the intermediate pane upwards until it is in the left- and right-hand retainers ...
-
Page 33: Troubleshooting
Troubleshooting en Push the inner pane upwards until it is in the left- Close the locking levers on the left- and right-hand and right-hand retainers . hinges . Put the door cover in position and push down on a The locking levers are closed. - Page 34 en Troubleshooting Fault Cause and troubleshooting Appliance does not Demo mode is activated in the basic settings; appears in the display. heat up. Briefly disconnect the appliance from the power supply by switching the circuit breaker in the fuse box off and back on again. Deactivate demo mode within three minutes in the → "Basic settings", Page 23.
-
Page 35: Disposal
Next time, set lower or higher values. ▶ Tip: A lot of information about the food preparation and corresponding setting values can be found on our website www.bosch-home.com. 25 Disposal Dispose of the appliance in an environmentally 25.1 Disposing of old appliance friendly manner. -
Page 36: Customer Service
en Customer Service This appliance is labelled in accord- ance with European Directive 2012/19/EU concerning used elec- trical and electronic appliances (waste electrical and electronic equip- ment - WEEE). The guideline determines the frame- work for the return and recycling of used appliances as applicable throughout the EU. - Page 37 How it works en ¡ Glass cookware is best. Baking on two or more levels Shelf position ¡ Follow the manufacturer's instructions for your roast- 2 levels ing dishes. ¡ Universal pan ¡ Baking tray Roasting in uncovered cookware 2 levels ¡ Use a deep roasting dish. ¡...
- Page 38 en How it works ¡ In the main part of the instruction manual, you can 27.5 Cooking frozen products find information on how to set the steam function. ¡ Do not use heavily frosted frozen products. → "Steam", Page 16 ¡ Remove any ice. ¡...
- Page 39 How it works en Food Accessories/cook- Shelf pos- Heating Temperature in Steam in- Cooking time ware ition function °C tensity in mins → Page 8 Bread, free-form, 1500 g Universal pan 1. 210 - 220 1. 10 - 15 2. 180 - 190 2.
- Page 40 en How it works Food Accessories/cook- Shelf pos- Heating Temperature in Steam in- Cooking time ware ition function °C tensity in mins → Page 8 Sirloin, medium, 1.5 kg Wire rack 220 - 230 60 - 70 Sirloin, medium, 1.5 kg Uncovered cook- ...
- Page 41 How it works en Food Accessories/cook- Shelf pos- Heating Temperature in Steam intens- Cooking ware ition function °C time in → Page 8 mins Rice pudding, 1:2.5 Universal pan 1. 1 35 - 45 2. 1 Fruit compote, 1/3 water Universal pan ...
- Page 42 en How it works Food Accessories/cook- Shelf pos- Heating Temperature in Steam intens- Cooking ware ition function °C time in → Page 8 mins Additional jam jar pro- Steam containers, 15 - 20 cessing step XL size Sterilise clean cookware Steam containers, ...
- Page 43 How it works en Recommended settings for reheating Food Accessories/cook- Shelf pos- Heating Temperature in Steam intens- Cooking ware ition function °C time in → Page 8 mins Pizza, cooked Wire rack 170 - 180 5 - 15 Bread rolls, baguette, Wire rack ...
- Page 44 en How it works Food Accessories/cook- Shelf pos- Heating Temperature in Steam intens- Cooking ware ition function °C time in → Page 8 mins Small cakes, on 2 levels Universal pan 25 - 35 Baking tray Small cakes, on 3 levels x 2 5+3+1 ...
-
Page 45: Installation Instructions
Installation instructions en 28 Installation instructions Observe this information when installing the appliance. 28.1 General installation instructions Follow these instructions before you start with the installation of the appliance. ¡ The safe operation of this appliance can only be guaranteed if it has been installed ¡... - Page 46 en Installation instructions 28.2 Appliance dimensions 28.3 Installation below a worktop You will find the dimensions of the appliance here Observe the installation dimensions and the installation instructions when installing below a worktop. ¡ To ventilate the appliance, the intermediate floor must have a ventilation cut-out. ¡...
- Page 47 Installation instructions en ¡ Ensure that air exchange is guaranteed in accord- 28.5 Installation in a tall unit ance with the diagram. Observe the installation dimensions and the installation instructions when installing in a tall unit. ¡ Only fit appliances up to a height that allows ac- cessories to be easily removed.
- Page 48 en Installation instructions ¡ Contact protection must be guaranteed by the in- Screw the appliance into place. stallation. Electrically connect the appliance with the protective contact plug Note: The appliance must only be connected to a pro- tective contact socket that has been correctly installed. Insert the plug into the protective contact socket.
- Page 52 Expert advice for your Bosch home appliances, help with problems or a repair from Bosch experts. Find out everything about the many ways Bosch can support you: www.bosch-home.com/service Contact data of all countries are listed in the attached service directory.