Table of Contents
Advertisement
Quick Links
Advertisement
Table of Contents

Related Manuals for Telefunken S540


Summary of Contents for Telefunken S540
- Page 1 MOBILE PHONE S540 INSTRUCTION MANUAL...
-
Page 2: Table Of Contents
TABLE OF CONTENTS 1. SCOPE OF DELIVERY ....................... 3 2. CONTROL ELEMENTS ......................4 3. UNDERSTANDING YOUR PHONE .................... 6 4. GETTING STARTED ........................7 5. INITIAL SETUP ........................... 8 6. USEFUL TIPS ..........................9 7. STATUS BAR ICONS ........................9 8. -
Page 3: Scope Of Delivery
1. SCOPE OF DELIVERY Remove all packaging and dispose of accordingly. Carefully check the below listed package contents. If anything is missing, contact your retailer immediately. 1. S540 mobile phone 2. Hands-free kit 3. Rechargeable Li-ion battery 4. Travel charger 5. -
Page 4: Control Elements
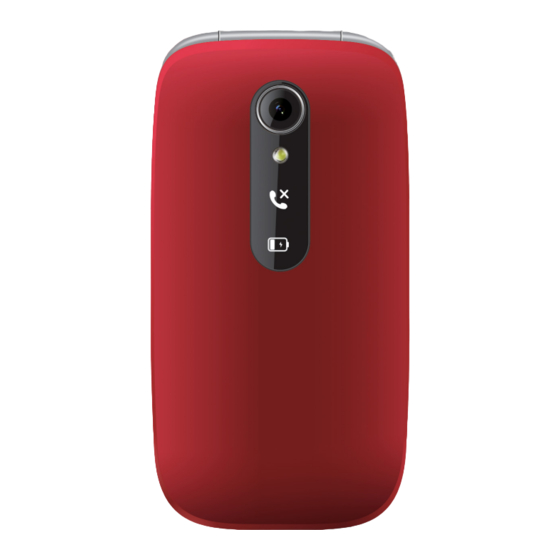
2. CONTROL ELEMENTS... - Page 5 2.1 DESCRIPTION Receiver Display screen Menu / OK key Call key Direct memory / Left key Microphone / Symbol key 0 / Space / Torch key # / Input method key / Change ring profile (press and hold) Alpha numeric keypad Photo capture / Right key End call / Power on / off key (press and hold) Contacts / Back key...
-
Page 6: Understanding Your Phone
3. UNDERSTANDING YOUR PHONE PART DESCRIPTION ƒ Use to make and answer calls. Call key ƒ Use to enter call log. ƒ Returns to the main screen. Back / End / power key ƒ Turns the phone on or off. ƒ... -
Page 7: Getting Started
4. GETTING STARTED Prepare your phone, battery, SIM card, memory card (this is required for camera & multimedia functions), and charger. WARNING: The device accessories contain small parts. Keep all the equipment out of the reach of children. The mains adaptor is the cutoff system for electrical supply to the device. The wall socket must be close to the device and easily accessible. -
Page 8: Initial Setup
4.5 Charging the battery ƒ For the first and subsequent uses, charge the phone battery until fully charged. The icon displayed on the right upper corner of the screen. The icon means that the battery is low. ƒ To use the travel charger, insert the small end of the charging cable into the charging port at the bottom of the phone. -
Page 9: Useful Tips
6. USEFUL TIPS ƒ To access the main menu, press the left key. ƒ To navigate up and down, press the key. To navigate left and right, press the key. ƒ To confirm a choice or access Options menu, press the left key. -
Page 10: Menu
ƒ The entered number can be saved to Contacts by selecting Options (left key) -> Save to contacts. ƒ To activate the loud speaker while connecting an outgoing call, press the left key. During the call, press the right key. 8.2 ANSWERING / DECLINING A CALL If the calling number exists in the contacts, the mobile phone will present both the name and the phone number of the caller. - Page 11 h Sending MMS Go to Contacts -> choose the contact -> click the left key to enter Options -> Send MMS -> OK -> type the message. Once message has been written, select Options with the left key -> Send to ->...
- Page 12 type the number, then press OK to confirm. To select a contact from the phonebook, select Add from Phonebook, then select a desired contact from the list and press OK. When the recipient is added, select Options -> Send). key to enter more Options: When in edit message interface, click the left ƒ...
- Page 13 h SMS templates Save time by creating text message templates that can be personalised for each contact. Create and save complete SMS templates with text, then send quickly without typing. To create a new SMS template, go to Messages -> SMS templates -> click the left key to confirm ->...
- Page 14 ƒ Preferred storage Here you can select whether you want to store MMS in the phone memory or on the memory card. keys to switch between the Phone and Memory card. Then, press OK. Use the ƒ Memory status 1. Phone You can verify used memory and free memory.
- Page 15 ƒ Image settings ƒ Image size key to choose between 240x320, 640x480, Press the 800x600, 1280x960, and 2048x1536. ƒ Image quality key to choose between Low, Normal, and Press the Good. ƒ Effect settings keys to switch between Normal / Gray scale / Sepia / Sepia green / Sepia blue Use the / Colour invent.
- Page 16 Multimedia -> Image viewers. By clicking the left key, you can enter the more Options. Options allows to View, Browse style (List style / Matrix style), Send (As MMS / Via Bluetooth), Use as (Wallpaper), Rename (change the photo's name), Delete, Sort by (Name / Type / Time / Size), Storage (Phone / Memory card), and as well as check Image information.
- Page 17 ƒ Type reminder key to enter more Options -> click the left Click the left key to Select -> select the type reminder using the keys (Reminder / Meeting / Course / Date / Call / Anniversary / Birthday) -> OK. ƒ...
- Page 18 ƒ Alarm key to enter more Options -> click the left key to Select Click the left -> select the alarm using the keys (Off / On / 5 min before / 10 min before / 15 min before / 30 min before) -> OK. ƒ...
- Page 19 9.7 SETTINGS The S540 provides a variety of settings which may be changed to best suit your needs. These vary from personalization options such as language, time and date and wallpapers, to more practical settings like blacklisting certain telephone numbers to prevent telemarketers. You will find a detailed explanation of each setting below.
- Page 20 ƒ Blacklist Reject numbers in blacklist (On / Off) / Blacklist number (to add a number to blacklist press Edit -> type the number using the keypad -> Options -> Done. Note: When a phone number is on the blacklist, the call will not be displayed on the mobile phone.
- Page 21 ƒ My device Choose Search new device -> Add. ƒ My name Name of the phone. It is pre-set: S540. It can be changed. Clear the editing field and type your own name. ƒ Services Go to Services -> SIM toolkit.
-
Page 22: Sos Function
ƒ Update method You can choose whether you want to update the software manually or automatically. With a data subscription, go to Settings -> Update phone -> Update method -> Manual / Auto. h Restore settings Selecting Restore Settings allows you to reset your phone to its factory settings. This will erase all data saved to the phone. -
Page 23: Voicemail
The phone will emit an audible alarm (if activated), and send a customized SOS message (if activated). The phone will then call the numbers on the list one after the other, five times. If the call is not answered and confirmed within 20 seconds, the phone will call the next number, and so on. IMPORTANT NOTE: Emergency contacts must confirm SOS calls by pressing their 0 key within 20 seconds after they pick up the call. - Page 24 ƒ Do not attempt to disassemble the mobile phone or battery. ƒ Do not store the phone with flammable or explosive products. ƒ Do not charge the mobile phone without the battery. 14.2 Network services and costs This mobile phone is approved for use on the GSM 850 / 900 / 1800 / 1900 MHz networks. To use the device, you should subscribe to the services of a mobile service provider.
- Page 25 14.7 Precautions for electronic devices Some electronic devices are susceptible to electromagnetic interferences from mobile phones if inadequately shielded, such as the electronic system of vehicles; consult the manufacturers of devices before using the phone, if necessary. 14.8 Precautions for use in potentially explosive atmospheres ƒ...
-
Page 26: Cleaning Instructions
WARNING: If the battery is damaged, do not discard it. In case of a leak and the battery fluid comes in contact with the eyes or skin, wash thoroughly with clear water and consult a doctor. 14.12 Power Adaptor ƒ When charging this phone with a power adaptor, only use the provided power adaptor or a power adaptor with identical specifications. -
Page 27: Technical Data
This device complies with international safety standards for exposure to radio waves. The value recorded for the TELEFUNKEN S540 is 0.43 W/kg for Body and 0.307 W/kg for Head (average measurement for 10g of organic tissue). The maximum limit according to the WHO is 2 W / kg (average measurement for 10g of organic tissue). -
Page 28: Warranty And After-Sales Service
18. WARRANTY AND AFTER-SALES SERVICE This telephone comes with a 24-month warranty, starting from the purchase date. For more information on the applicability of this warranty, please refer to our website at www.befuzze.com, or contact our after-sales service: After-sales Service Information: In the event of a technical problem, please contact our after-sales service: helpdesk@befuzze.com Manufacturer Information...