Advertisement
Quick Links
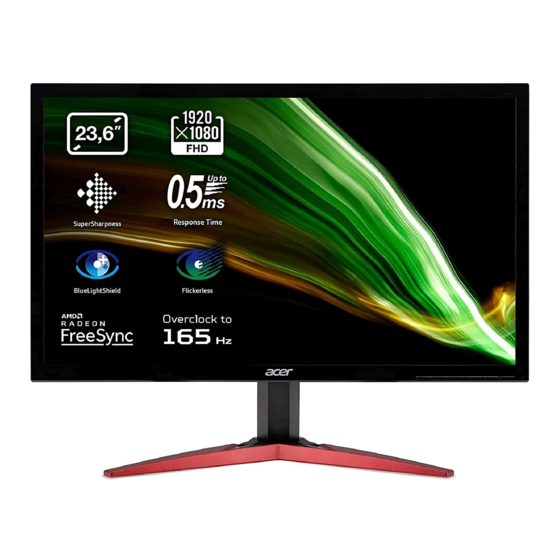
Acer LCD Monitor Quick Start Guide (QSG)
Important safety instructions
Please read the following instructions carefully.
1.
To clean the LCD monitor screen:
•
Turn off the LCD monitor and unplug the power cord.
•
Spray a non-solvent cleaning solution onto a rag and clean the screen gently.
Do not place the LCD monitor near a window. Exposing the monitor to rain, moisture or sunlight can severely damage
2.
it.
Do not apply pressure to the LCD screen. Excessive pressure may cause permanent damage to the display.
3.
Do not remove the cover or attempt to service this unit yourself. An authorized technician should perform servicing of
4.
any nature.
Store the LCD monitor in a room with a temperature of -20° to 60° C (-4° to140° F). Storing the LCD monitor outside
5.
this range may result in permanent damage.
6.
Immediately unplug your monitor and call an authorized technician if any of the following circumstances occur:
•
Monitor-to-PC signal cable is frayed or damaged.
•
Liquid spills onto the LCD monitor or the monitor is exposed to rain.
•
The LCD monitor or case is damaged.
In order to prevent damage to the LCD panel, do not place the monitor face down on a surface.
7.
Connecting your monitor to a computer
Turn off your computer and unplug your computer's power
1.
cord.
Connect the signal cable to the HDMI (optional) and /or
2.
DP (optional) input socket of the monitor, and the HDMI
(optional) and /or DP (optional) output socket of the
graphics card on the computer.
Connect the USB Cable(Optional)
3.
Connect the USB 3.0 cable to port for fast charge.
Connect the USB 3.0 cable to port.
Insert the monitor power cable into the power port at the
4.
back of the monitor.
Connect the power adapter and power cord to the monitor,
5.
then to a properly grounded AC outlet.
Note: Audio output is only for audio output model. Please check user manual for more instruction.
1
2
3
4
5
External controls
Power button
1
Function key
2
/
Function key
3
/
Function key
4
/
X
Turns the monitor on/off.Blue indicates power on. Amber indicates standby/ power saving mode/
OSD locked.
Press to view Main page. Press again to enter hotkey1 function.
a.
b.
When the Function Menu is active, press this key to view the basic information for your monitor
and current input or reset the custom color settings to the factory defaults.
Press to view Main page.Press again to enter hotkey2 function.
a.
b.
When the Function Menu is active, press this button to select select scenario mode or game
mode .
Press to view Main page.Press again to enter Input select function.
a.
b.
When the Function Menu is active, this button will quit the OSD.
HDMI 1(2.0)
HDMI 2(2.0)
USB
DP
Advertisement

Related Manuals for Acer KG241QS


Summary of Contents for Acer KG241QS
- Page 1 Acer LCD Monitor Quick Start Guide (QSG) Important safety instructions Please read the following instructions carefully. To clean the LCD monitor screen: • Turn off the LCD monitor and unplug the power cord. • Spray a non-solvent cleaning solution onto a rag and clean the screen gently. Do not place the LCD monitor near a window. Exposing the monitor to rain, moisture or sunlight can severely damage Do not apply pressure to the LCD screen. Excessive pressure may cause permanent damage to the display. Do not remove the cover or attempt to service this unit yourself. An authorized technician should perform servicing of any nature. Store the LCD monitor in a room with a temperature of -20° to 60° C (-4° to140° F). Storing the LCD monitor outside this range may result in permanent damage. Immediately unplug your monitor and call an authorized technician if any of the following circumstances occur: • Monitor-to-PC signal cable is frayed or damaged. • Liquid spills onto the LCD monitor or the monitor is exposed to rain. • The LCD monitor or case is damaged.
- Page 2 Function key Press to view Main page.Press again to enter next function in the Function Menu. The single toggle button on the backside of the Display bezel operates like a joystick. To move the cursor, simply toggle the button in four directions. Press the button to select desired option. Red indicates operable. Gray indicates inoperable. Note: Acer monitor is purposed for video and visual display of information obtained from electronic devices. AdaptiveSync (DP/HDMI) : It can allow a AdaptiveSync (DP/HDMI) supported graphics source to dynamically adjust display refresh rate based on typical content frame rates for power efficient, virtually stutter free and low-latency display update. G-Sync Compatible/AdaptiveSync: DP port could support G-Sync Compatible/AdaptiveSync, HDMI could support HDMI-VRR (for Xbox One VRR). Regulations and safety notices FCC notices This device has been tested and found to comply with the limits for a Class B digital device pursuant to Part 15 of the FCC rules. These limits are designed to provide reasonable protection against harmful interference in a residential installation. This device generates, uses, and can radiate radio frequency energy and, if not installed and used in accordance with the instructions, may cause harmful interference to radio communications. However, there is no guarantee that interference will not occur in a particular installation. If this device does cause harmful interference to radio or television reception, which can be determined by turning the device off and on, the user is encouraged to try to correct the interference by one or more of the following measures: • Reorient or relocate the receiving antenna. • Increase the separation between the device and receiver. • Connect the device into an outlet on a circuit different from that to which the receiver is connected. • Consult the dealer or an experienced radio/television technician for help.
- Page 3 Light Sensor Refresh Rate Num External Functions Super Sharpness DDC/CI Controls: Gamma Ultra-low lantecy HDMI Black Level Color Temp. Aim Point Quick Start Mode LED Control Modes Language Color Space OSD Timeout 4K-144Hz Mode Grayscale Mode Transparency Power-off USB Charge * All specifications are subject to change without notice. Find manuals and other documents for your Acer product on the official Acer support website. *Annual energy consumption is calculated using the typical power consumption 4 hours per day, 365 days per year. Note: • HDMI1 (2.0): Support max timing resolution (3840x2160-60Hz), Support (AdaptiveSync & HDR). • HDMI2 (2.0): Support max timing resolution (3840x2160-60Hz), Support (AdaptiveSync & HDR). • DP1: Support max timing resolution (3840x2160-120Hz), Support (AdaptiveSync & HDR). • DP2: Support max timing resolution (3840x2160-120Hz), Support (AdaptiveSync & HDR). • DP1 + DP2: Support max Timing resolution (3840x2160-144Hz), Not Support (AdaptiveSync & HDR). • Need to use VESA certified DP cables...