Table of Contents
Advertisement
Available languages
Available languages
Quick Links
Advertisement
Table of Contents

Related Manuals for Sylvania SB3713-OP


Summary of Contents for Sylvania SB3713-OP
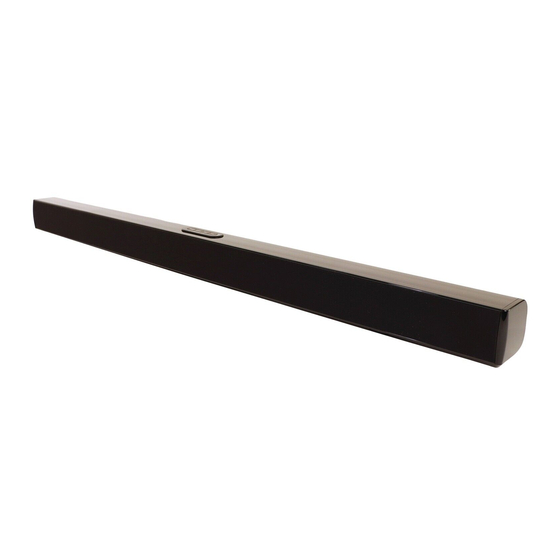
- Page 1 37 INCH BLUETOOTH SOUNDBAR WITH OPTICAL MODEL: SB3713-OP READ THESE INSTRUCTIONS BEFORE USE AND RETAIN FOR FUTURE REFERENCE. SYLVANIA is a registered trademark of OSRAM Sylvania Inc. used under license.
-
Page 2: Important Safety Instructions
IMPORTANT SAFETY INSTRUCTIONS CAUTION: TO REDUCE THE ELECTRIC SHOCK, DO NOT REMOVE THE COVER (OR BACK). NO USER SERVICEABLE PARTS INSIDE. REFER SERVICING TO QUALIFIED SERVICE PERSONNEL. DANGEROUS VOLTAGE: The lighting flash with arrowhead symbol within an equilateral triangle is intended to alert the user to the presence of uninsulated “dangerous voltage”... - Page 3 -- Reorient or relocate the receiving antenna. -- Increase the separation between the equipment and receiver. -- Connect the equipment into an outlet on a circuit different from that to which the receiver is connected. -- Consult the dealer or an experienced radio/TV technician for help. To assure continued operation, follow the attached installation instructions and use only shielded cables when connecting to other devices.
-
Page 4: General Safety Instructions
GENERAL SAFETY INSTRUCTIONS Before using the unit, be sure to read all operating instructions carefully. Please note that these are general precautions and may not pertain to your unit. For example, this unit may not have the capability to be connected to an outdoor antenna. Read these instructions –... -
Page 5: Placement And Mounting
19. Do not attempt to dismantle, open or repair this product yourself. If a problem occurs, seek advice from your local qualified service technician or contact the distributor at the telephone number at the back of this instruction manual. 20. Caution marking and nameplate are located on back or bottom of product. PLACEMENT AND MOUNTING Placing the device on table - Ventilation When placing the Sound Bar on an entertainment center, bookshelf, or any type of... - Page 6 2 Mounting to a brick wall A. Mark the position of the mounting screws on the wall using a pencil. B. Drill 2 holes on wall with a powerful electric drill. C. Insert the supplied fixing plug and hammer into the holes. D.
-
Page 7: Location Of Controls
LOCATION OF CONTROLS: Front View 1. Indicator 3. Speaker 2. Remote sensor 3. Speaker Rear View 4. Antenna 6. OPTICAL input 5. USB port 8. AUX 1 9. DC IN jack 7. AUX 2 Top View 10. Standby/Source button 12. Volume down button Vol+/REC. -
Page 8: Remote Control
REMOTE CONTROL STANDBY button (Previous)/ TUNE- button 2. VOL(Volume) - button button 3. SOURCE button (Mute) button 4. BASS down button 11. VOL(Volume) + button 5. PAIR button 12. BASS up button 6. TREBLE down button 13. TREBLE up button 7. - Page 9 BATTERY (included) - Before Using the Remote Control: Remove the plastic tab as picture on the right.>>> R2025 - To Replace battery OPEN PUSH 1. Push and slide out the battery holder. RELEASE 2. Replace the battery with a new CR2025 button cell as the polarity marking facing upward.
-
Page 10: General Operation
GENERAL OPERATION 1. Connect the AC/DC adapter to the unit and wall outlet. The indicator will light up in red, which indicates the unit is powered on and enters the standby mode. 2. Press the Standby/Source button on the unit or the button on remote control to enter the play mode. -
Page 11: Fm Radio Operation
FM RADIO OPERATION Before listening to the radio, please unwind and extend FM antenna or relocate the unit to get better reception. 1. Power on the unit and enter the play mode as previously explained. 2. Press the Standby/Source button on the unit or the SOURCE button on the remote control repeatedly until the indicator turns Green. -
Page 12: Bluetooth Pairing And Connection
2. Turn on the BT function of the external BT Device. 3. Touch SYLVANIA SB3713 and wait a few seconds until the unit pairs to the external BT device automatically. The Blue indicator will stop blinking. 4. Play the music in the connected BT Device as usual. - Page 13 AUX 1: LISTEN TO TV/DVD/VCR/DVR An external Video/Audio player (such as TV, DVD player, VCR, etc.) can be connected to this unit and heard through the speakers. 1. Plug one side of RCA White and Red cable into the AUX 1 jacks on the rear of the unit.
- Page 14 OPTICAL DIGITAL AUDIO IN Connect the Optical out jack from the external audio Player (including TV, DVD Player BD Player, etc.) to the OPTICAL IN jack on the back of unit by the Optical Connection Cable (not supplied) as the figure below: (For PCM format only) Rear view of the unit TV;...
- Page 15 AUX 2: LISTEN TO EXTERNAL AUDIO DEVICE An external (Auxiliary) audio source (i.e., personal CD player or MP3 player) can be connected to this unit and heard through the speakers. 1. Plug one side of the Aux In cable into the AUX 2 jack on the rear of the unit. 2.
-
Page 16: Usb Operation
USB OPERATION 1. Insert the USB device to the USB Player port on the unit. Rear view of the unit 2. Power on the unit and enter the mode as previously explained.. 3. Press the Standby/Source button on the unit or press SOURCE button on the remote control repeatedly until the color of Indicator turns to WHITE. -
Page 17: Troubleshooting Guide
TROUBLESHOOTING GUIDE PROBLEM POSSIBLE CAUSE POSSIBLE SOLUTION No power Power AC/DC Adapter Connect the power AC/DC adapter to the unit or wall outlet. not connected The unit is in standby mode Press the Standby/Source button on the unit or button on the Remote Control to turn on the unit from Standby mode. -
Page 18: General Specifications
GENERAL SPECIFICATIONS Power Input..............AC 100-240V~; 50/60Hz Power Output..............DC12V Audio Power.....................10Wx2 Bluetooth Effective Range in Open Area.........Up to 32 feet Remote Effective Range..............Up to 16 feet FM Frequency................87.5-108.0MHz 1 x AC/DC Adapter 1 x Remote Control 1 x Stereo Audio Connection Cable with 3.5mm stereo plugs 1 x RCA Cable 1 x User's Manual 2 x Plastic Inserts (For wall mounting) - Page 19 To make a warranty claim, please email support@curtiscs.com or call 1-800-968-9853. 90 day Year Warranty This product is warranted to be free from defects in material and workmanship for a period of ninety (90) days from the date of original purchase. During this period, your exclusive remedy is repair or replacement of this product or component found to be defective, at our option;...
- Page 20 Barre de son Bluetooth 37’’ MODEL: SB3713-OP LISEZ CES INSTRUCTIONS AVANT L’UTILISATION ET CONSERVEZ-LES POUR RÉFÉRENCE FUTURE. SYLVANIA est une marque déposée de OSRAM Sylvania Inc. utilisée avec son autorisation.
- Page 21 IMPORTANT SAFETY INSTRUCTIONS ATTENTION RISQUE D’ÉLECTROCUTION NE PAS OUVRIR ATTENTION : POUR RÉDUIRE LES RISQUES D’ÉLECTROCUTION, N’OUVREZ PAS LE BOÎTIER (OU LE PANNEAU ARRIÈRE). AUCUNE PIÈCE REMPLAÇABLE PAR L’UTILISATEUR À L’INTÉRIEUR. CONTACTEZ UN PROFESSIONNEL DE SERVICE QUALIFIÉ. TENSION DANGEREUSE : Le symbole d’un éclair avec une tête de flèche contenu dans un triangle équilatéral est présent pour vous alerter de la présence d’une «...
- Page 22 -- Réorientez ou déplacez l’antenne réceptrice. -- Augmentez la distance entre l'équipement et le récepteur. -- Branchez l'équipement à une prise sur un circuit différent de celui auquel le récepteur est connecté. -- Consultez le revendeur ou un technicien radio/TV expérimenté pour obtenir de l'aide. Pour assurer un fonctionnement sans interruption, suivez les instructions d’installation incluses et utilisez des câbles blindés pour effectuer la connexion avec d’autres appareils.
-
Page 23: Consignes De Sécurité Générales
CONSIGNES DE SÉCURITÉ GÉNÉRALES Avant d’utiliser l’unité, assurez-vous de lire toutes les instructions d’utilisation avec attention. Veuillez noter que ces consignes sont générales et pourraient ne pas être applicables à votre unité. Par exemple, cette unité pourrait ne pas avoir la capacité à se connecter à... - Page 24 16. Sources d'alimentation - L'appareil doit être connecté à une alimentation électrique uniquement du type décrit dans les instructions d'utilisation ou comme indiqué sur l'appareil. Ne surchargez pas la prise murale. 17. La batterie ne doit pas être exposée à une chaleur excessive telle que la lumière du soleil, un feu ou similaire.
- Page 25 Monter sur un mur 1. Monter sur un mur de bois A. Marquez la position des vis de monture sur le mur à l'aide d'un crayon. B. Percez des trous pour les vis fournies directement dans les marques que vous avez faites sur le mur et laissez-les dépasser d’environ 0,3 pouce pour accrocher la barre de son.
-
Page 26: Emplacement Des Contrôles
EMPLACEMENT DES CONTRÔLES : Vue avant 1. Voyant indicateur 3. Haut-parleur 2. Capteur de la 3. Haut-parleur télécommande Vue arrière 4. Antenne 6. Entrée OPTIQUE 5. port USB 7. AUX 2 8. AUX 1 9. Prise DC IN Vue du dessus 10. - Page 27 TÉLÉCOMMANDE Bouton VEILLE 8. Bouton (Précédent)/FRÉQUENCE- 2. Bouton VOL(Volume) - 9. Bouton 3. Bouton SOURCE 10. Bouton (Mute) 4. Bouton BASSE - 11. Bouton VOL(Volume)+ 5. Bouton ASSOCIATION 12. Bouton BASSE + 6. Bouton AIGU - 13. Bouton AIGU + 7.
- Page 28 PILE (incluse) - Avant d’utiliser la télécommande : Retirez la languette de plastique comme illustré sur la droite.>>> - Pour remplacer la batterie R2025 OPEN 1. Poussez et faites glisser pour retirer le tiroir de pile. PUSH RELEASE 2. Remplacez la pile par une nouvelle pile bouton CR2025, avec la polarité...
-
Page 29: Utilisation Générale
UTILISATION GÉNÉRALE 1. Branchez l’adaptateur CA/CC à l’unité et à une prise murale. Le voyant indicateur s’illuminera en rouge pour indiquer que l’unité est alimentée et qu’elle est en veille. 2. Appuyez sur le bouton Veille/Source sur l’unité ou sur le bouton de la télécommande pour activer le mode lecture. -
Page 30: Utilisation De La Radio Fm
UTILISATION DE LA RADIO FM Avant d’écouter la radio, veuillez dérouler et étendre l’antenne FM ou déplacer l’unité pour améliorer la qualité de réception. 1. Allumez l’unité et activez le mode de lecture comme décrit précédemment. 2. Appuyez sur le bouton Veille/Source sur l’unité ou sur le bouton SOURCE de la télécommande à... - Page 31 à plusieurs reprises, jusqu’à ce que le voyant indicateur passe au bleu. 3. Allumez l’appareil BT externe et lancez une recherche depuis le menu Bluetooth. Lorsque SYLVANIA SB3713 est trouvé dans la liste des appareils, sélectionnez-le pour effectuer l’association. Cela fait, le voyant indicateur bleu cessera de clignoter.
- Page 32 AUX 1 : Pour écouter le son du TV/DVD/VCR/DVR Vous pouvez connecter un lecteur vidéo/audio (comme un téléviseur, un lecteur DVD, un magnétoscope, etc.) à cette unité pour en diffuser le son. 1. Branchez une extrémité du câble RCA blanc et rouge aux jacks AUX 1 de l’arrière de l’unité.
- Page 33 ENTRÉE AUDIO NUMÉRIQUE OPTIQUE Connectez le jack de sortie optique du lecteur audio externe (comme une TV, un lecteur DVD/BD, etc.) au jack Entrée optique de l’arrière de l’unité avec le câble de connexion optique (non inclus) comme illustré ci-dessous : (pour le format PCM seulement) Vue arrière de l’unité...
- Page 34 AUX 2 : ÉCOUTER UN APPAREIL AUDIO EXTERNE Vous pouvez connecter une source audio externe (auxiliaire) (comme un lecteur CD ou un lecteur MP3) à cette unité pour en diffuser le son. 1. Branchez une extrémité du câble AUX sur les prises jack AUX 2 de l’arrière de l’unité.
-
Page 35: Utilisation Usb
UTILISATION USB 1. Branchez la clef USB au port USB de l’unité Vue arrière de l’unité 2. Allumez l’unité et activez le mode comme décrit précédemment. 3. Appuyez sur le bouton Veille/Source sur l’unité ou sur le bouton SOURCE de la télécommande à... -
Page 36: Guide De Dépannage
GUIDE DE DÉPANNAGE PROBLÈME CAUSE POSSIBLE SOLUTION POSSIBLE L’adaptateur d’alimentation CA/CC Pas d'alimentation Branchez l’adaptateur CA/CC à l’unité et à une prise murale. n’est pas branché. L’unité est en veille Appuyez sur le bouton Veille/Source sur l’unité ou sur le bouton de la télécommande pour sortir l’unité... -
Page 37: Spécifications Générales
SPÉCIFICATIONS GÉNÉRALES Alimentation en entr.............AC 100-240V~; 50/60Hz Alimentation en sortie.............CC 12V Puissance audio..................10Wx2 Portée Bluetooth efficace en zone ouverte.......jusque 10 mètre Portée efficace de la télécommande...........jusque 5 mètre Fréquence FM................87,5-108,0MHz 1 x Adaptateur CA/CC 1 x Télécommande 1 x Câble de communication audio stéréo avec fiches de 3,5 mm 1 x Câble RCA 1 x Guide de l’utilisateur 2 x Chevilles de plastique (pour monture murale) - Page 38 Pour faire une demande de garantie, veuillez envoyer un courriel électronique à support@curtiscs.com ou appeler le 1-800-968-9853. 90 jours de garantie Ce produit est garanti contre tout défaut de matériel et de fabrication pendant une période de quatre-vingt-dix (90) jours à compter de la date d'achat d'origine. Pendant cette période, votre seul recours est la réparation ou le remplacement de ce produit ou composant jugé...